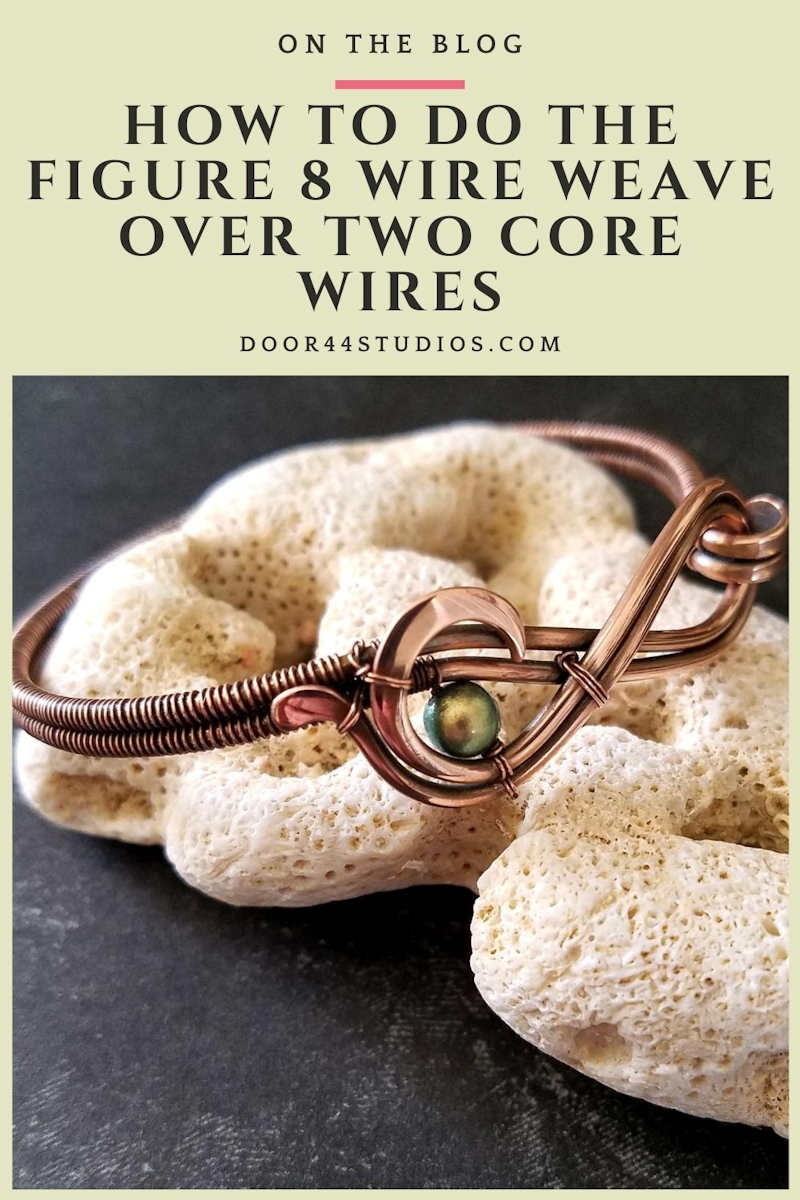
The Figure 8 Wire Weave Over Two Core Wires
Today we’re going to learn the Figure 8 wire weave using just two core wires. If you’ve ever dabbled in basket weaving, you’ll find that this weave feels familiar. It’s an easy weave to learn, and it creates a lovely rustic texture. That pretty texture makes the Figure 8 weave my go-to choice for more organic designs like my Twig Pendant.
Just as I did with the Modified Soumak weave, I’m beginning the Figure 8 series with just two core wires. Then I’ll follow up with a three (or more) core version of this weave that will build on the basic skills you’ll learn here. And of course I’ll add some fun new projects that will allow you to practice your new weaving skills.
Copyright & Disclosure
Weaving is a technique — not a design. And techniques are not eligible for copyrights. However, I reserve exclusive rights to my particular method of teaching this weave, which includes all images and written content contained within this tutorial.
You may not reproduce or redistribute any portion of this tutorial in any way, shape, or form. You may share the free version of this tutorial only by linking directly to this page.
This post may contain affiliate links. If you click on a link and then make a purchase, I may earn a small commission (at no cost to you). As an Amazon Associate I earn from qualifying purchases. To learn more, please see my full disclaimer.
Choosing Wire Gauges for the Figure 8 Wire Weave
There are loads of conflicting opinions about which weaving wire gauges you should use for which core wire gauges. You may have heard lots of wire jewelry makers talk about the “Rule of 6”. The idea is that your weaving wire should be six gauge points higher than your core wire gauge.
Personally, I disagree. According to this rule, you should use 26ga wire to weave over 20ga core wires. And that’s definitely not a combination that I recommend for beginners. It’s quite difficult to achieve a clean weave with that combo. You’ll have much better luck using 28ga weaving wire over 20ga core wires. So, I’m here to tell you to feel free to ignore the so-called “Rule of 6”. I believe strongly that weaving wire gauge is strictly a matter of personal preference.
Want to know a secret? I use 28ga wire almost exclusively to weave core wires from 20ga to 10ga and everything in between. And I find that 28ga gives me the most consistently neat and tidy weave, regardless of the core wire gauge. For very delicate work over core wires that are 20ga and smaller, I’ll often choose 30ga wire for weaving. But that’s about the only exception that I make when working on jewelry. Home décor pieces are another story. And I will be writing tutorials from some wall hangings at some point. But for now, stick with 28ga weaving wire. It’s just easier to work with — especially for beginners.
If you’d like to know more about what I have to say on this topic, be sure to read this post. It’ll demystify the process of choosing the right wire gauges for the three main styles of wire jewelry. And if you’re still not sure which type of jewelry wire is right for you, this post will help you figure that out as well.
About the Figure 8 Wire Weave Over Two Core Wires
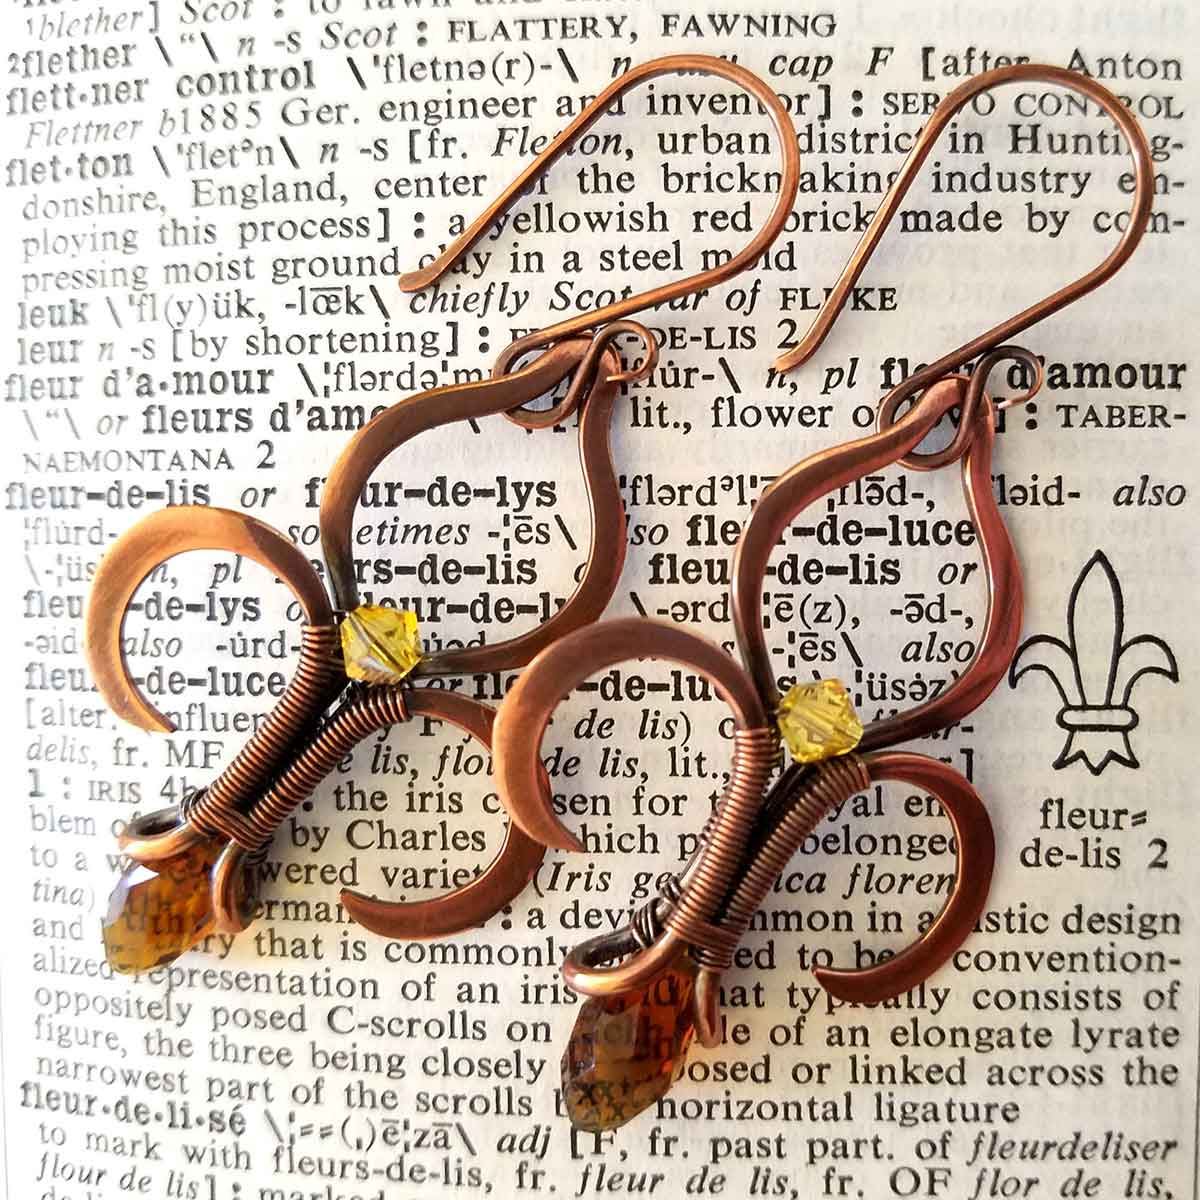
The Figure 8 wire weave is fun, versatile, and easy to modify. It also blends well with other weaves. Even if you’re very new to wire weaving, you’ve probably seen this weave already. It’s quite common in the wire jewelry world. That’s because it’s a workhorse of a weave. And it can also be used to create some striking lines and visual effects.
One artist in particular who uses this weave well is Julie Hulick of Copar Aingeal. Julie makes some beautiful pendant bails and she has some fun tutorials that feature this weave. My favorite is the Scrolls and Coils Cross. Learn the Figure 8 wire weave with this free tutorial. Then be sure to check out Julie’s shop. Pick up a tutorial or two so you can practice your new skills. And you’ll have some beautiful jewelry to show for your efforts.
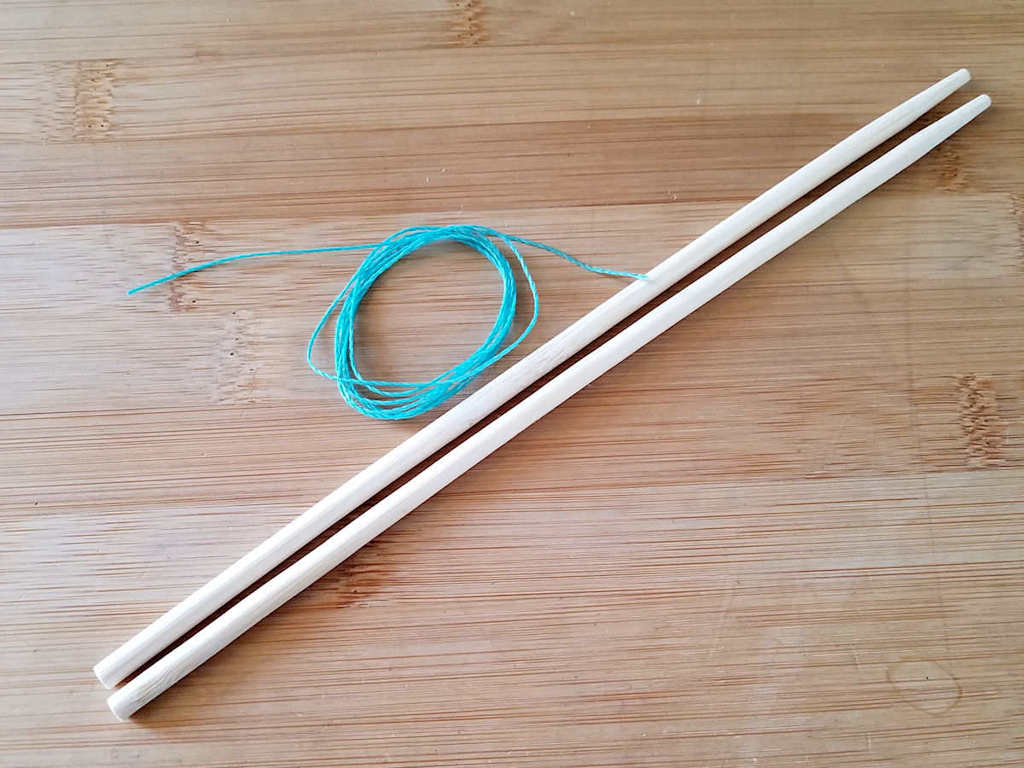
Once again, I’m demonstrating the Figure 8 wire weave using wood chopsticks and a contrasting waxed jewelry cord for clarity. It’s easier to get clear close-up photos with something other than shiny copper wire. But the weaving principles that I’m about to show you are the same, regardless of the materials you use.
The jewelry cord that you’ll see in the following images has a diameter of 0.5 mm and the chopsticks are 5 mm. Visually, that’s like using 30ga wire to weave over 10ga core wires. In both cases, the cores are about 10 times larger than the weaving material.
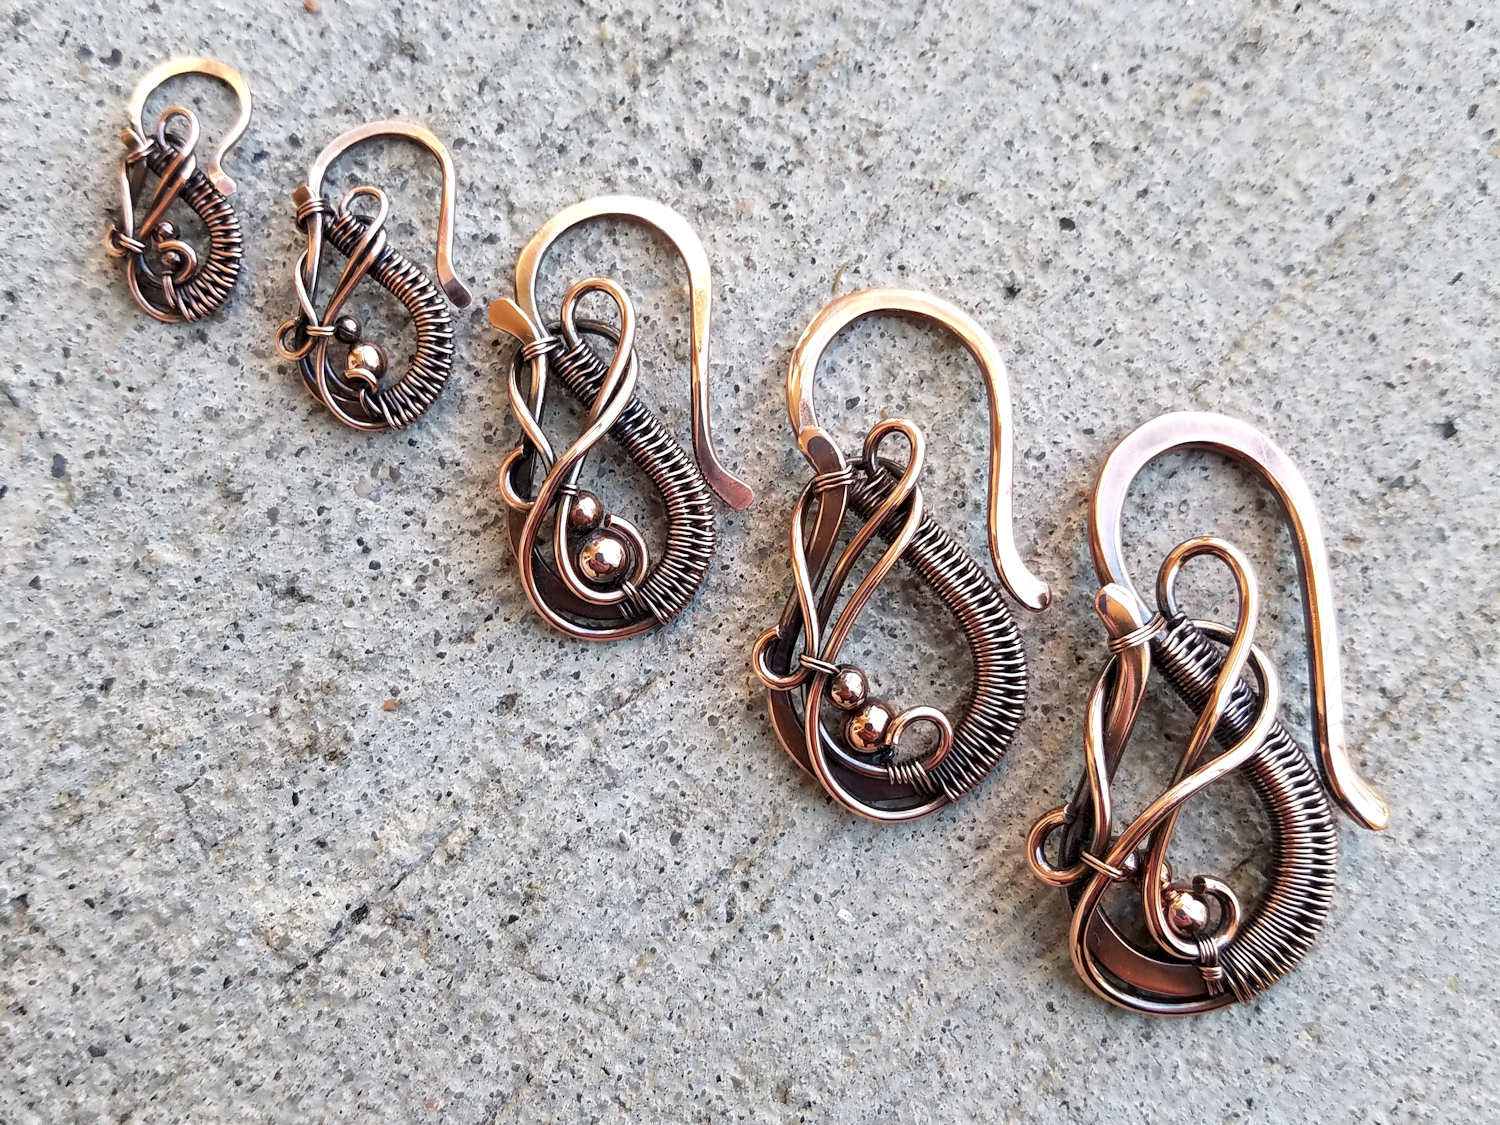
Front and Back Views of the Figure 8 Wire Weave
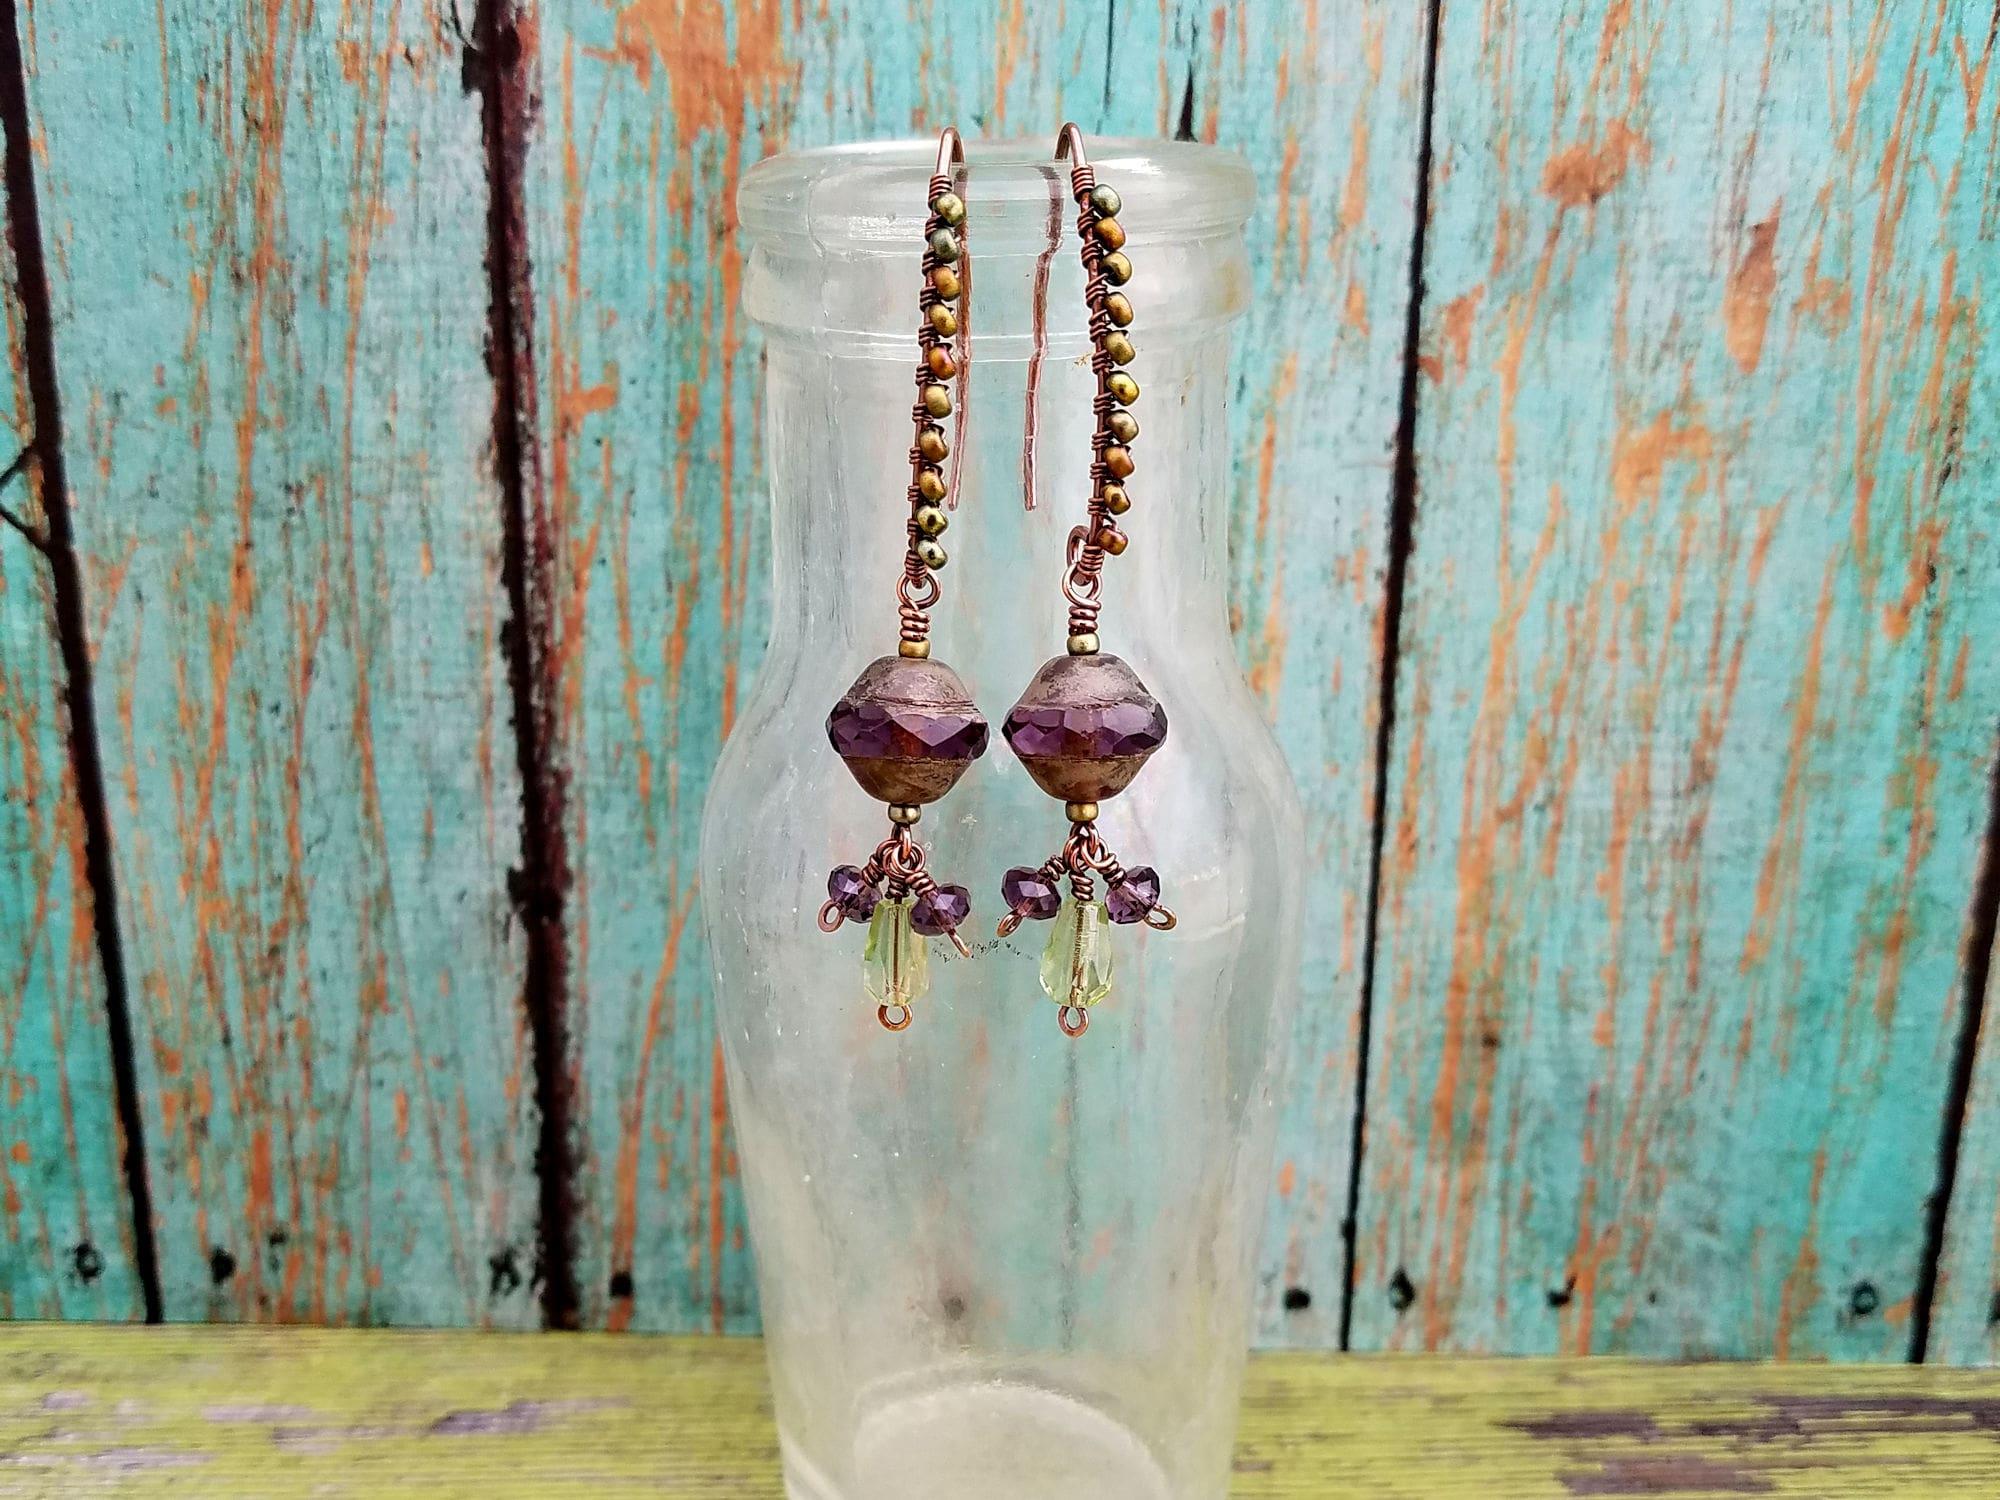
The front and back surfaces of the Figure 8 wire weave are nearly identical. This makes it a great weave to use for designs like my Twig Earrings. Because of the twist in that design, both faces of the weave are clearly visible.
Look closely at the side-by-side comparison below. Notice that it’s quite difficult to tell the back of the Figure 8 wire weave from the front. The only clear indication is the position of the starting and ending tails. But those tails will be removed when the piece is finished.
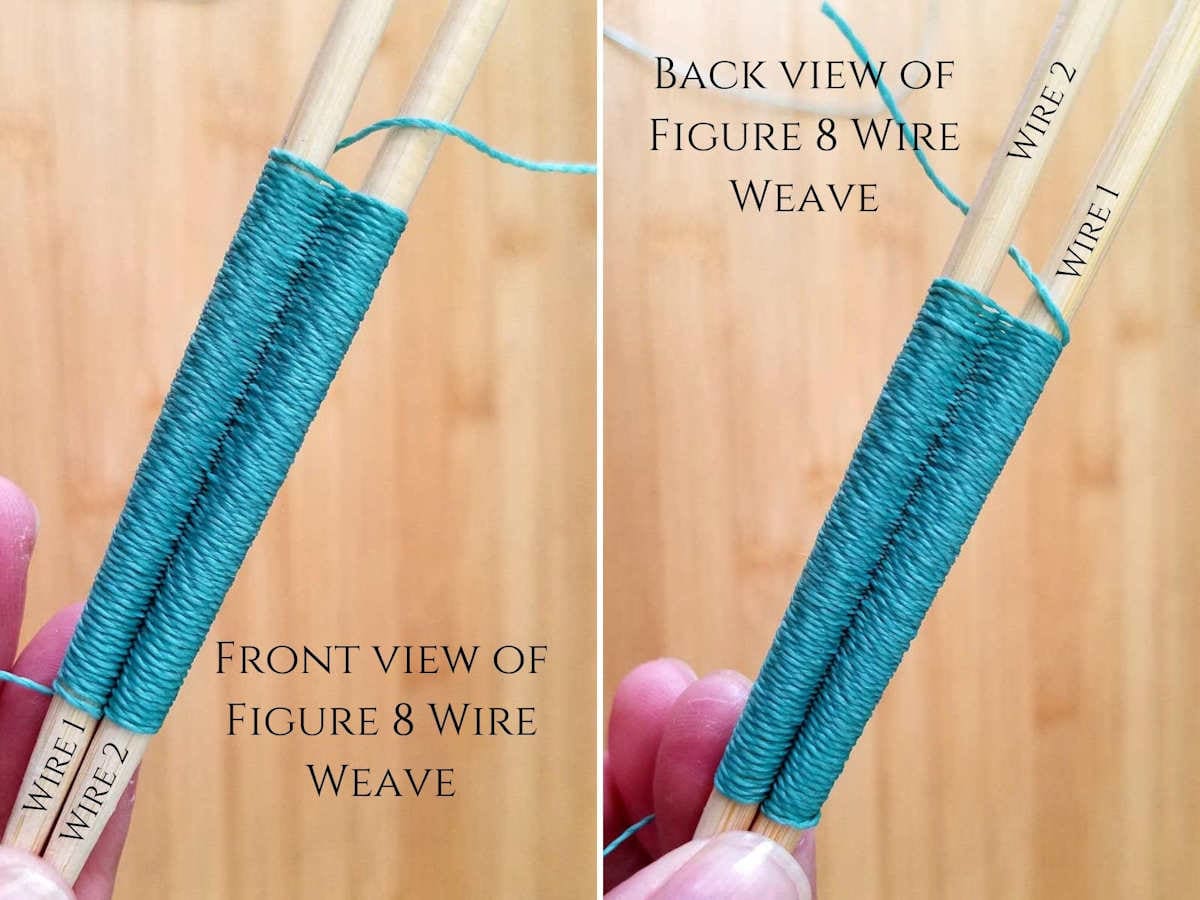
This weave creates a lovely texture while clearly defining the underlying core wires. And that’s one of my favorite characteristics of the Figure 8 wire weave.
Look closely at the image above. Notice the interesting depth and dimension that develops as the gap between the core wires increases. That sculptural quality is one of the unique traits of the Figure 8 wire weave. And that trait makes it particularly suited for making pendant bails.
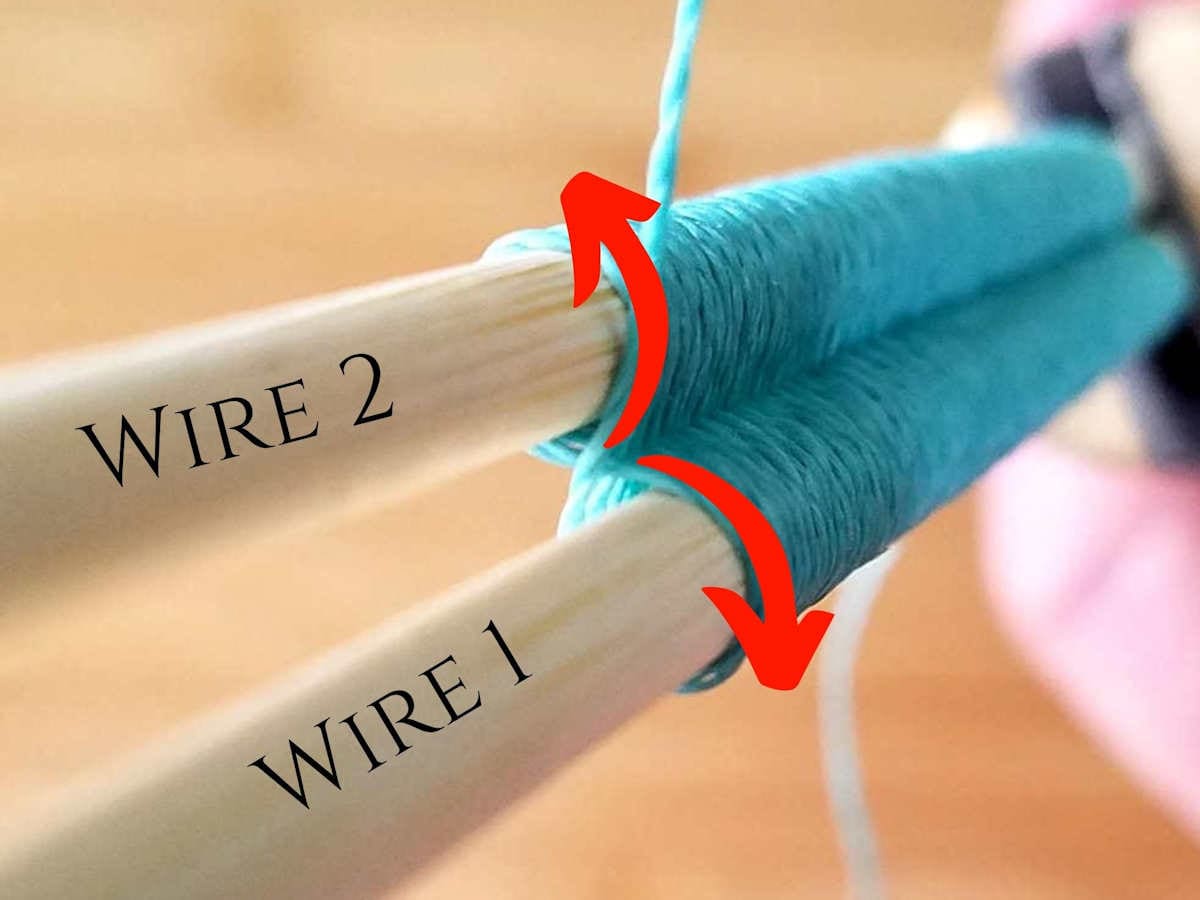
It’s the crossover between the two core wires (shown in detail below) that creates the channel. And it’s the channel that creates the lovely definition that’s so characteristic of this weave. Notice that the path of the weaving wire forms a perfect Figure 8 around the core wires. That’s where this weave gets its name.

Left-Hand Vs. Right-Hand Weaving
I’m a left-handed weaver, and that’s reflected in the photos here on the written version of this tutorial. The only difference for left and right-handed weavers on this particular weave is the direction in which we work. Left-handed weavers like me weave from right to left. Right-handed weavers, on the other hand, work from left to right. Outside of that one difference, the Figure 8 wire weave works up exactly the same way. Regardless of the direction that you go.
That being said, I do understand that it can be confusing to look at left-handed images when you’re a right-handed weaver. So, although the photos in this written tutorial were all taken while I was weaving left-handed, I demonstrate both left-handed and right-handed weaving in the companion video tutorial that goes along with this post. You can view that video here:
The latest on Youtube:
Alright. Now that you know what this weave looks like and what to expect in the instructions, let’s get started!
Weaving the Figure 8 Wire Weave
Everyone has their own way of starting a weave, but I prefer to keep it super simple. I rarely anchor my weaving wire to the first core wire with multiple wraps. And that’s because I generally begin weaving my pieces in the middle. Doing so allows me to weave in one direction to the end point. Then I flip the piece over and continue weaving in the other direction without a visible seam.
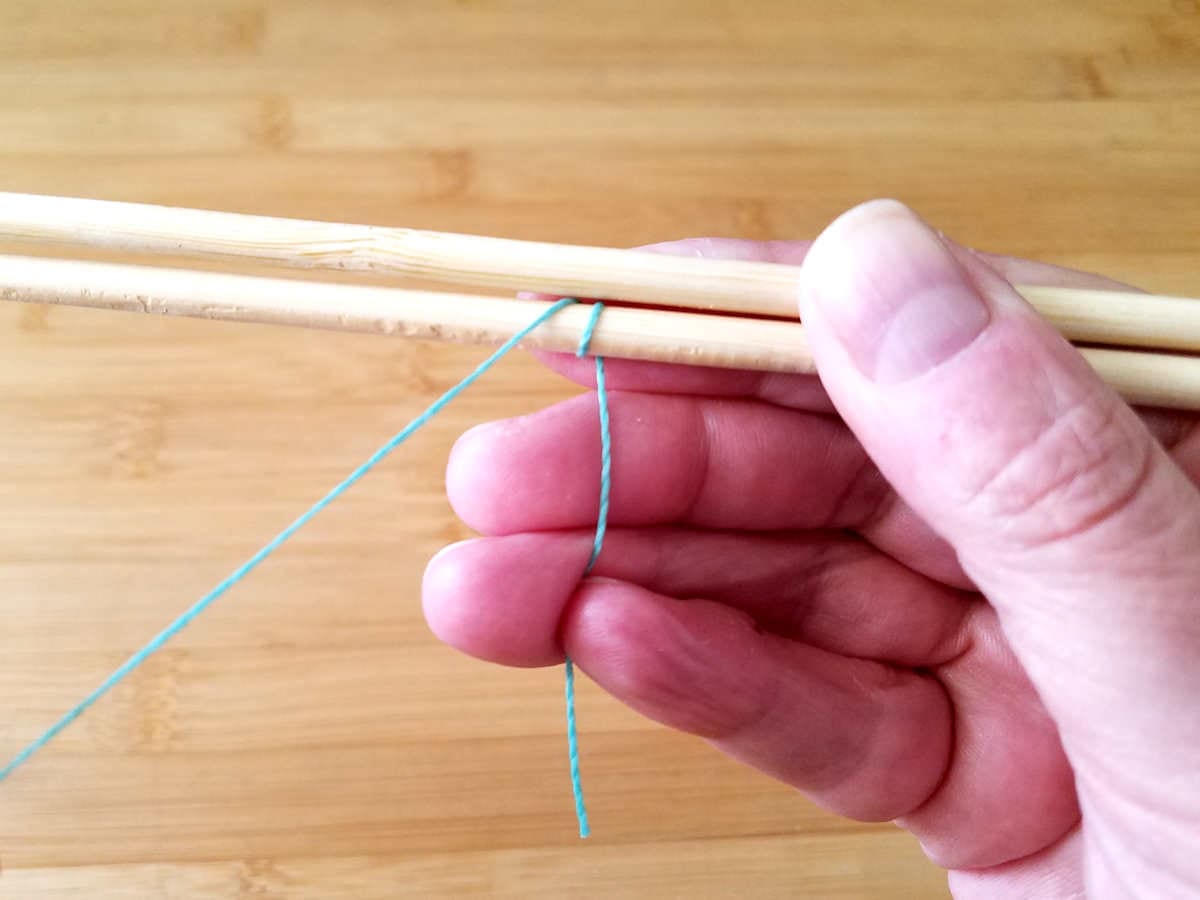
Do what works for you, though. You can easily anchor your weaving wire to the core with a few single wraps. Just be sure you start with the tail of your weaving wire in the position shown in Step 1. I always begin this weave with the tail pointing down and placed behind the first core wire.
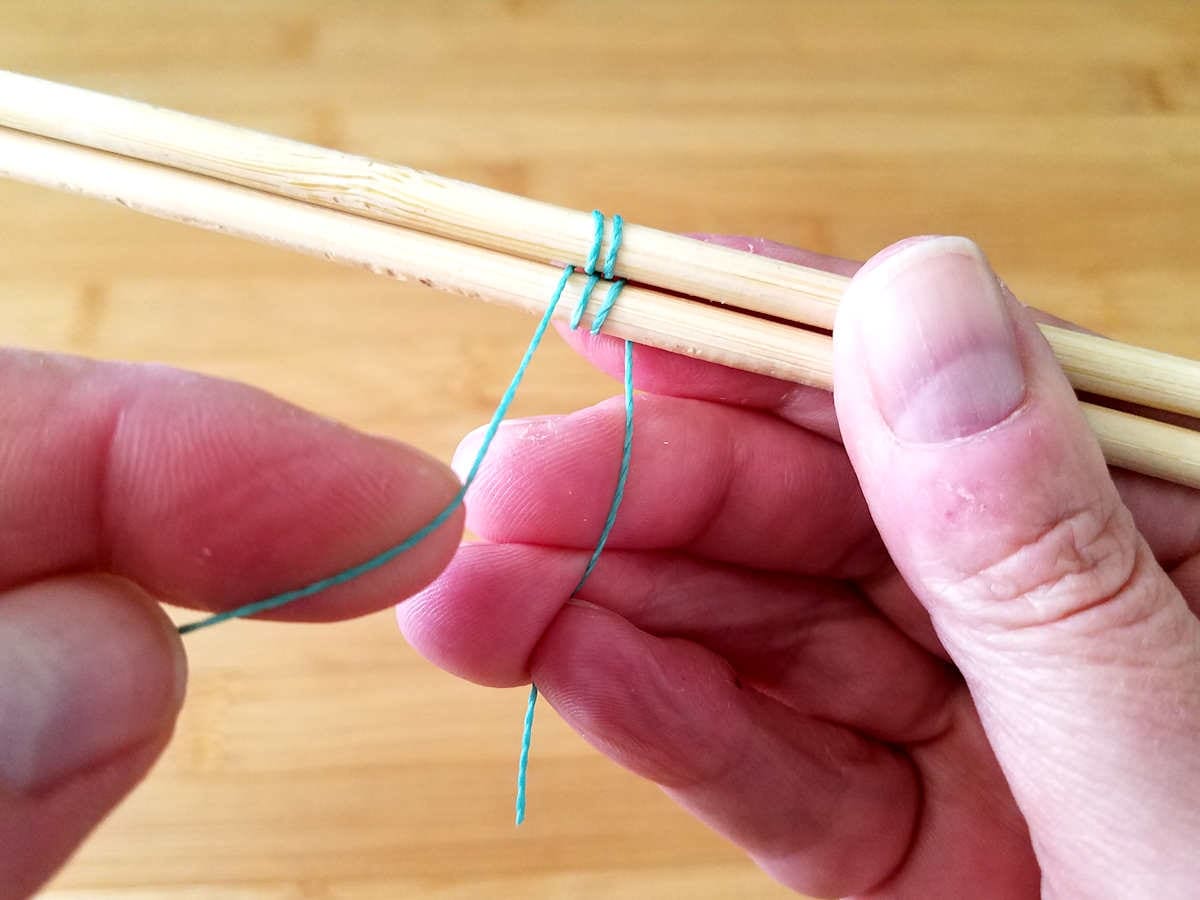
Step 1
Pick up your first core wire (or chopstick, in my case) and place your weaving wire behind the core wire. Make sure the starting tail is pointing down, as shown.

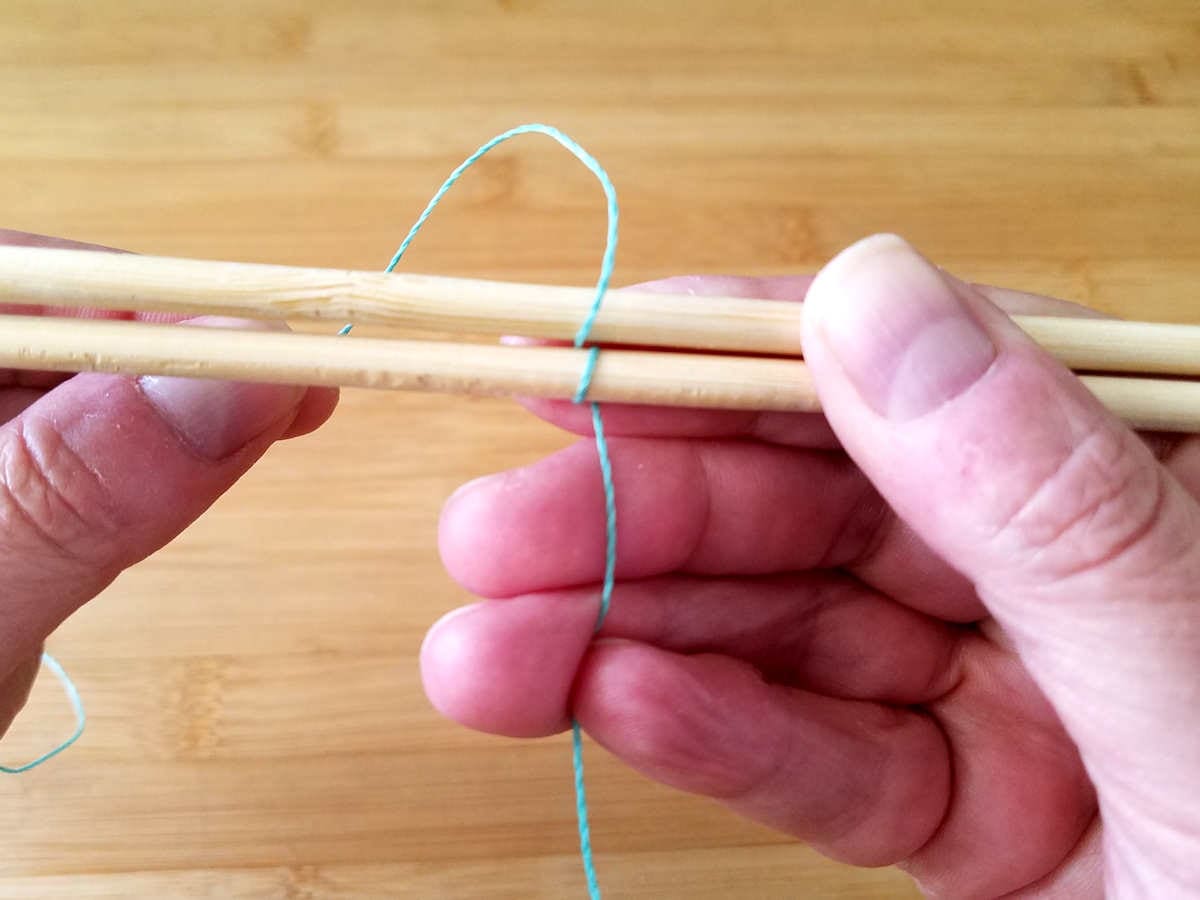
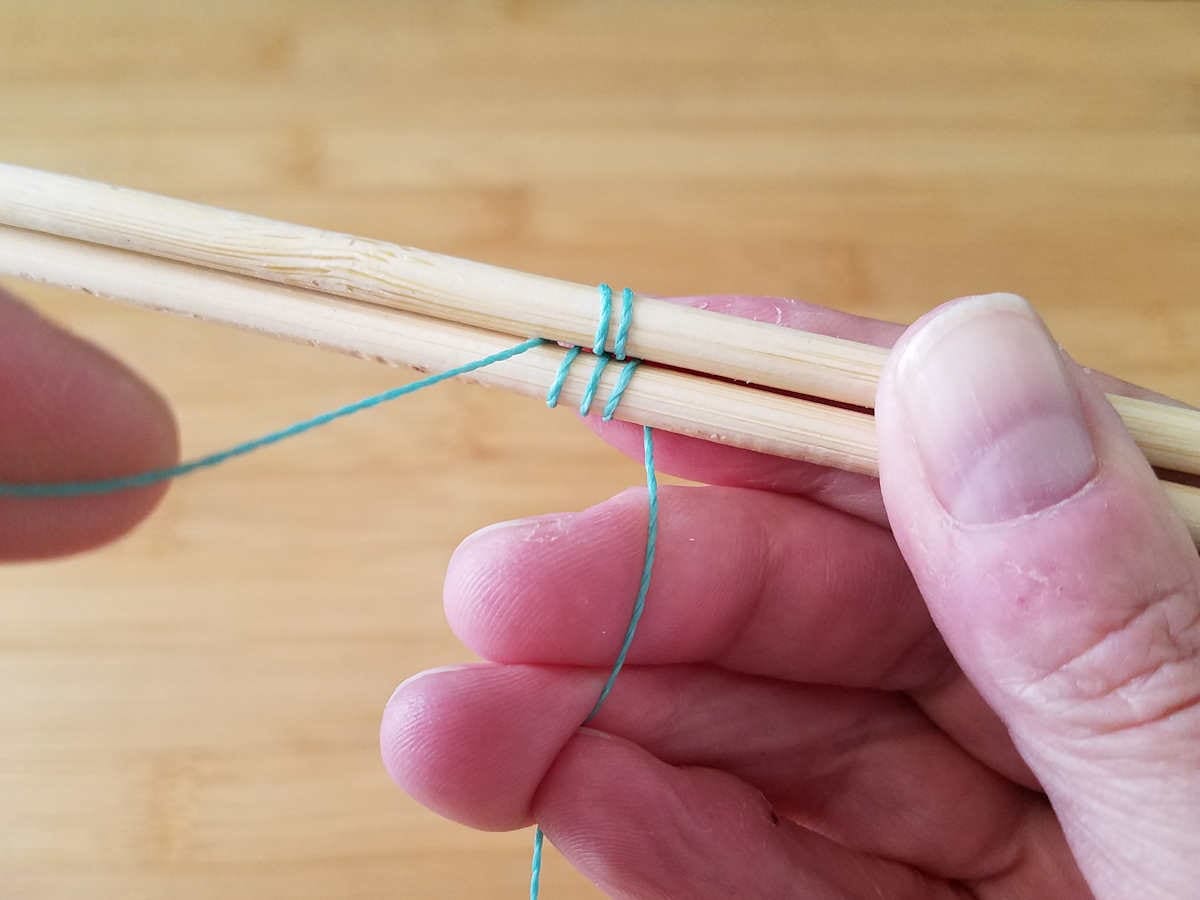
Step 2
Now bring the working end of your weaving wire over the top and around the front of the core wire.

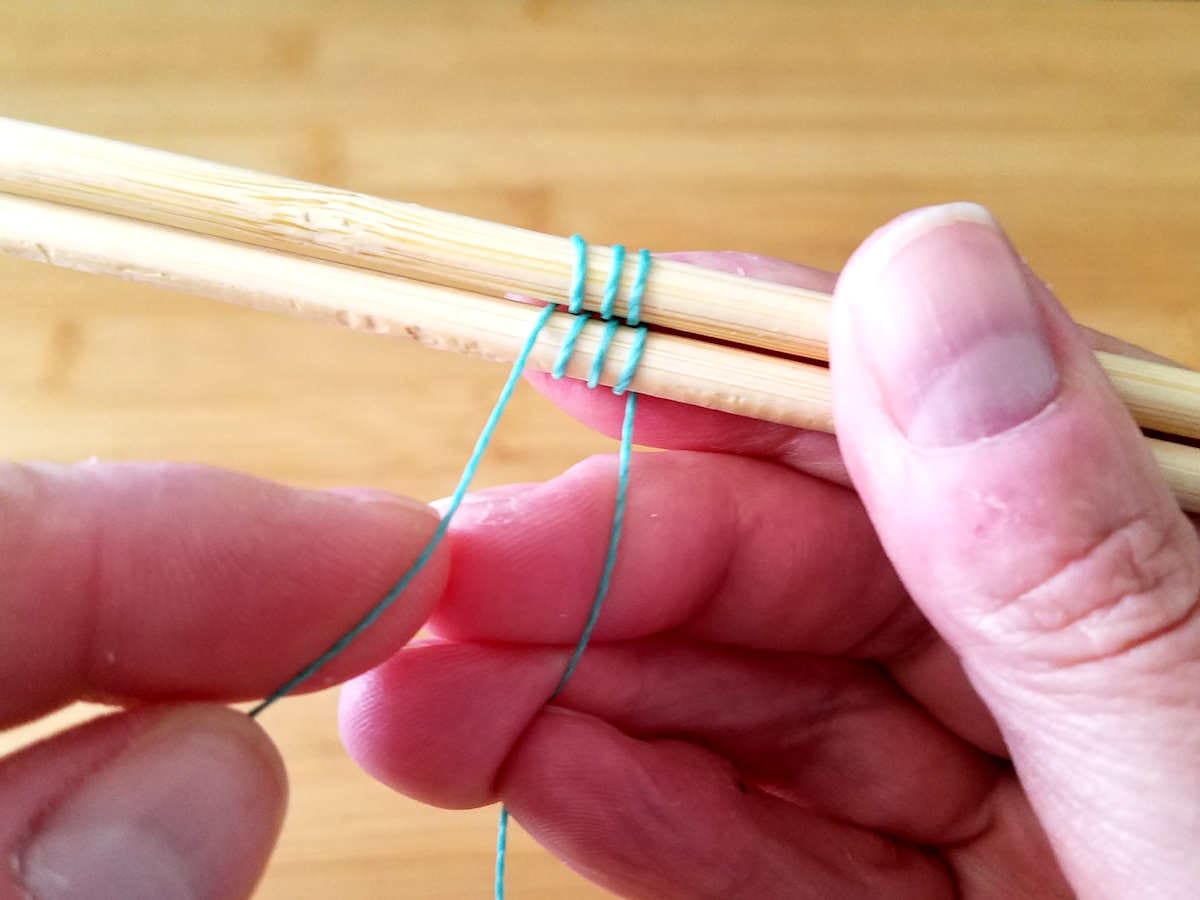
Step 3
Wrap the weaving wire all the way around Wire 1 until the working end comes over the top again. Then add Wire 2 on top of Wire 1, as shown.
Step 4
Now we’re going to begin the first wrap around Wire 2. Bring the working end of the weaving wire over the top and around the back of Wire 2, as shown.
Step 5
Complete the first pattern repeat by bringing the weaving wire to the front between Wires 1 and 2, as shown.

To really master this weave, you need to understand the path of the weave.
You’ll always begin to wrap each core wire from the center point between the two wires.
For Wire 1, you start at the top of the core wire and wrap down and around the wire. After completing the wrap around Wire 1, you’ll be back at the center point between the two wires. Then you wrap up and over Wire 2 and again return to the front center point. Just imagine that you’re drawing a Figure 8 with your weaving wire, as illustrated below.
Step 6
Let’s do another pattern repeat. Wrap all the way around Wire 1 and come out between the two core wires, as shown.

Step 7
Now wrap all the way around Wire 2 and return to the center. That completes the second pattern repeat. You should now have two wraps on each core wire.
Step 8
One more time. Wrap around Wire 1 and return to center.
Step 9
Then wrap around Wire 2 and return to center. That completes your third pattern repeat.
That’s all there is to this weave. Just continue repeating the same simple Figure 8 pattern as many times as needed to fill the space.
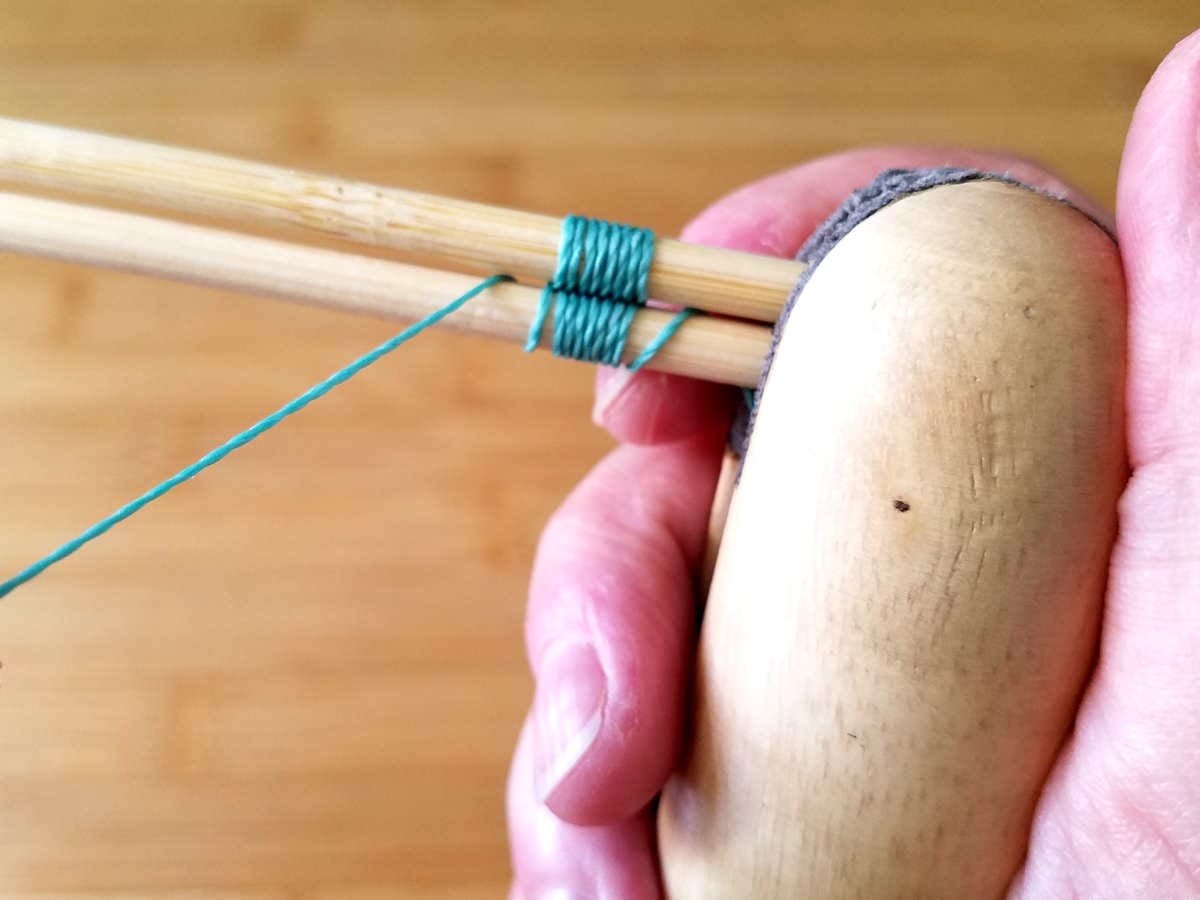
Tip: Compressing Your Weave
Besides mastering the weaving pattern, remembering to compress your weave frequently is equally important. Compression is the key to achieving a neat and tidy weave. And this is how I do it. Every three or so pattern repeats, I gently compact the weave with my thumbnail, as shown below.

This is hard on your nails. I’ve written more than 30 tutorials and I’ve taken dozens of photos of my hands by now. Notice that you’ve yet to see me with a perfect manicure. Pretty nails aren’t a super high priority for me. Especially not now in the era of pandemic pandemonium. So this method works for me.
If you’re concerned about damaging your nails, you can always use a different tool to compress your weave. Please just don’t use anything made of metal. Metal tools can scratch (or even break) your weaving wire. Use something made of wood or plastic instead.
Some common household items that work well for compressing weaves are bamboo skewers, toothpicks, and orange sticks. Plastic guitar picks, an old credit card or gift card also work really well. I’ve even used one of those clear plastic rulers that Fire Mountain Gems sometimes includes in their shipments. It worked great!
Use any soft tool of your choice to compress your weave at regular intervals as you work. The goal is not to force your wraps so close together that there aren’t any visible gaps between wraps. That will only distort your weave.
Instead, just gently push the wraps together until your weave looks something like the one shown above. Note that all of the wraps line up neatly with evenly spaced gaps. And those gaps are about the same width of the weaving wire.
Tip: Use a Ring Clamp to Hold Your Core Wires
I turned 51 this month, and I’m in pretty good shape for my age. No one ever guesses that I’m nearly that old. But I’ve started to feel just the slightest tinge of arthritis in my thumbs this year. After a lifetime of working with my hands, that’s not surprising at all. I think I always sort of took it for granted that my hands would never fail me. But lately, I’ve become much more intentional about how I use my hands.
One of the tools that I find myself reaching for more frequently is my Ring Clamp. It’s basically like having a third hand. My ring clamp does the most physically demanding part of weaving, which is holding the core wires while I weave.
A Ring Clamp is designed to fit comfortably in your hand while holding metal objects very securely. And it does so without damaging the metal surfaces. Let’s take a closer look at this useful tool.
The Anatomy of a Ring Clamp
A typical ring clamp consists of two half-round pieces of wood, which are bound at the center with metal straps. There’s a steel tube mounted between the two halves of the clamp. The tube creates a pivot point, which allows the wooden halves to move in a see-saw motion. A separate hardwood wedge is what activates the clamp. And the leather that lines the jaws on both ends of the clamp helps grip materials without damaging their surfaces.

How to Use a Ring Clamp
To use a ring clamp, you just set your wires between the jaws on either end of the clamp. Then push the wedge firmly into the opposite end of the clamp to apply even pressure on your wires. Then simply hold the clamp gently in your non-dominant hand while you weave with your free hand.
As your weave grows, periodically reposition the Ring Clamp to keep it close to the point where you’re weaving. This will help keep your core wires straight and minimize distortion of either your weave or your core wires.
I really can’t recommend this tool strongly enough. It’s been tremendously helpful for me. And I find myself reaching for it more often to give my hands a break. Work smarter, not harder!
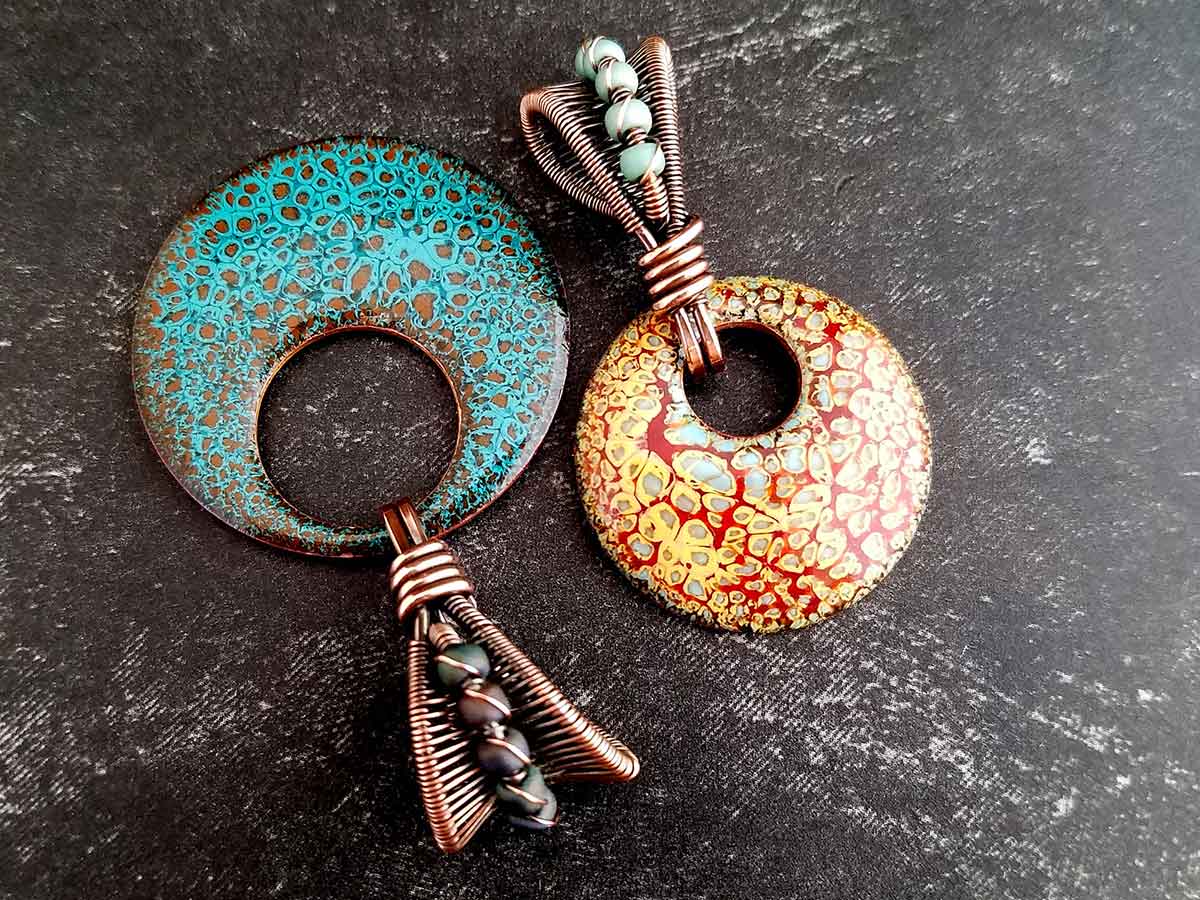
Where to Use the Figure 8 Wire Weave Over Two Core Wires
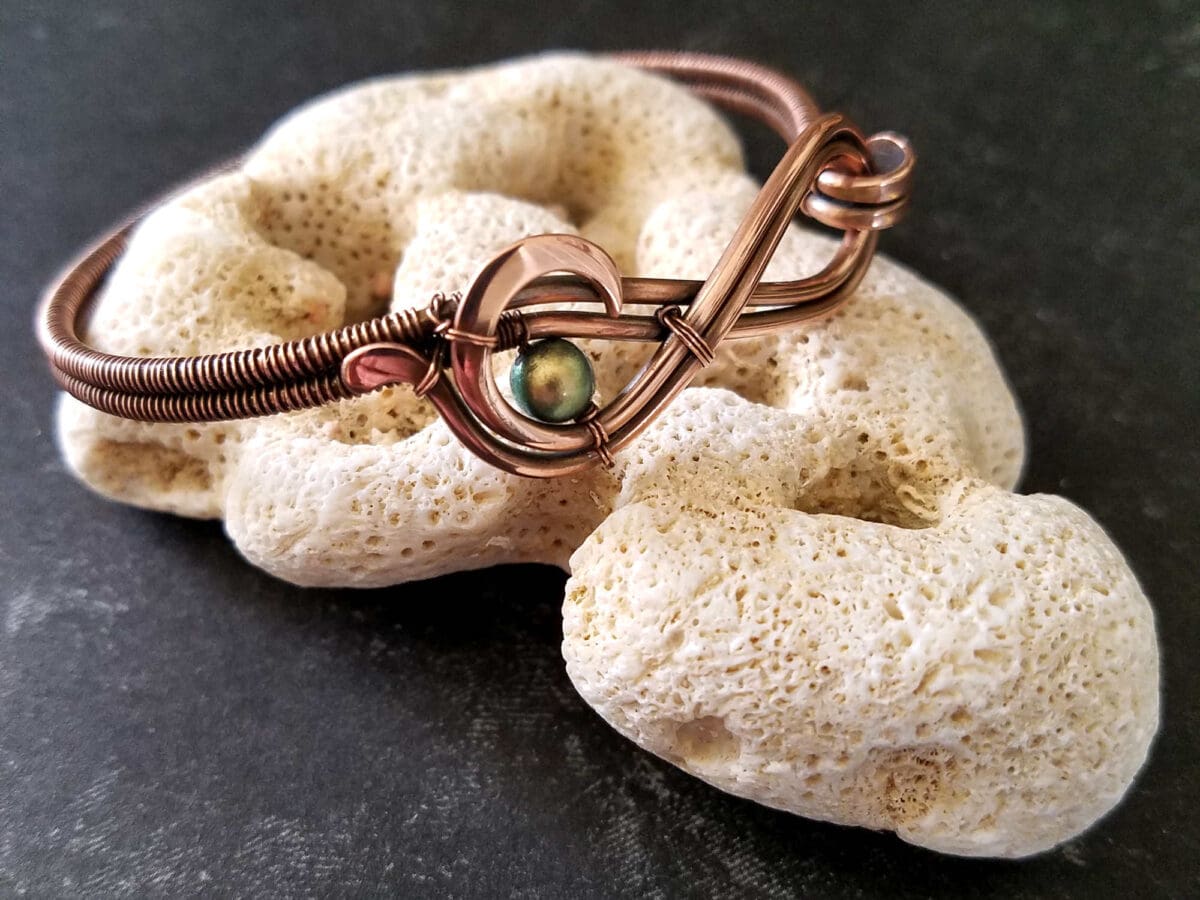
Try using this weave on the Ride the Wave Bracelet, as I did for the cover photo for this post.
Some of my other 2-core designs that will work up well with the Figure 8 weave are linked below.
- The Chalice Earrings
- The Chalice Necklace
- The Lover’s Knot Stacked Bangle
- The Egyptian Sun Pendant
- The Delicate Bar Pendant
- The Rosewood Pendant
- The Rosewood Earrings
Give some of these tutorials a try! All of my jewelry tutorials are suitable for beginners and experienced wire weavers alike. And stay tuned for the next post in this series where we’ll add more core wires and experiment with some simple variations of the Figure 8 weave.
Discover More Behind Door 44
Thank you for joining me today! I hope you enjoyed this basic weave tutorial. If you’re a right-handed weaver, are the instructions and images hard for you to follow? Or do you find it easy enough to understand my left-handed instructions, even if you’re right-handed? Let me know in the comments so I can refine future weave tutorials for you.
I like to share useful wire weaving tips and tricks on my social media channels, and we have some great conversations about wire jewelry in my private Facebook Group. Also, be sure to connect with me @door44studios on Instagram, and Facebook to keep up with everything that’s happening behind Door 44. And if you haven’t already done so, be sure to subscribe to my YouTube channel where you’ll find new wire jewelry videos weekly.
Until next time, go make something fun and beautiful with the 2-core Figure 8 Wire Weave!

Pin This Post for Later