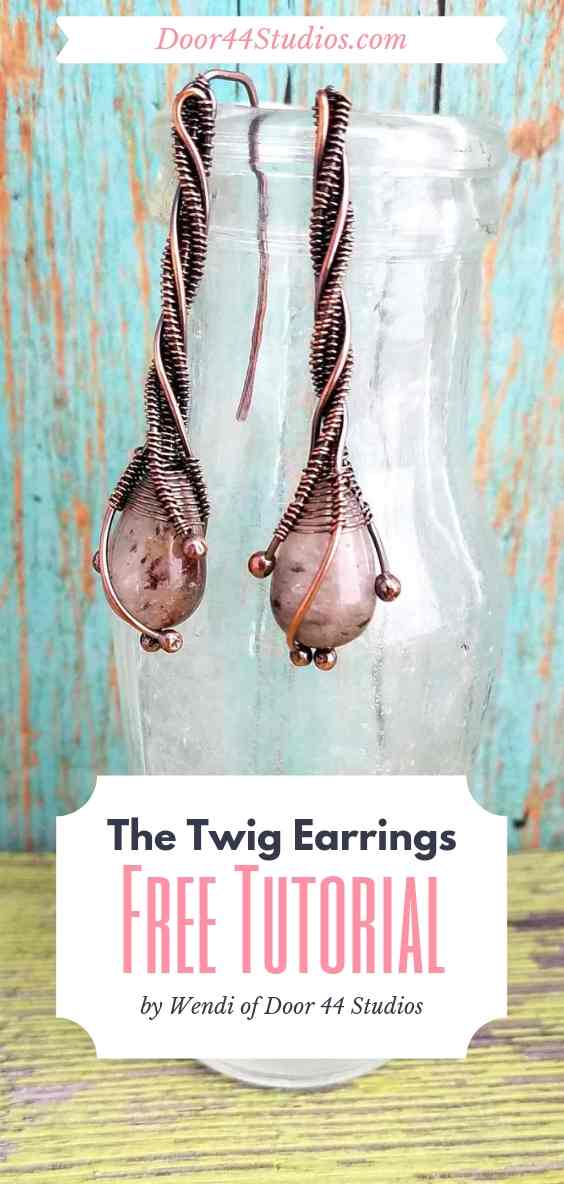
How to Make the Popular Door 44 Twig Earrings
The Twig Earrings are far and away my most popular Door 44 Jewelry design. They’re my best sellers, and they continue to be my most popular images on Pinterest. Even long after the original pieces were sold. You never really know which designs are going to really resonate with people, but this design was definitely a home run for me. And now you can make these pretty earrings yourself!
It’s springtime here in the Rockies, and the trees outside my window are just starting to bud. I’m struck by the resemblance of those buds to these pretty earrings. It just feels like the right time to release tutorials for this design.
As I’ve mentioned before, I’m kind of a square when it comes to jewelry design. I like clean lines and symmetry, but the Twig Earrings are more organic than my other designs. There’s an element of surprise with every pair I make, and no two pairs — no two individual earrings, for that matter — ever turn out exactly alike. So, if perfect symmetry is your jam, the Twig Earrings are going to challenge you to accept a certain degree of imperfection and asymmetry. It’s the kind of imperfection that you find in nature, though. The kind that makes your finished work all the more beautiful because of the subtle differences from one piece to the next.
Copyright & Use Info
You’re welcome to make and sell products from this tutorial. If you do so, however, please credit Door 44 Studios for the design and link back to this page.
When it comes to my written tutorials, on the other hand, I reserve exclusive rights to all images and written content. You may not reproduce or redistribute any portion of this tutorial in any way, shape, or form. Furthermore, you may not teach the designs contained within this tutorial without my written permission.
This copyright applies to the printable PDF version of this tutorial as well, and it’s included therein. You may share the free version of this tutorial only by linking directly to this page.
This post may contain affiliate links. If you click on a link and then make a purchase, I may earn a small commission (at no cost to you). As an Amazon Associate I earn from qualifying purchases. To learn more, please see my full disclaimer.
Alright. Let’s get started!
Skill Level: Intermediate
This is a more challenging project that involves wire weaving. It can be achieved by someone who has some basic wirework skills.
This tutorial assumes you’re familiar with Figure 8 Weave over three core wires. Other skills required are balling the ends of the wire with a micro torch. Just click the links above to review my free tutorials for those two skills. Also, I discuss torch safety briefly in my own tutorial. But I also recommend this free mini-course on Craftsy that will introduce you to the basics of safely using a micro torch.
Getting Started
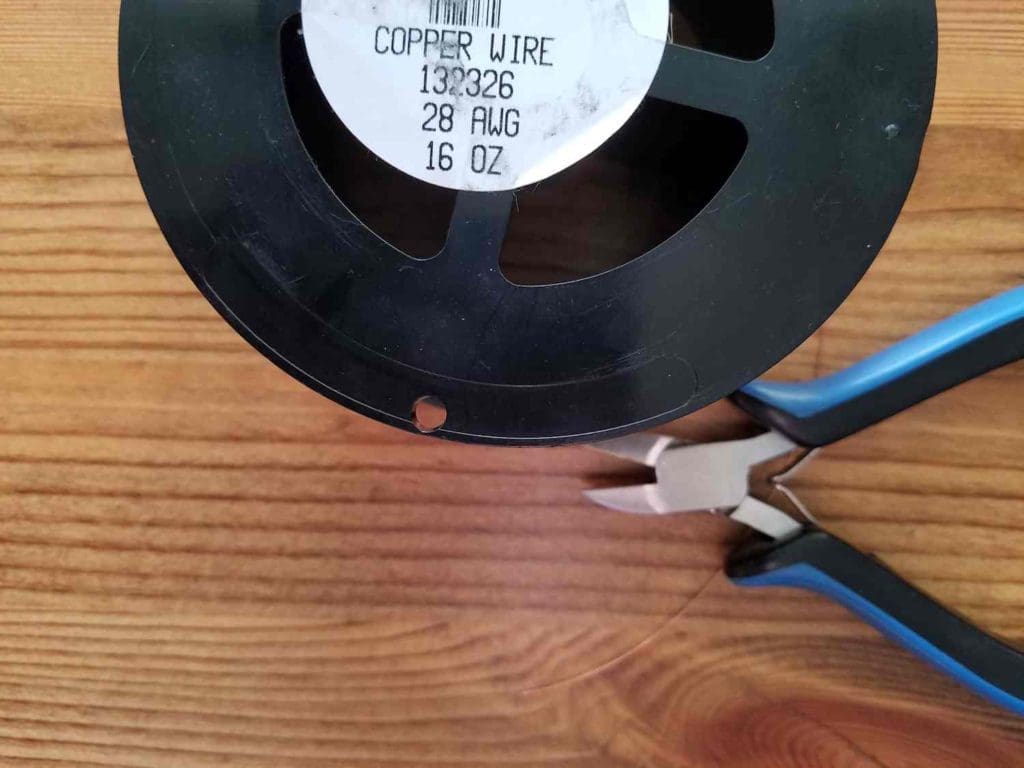
For best results, use solid copper or sterling silver wire for your core wires and dead soft copper or fine silver wire for weaving. The ends of the core wires are balled with a torch in this tutorial, so filled wires or coated craft wires are not suitable for these earrings. Refer to this post to learn more about jewelry wire and why I recommend solid wires for my tutorials.

Tools & Materials
- 20ga wire – 28 inches
- 28ga dead soft wire – 80 inches
- 10mm x 15mm center-drilled drop beads – 2 each
- Flat Nose Pliers
- Wire Cutters
- Nylon Jaw Pliers
- Nylon Mallet or Rawhide Mallet
- Chasing Hammer
- Bench Block
- Cup Burr Tool or Needle File
- Fine Point Permanent Marker
- Ruler
- Butane Micro Torch (This is the same torch that I use)
- Stainless steel cross-lock tweezers
- Safety Glasses
- Quenching Bowl
- Pickle Pot
Modifying Your Twig Earrings
I used some 10 mm x 15 mm Lodolite gemstone beads for the samples I created while writing this tutorial, but you can make these earrings with virtually any center-drilled drop, oval, or rice bead. The beauty of this design is that it can be easily adapted to almost any sized bead, and it’s super simple to customize the length of your earrings.
Feel free to experiment with different sizes and shapes of beads and different lengths of core wires. There’s really no wrong way to make these earrings, so relax and have fun with this tutorial.
Shopping for Beads
I found the pretty Lodilite beads that I used for this tutorial at my local bead shop. As always, shop locally first. Otherwise, you can find center-drilled drop beads at most of the major online jewelry suppliers. Try Fire Mountain Gems, for instance. Beadaholique is another good resource. Both of these sources have a nice selection of Swarovski beads. Cherry Tree Beads is a great resource for gemstone beads. They have a fantastic selection, and they’re one of the only major wholesale suppliers (that I know of) that also sells retail to hobbyists. And of course there’s Etsy, which (next to shopping locally) is my favorite way to support small businesses. For your convenience, I’ve curated a collection of my favorite beads for Twig Pendants and Earrings from a few of my favorite Etsy shops.

Finished Size
- WIDTH: about 3/8 inch (0.95 cm)
- LENGTH: about 2 inches (5.08 cm)
You can easily make your earrings either longer or shorter by adjusting the lengths of your core wires. The beads you choose will determine the overall width of your earrings.
Instructions
The following instructions assume that you’re using 10 mm x 15 mm beads, as specified in the materials list. However, the Twig Earrings can be easily adapted to larger or smaller beads. I’ve provided specific recommendations for resizing these earrings in the Variations section below. Refer to that section now if you’ve chosen to use a bead that is substantially different than those specified in the materials list. Otherwise, proceed with the instructions for the earrings, as written.
Prepare the Core Wires
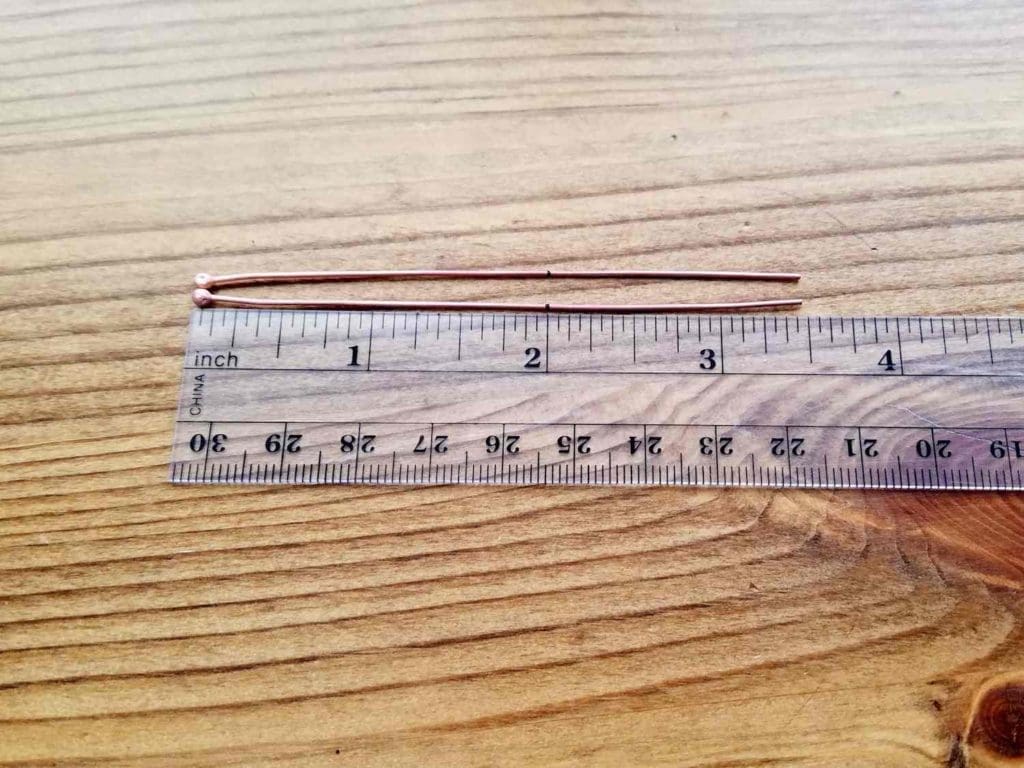
Step 1
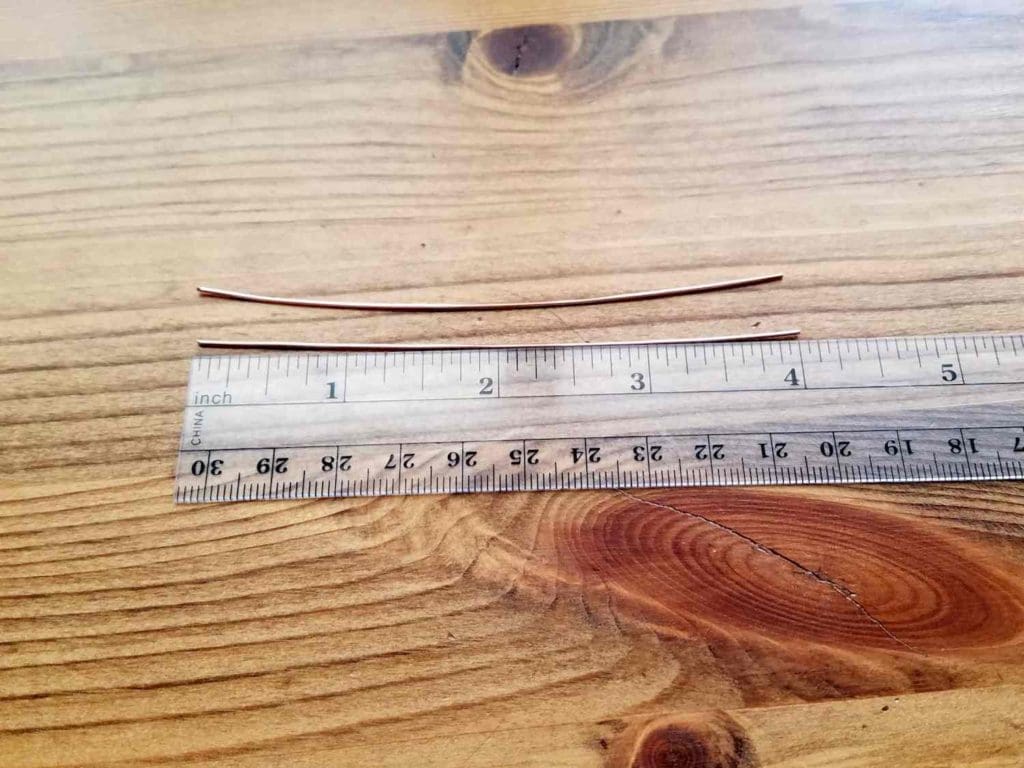
Measure and cut two 4-inch pieces of 20ga wire.
These will be your ear wires, so if you’re making silver earrings, be sure to use sterling silver wire here. Fine silver wire isn’t strong enough for ear wires.
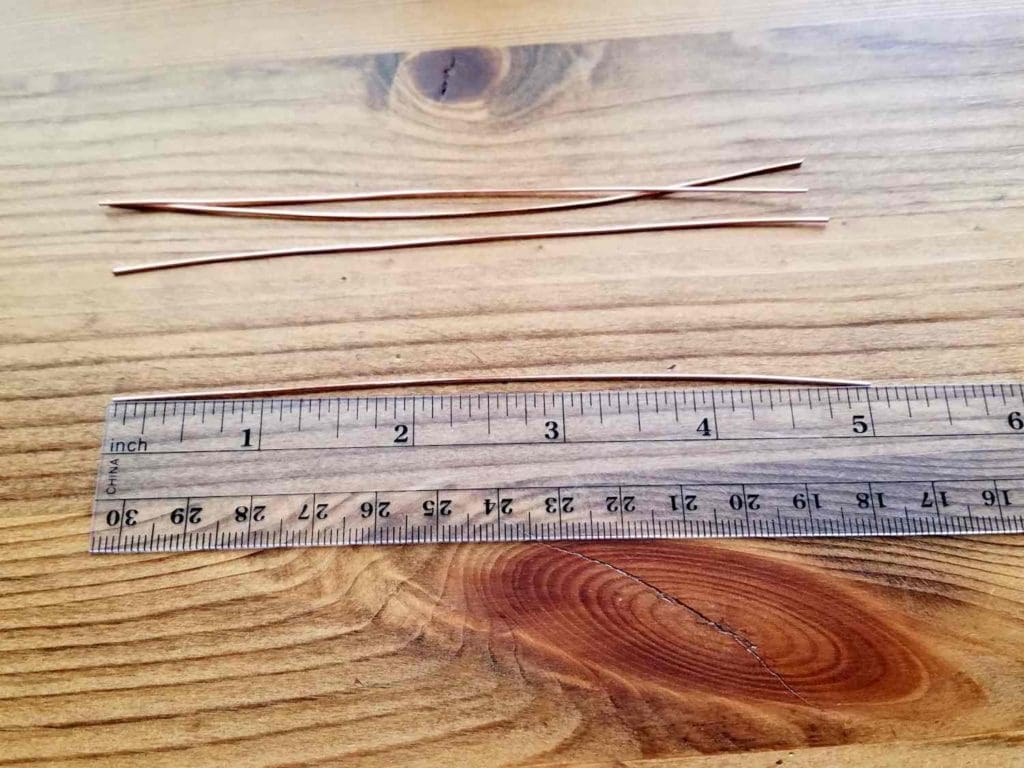
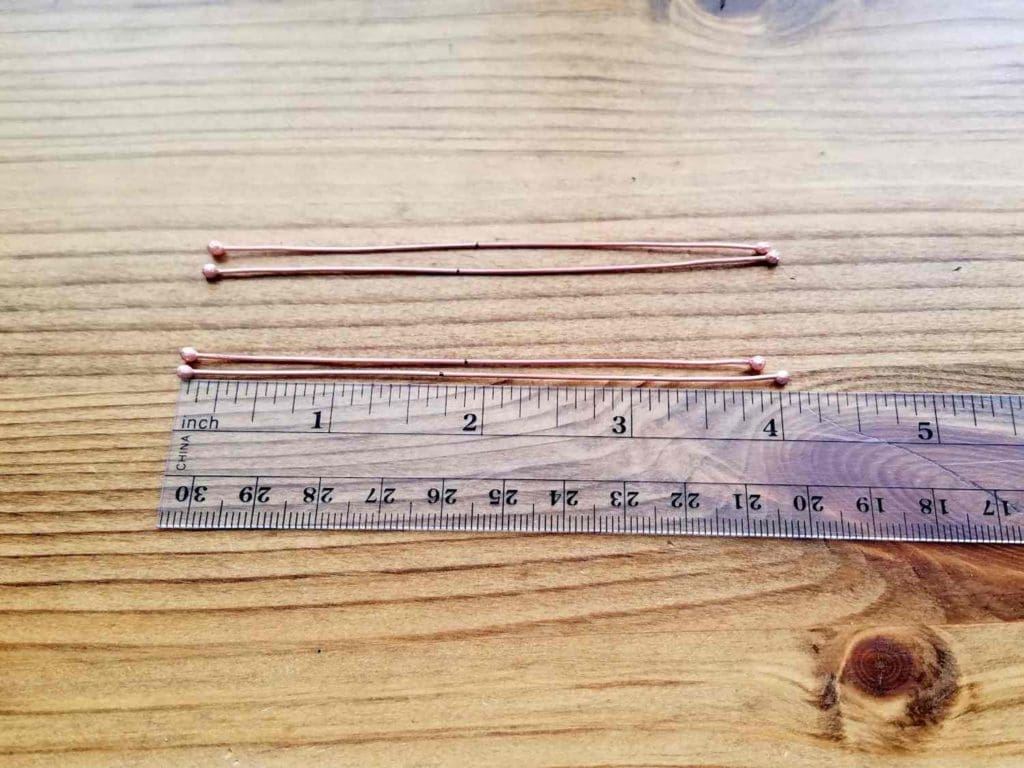
Step 2
Measure and cut four 5-inch pieces of half-hard 20ga wire. These are the wires that will form the twist.
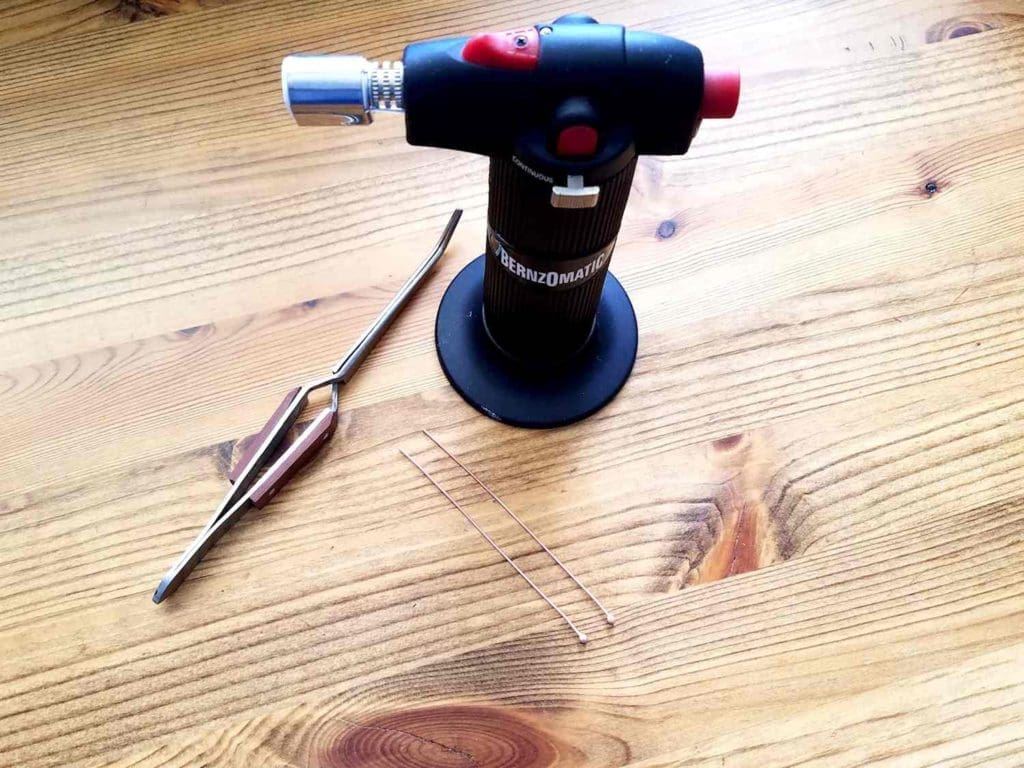
Step 3
Use your micro torch to ball one end of your two 4-inch wires.
These two wires will be your ear wires. Make sure the ball on the end of the wire is large enough to support your bead.
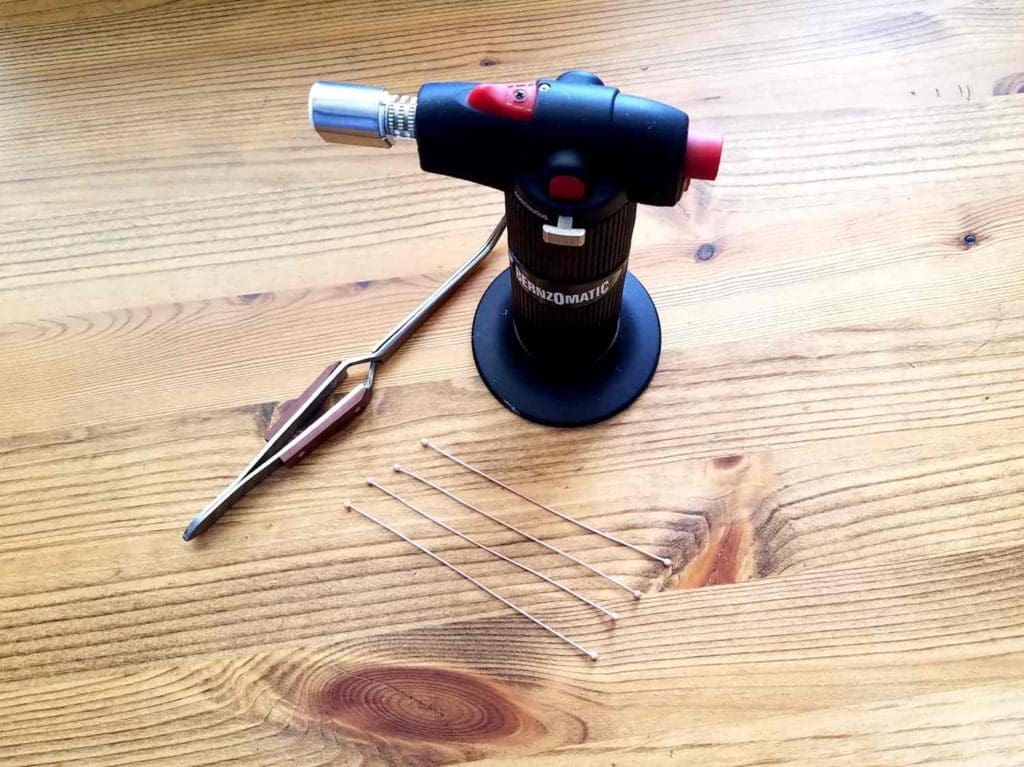
Step 4
Use your micro torch to ball both ends of your four 5-inch wires.
These will be the outer core wires, which will be positioned on either side of the ear wires. It’s not always easy to control the length of these wires when balling the ends. Do your best to keep those wires close to the same length, but don’t stress yourself out over it. Your earrings will still be beautiful, even if they’re not perfectly symmetrical.
Step 5
Trim the cut ends of your ear wires so the two wires are the same length. Then mark both ear wires at 2 inches from the tip of the balled end of the wires and slide a bead onto each ear wire.
Your mark will not be exactly in the center of your wires. That’s because the process of balling the ends shortens your wires significantly. That’s okay. As long as you have at least 1-1/4 inch of wire between your mark and the trimmed ends of the ear wires, they’ll be fine.
Step 6
Mark two of your remaining core wires 1-7/8 inches from one balled end of the wires.
Mark the last two core wires 1-3/4 inches from one balled end of the wires.
Weave the Core Wires Together
Step 1
Cut two 40-inch lengths of dead soft 28ga wire.
If you’re making your earrings with silver wire, use dead soft fine silver wire for weaving in this section.
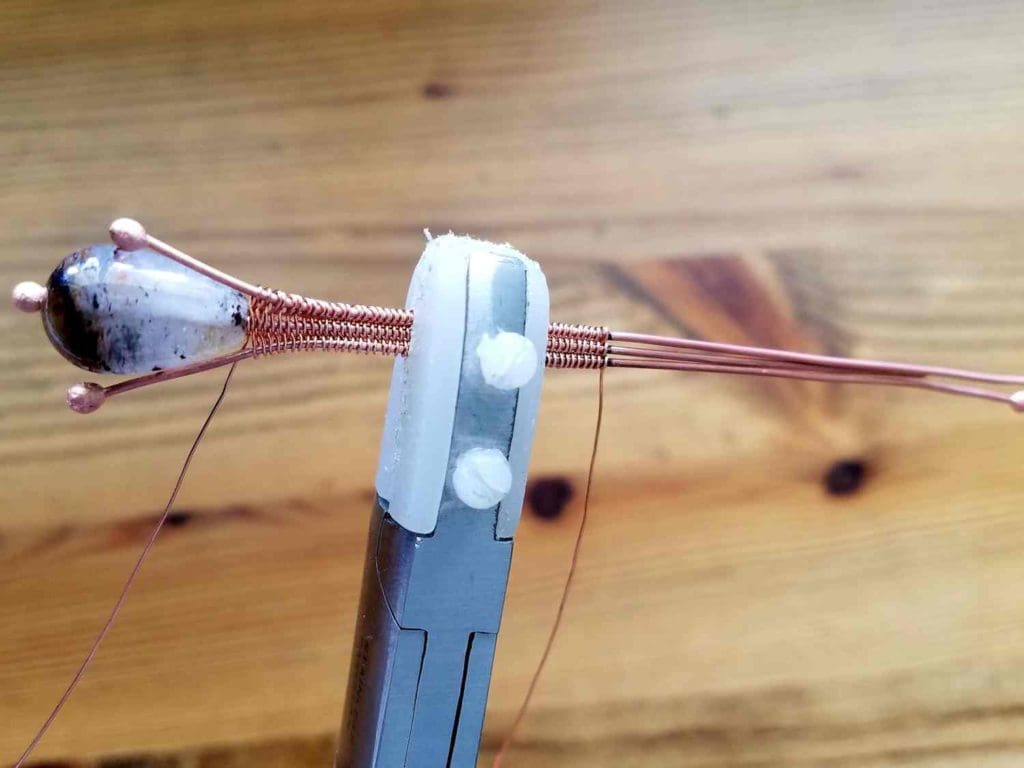
Step 2
Take one beaded ear wire and one each of the core wires marked at 1-7/8 and 1-3/4 inches.
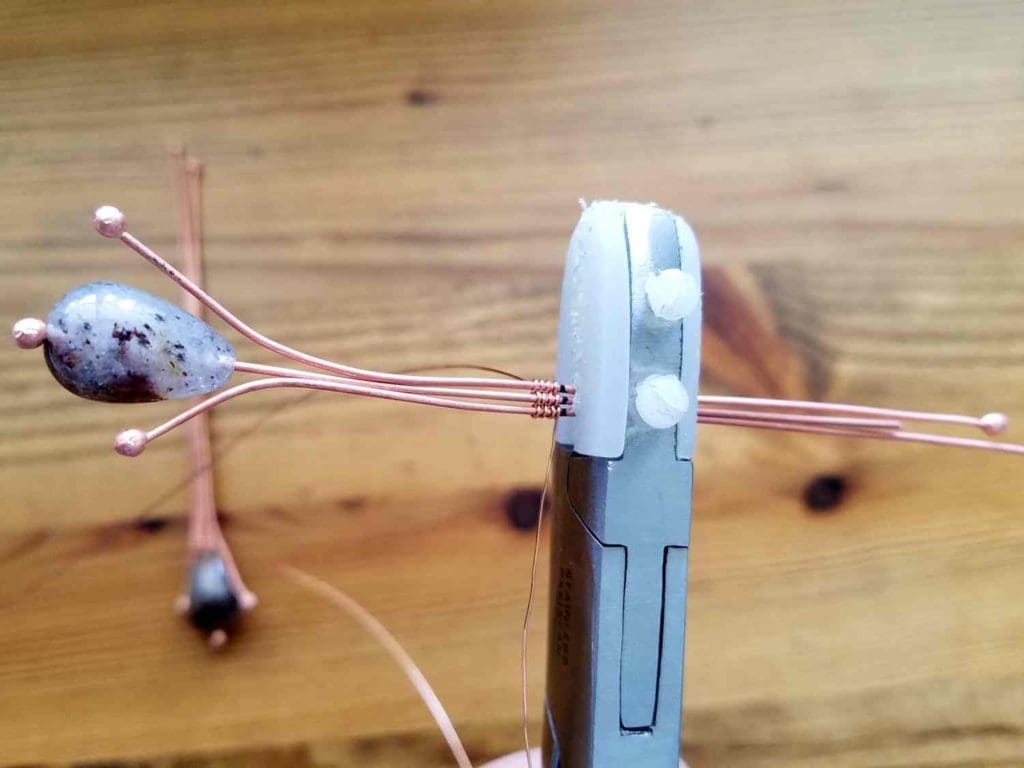
Place the wire marked at 1-7/8-inch to the left of the ear wire and the wire marked at 1-3/4-inch on the right. Line up the marks on all three wires and lash the core wires together with your 28ga weaving wire. Leave a 3-inch tail on your weaving wire.
Weave the three core wires together using Figure 8 weave. Continue weaving until you reach the top of your bead. Finish the weave with two wraps around the center core wire. Do not break your weaving wire. Set that earring aside for now.
Step 3
Place the remaining wire marked at 1-7/8-inch to the right of the remaining ear wire and the last outer core wire marked at 1-3/4-inch on the left. Line up the marks on all three wires and lash the core wires together with your remaining piece of 28ga weaving wire.
Weave the three core wires together using Figure 8 weave. Continue weaving until you reach the top of your bead. Again, finish the weave with two wraps around the center core wire.
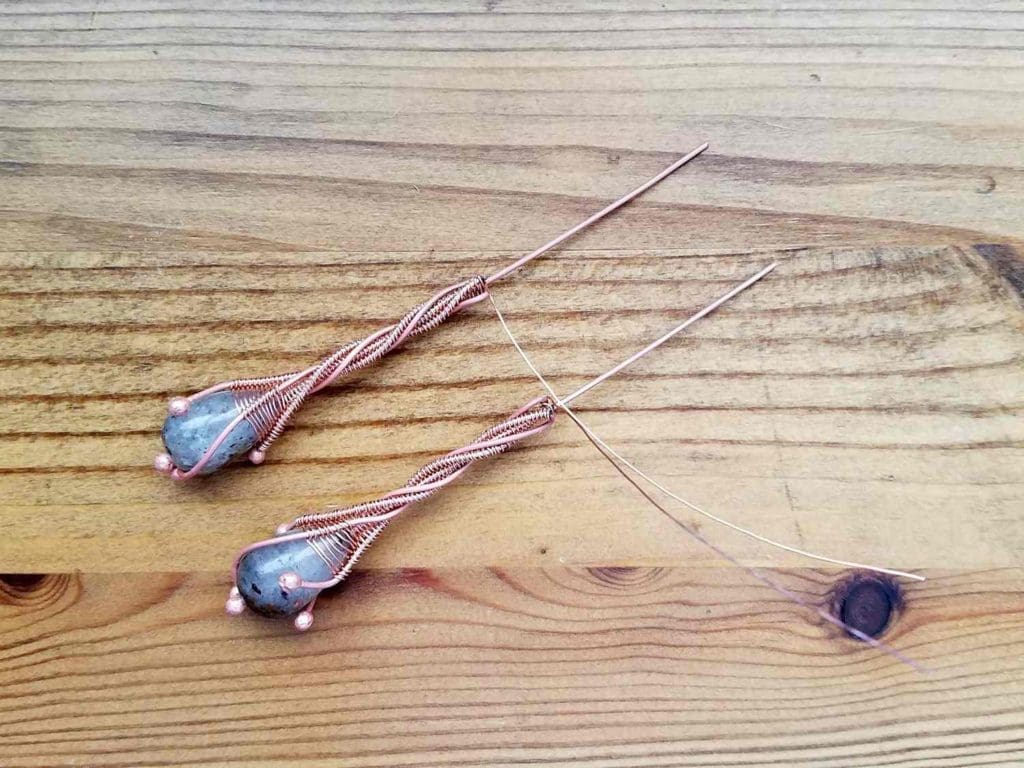
Step 4
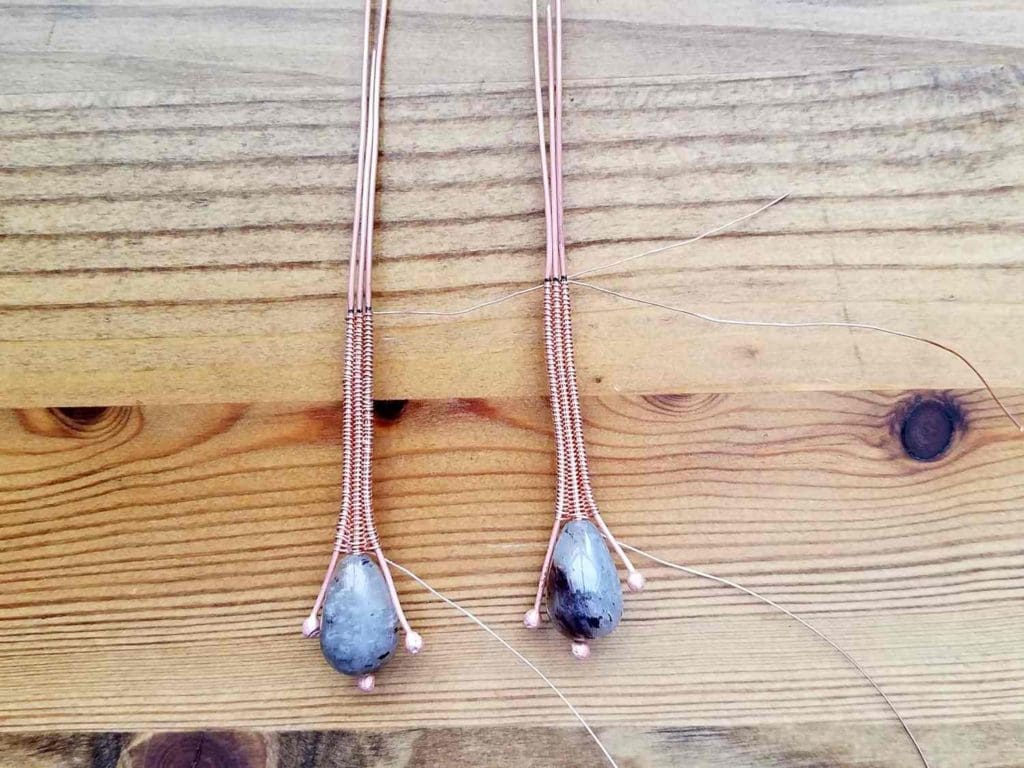
Symmetry is important for these earrings, but it’s difficult to maintain perfect symmetry with this design. You’re going to have to get comfortable with a certain degree of imperfection on these earrings or you’ll just get frustrated.
Compare the two earrings, side-by-side. If any of your core wires slipped out of alignment while weaving, gently work them back into alignment now. Try to get your earrings to a point where they mirror one another as closely as possible. Again, you’re not going to achieve perfection with this design. Especially if you’re very new to using a micro torch.
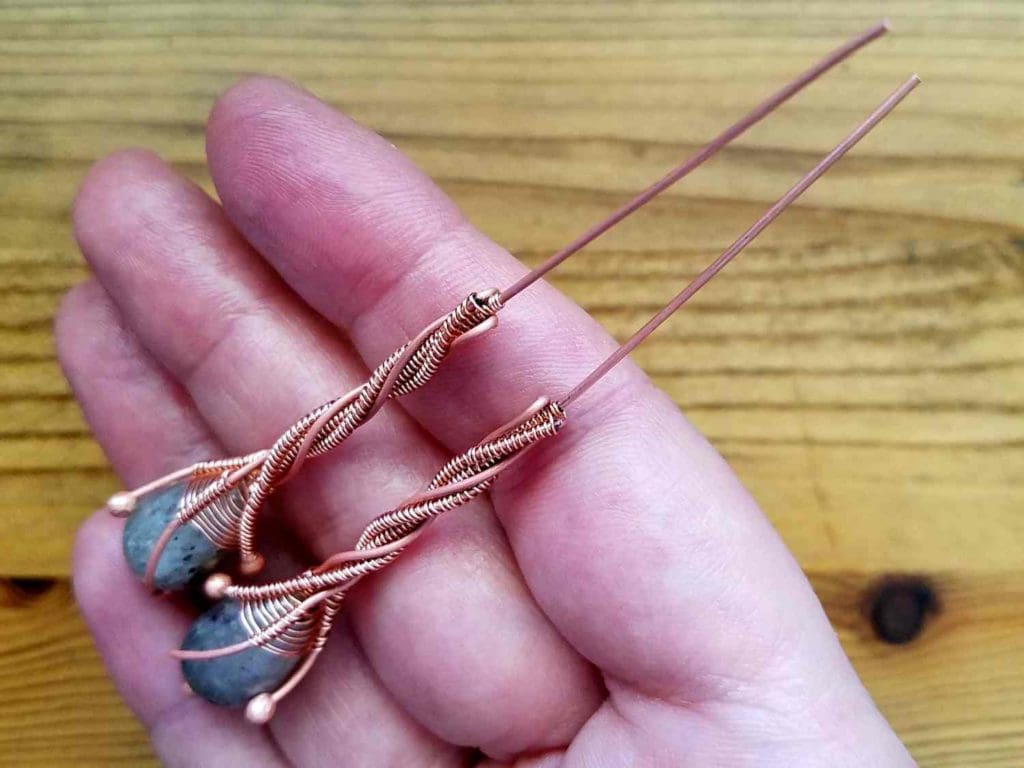
Step 5
Grasp the core wires on one earring just above the bead with your fingers. Using your other hand, gently start twisting the core wires from the bottom up in a counterclockwise direction. Continue twisting until you have an even twist from the top of the bead to the top of the weave at the 2-inch mark on your ear wire.

Step 6
Repeat Step 5 on the remaining earring only twist this one in a clockwise direction. This step may feel awkward at first. Twisting in one direction will feel more comfortable than the other, depending on your dominant hand. The core wires are fairly forgiving at this point, however. If you didn’t get the twist just right on the first try, gently straighten out your core wires and try again.

Final Assembly of Your Twig Earrings
Step 1
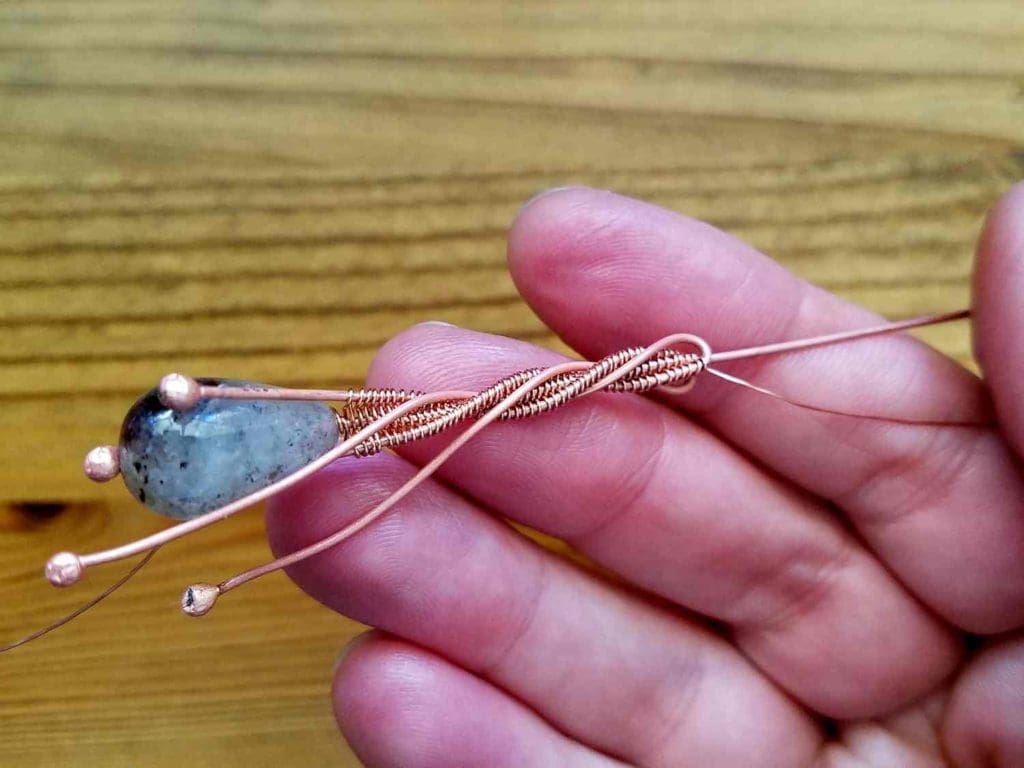
We’re now going to finish off the twisted shaft of the earrings with the remaining lengths of the two outer core wires.
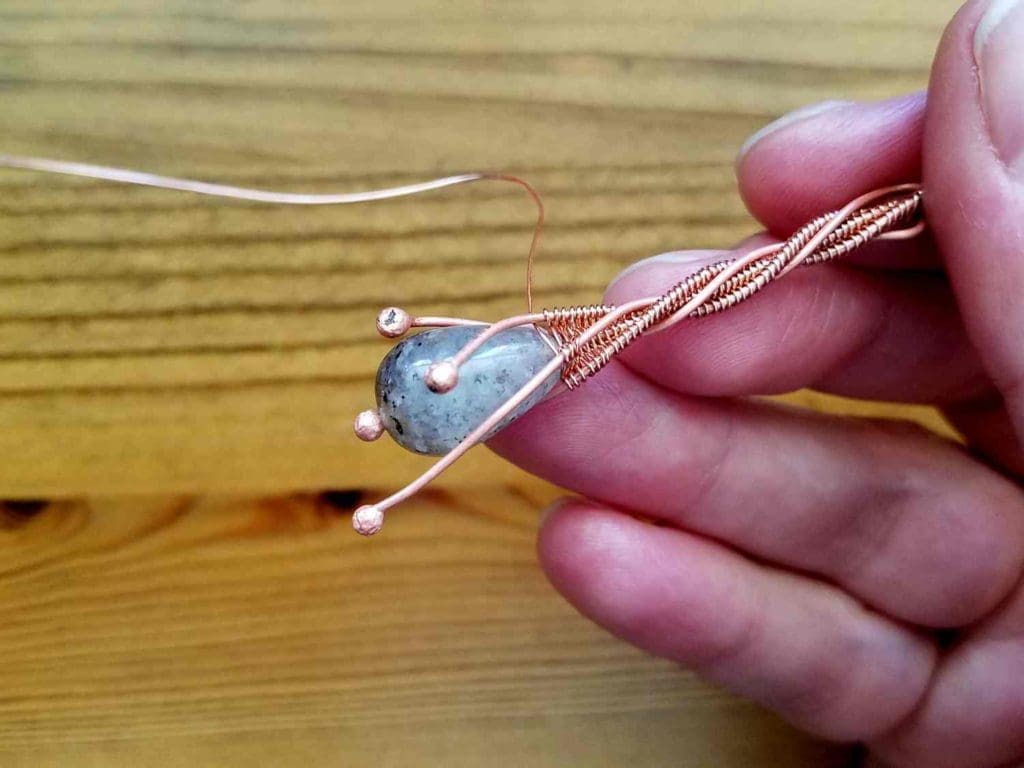
Following the flow of the twist, gently bend the outer core wires in half and guide them down either side of the twist so they follow the lines of the twist all the way down to the bead.
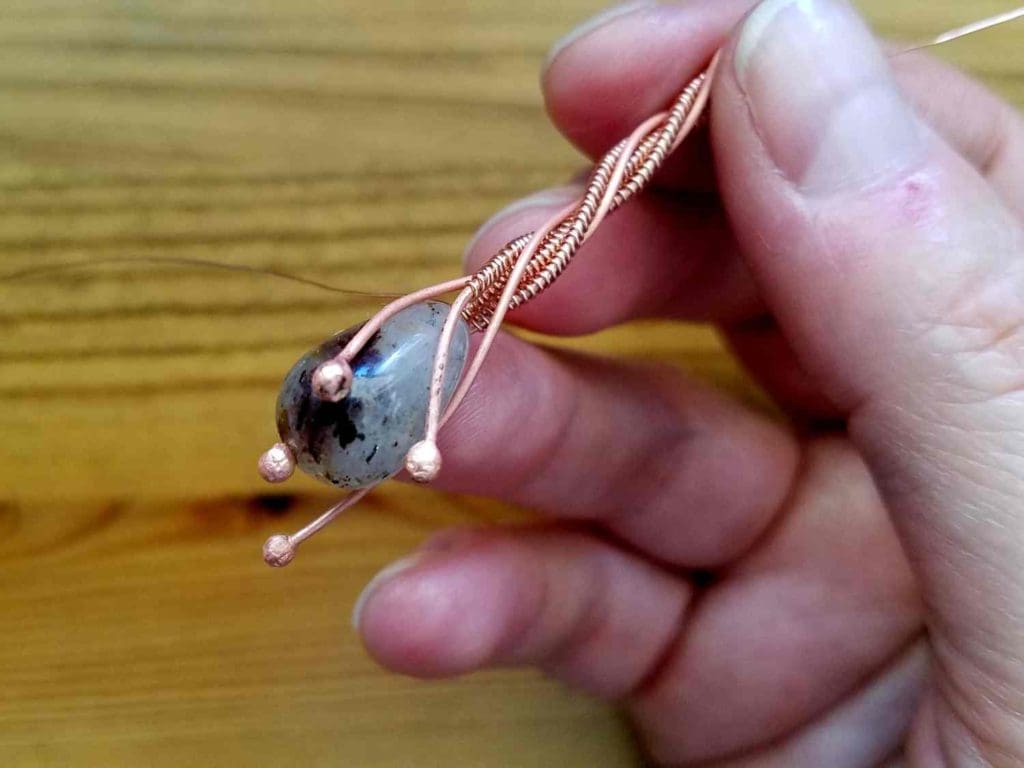
Step 2
Once you reach the bottom of the earring, gently space the four balled ends of your core wires evenly around the bead and gently curve those ends so they continue the flow of the twist.
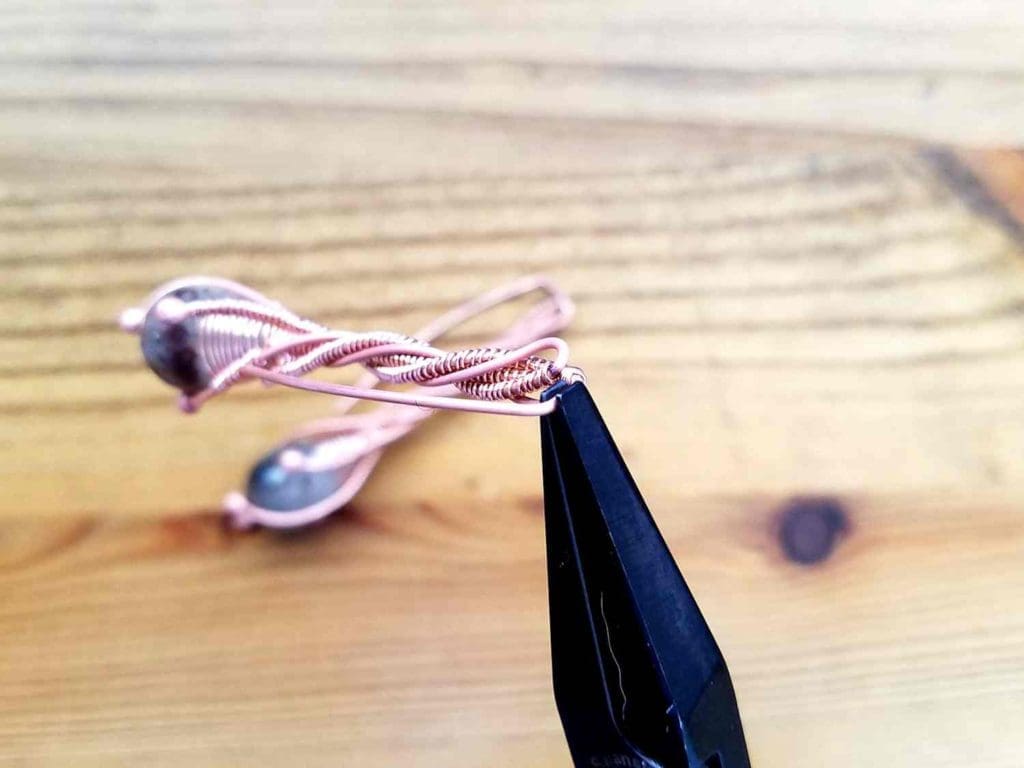
Step 3
We’re now going to lash the balled ends of the wire using the remaining tail of the weaving wire.
Figure out which direction your core wires are flowing (clockwise or counterclockwise), and work in the opposite direction of that flow.
Lash each core wire by sliding the weaving wire under, over, and around the core wire. Continue lashing the core wires until you reach the ball on the shortest of the four core wires. Wrap the weaving wire three times around that wire, just above the balled end, and break your weaving wire.
Step 4
Repeat Steps 1 through 3 on the second earring. Be sure you pay attention to the direction of the twist and position the core wires so they continue the flow of the twist. Also, be sure to work in the opposite direction of the twist when lashing the balled ends of your core wires with the weaving wire.
Step 5
Use your Nylon Jaw Pliers or your fingers to straighten both ear wires. Wrap the 3-inch tail of your weaving wire three times around the ear wire and break the weaving wire.
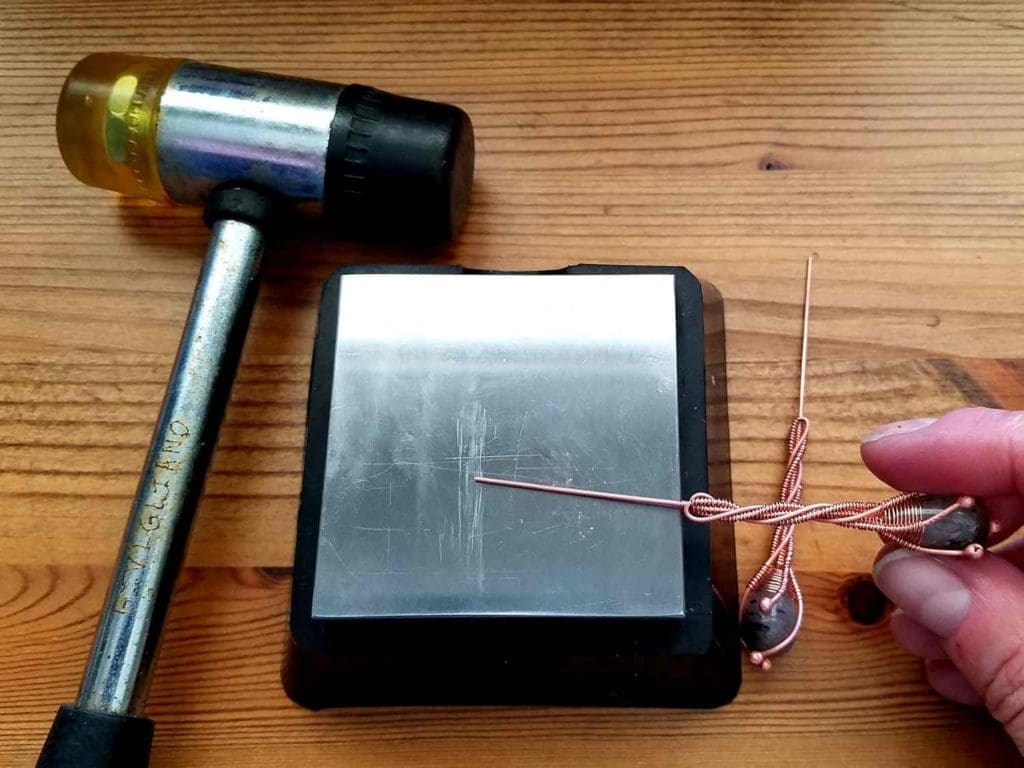
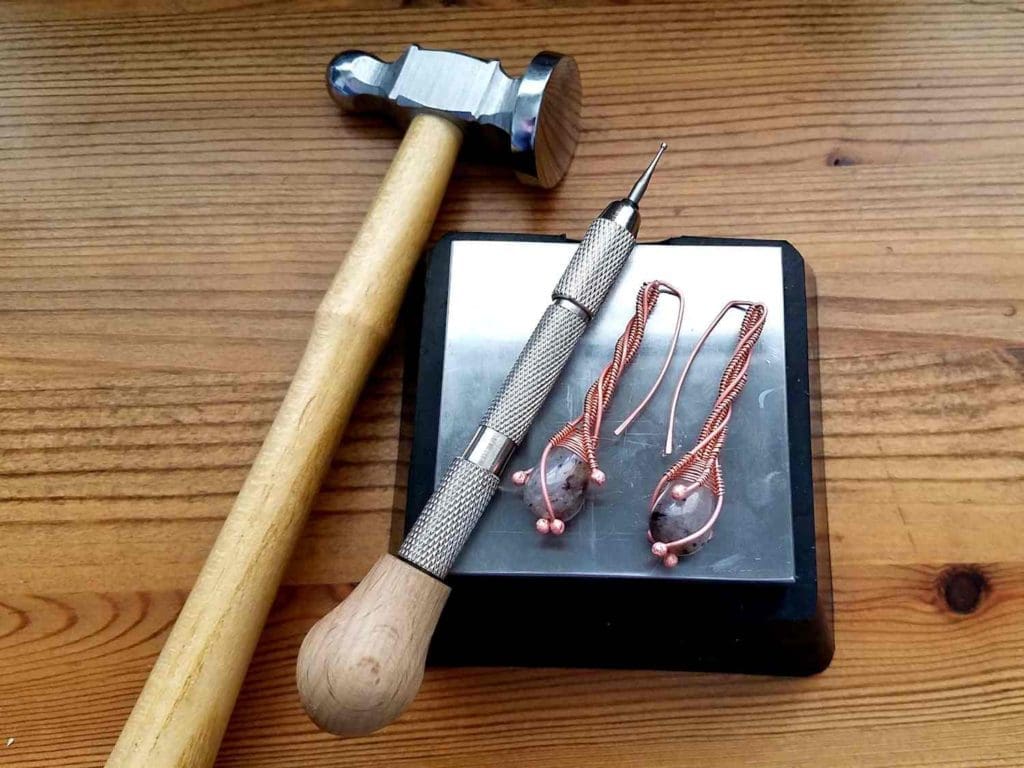
Step 6
Using your bench block and a rawhide or rubber mallet, tap all along the length of the ear wire with short even strokes. This hardens the wire so it will retain its shape after you finish forming it.
Your wire should be noticeably more stiff and springy at this point. If it still feels soft and pliable, continue tapping it with your mallet until you can feel a distinct difference in your wire. Hardening is another skill that takes practice in order to develop a feel for the work.
Step 7
Once you feel your wire is sufficiently hardened, use your fingers to bend the ear wire into a 90-degree angle just above the woven part of the earring shaft.
Now use your fingers to form the length of the ear wire into a slight curve so that the tip of the wire is pointing slightly downward in the direction of your earring.
Grasp the ear wire with your flat nose pliers as close as you can get to the 90-degree angle you just made. Using your fingers again, bend the ear wire down against the outer edge of your pliers. Continue that bend until you have another 90-degree angle and the ear wire is parallel to the twisted shaft of the earring.
Step 8
Use your chasing hammer and bench block to gently flatten the top angle on the ear wire as well as the tip of the wire.
Use a cup bur or needle file to smooth the tip of the ear wire. Make sure there are no sharp edges on the wire that could scratch the ear lobe when putting the earrings on.
Repeat Steps 5 through 8 on the remaining earring.
That’s it! Your Twig Earrings are now complete and ready for patina and polish.
Finishing Suggestions
I patina all my copper and silver jewelry with Liver of Sulfur (LOS) first. Then I polish my jewelry with a rotary tumbler. If you want to know exactly what that process looks like, you can find my free 7-Step Finishing Process tutorial here. Also, if you’d like to learn more about why I recommend tumble polishing specifically, check out this post.
Before tumbling stones or delicate beads, I recommend sacrificing a test bead. Run a test tumble to make sure that your beads won’t be damaged in that process. I don’t recommend tumbling natural pearls, certain soft gemstones or glass beads with polymer coatings, such as glass pearls and some frosted-look beads.
If you do choose to use these types of beads, tumble all the wire components of your jewelry (including the wire you plan to use to attach your beads) prior to weaving in the beads. That way you can achieve a beautiful antiqued metal finish without damaging your delicate beads.
Variations of the Twig Earrings Design
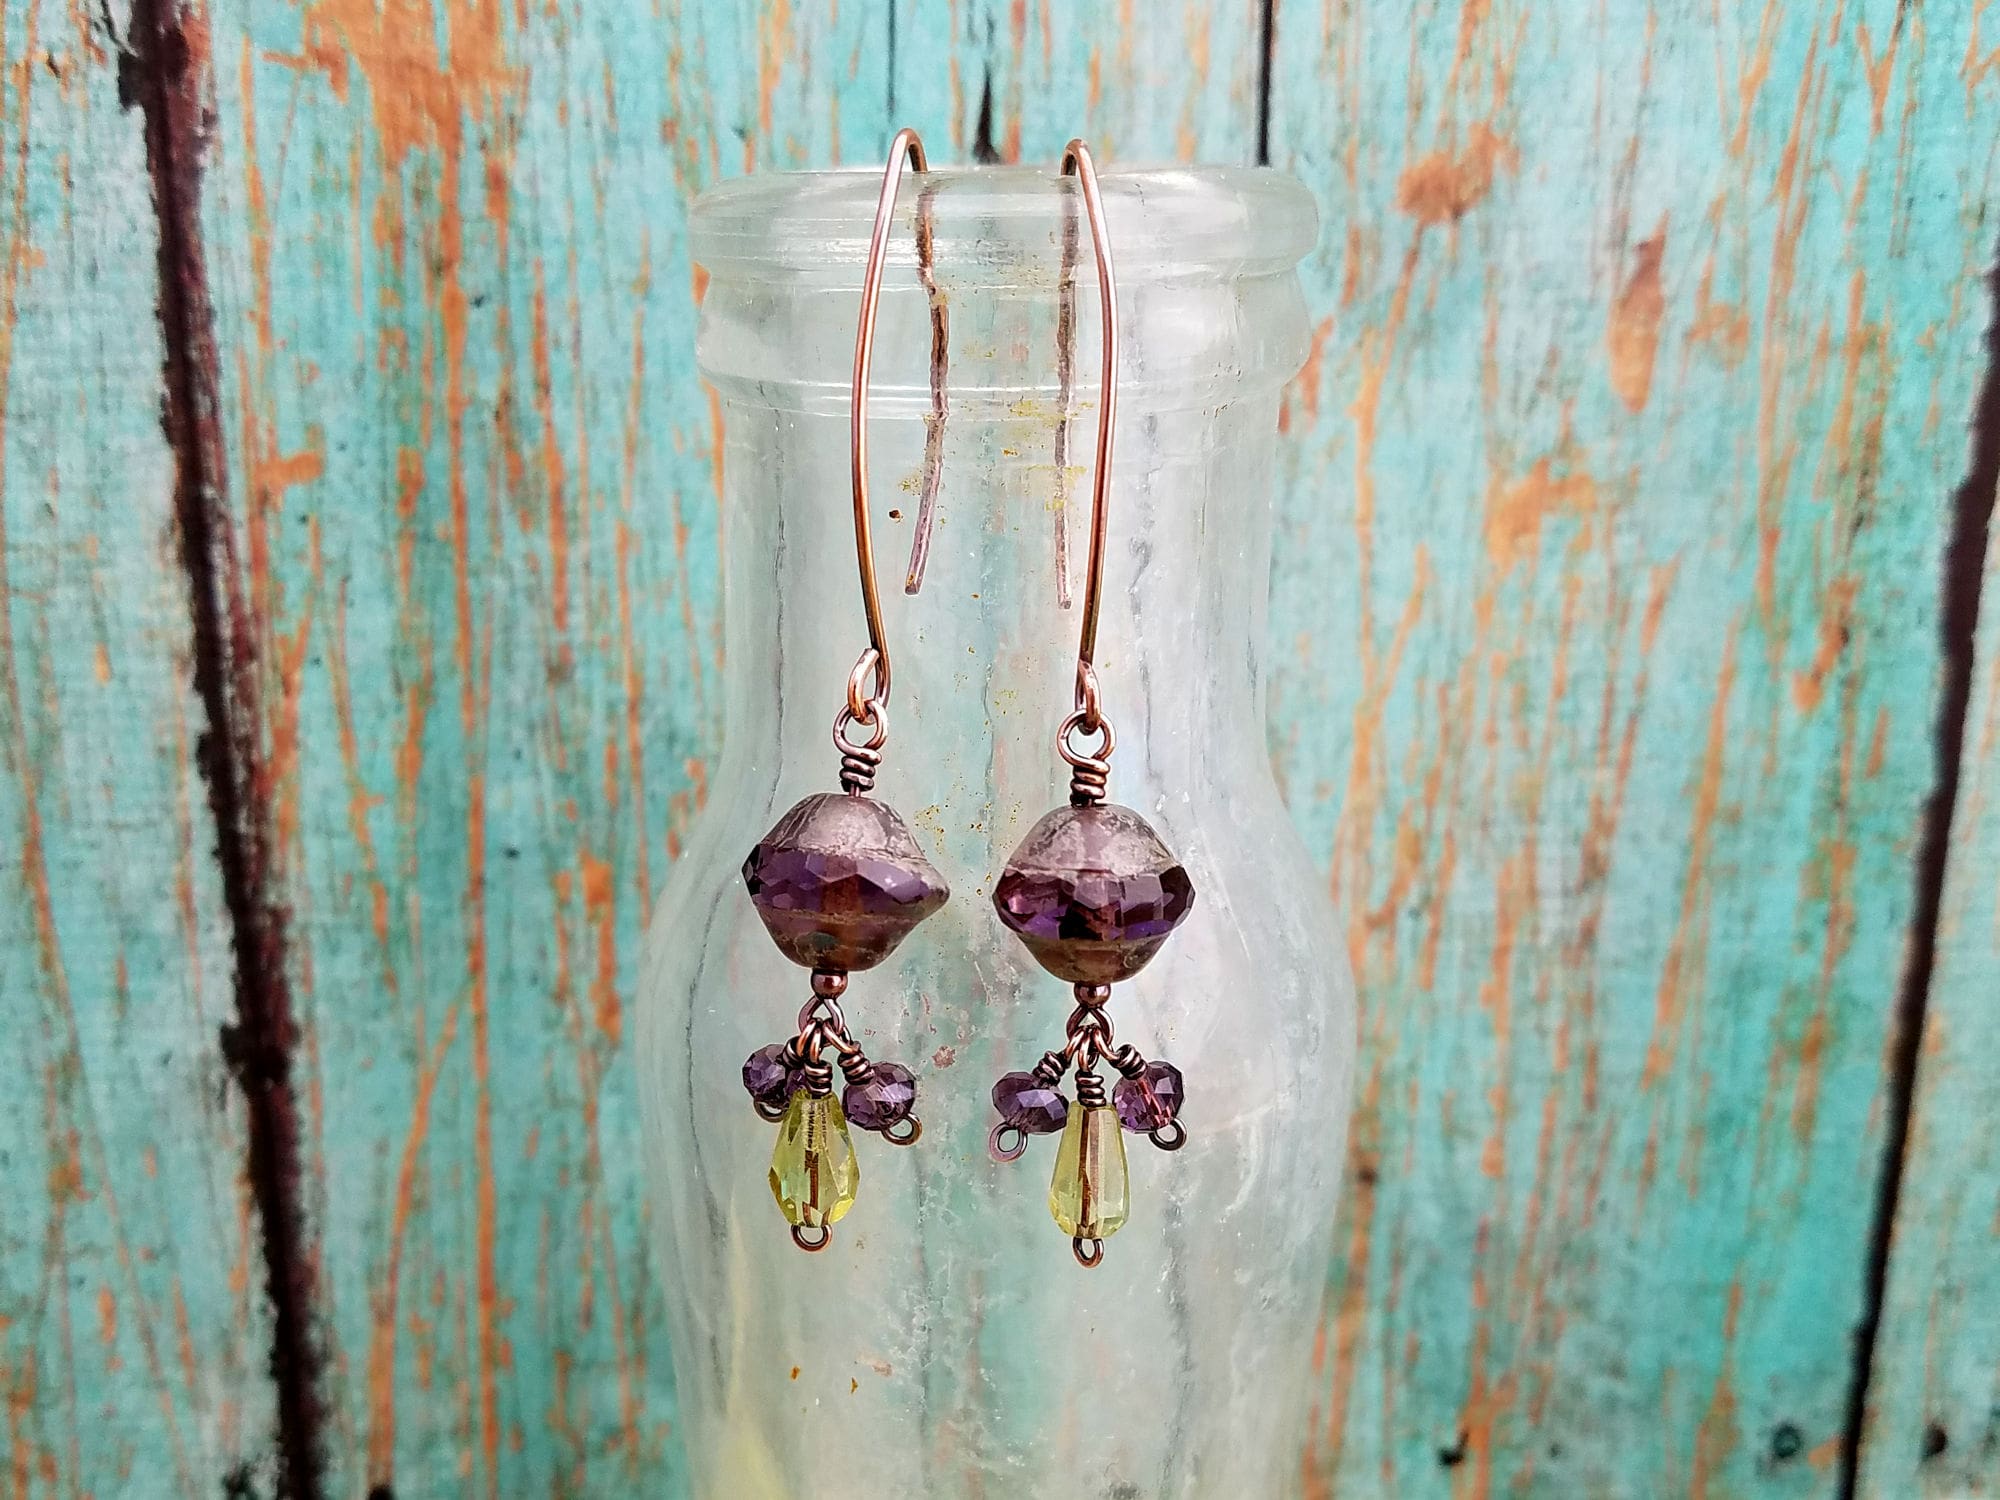
This design can be adapted to virtually any type of center-drilled bead, but I find that it works best with drop, oval, and rice beads. 20ga wire is the industry standard for ear wires, so your beads need to have a hole large enough for a 20ga ear wire. I’ve used 22ga ear wires for some particularly dainty turquoise Twig Earrings in the past, but I don’t recommend going any smaller than that.
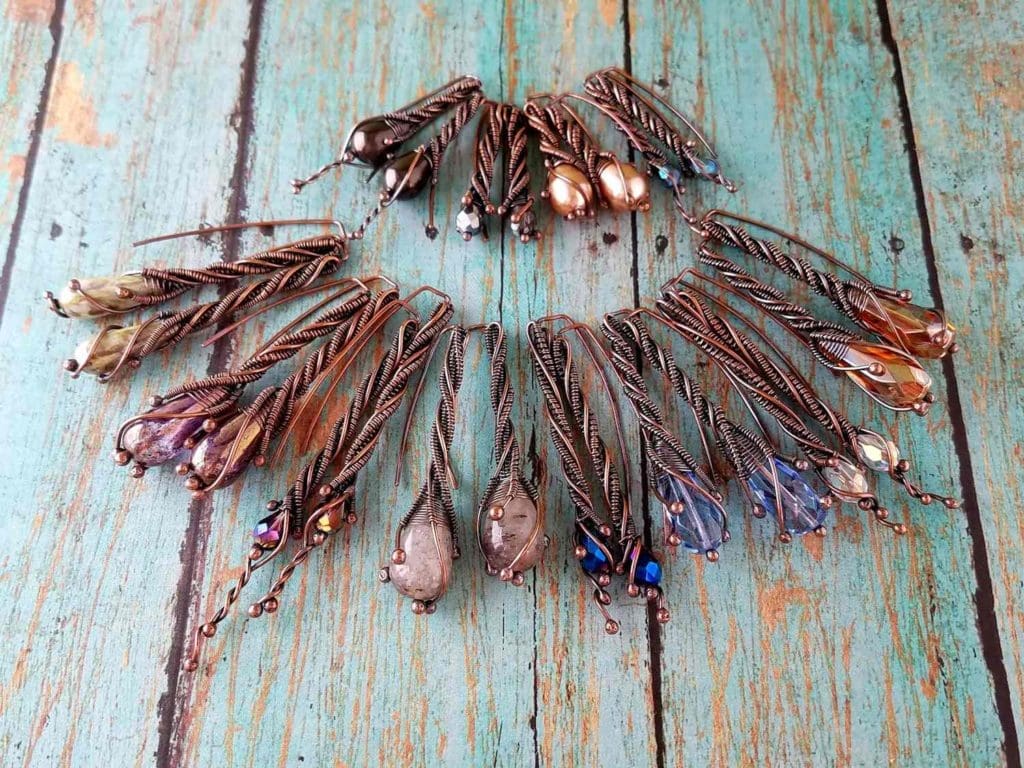
The outer core wires can be either 20ga or 22ga, depending on the size of your beads. The smaller the bead, the smaller you’ll want those core wires to be so the balled ends don’t overpower the beads. If you look closely at the top row of earrings in the image above, you can see the difference between 20ga and 22ga core wires. The pearl earrings on the top left and the crystal earrings on the top right are made with 22ga outer core wires and 20ga ear wires. The two pairs of earrings in the top center are made with 20ga core wires only. All of the earrings in the bottom row were also made with 20ga core wires only.
To adjust the length of your earrings, determine how long you want the drop of the earring to be, and then double that measurement to get the cut length of your ear wires. Add at least one inch to the ear wire measurement for the outer core wires. The longer you make those wires, the further down (or beyond) the bead they’ll reach when you fold them down and around the twist.
Sometimes I’ll deliberately make those wires significantly longer and then twist them beneath the bead to form a cage. Play with this design and experiment with different core wire lengths. There are so many fun things you can do to make the Twig Earrings uniquely your own.
Discover More Behind Door 44
Thanks so much for joining me today. I hope you enjoyed creating my Springy Twig Earrings. If you’d like a printable PDF version of this tutorial, you can find it here. Want more free wire jewelry tips and tutorials?
I like to share useful wire weaving tips and tricks on my social media channels, and we have some great conversations about wire jewelry in my private Facebook Group. Also, be sure to connect with me @door44studios on Instagram, and Facebook to keep up with everything that’s happening behind Door 44. And if you haven’t already done so, be sure to subscribe to my YouTube channel where you’ll find new wire jewelry videos weekly.
Until next time, go make something beautiful!

Pin this Post for Later