

The 8 Most Essential Tools for New Wire Weavers
Are you ready to give wire weaving a try? I hope so because I want everyone to discover this wonderful craft. These are the essential tools that I use daily, and you will too if you stick with this craft for very long. These tools will become extensions of your hands, in a sense. So choose those that feel most comfortable to you.
By the time you’re hopelessly addicted to wire weaving, as I am, you’ll own more than just eight tools. If you’re brand new to wire weaving, though, the tools that I’ll cover in this post are the most essential tools that I recommend for beginners.
This post may contain affiliate links. If you click on a link and then make a purchase, I may earn a small commission (at no cost to you). As an Amazon Associate I earn from qualifying purchases. To learn more, please see my full disclaimer.
Where to Shop
The best place to shop for jewelry making tools is at your local bead shop. Even though I make money through affiliate sales on this site, I’ll always advise you to shop locally first. We need to support our local bead shops in order to keep their doors open. Talk to the staff at your local shop and ask them for tool recommendations. If they don’t carry all of the tools you need, ask if they’ll order them for you.
Every bead shop has a slightly different focus. My local bead shop, for instance, tends to cater to beadweavers. They have a big selection of tools and supplies for that particular niche, but hardly any for wire weavers. Your shop owner has access to the tools you’ll need through her suppliers, though. And she’ll probably be happy to order them for you.
You’ll find most of the tools on this list at big box craft stores, like Michael’s, Hobby Lobby, or JoAnn. But I don’t recommend buying your tools there unless you’re not ready to fully commit to wire weaving just yet.
Quality can be a challenge at big box stores. They’re really geared more toward kids or very casual hobbyists. So the pliers sold at big box craft stores are often too small for adults, and they’ll cause hand fatigue.
Look for tools with longer and thicker handles that are comfortable to grip. The handles should be long enough to rest all four of your fingers on the handle. If any of your fingers are hanging off the end of the handles, they’re too short for your hands.
Alright. Let’s get to our list!
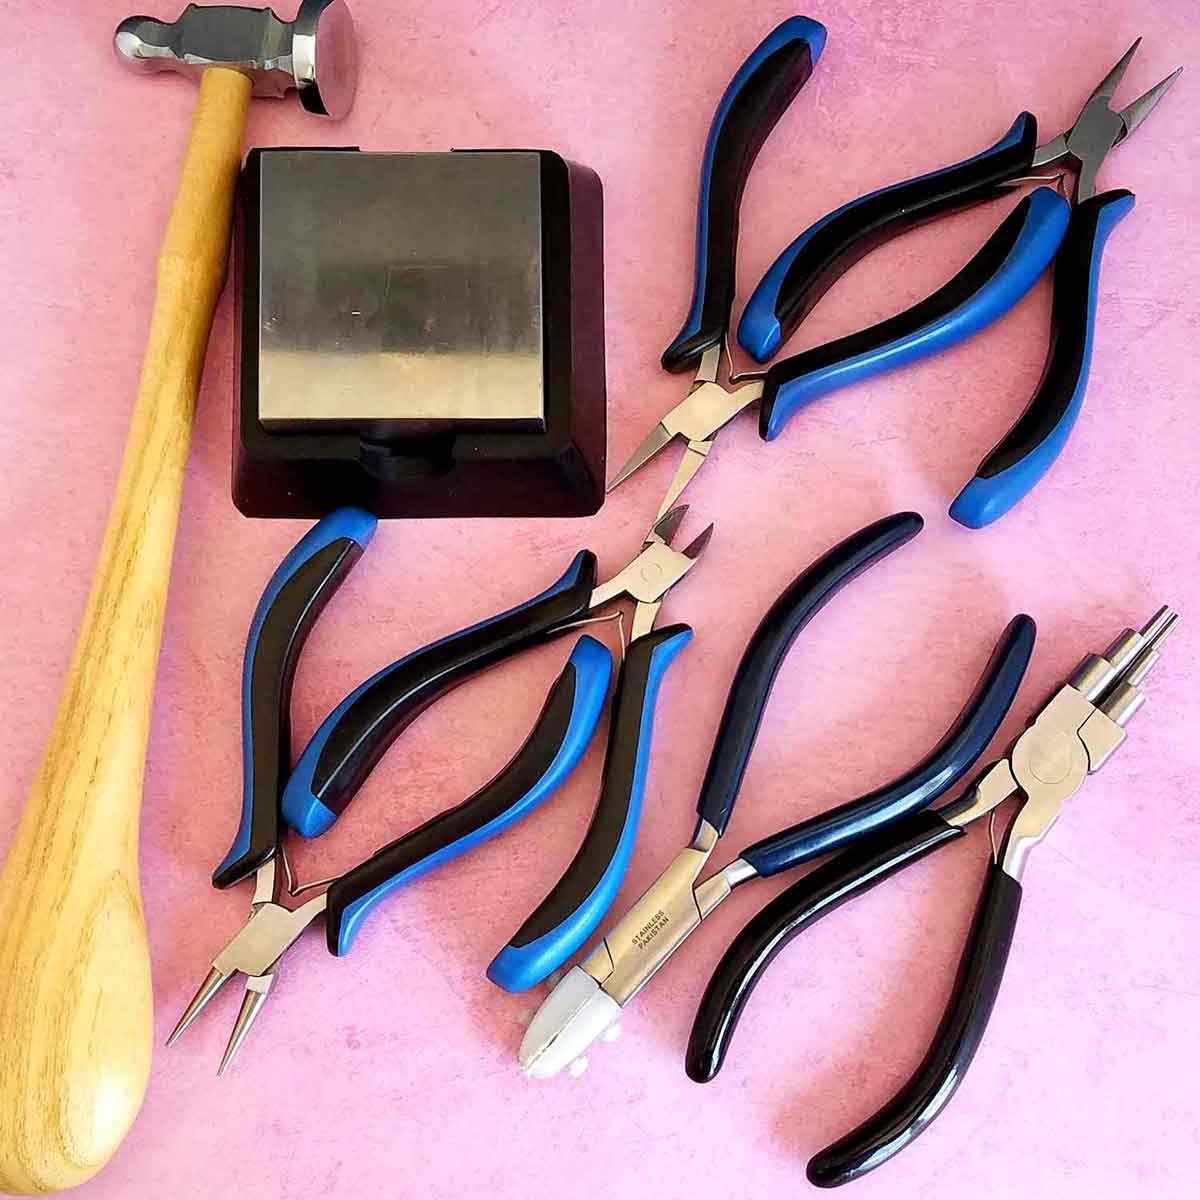
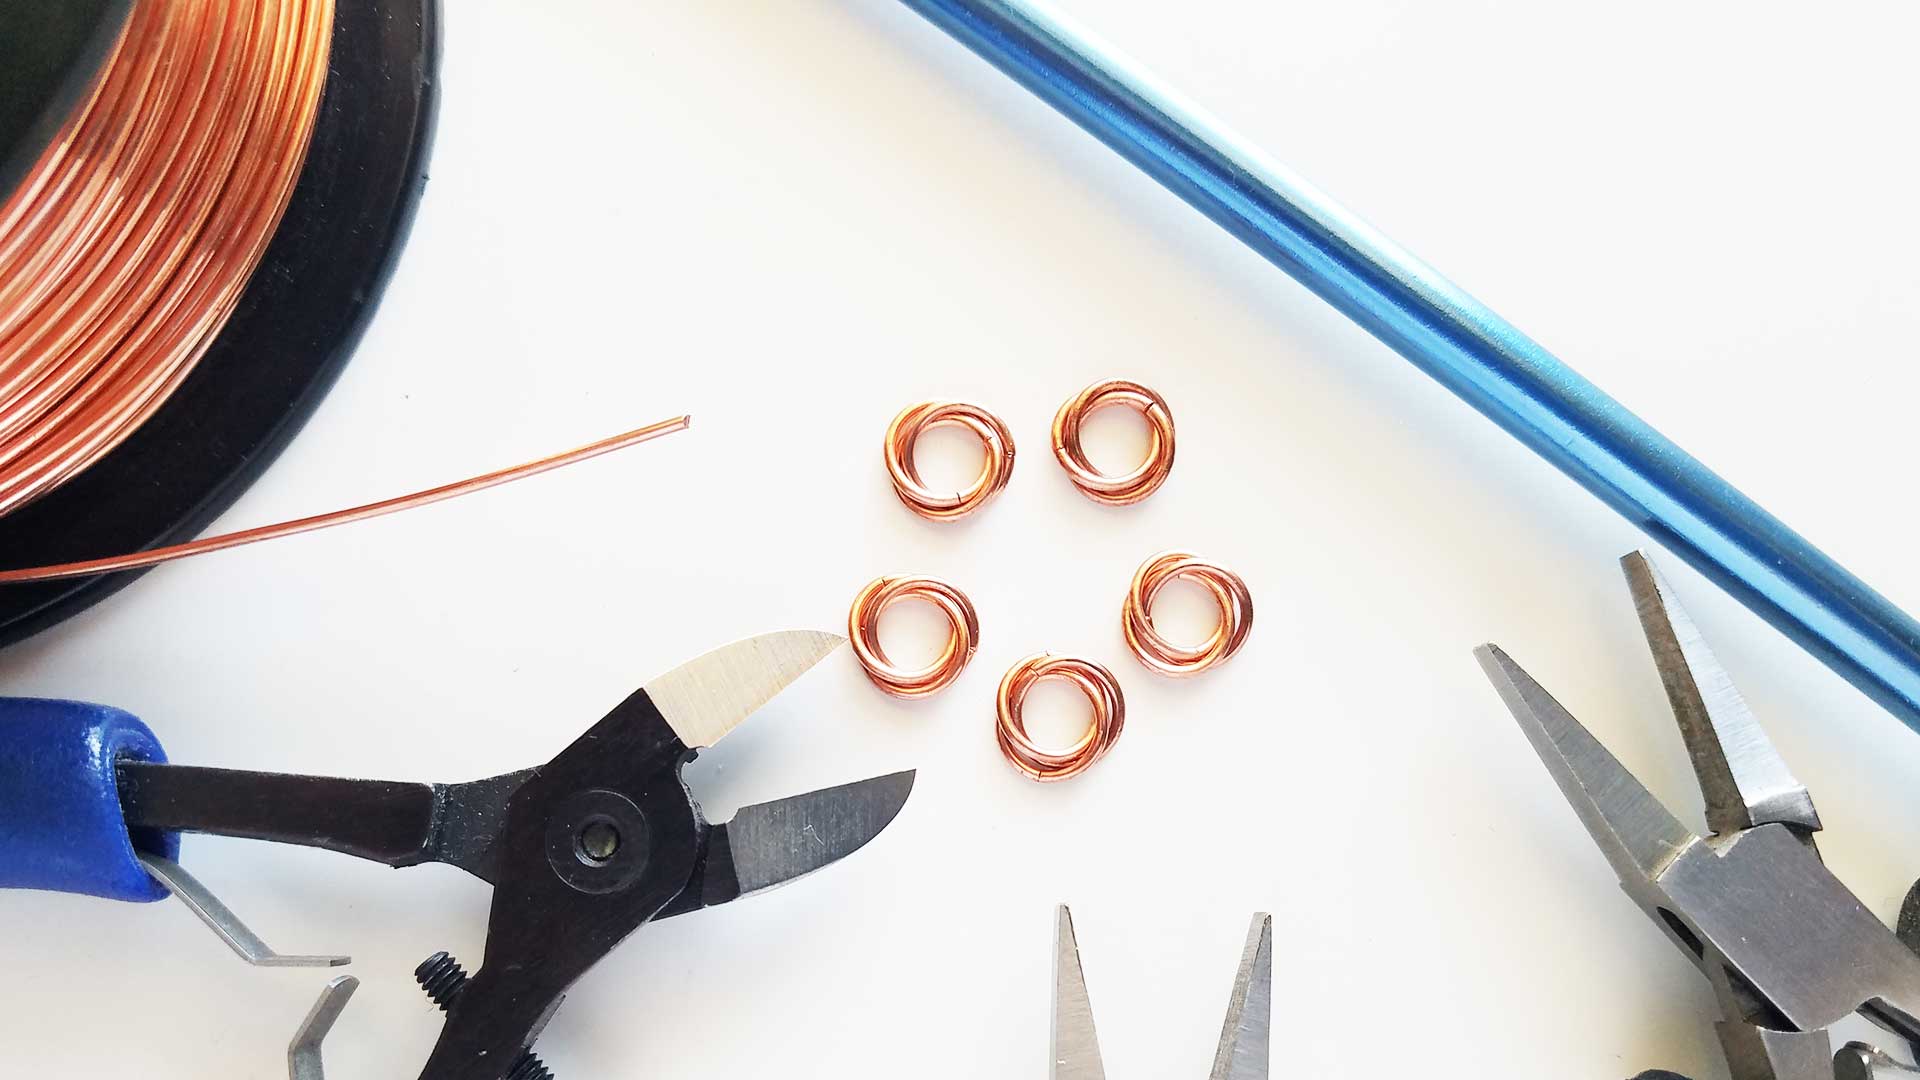
Essential Shaping Tools
Pliers are the hardest working tools in a wire weaver’s arsenal. You’ll use them constantly, so this is an area where you really need to choose carefully. You don’t need to spend a ton of money. In fact, I upgraded to professional grade pliers relatively recently. Before that, I used the same set of basic jewelry pliers for more than a decade.
Let’s go over exactly which pliers you’ll need. There are lots of different kinds, but you definitely don’t need them all. You really only need five types of pliers, in my opinion.
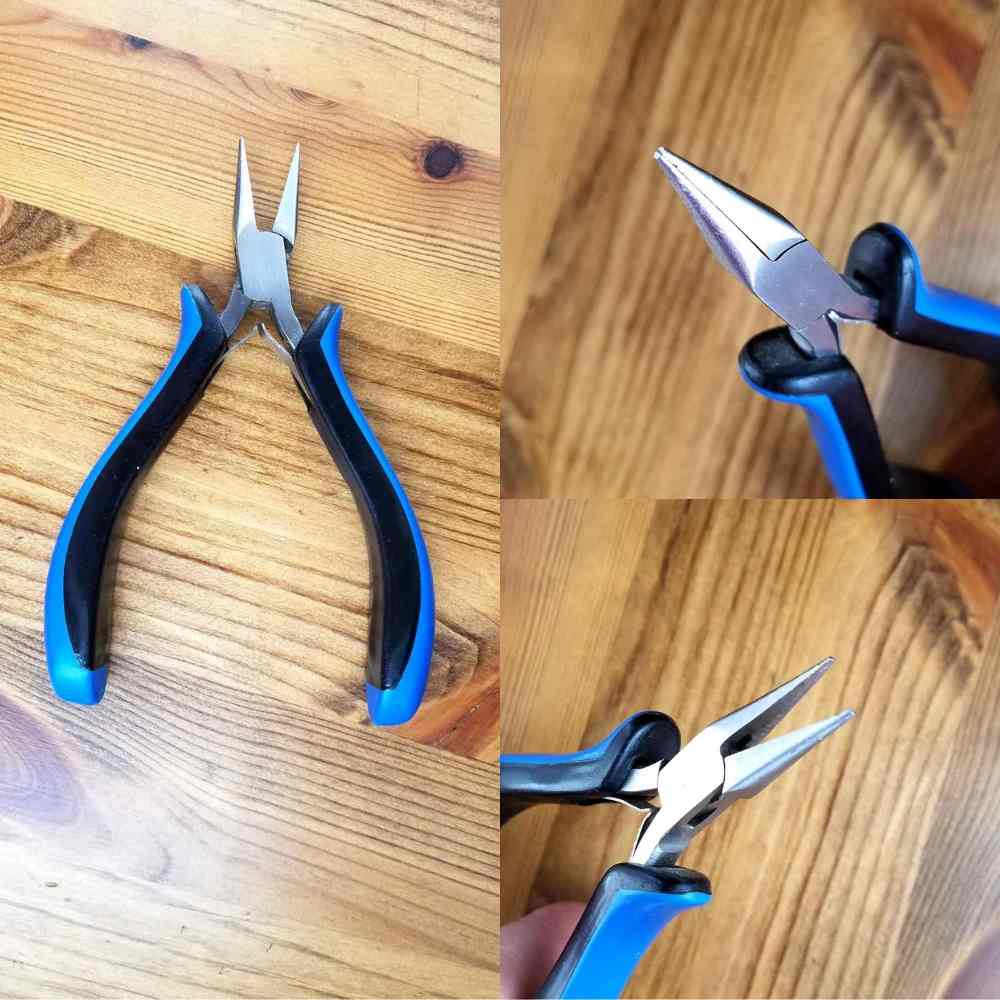
1. Chain Nose Pliers
Besides your wire cutters, this is the tool you’re going to reach for every time you make jewelry. Chain nose pliers have short tapered jaws with pointed tips. The gripping surfaces of the jaws should be smooth and flat.
The outer surfaces of the jaws are slightly rounded, which is what gives these pliers their name. They can be used to stretch soldered rings into oval-shaped chain links. The narrow tips also allow you to do fine detail work.
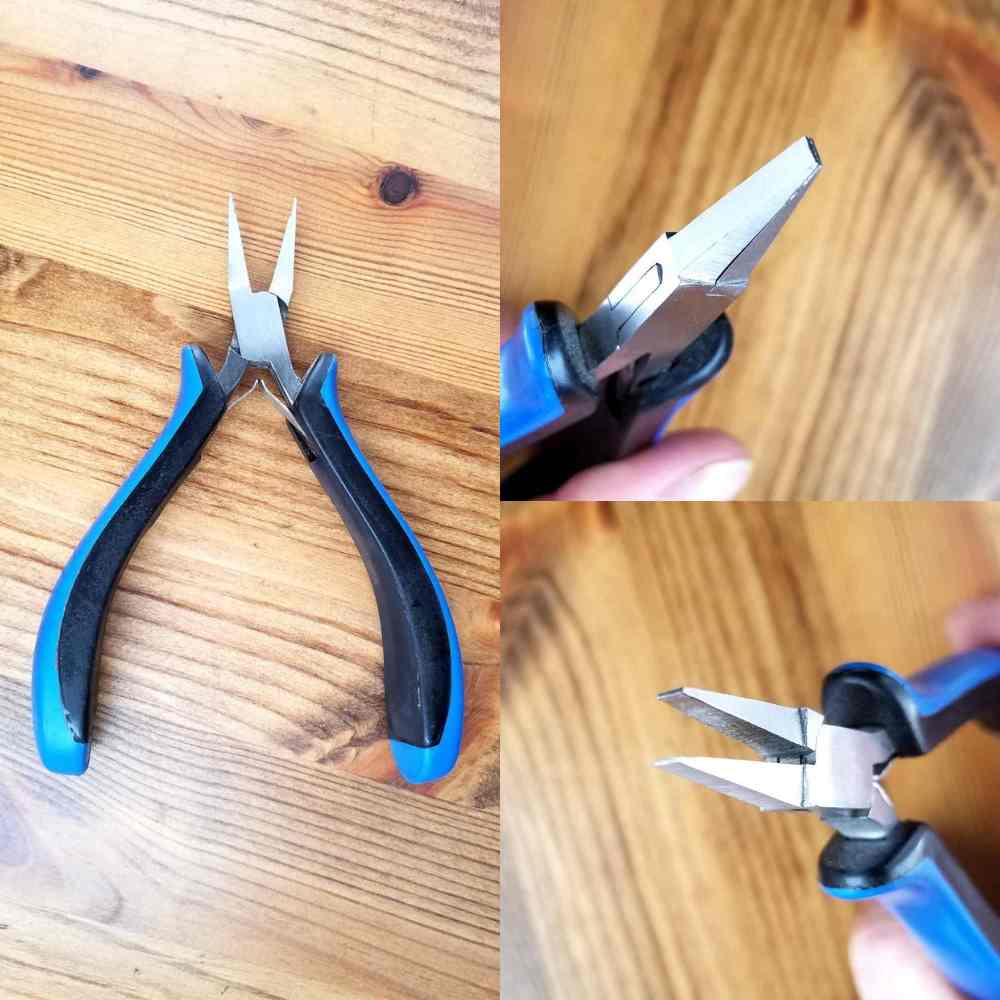
2. Flat Nose Pliers
I don’t use my flat nosed pliers nearly as often as I use my chain nose pliers. However, they are my secret weapon for making very consistent ear wires. My most popular earrings are my twig earrings, which have a threader style ear wire. My favorite earrings for everyday wear use the same threader style ear wires. I couldn’t make those earrings without my flat nose pliers.
As you can see from the photos, these pliers are somewhat similar to the chain nose pliers. However, the jaws are only slightly tapered, and the tips are flat. All other surfaces of the jaws are also flat with square edges. The sharp square angles on the jaws of these pliers help make sharp square angles on your wire. This is particularly useful when you’re folding a piece of wire in half. Or when you want to make clean and sharp bends, as on my threader ear wires.
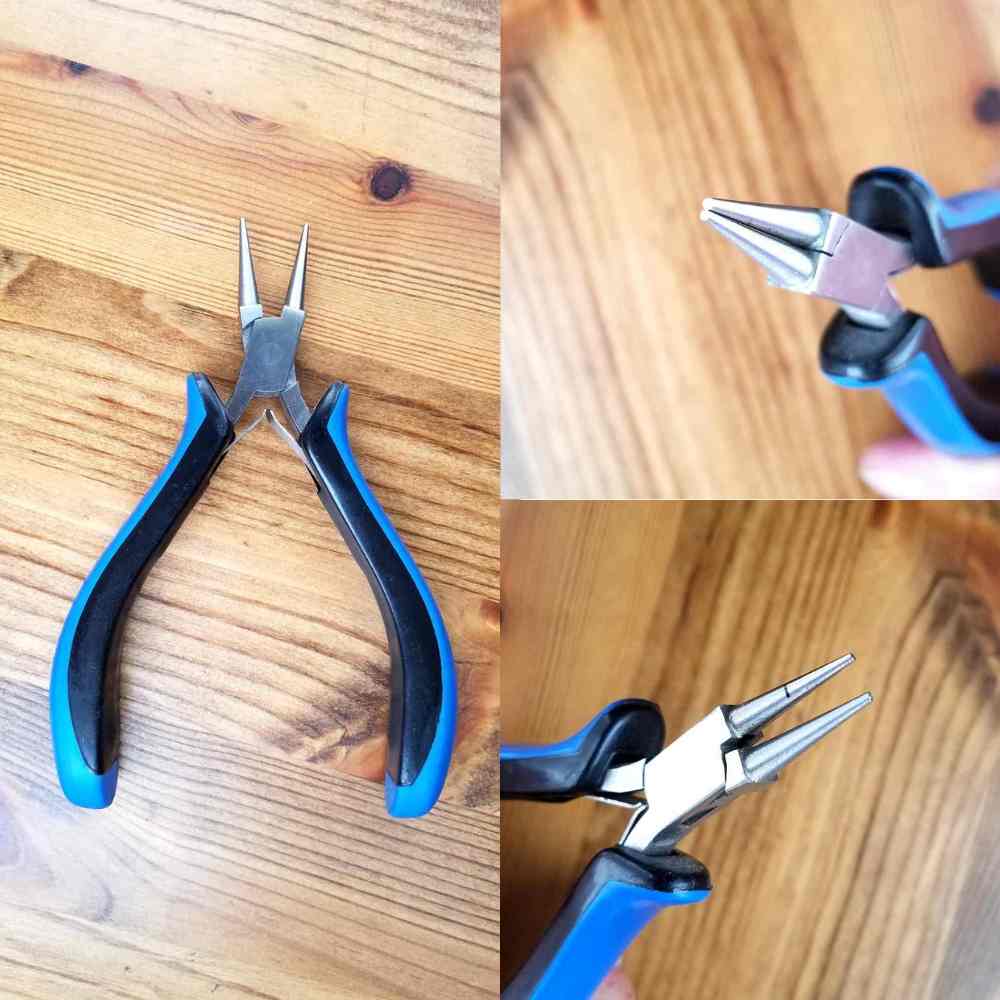
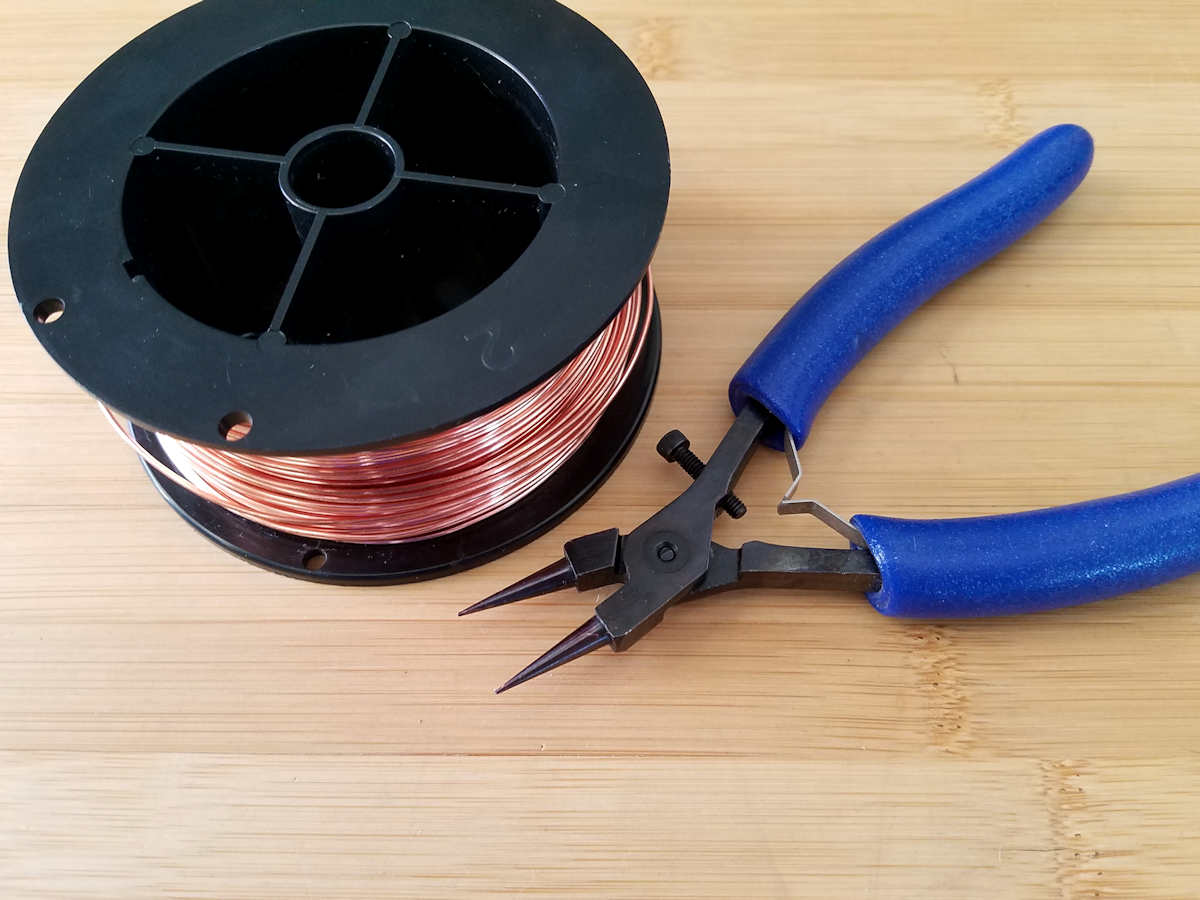
3. Round Nose Pliers
Round nose pliers, as the name suggest, have round cone-shaped jaws that taper to small points. These pliers are most useful for making loops and soft curves in your wire.
4. Nylon Jaw Pliers
My nylon jaw pliers are the second most heavily used pliers in my toolkit. I bought these pliers mainly for straightening wire. However, I find that I use them most frequently to grip my core wires while I’m weaving.
The soft jaws won’t leave tool marks on your core wires or break your weaving wire. The nylon jaws are also replaceable so these pliers will last forever if you take good care of them.
These are the same pliers that I use but do shop around because this isn’t the best price I’ve seen. And here are the replacement jaws. Many bead shops carry these pliers and the replacement inserts, but you can also find them online through most major bead suppliers. Rio Grande also carries a wide selection of nylon jaw pliers, but I don’t see the ones I use in stock as I’m writing this post.

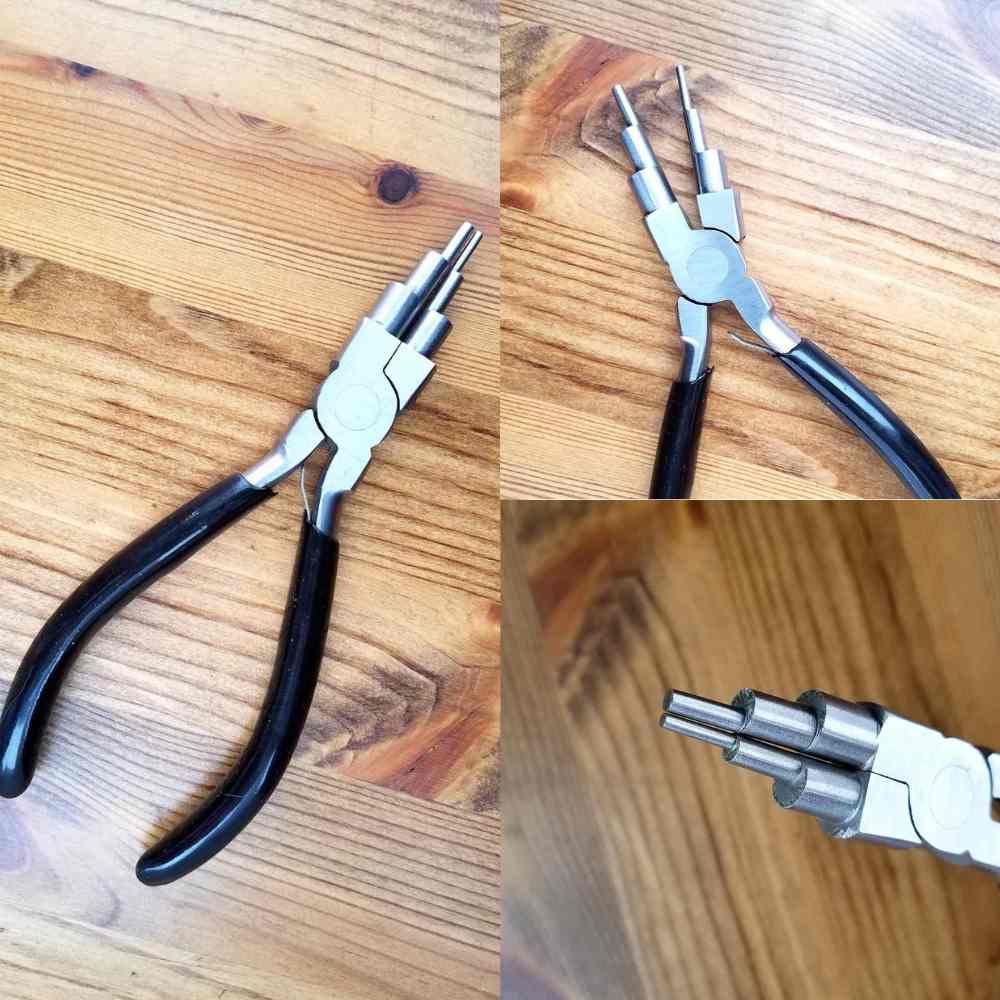
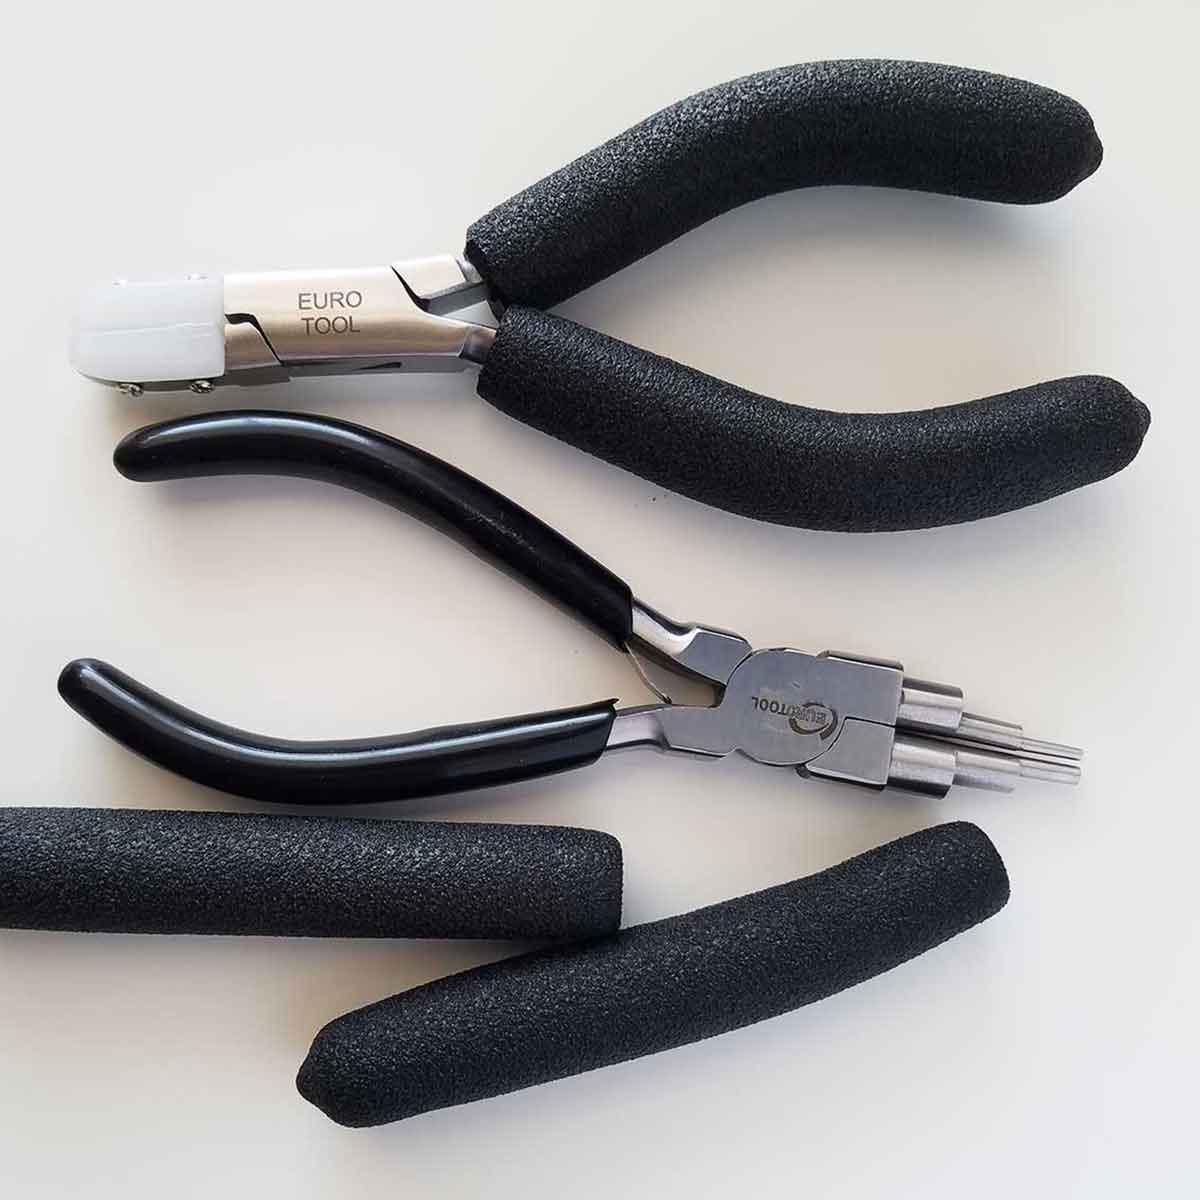
5. Stepped Bail-Making Pliers
Much like flat nose pliers, stepped bail-making pliers are the secret to consistency. I use them to make all of my wrapped loops as well as my signature infinity clasps. I make those clasps by the dozen, assembly line style. And these pliers allow me to repeat the same size and shape every time.
My bail-making pliers have been thoroughly used. As you can see below, one of the springs is broken and the 2mm step is a bit wonky, but they still work well. If I had to choose between my stepped bail-making pliers and my round nose pliers, it’d be no contest. I’d choose the stepped bail-making pliers every time.
Round nose and bail-making pliers serve essentially the same purpose. Because I’m a stickler for consistency and symmetry, though, the stepped bail-making pliers are the better tool for me.
I use my round nose pliers mainly when I’m doing repairs or putting the final touches on wire woven jewelry. That’s because they fit better in tight spaces. When I’m forming individual core wires, on the other hand, I rely on my bail makers for symmetry. This is particularly important for designs like my Lyonesse Pendant.
I’m currently using a EuroTool version that doesn’t appear to be available any longer. However, these Beadsmith pliers from Amazon are comparable. So are these stepped bail-shaping pliers from Rio Grande. The Rio Grande version costs a little less, but Rio’s shipping charges are on the high side. Be sure to take that into consideration if you can’t find these pliers locally.
Buy a Set of Pliers to Save Money
I bought my original pliers as a 5-piece set. The set came with bent nose pliers, which many people swear are their favorite tool. Personally, I don’t like them, so my bent nose pliers are virtually brand new. I’ve probably used them fewer than a dozen times in as many years.
You can buy pliers either individually or in a set. Sets are usually less expensive, but you risk buying tools you’ll never use, as I did with my 5-piece set.
To save money, look for a 4-piece set, like this one from Amazon or this one from Rio Grande. You’ll check four items off of this list with a single purchase, and you’ll only buy tools that you know you’ll use.
Essential Cutting Tools
6. Wire Cutters
Good wire cutters are worth their weight in gold. This is the only essential tool where I recommend buying the best you can afford. A really good set of super flush cutters will save you time.
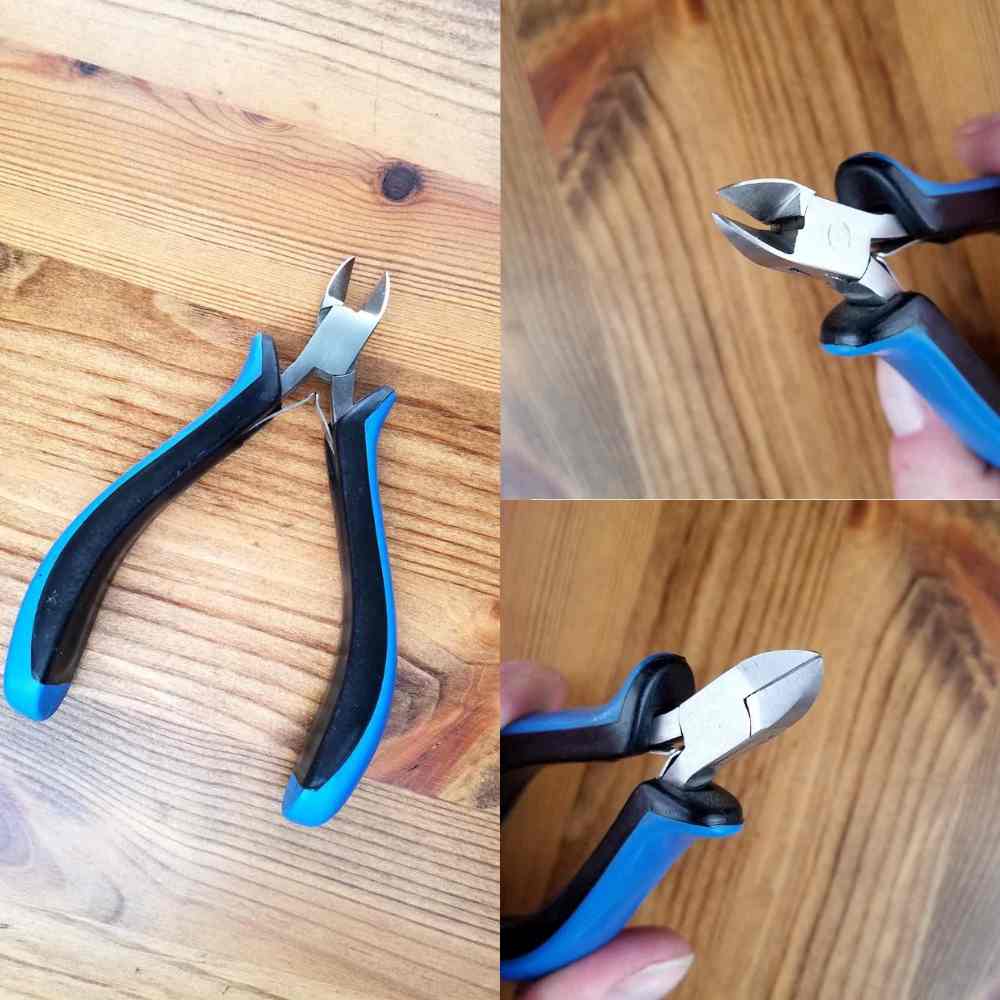
One of the reasons I list a needle file in my tutorials is because most people don’t own flush cutters. And most wire cutters leave sharp ridges on the ends of your wires that need to be filed smooth. My Swanstrom super flush cutters from Rio Grande virtually eliminate the need to file my wire ends.
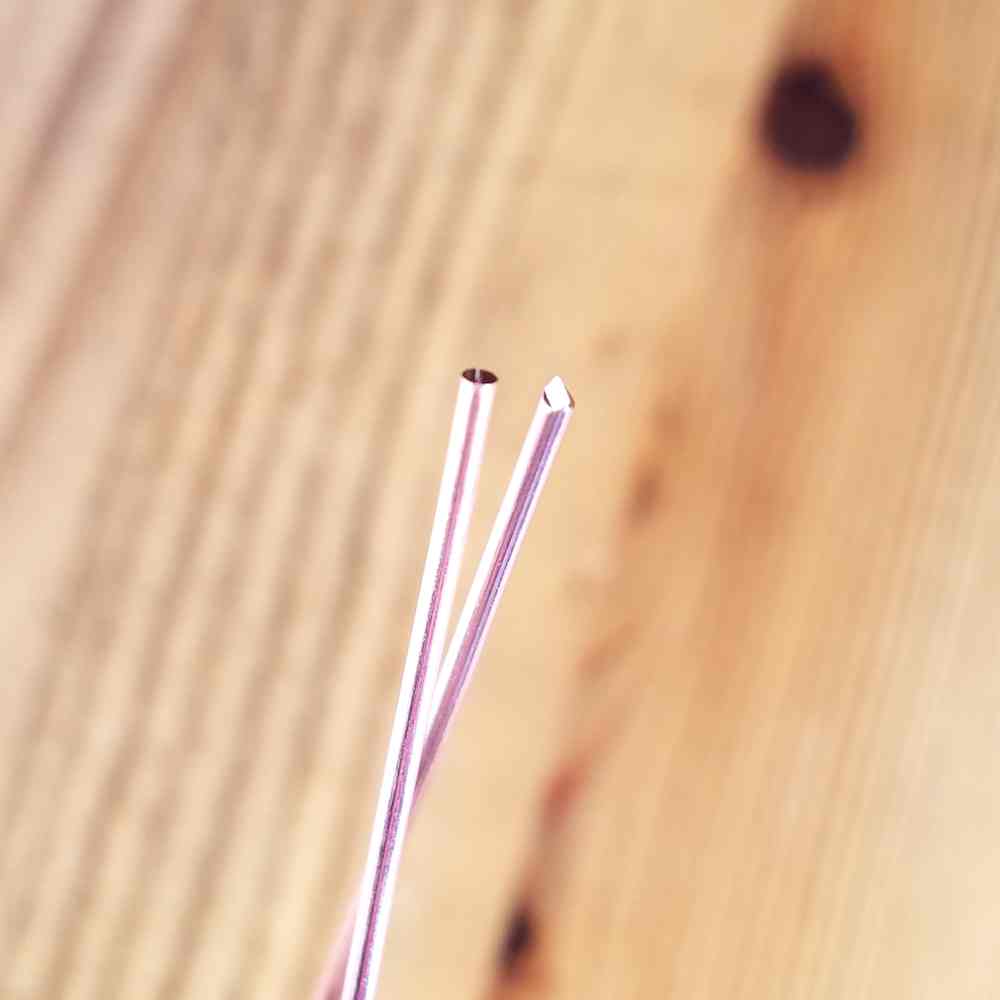
Look at the difference between the wire cut with my new super flush cutters (above left) and the same wire cut with my old wire cutters (above right). That pretty much says it all right there.
If you purchase the 4-piece set that I recommended above, you’ll receive a set of cutters like my old ones. They’re fine for starting out. In fact, they’ll work through the beginner and intermediate stages and even well into the professional stage of your career. Mine did.
That said, the desire for better wire cutters is what motivated me to make the jump to professional grade tools. I love my Swanstrom super flush cutters. I wish I’d have bought them sooner!
Ferrous vs. Non-ferrous Wire
One important thing to keep in mind is that most wire cutters are designed for cutting non-ferrous metals only. And then only up to a certain gauge. My new Swanstrom cutters, for instance, are rated for cutting up to 14 gauge non-ferrous wire. Because I’m careful with my tools, I’ll never cut anything thicker than 16 gauge wire with them. I have an old pair of heavy-duty wire cutters that I picked up at my local hardware store. Those are what I use to cut heavy gauge wires or memory wire, which is a ferrous material.
Ferrous materials contain iron. Three examples of ferrous wires used in the jewelry industry are blackened steel, stainless steel, and hardened spring steel. Memory wire is spring steel.
Non-ferrous wires contain alloys like copper, silver, brass, aluminum, and gold. These wires can be a mixture of metal alloys, but they don’t contain iron. Sterling silver wire, for example, contains copper alloy. That’s where it gets its strength and springiness. Filled wire is another example that’s typically non-ferrous. Filled wires have a base metal core (typically brass or copper) surrounded by a thick layer of precious metal.
How to Choose the Right Jewelry Wire
Jewelry wire is a constant source of confusion for beginners. I remember those days well! If you’d like to learn how to choose the right jewelry wire for wire weaving, be sure to read this post. In it, I share everything you need to know about jewelry wire as you set out on your wire weaving journey.
Essential Forming Tools
The last two essential tools on my list, a chasing hammer and bench block, work together. And they’re really only necessary if you’re doing a certain style of wire weaving. There are some forms of wire weaving that don’t require these two tools. You’ll find that they are necessary for most of my tutorials, though. I love the dimension that hammering adds to my work. I also appreciate the strength that comes from working wire with a hammer.
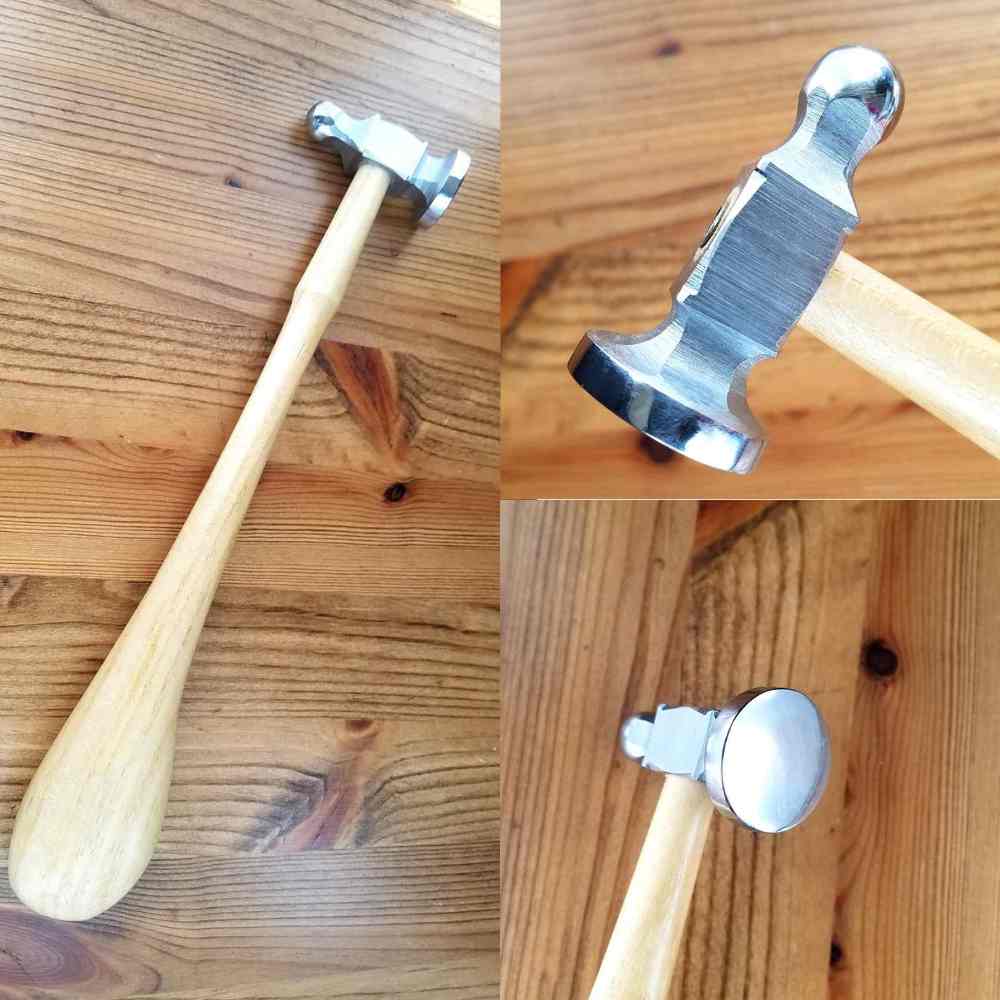
7. Chasing Hammer
Hammers are like pliers in that there are many different kinds to choose from. There are specialized texturing hammers, which are mainly geared toward sheet metal workers. And then there are forming hammers, which are again used mainly by sheet metal workers, but also by wire workers. Chasing hammers are a type of forming hammer. And, although they vary widely in price, they have a fairly standard shaped head that you’ll learn to recognize on sight.
One end of the head is shaped like a small ball. This allows you to add peening or texture to your metal. The other side of the head has a slightly domed, convex surface that is about one inch wide. This is the side you’ll use to flatten or planish your metal. The convex surface does two things. First, it minimizes tool marks on your wire surface. Secondly, it helps to draw or “chase” metal into shape. Hence the name, Chasing Hammer.
The chasing hammer that I use is made by Beadsmith. I bought it several years ago at my local bead shop. This hammer is still on the market, and it ranges in price between $8 and $16, depending on the seller. You can find comparable hammers like this one from Amazon or this one from Rio Grande in the same general price range.
8. Bench Block
This is going to sound a little crazy. It might give you some insight into just how much of a tool nerd I am, though. I recently bought a new bench block and I absolutely adore it. Seriously. I’m kind of crazy about my new bench block. Do you know why? Because it’s super quiet.
I’m an apartment dweller, and I do my best to be a good neighbor. That means I try to minimize noise as much as possible. And hammering is noisy business. There’s just no way around it. I used to dampen the sound of my old bench block by placing it on a sandbag or on a thick silicone hot pad from my kitchen. That never really did the trick, though, so I recently bought this bench block from Rio Grande, pictured below. And it’s so quiet! It’s also very stable because of the sturdy rubber base.
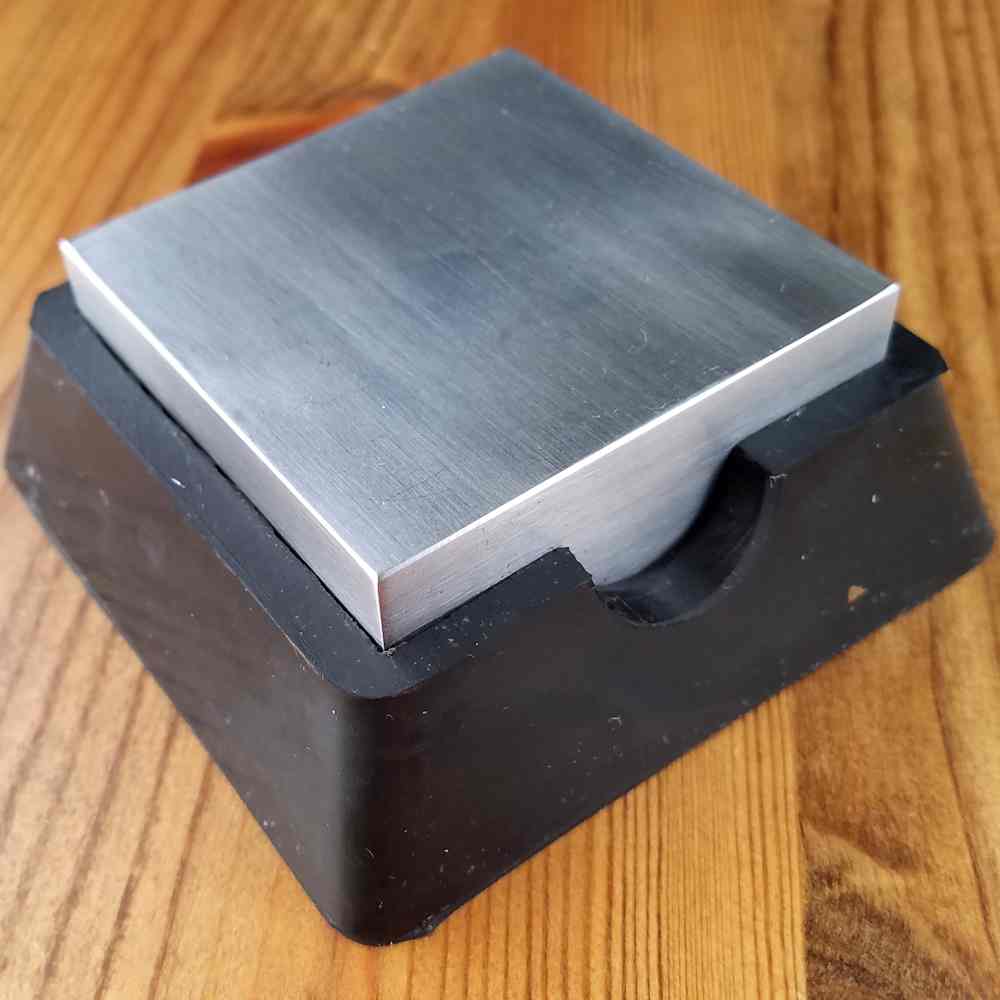
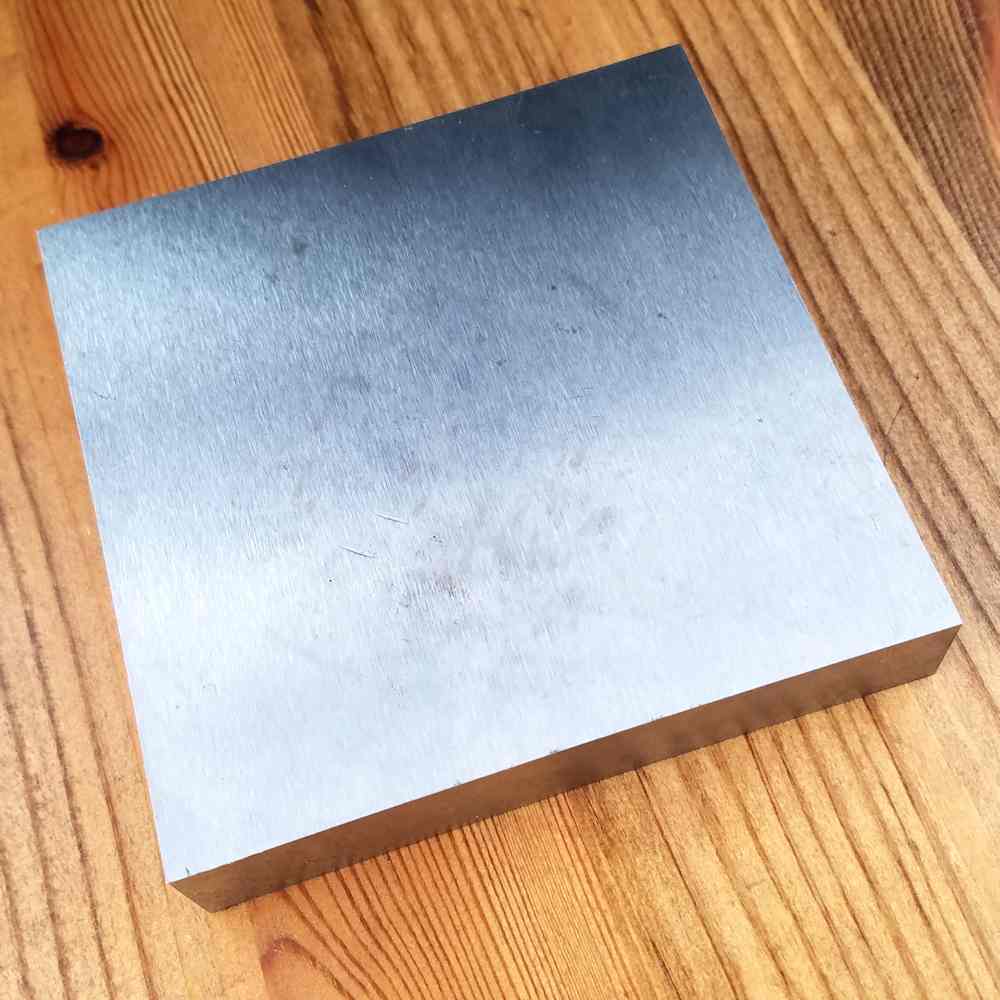
If you’re concerned, as I am, about disturbing your neighbors (or maybe a sleeping infant), I highly recommend a rubber-based block like the one above. It’s significantly smaller than my old block (below), though, and sometimes space is an issue. So, if noise is less of a concern for you, a simple 4-inch square bench block like this one from Amazon will do. I also bought my first bench block from Rio Grande. You’ll find that one, which is pictured below, here.
Finally, I found this block at Amazon which has a 3-inch square steel block and a 4-inch square rubber base. Having never tried this block personally, I can’t vouch for how quiet it will be. I think it’s safe to say, though, that any rubber-based bench block will be significantly quieter than a plain metal block sitting directly on your work surface.
You’ll also find links to multiple options for each of these tools in the detailed descriptions above.
Discover more behind Door 44!
Thanks so much for stopping by today. I hope you’ve found this post both useful and inspiring. You’ll find lots more wire jewelry tool tips here.
Also, be sure to add my Etsy shop to your favorites for the latest printable PDF wire jewelry tutorials. and as always, I’d love to see what you’ve made from my tutorials and hear your ideas and suggestions for new tutorials and blog posts. You can connect with me @door44studios on Instagram, and Facebook.
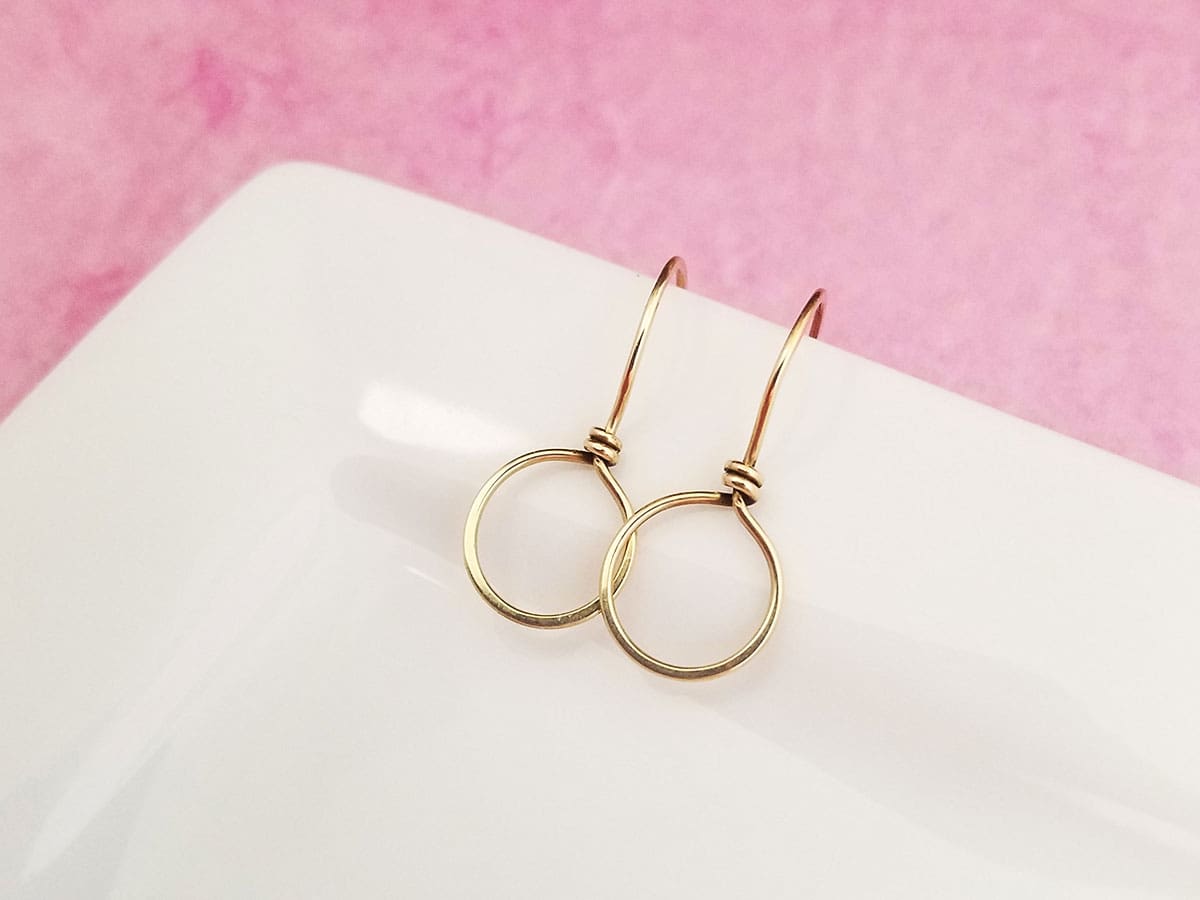
Now go gather up the tools you need for wire weaving, and try one of my beginner-friendly tutorials. If you’ve never worked with wire before, these easy wire earrings are a super first project! If you’re already familiar with wire weaving concepts, try one of my more advanced tutorials like my pretty Chalice Earrings or the ever popular Lyonesse Pendant.

Pin this Post for Later
Thanks for all the great info. I’m contemplating doing wired jewelry and this really helped narrow some of my lists/questions.
Glad to hear this post was helpful. Please let me know if you have any other questions I can answer. I’m always happy to help newbies to this craft!