

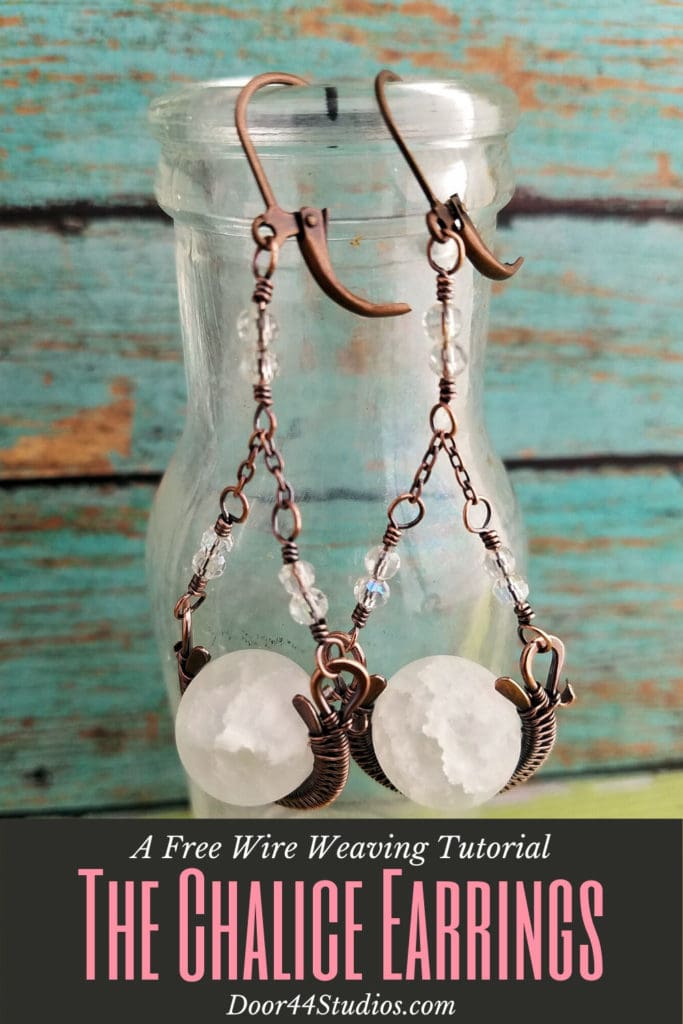
Weave a Pair of Wire Chalice Earrings
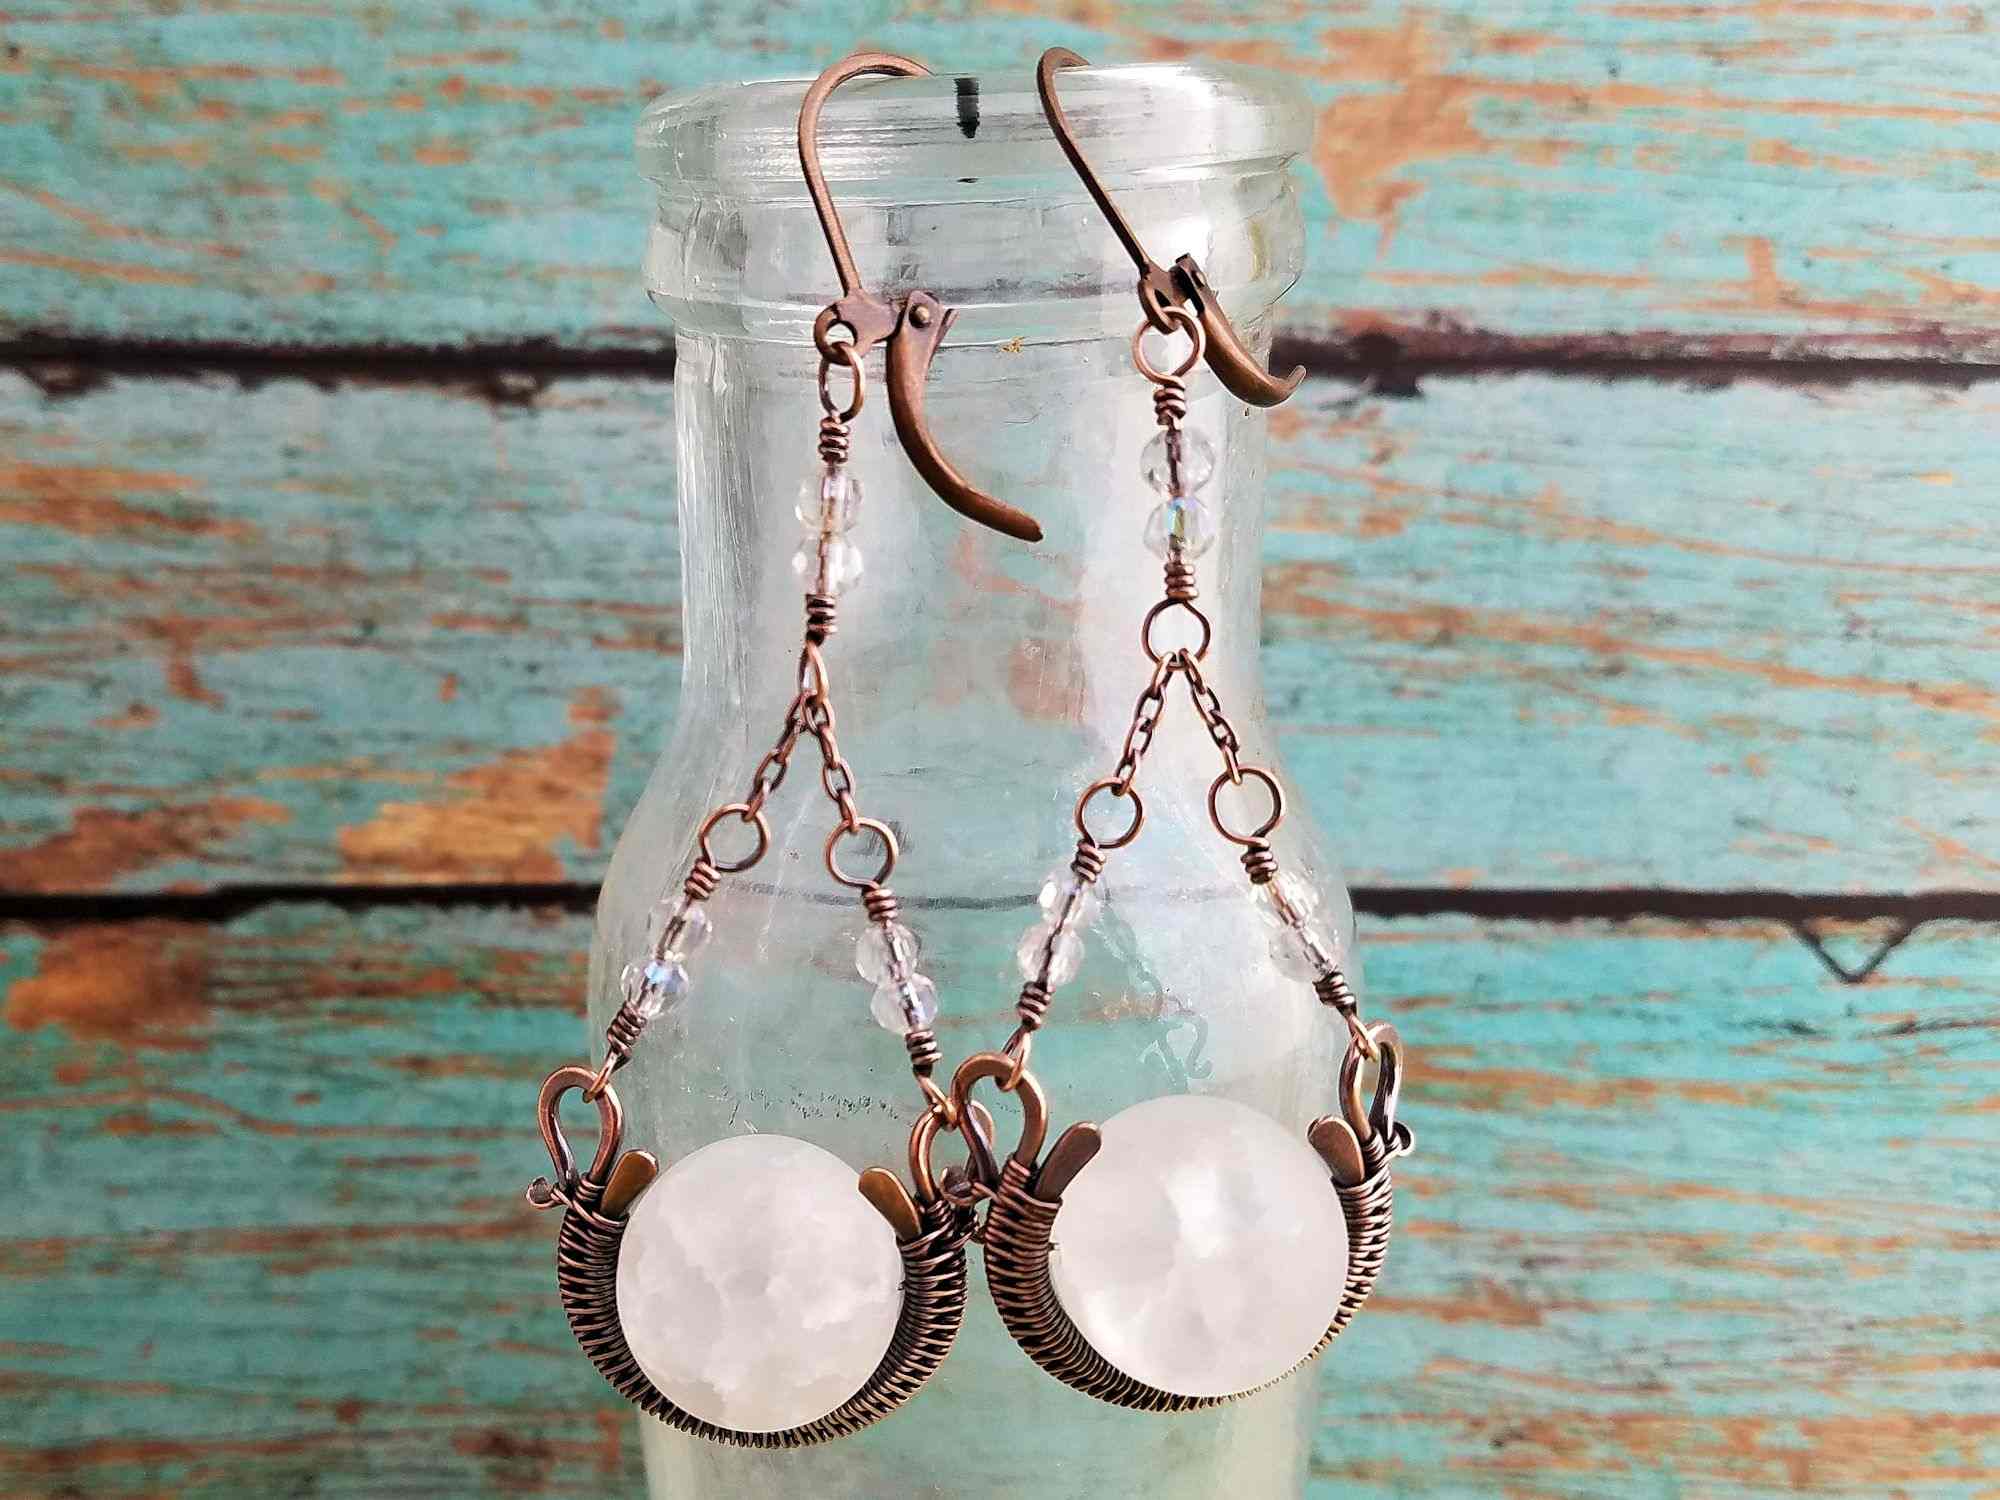
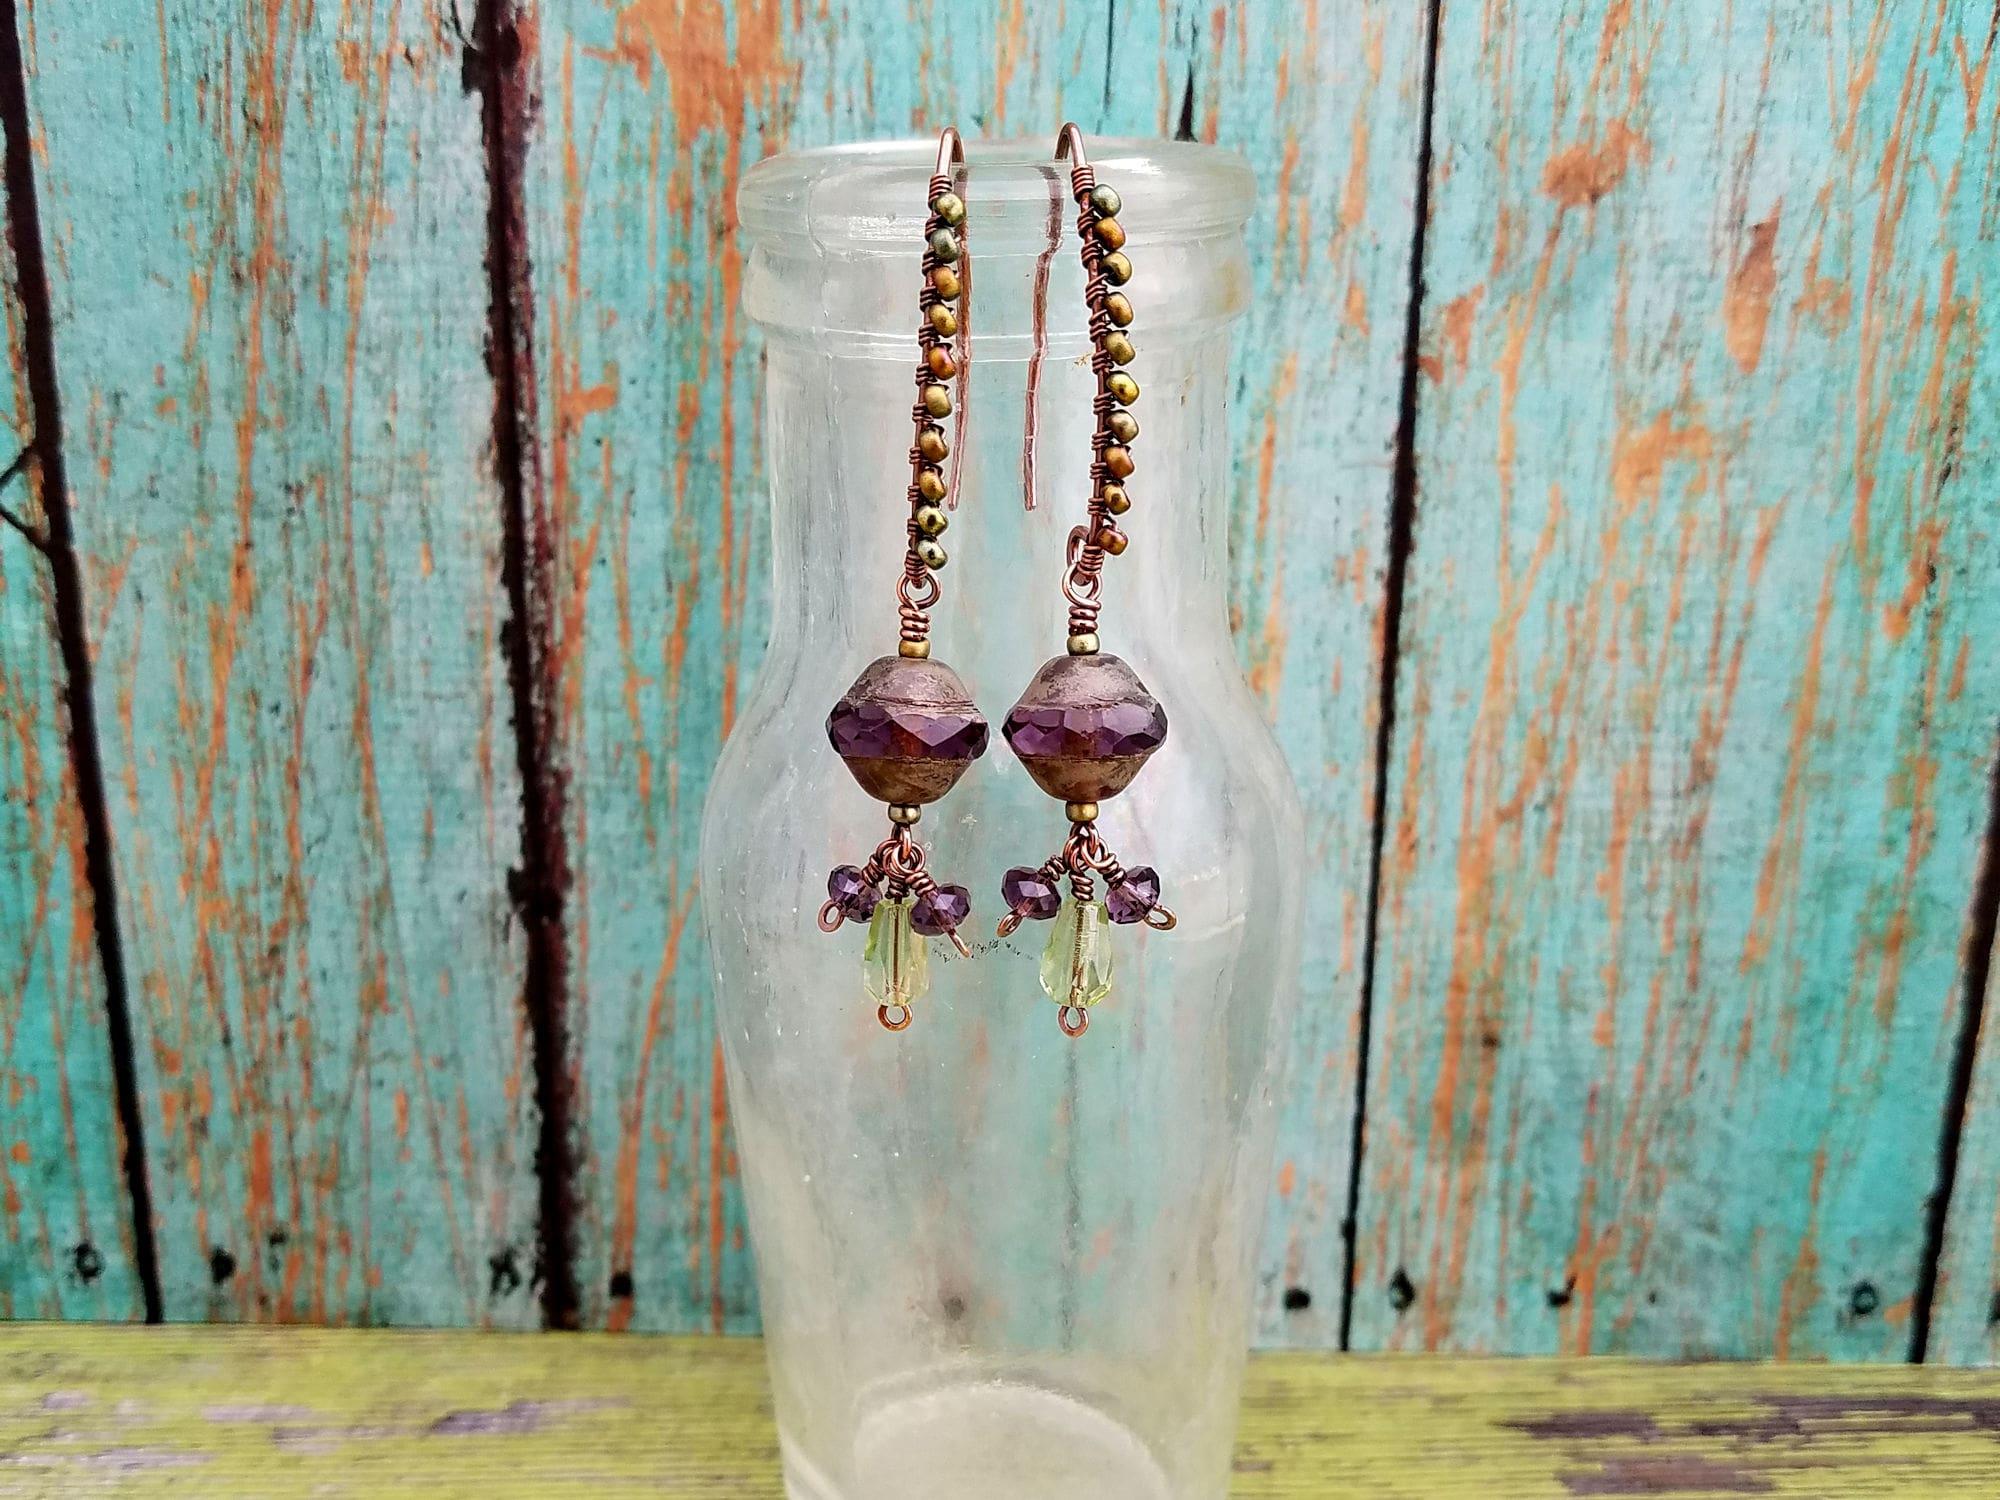
My Chalice Earrings have proved to be one of my most enduringly popular designs. And the timeless elegance of this classic chandelier silhouette means you can dress them up or down to suit your personal style. I always thought the Swarovski pearl versions of the Chalice Earrings would be perfect for a formal evening wedding, and I regret that I never had the opportunity to create them for a wedding party. If any bridal jewelry makers out there choose to use this design for a wedding, please share pictures. Because I’d love to see my vision manifest!
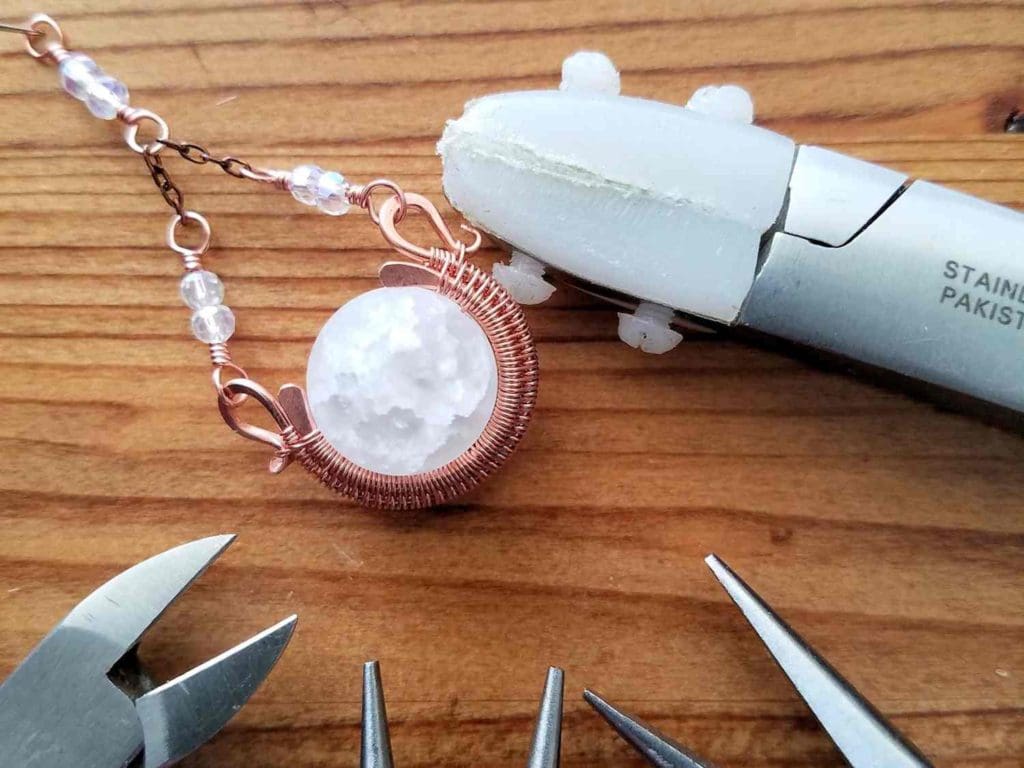
When I chose the beads that I wanted to use for this tutorial, they made me think of snow. And the universe must have been paying attention because I found myself writing this tutorial in the midst of a Colorado winter storm.
I found these pretty Crackled Quartz beads with a matte finish at my local Michael’s store. By switching the beads from Swarovski pearls to a natural gemstone bead with a soft matte finish, the look is instantly transformed from classically elegant to contemporary casual. I can’t wait to pair these earrings with my cozy winter boots, jeans, and an oversized sweater!
I’m using 14mm beads for this tutorial, and I recommend that beginners start with beads no smaller than that because the woven wire bead frame becomes more challenging to make as the beads get smaller. However, this design can be easily adapted to almost any sized bead. If you’re interested in resizing recommendations, I discuss that topic in detail in the downloadable PDF version of this tutorial, which you’ll find in my Etsy shop.
Copyright & Disclosure
You’re welcome to make and sell products from this tutorial. If you do so, all I ask is that you credit Door 44 Studios for the design and link back to this page.
When it comes to my written tutorials, on the other hand, I reserve exclusive rights to all images and written content that you find here on my blog. You may not reproduce or redistribute any portion of this tutorial in any way, shape, or form. Furthermore, you may not teach the designs contained within this tutorial without my written permission.
This copyright applies to the downloadable PDF version of this tutorial as well, and it’s included therein. You may share this free version of this tutorial only by linking directly to this page.
This post may contain affiliate links. If you click on a link and then make a purchase, I may earn a small commission (at no cost to you). As an Amazon Associate I earn from qualifying purchases. To learn more, please see my full disclaimer.
Getting Started
For best results, use half-hard solid jewelry wire for your core wires and dead soft wire for weaving. If you choose to use a filled wire, be aware that the core wires are finished and hardened by hammering the wire. Even light hammering can expose the base metal core in filled wires, and that can negatively affect your final finish. I don’t recommend plated or anodized craft wire for these earrings as those coatings will be ruined with this construction process.
How to Choose the Right Jewelry Wire
Jewelry wire is a constant source of confusion for beginners. I remember those days well! If you’d like to learn how to choose the right jewelry wire for wire weaving, be sure to read this post. In it, I share everything you need to know about jewelry wire as you set out on your wire weaving journey.

Tools & Materials
- 16ga half-hard wire – 3 inches
- 18ga half-hard wire – 5.5 inches
- 24ga half-hard wire – 30 inches (plus additional 10 inches, if using silver wire)
- 28ga dead soft wire – 80 inches
- 14mm round beads – 2 each
- 3mm crystal roundel beads – 12 each
- delicate chain – about 2 inches
- ear wires of your choice*
- Wire Cutters
- Chain Nose Pliers
- Round Nose Pliers
- Nylon Jaw Pliers
- Needle File
- Nylon Mallet or Rawhide Mallet
- Chasing Hammer
- Bench Block
- Ring mandrel
- Ruler
- Fine Point Permanent Marker
- Bead caliper (optional)
- Sharp Beading Awl (optional)
- Sunshine® polishing cloths (optional). These are the polishing cloths that I use for dry polishing jewelry.
*I chose lever-back ear wires in an antique copper finish for my earrings. These earrings have a bit of weight to them because of the gemstone beads, and I prefer to use a very secure ear wire for heavier earrings. However, ear wires are a very personal choice. So feel free to use what’s most comfortable for you.
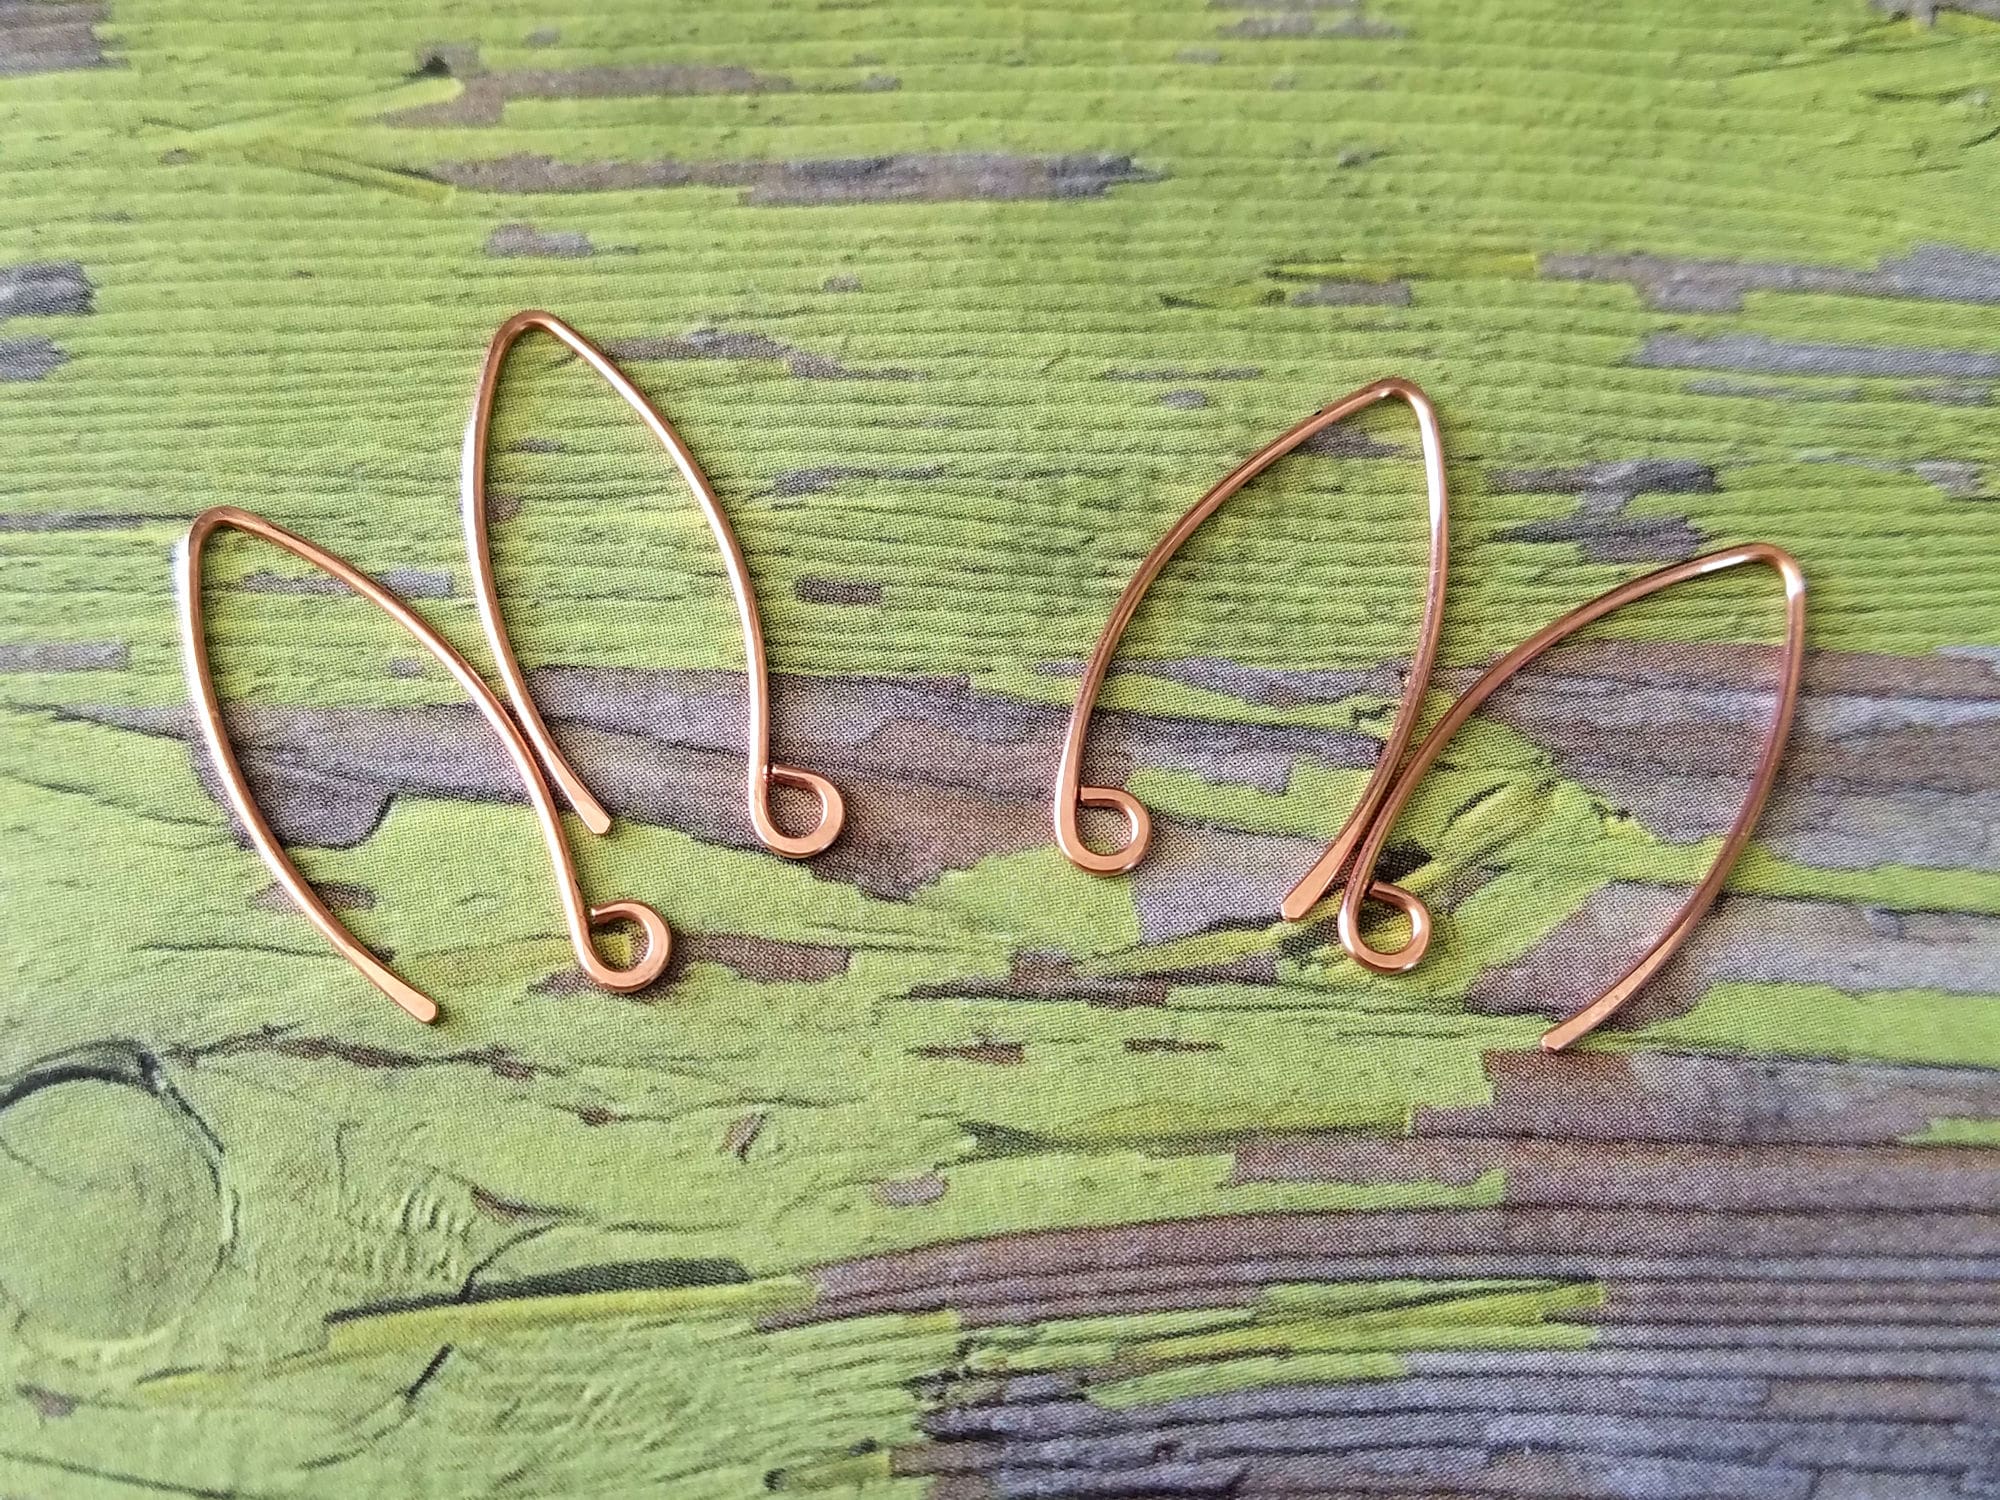
If you’d like to learn to make your own perfectly matched ear wires, be sure to check out my free tutorial.
Skill Level: Intermediate
This is a more challenging project that involves wire weaving. It can be achieved by someone who has some basic wirework skills.
This tutorial uses the Modified Soumak Weave for two core wires. Click the link above for a quick tutorial if you’re not already familiar with that weave. You should also be comfortable weaving pre-formed core wires for this tutorial.
Other skills required are making wrapped loop links and working in very tight spaces.
If you’re making your Chalice Earrings in silver, you’ll also need to be familiar with piercing your weave and securing focal beads to a bead frame. This free tutorial will walk you through the process of securely suspending your focal beads with sturdier sterling silver wire. Fine silver wire isn’t strong enough to bear the weight of most gemstone beads.

Finished Size
- WIDTH: about 1 inch (2.54 cm)
- LENGTH: about 2-1/2 inches (6.35 cm)
Keep in mind that how you choose to style your wrapped loop connectors, how much chain you use, and the size and style of ear wires that you choose will change the overall length of your Chalice Earrings
How to Make the Chalice Earrings
These instructions assume you’re using 14mm beads, as specified in the materials list. However, the bead frame can be easily adapted to larger or smaller beads. If you’re using a different sized bead, you’ll need to add or subtract roughly 1/4-inch of wire on each of the two core wires for every 2mm difference in bead size.
To determine the size to use on your ring mandrel, locate the point that is the same size as your bead and use that point to form your inner core wire. Add three sizes to your first ring size to locate the point where you’ll need to form your outer core wire.
I provide more detailed resizing instructions, including a quick-reference table with the most common bead sizes, in the downloadable PDF version of this tutorial.
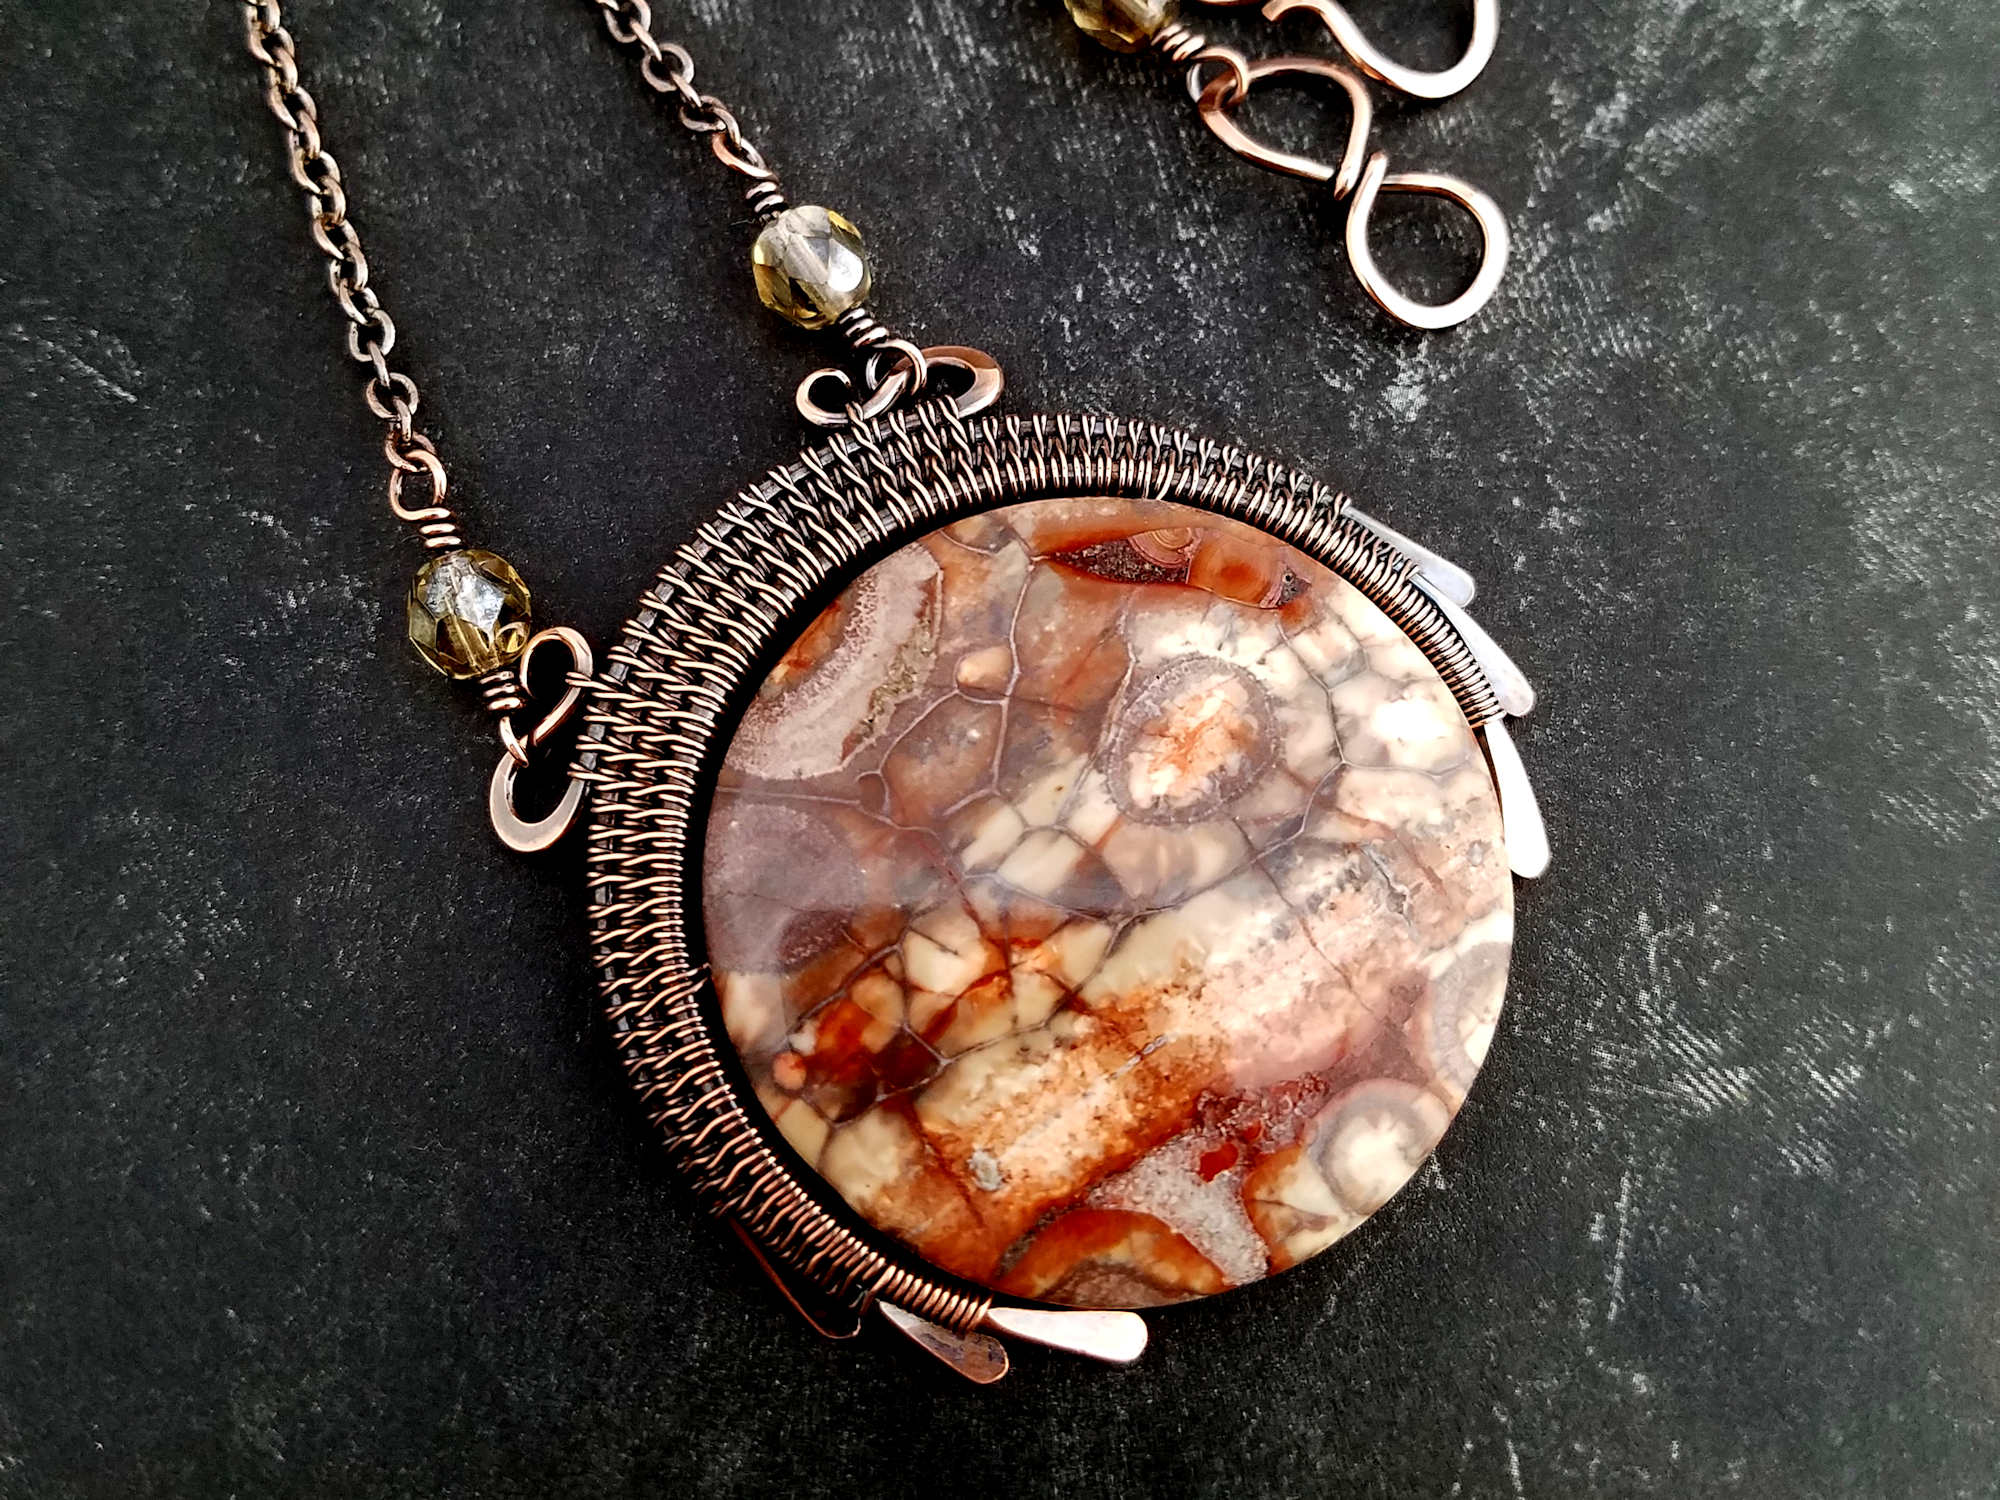
The bead frame is a relatively simple component to make. And the beauty of this frame is that it can be easily repeated and joined in various ways to create larger statement pieces. Look for an example of stacking this component in the long and luscious Chalice Necklace that matches these earrings.
Form the Core Wires
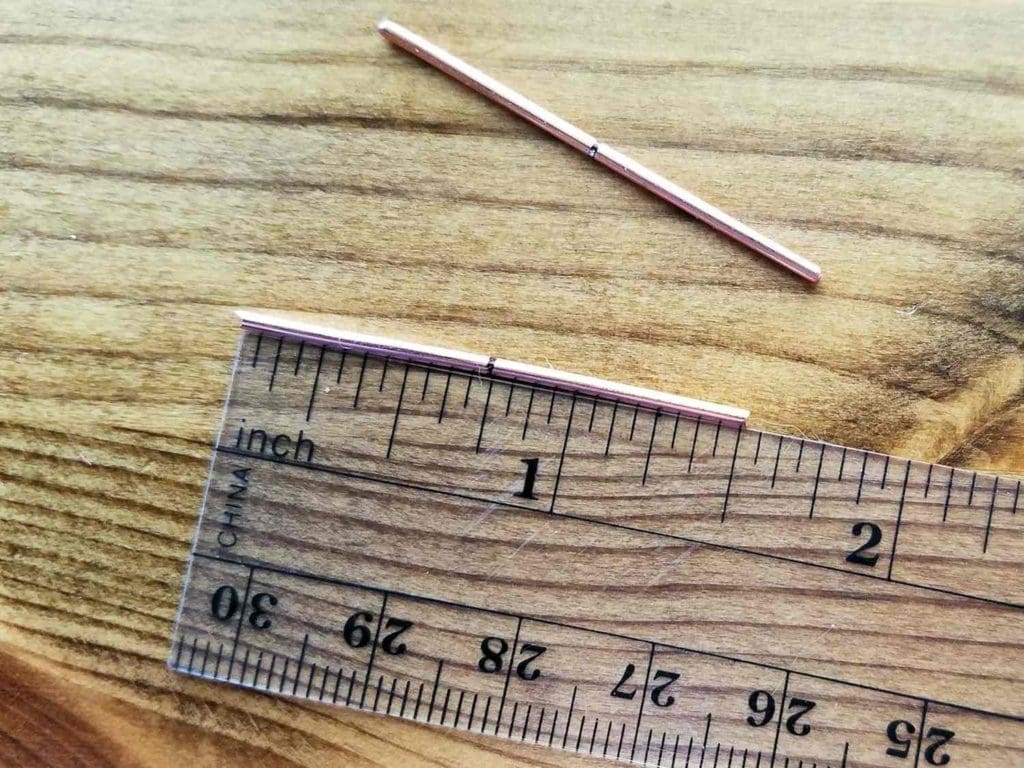
Step 1
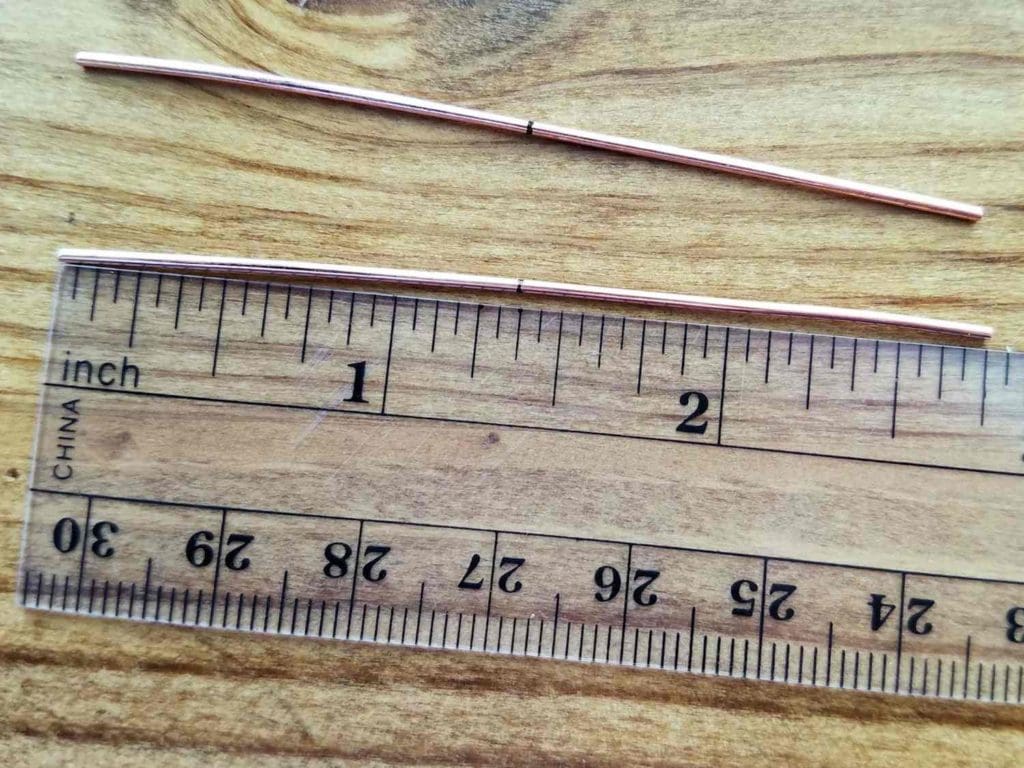
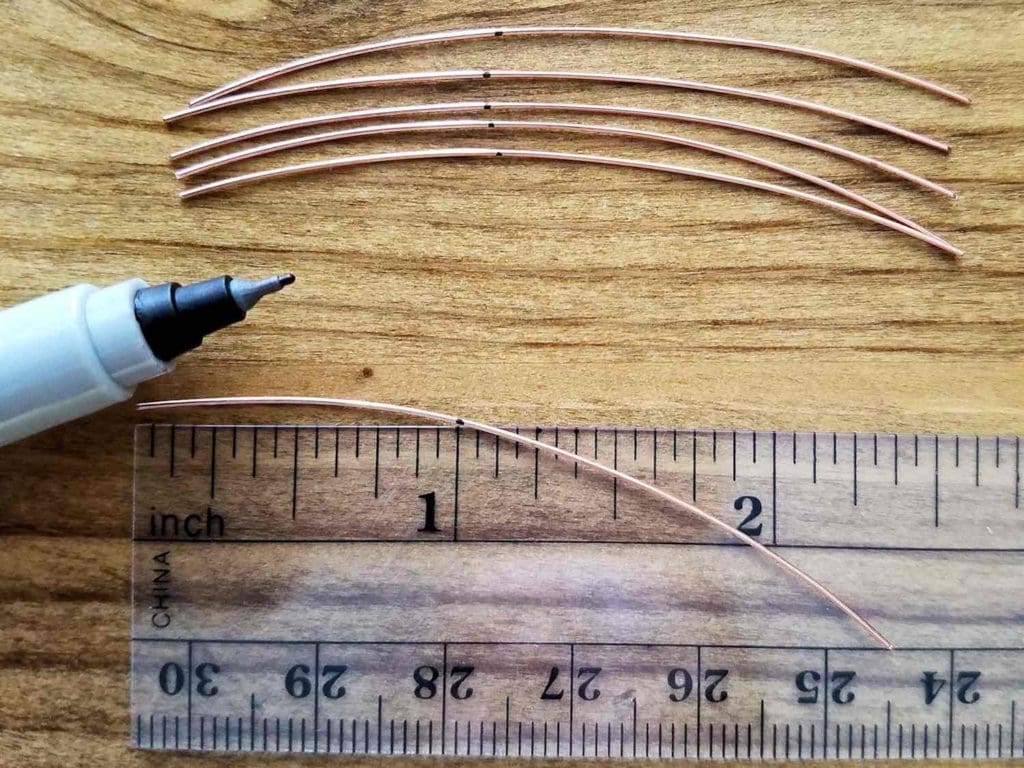
Measure and cut two 1.5-inch pieces of 16ga wire. File the ends smooth and mark each piece at the center.
It sounds simple, but accurate measurements can make the difference between a good end result and a fabulous end result. Details matter and your level of attention to detail becomes plainly evident in your finished jewelry. So take your time as you work through this tutorial and enjoy the process.
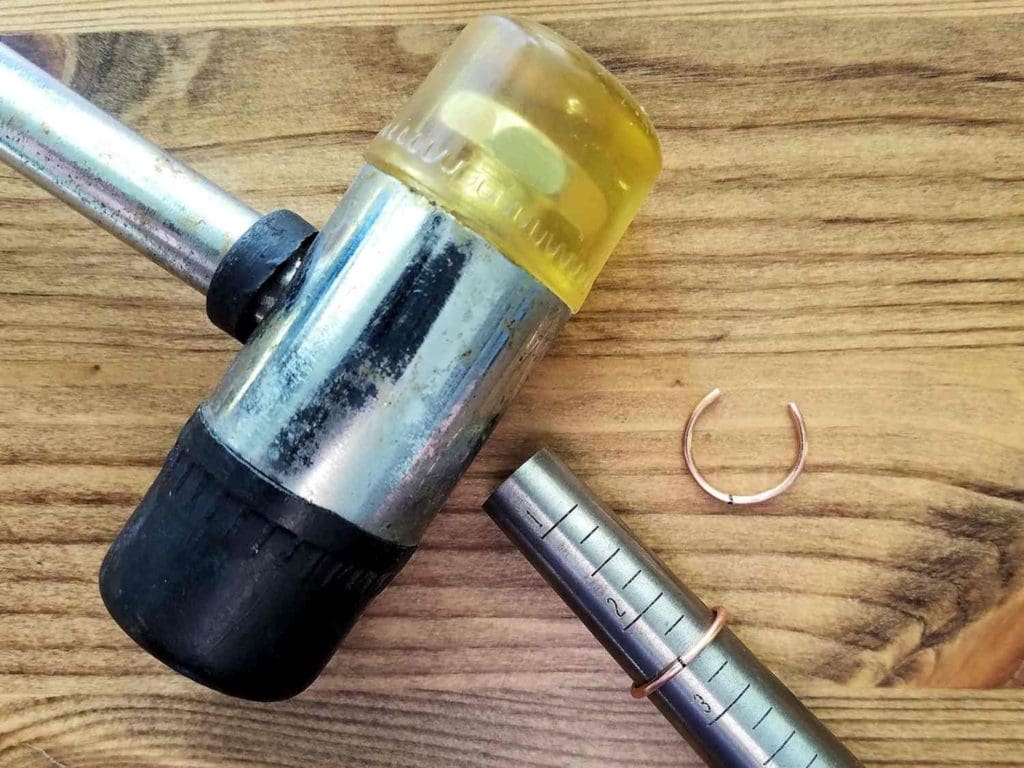
Step 2
Place one piece of wire at the size 2.5 mark on your ring mandrel and gently form the wire around the mandrel. Use a rubber or rawhide mallet to form the ends so you have a continuous soft curve, as shown.
Repeat for the second wire.
This is the inner core wire, which will fit around your bead. Test the fit now. The curved wire should slip easily over your bead. You want a close fit, but not a tight fit. If it feels tight, put the wire back on your mandrel and gently stretch it, 1/4 size at a time, until it slips easily over your bead.
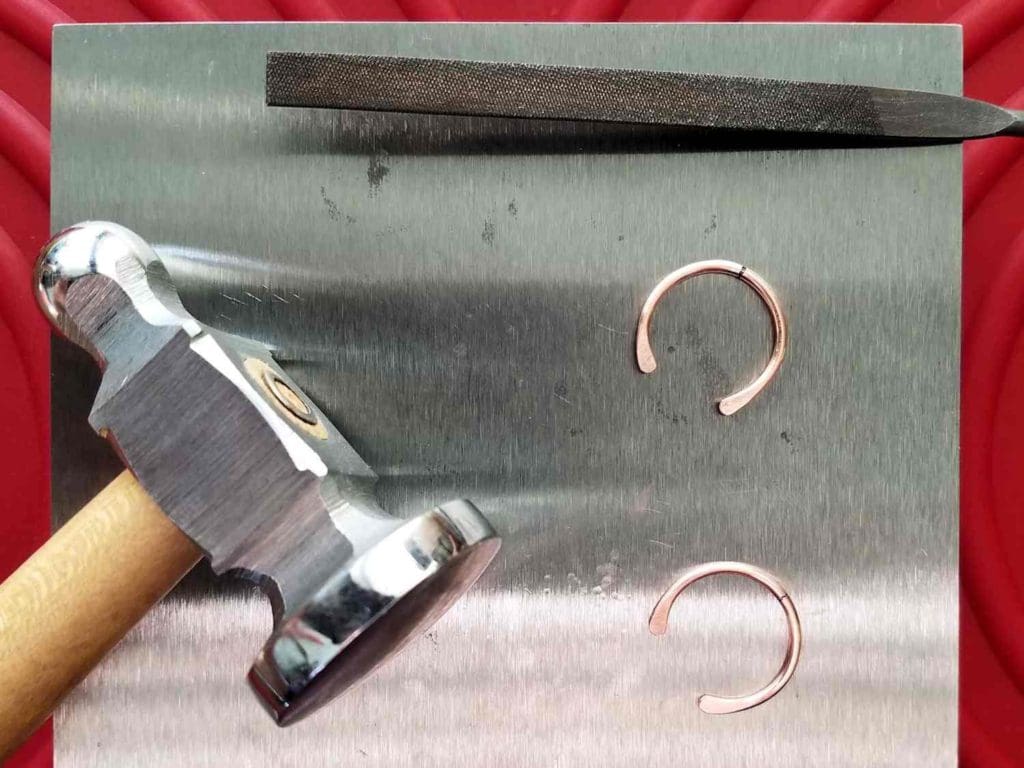
Step 3
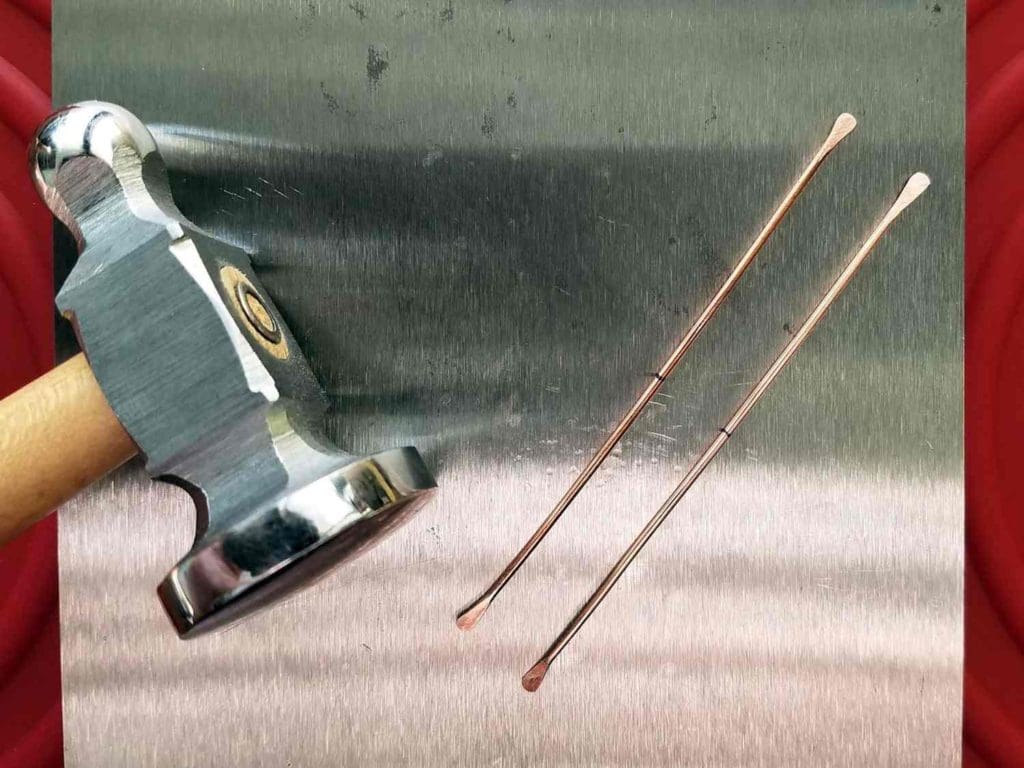
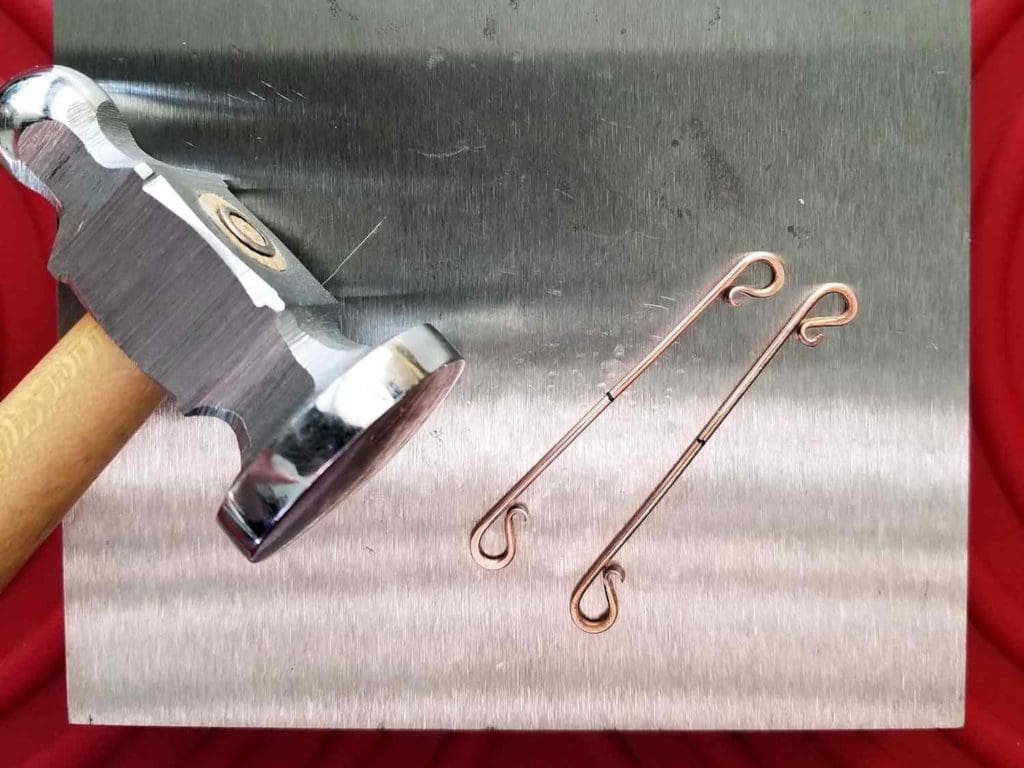
Use your bench block and chasing hammer to paddle the ends of both wires. You want just a slight paddle on about 1/4 inch of each end of the wire.
Smooth and shape the paddles with your needle file, if necessary, until your two core wires look like those shown. Then set the 16g wires aside for now.
Step 4
Measure and cut two 2.75-inch pieces of 18ga wire. File the ends smooth and mark each piece of wire at the center point with your permanent marker.
Step 5
Use your bench block and chasing hammer to lightly paddle the tips of each wire. Try not to hammer more than about 1/4 inch from each end, as shown.
Gently shape and smooth the paddled ends with your needle file, as necessary.
Step 6
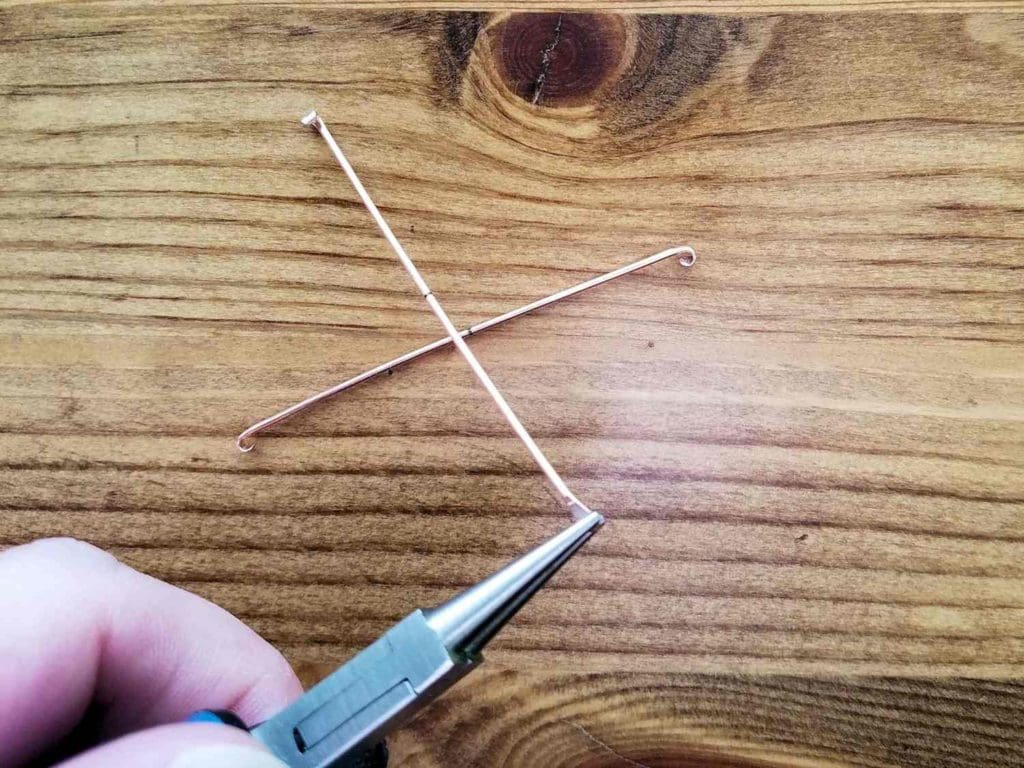
Grasp the tip of one paddle with the very tips of your round nose pliers. Roll the paddle into a tight curl that wraps about 3/4 of the way around the tip of the pliers.
Repeat on the second paddle, making sure that the ends of the wire curl in toward one another, as shown. Then repeat on the second piece of 18ga wire.
Step 7
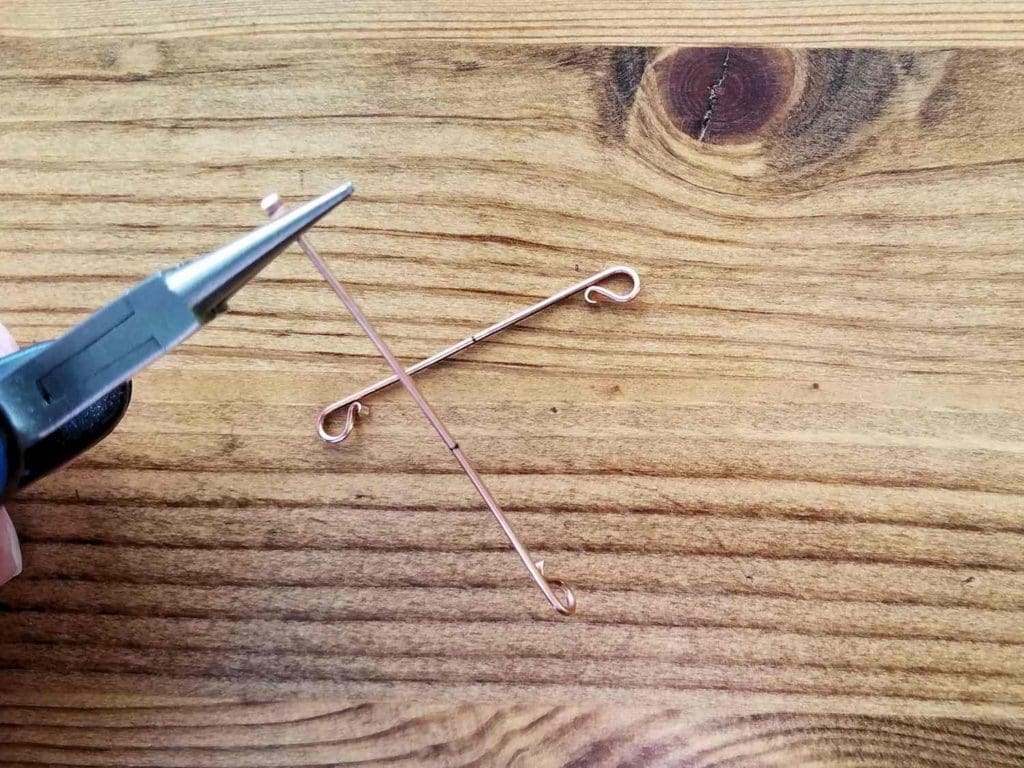
Position one curled end of a wire at the center of your round nose pliers and grasp the wire just under the tight curl you made in Step 6. The rounded face of the curl should be pointing toward you, as shown.
Use your fingers to push the long end of the wire away from you and bring it all the way around the tip of your round nose pliers until the small curl made in Step 6 touches the straight length of the wire. Then repeat on the other end to complete your shape.
Finally, repeat this entire step on the second piece of 18g wire.
Step 8
Use your bench block and chasing hammer to flatten the rounded ends of each 18g wire. But be careful not to flatten the small curls.
Hammering may open the gap between the straight portion of the wire and your tight curls. If so, gently squeeze the curl back against the core wire with the tips of your round nose pliers.
These ends will be lashed to the core wire in the next section of this tutorial, so don’t worry if there’s still a small gap between the curled end and the core wire.
Step 9
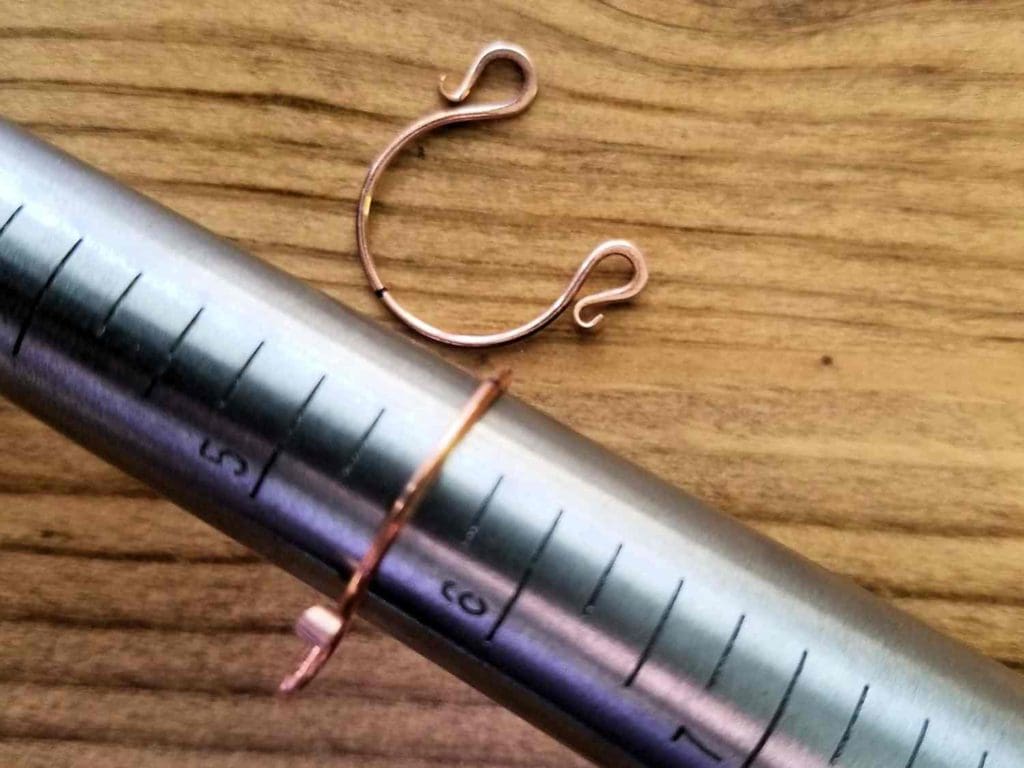
Position one 18ga piece of wire at the size 5.5 mark on you ring mandrel. Make sure the curled ends of the wire are facing up (away from the ring mandrel).
Then gently form the 18ga wire into a continuous curve around the ring mandrel, as shown.
Finally, repeat for the second 18ga wire.
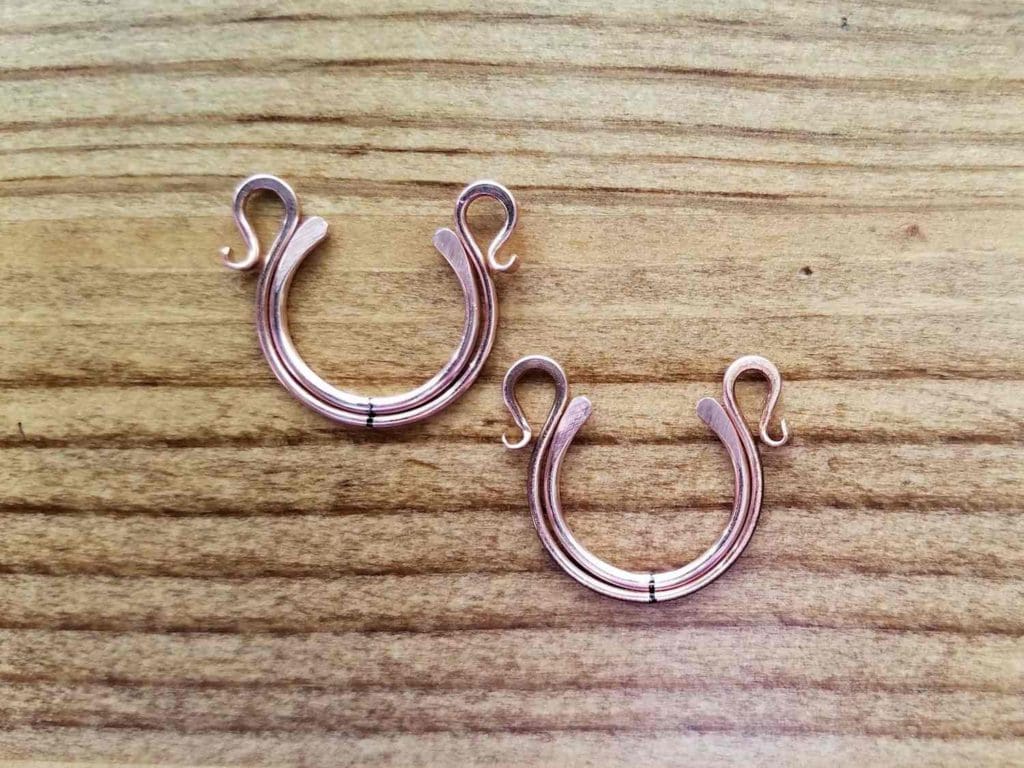
Step 10
Your frame wires are now complete and ready to weave together. Before proceeding nest the inner core wires (the 16ga wires) into the curve of the outer core wires (the 18ga wires) and line up the center marks.
The wires should nest closely together, and everything should be lined up symmetrically. If not, make any necessary adjustments now and mark new center lines on both core wires. You’ll use these marks to keep your core wires aligned while you weave the two wires together.
Weave the Core Wires Together
Step 1
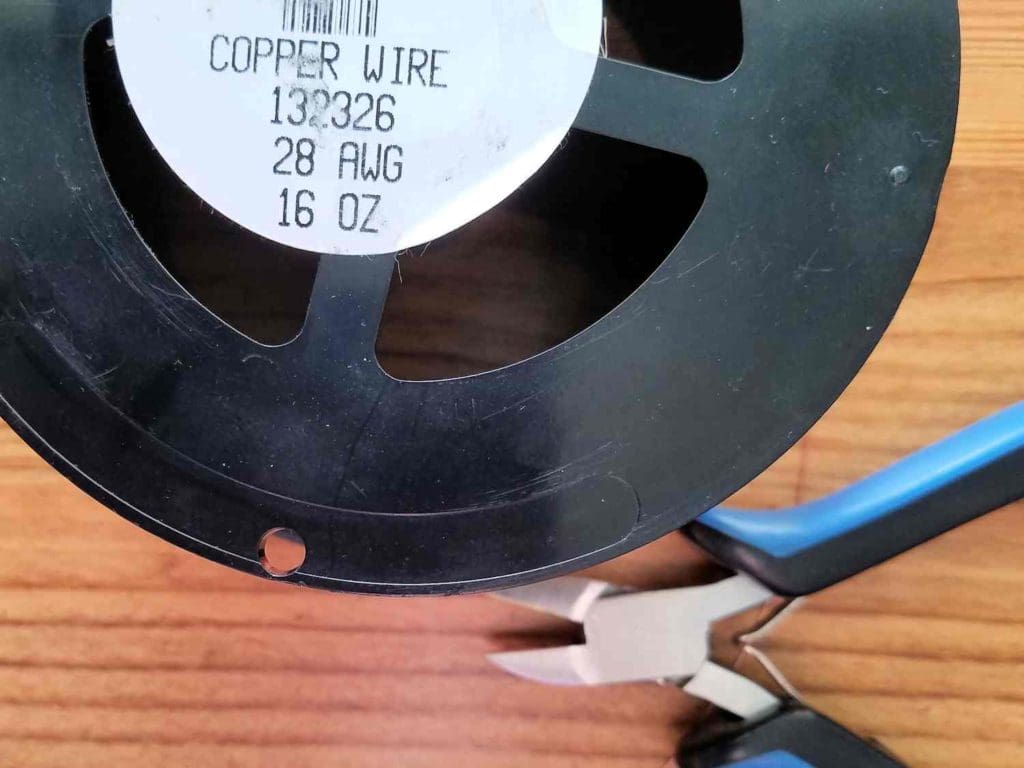
Cut two 40-inch lengths of dead soft 28ga wire.
NOTE: If you’re making silver earrings, you should have used half-hard sterling silver for the core wires prepared in the previous section. Use dead-soft fine silver wire for weaving in this section. You’ll also need about six inches of 24ga half-hard sterling silver wire to secure your bead to the bead frame as fine silver isn’t strong enough to safely secure the bead.
Step 2
Locate the center of your 40-inch weaving wire and position it at the center marks on your core wires. Then begin weaving the two core wires together using the Modified Soumak Weave.
Weave in one direction until you get to a point just below the small curls on your outer core wire and stop just after making a single wrap around the inner core wire. Then flip the frame over and begin weaving in the other direction. Again, stop after making a single wrap around the inner core wire and end your wrapping below the small curl on the outer core wire.
Both wire tails should now be sticking out between the two core wires, one will be coming out of the front of the frame, and the other will be coming out the back of the frame.
NOTE: I’m a left-handed wrapper, so my frames may look a little different than yours. Don’t let that confuse you. I demonstrate both right-handed and left-handed weaving in this video, if you need help with this weaving pattern.
Step 3
Now you need to determine if the holes in your bead are going to line up with the points where you ended your weave.
Slide a bead onto a straight piece of scrap wire (20ga works well for this) and center the frame over your bead. It’s likely to fit more snugly now that you’ve added the thickness of the weaving wire. Open the frame gently with your fingers until it slips easily over the bead if it’s too tight.
If the scrap wire passing through your bead lines up perfectly with the ends of your weaving, proceed to Step 4. If not, adjust the weave until it does line up with both holes in your bead by completing one or two more pattern repeats on one or both sides. Try to keep the weaving symmetrical on both sides of the frame.
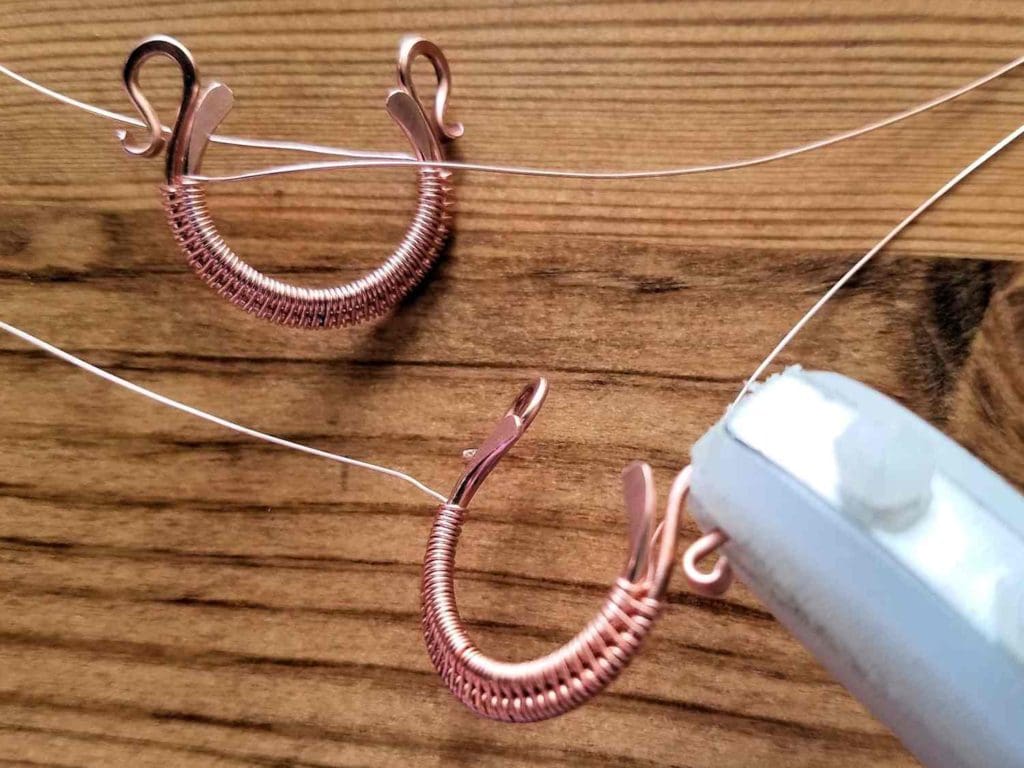
Step 4
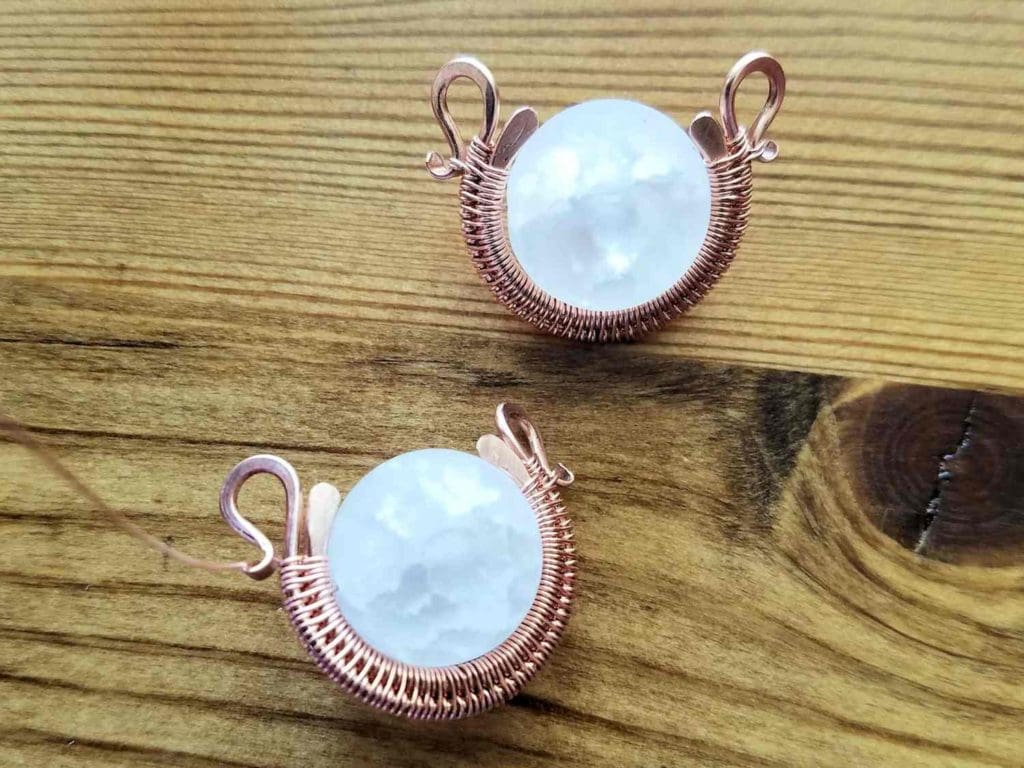
Before securing the bead, I like to sculpt my bead frame to give it a little extra dimension. The Modified Soumak weave allows the core wires to slide a bit, and I use this to my advantage in many of my designs.
Use your fingers to gently slide the inner core wire forward and the outer wire back. Then, using your fingers or your nylon jaw pliers, gently bend the curved loops toward the back slightly, as shown.
This sculpted curve is what gives your earrings the distinctive look of a gilded chalice. You’ll really see this shape come alive when you weave your beads into the frames in the next step.
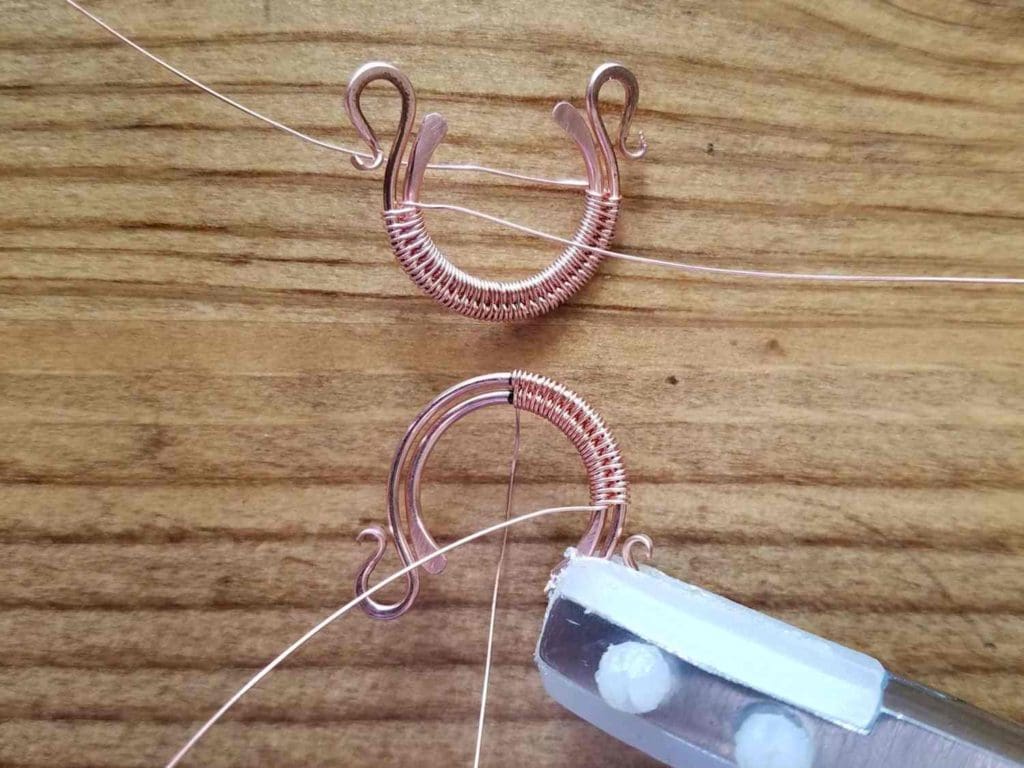
Step 5
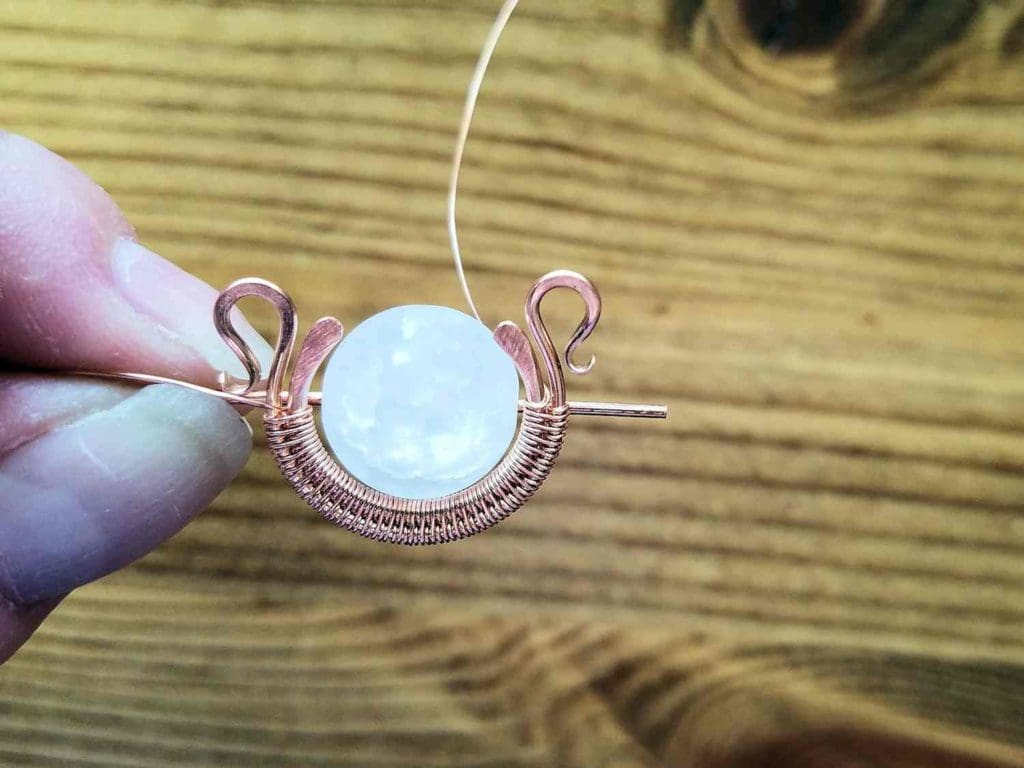
For copper earrings only, take the tail end of the weaving wire on the left side of the frame and thread it through the bead, from left to right. Now take the tail of the weaving wire on the other side of the frame and thread it through the bead from right to left.
You should now have two wires crossing through the bead and coming out to the opposite sides of the frame.
For silver earrings, you’ll attach the beads with sterling silver wire after completely weaving the frames with fine silver wire. Do not pass your weaving wire through the bead or cross over to the other side. Instead, finish weaving the frame as directed in Steps 6 and 7. Then come back and pierce your weave between the two core wires at the points identified in Step 3. Finally, secure your beads with 24ga half-hard sterling silver wire.
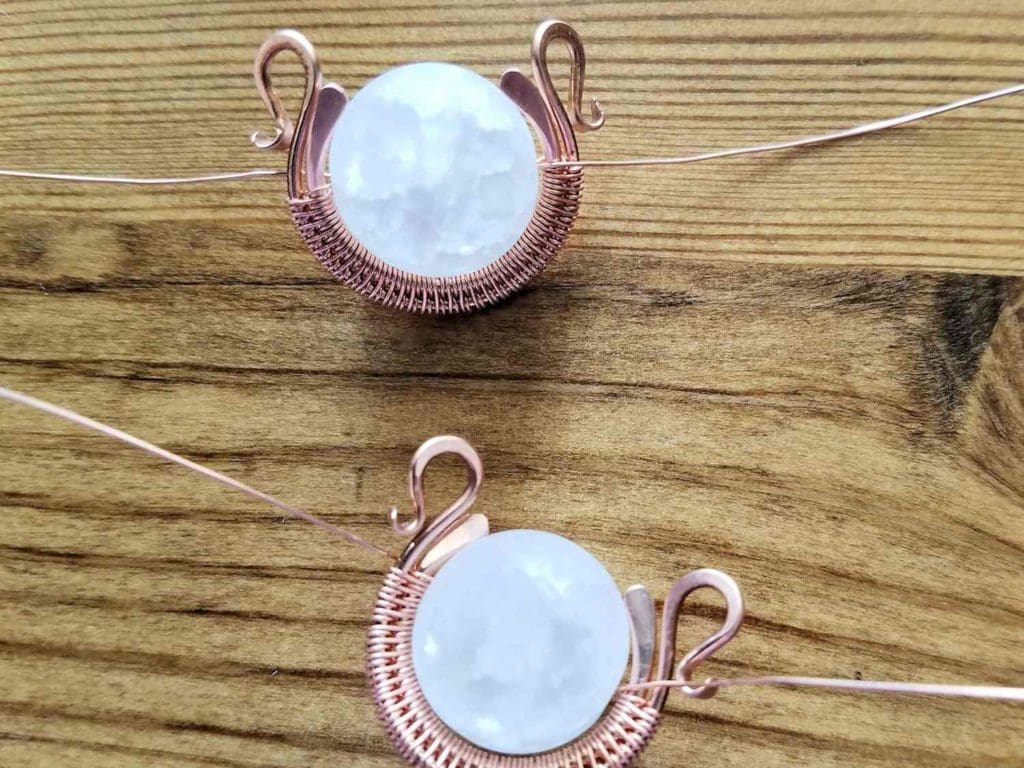
Step 6
Pick up the weave where you left off before threading your wires through the bead and continue until you reach the small curls on the outer core wire.
Lash the curls in place by integrating that point into your weave as if it were a third core wire.
Complete one pattern repeat around all three wires and then switch back to wrapping just the two inner wires for one or two more pattern repeats. Keep an eye on symmetry as you go and stop before you get too close to the end of the inner core wire.
Step 7
To finish off the weave, wrap the wire three times around the outer core wire and break off your weaving wire where it passes between the two core wires.
Then repeat this step on the other side to secure that wire tail and break your weaving wire.
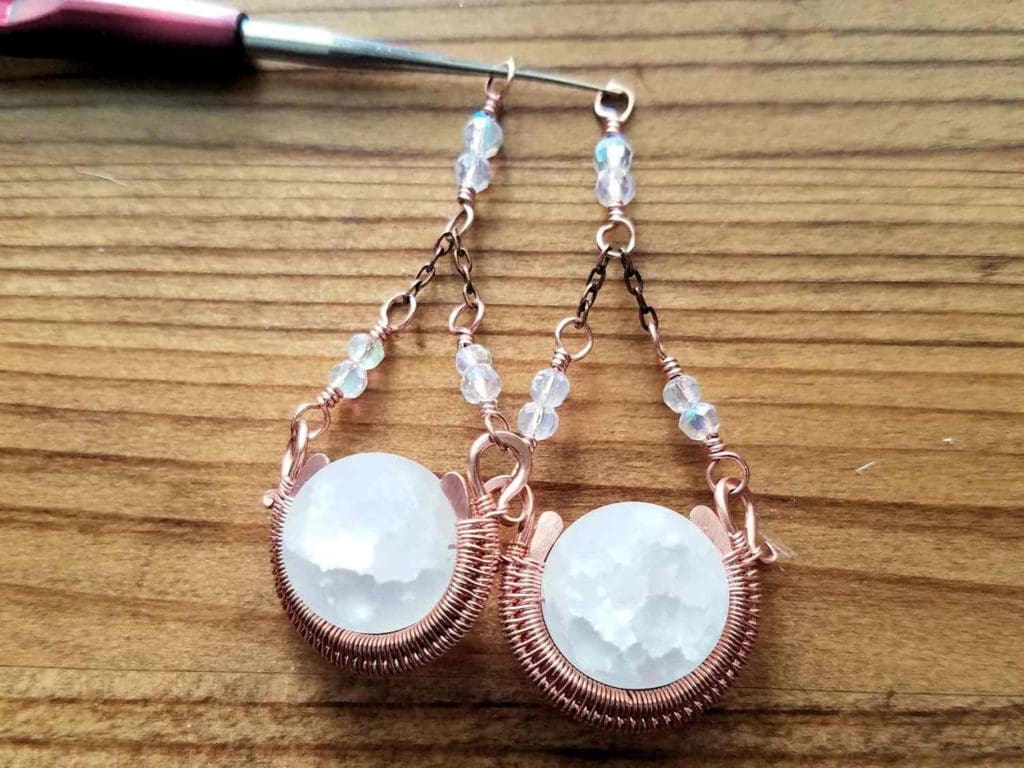
Finally, repeat Steps 1 through 7 of this section for the second bead frame if you haven’t already done so (I usually make mine at the same time so I can keep an eye on the symmetry between the two bead frames as well as the left and right side symmetry of each individual frame).
Final Assembly of the Chalice Earrings
Step 1
Cut six pieces of 24ga half-hard wire 2-1/2 inches long. Then mark each wire at 1 inch from one end. This is where you’ll start your first wrapped loop.
Step 2
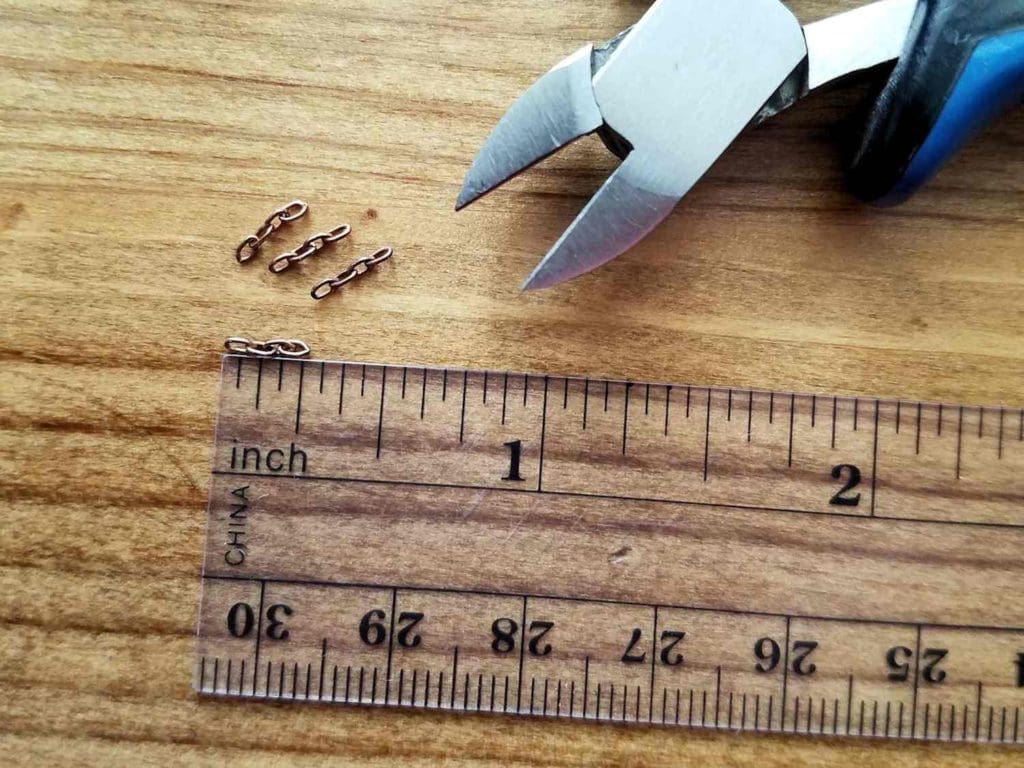
Cut four pieces of chain 1/4 inches long. I chose a very delicate chain (see resources for details) with roughly 16 links per inch, so I’m using pieces that are 4 links long.
Step 3
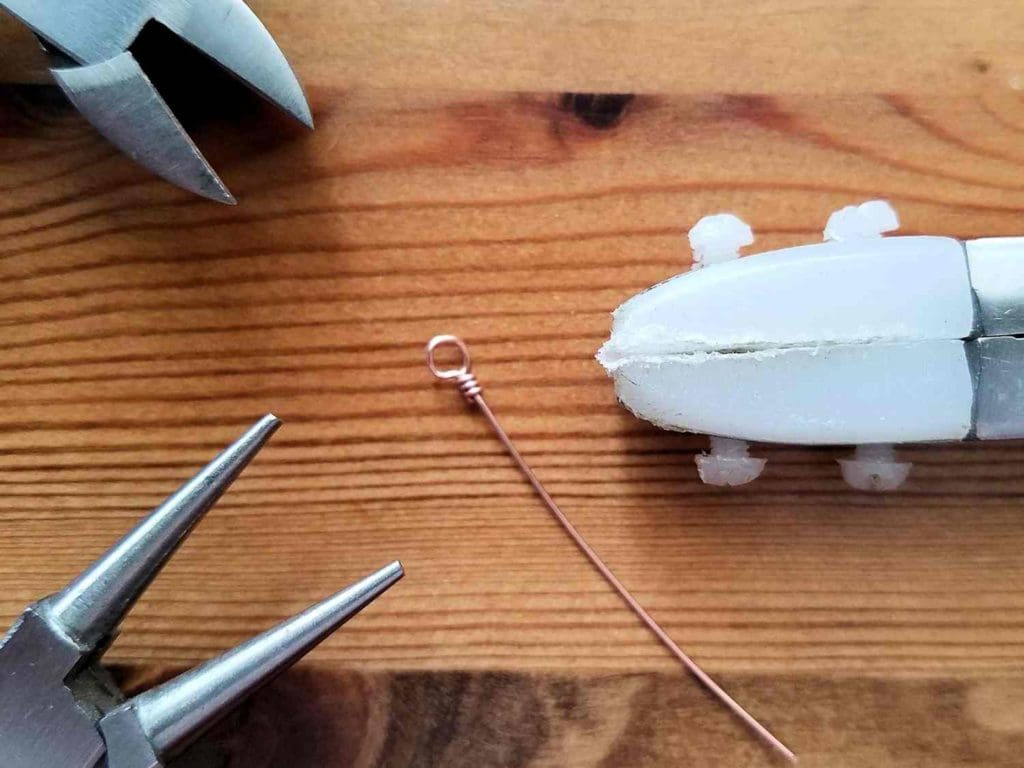
Make a complete wrapped loop on one end of the first piece of 24ga wire.
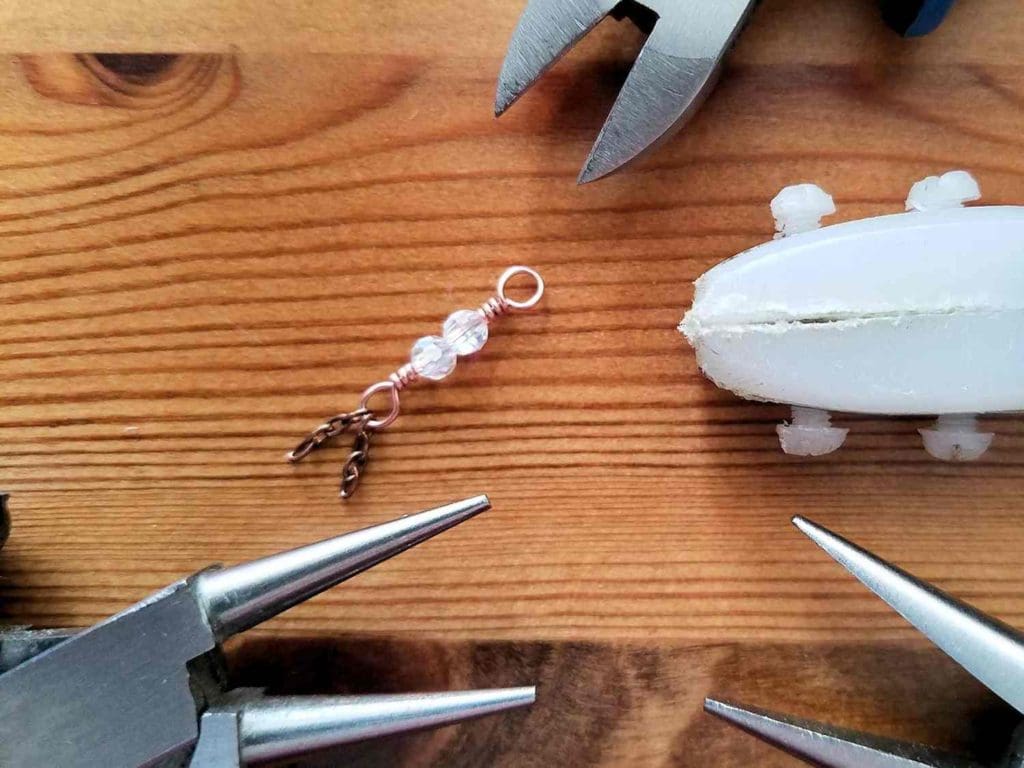
Step 4
Thread two 3mm roundel beads onto your wrapped loop and begin the second wrapped loop.
Then thread two pieces of chain onto that loop before finishing the loop with the same number of wraps you used on the other side.
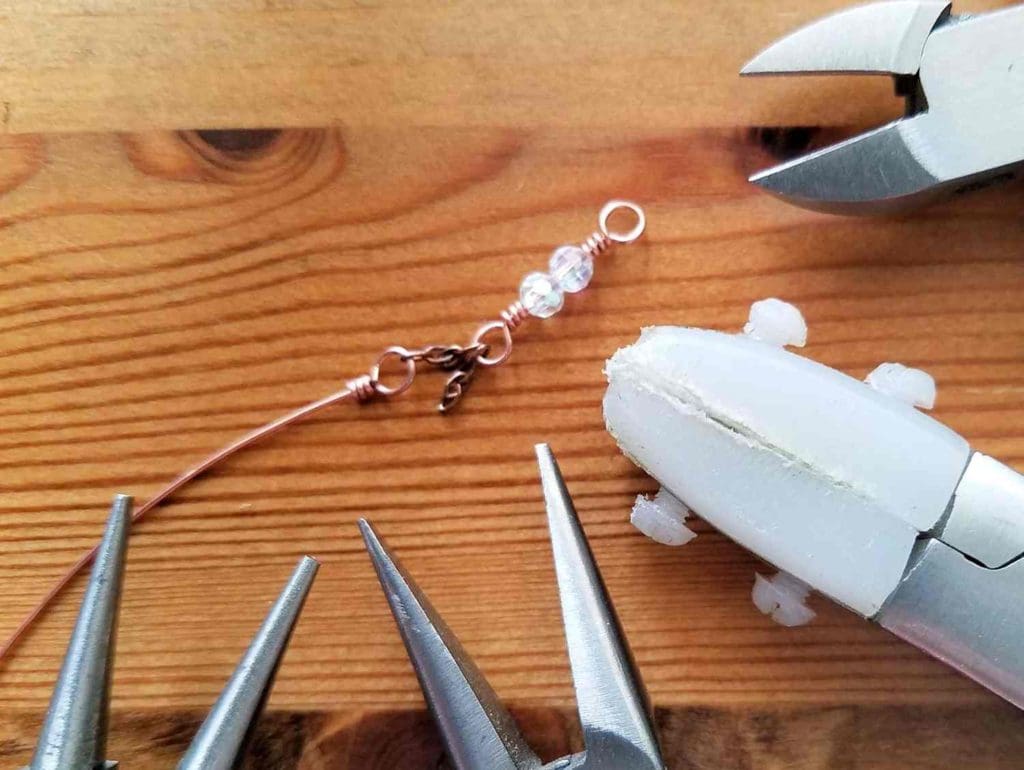
Step 5
Begin a wrapped loop on another piece of 24ga wire. Then thread one loose end of chain onto that loop before wrapping. Finally, complete the loop with the same number of wraps you used on your first connector.
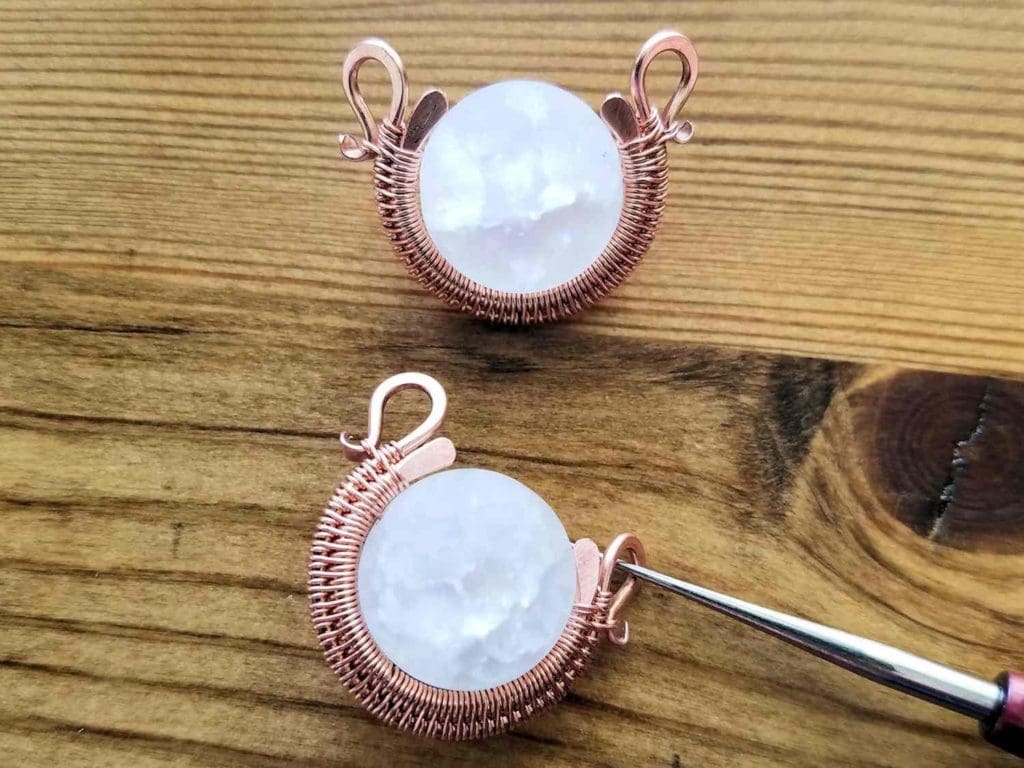
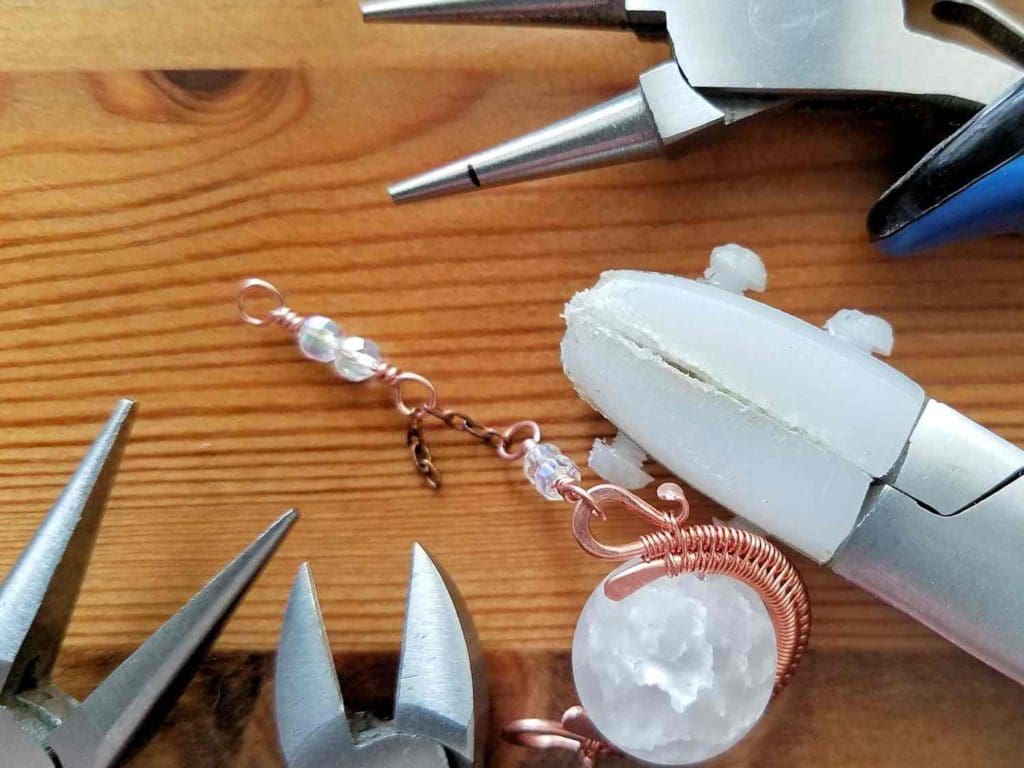
Step 6
Thread two 3mm roundels onto the 24ga wire you just connected to the chain and begin the second wrapped loop.
Then connect the loop to one curl of your bead frame. Finally, finish wrapping that loop.
Step 7
Repeat Steps 5 and 6 to connect the other side of your bead frame to the remaining piece of chain.
Then repeat Steps 1 through 7 for your matching earring.
Step 8
Your earrings are now essentially complete. If you’re using pre-made ear wires, such as the lever-backs I’ve chosen, patina and polish your earrings before adding the ear wires.
If, however, you plan to make your own ear wires, go ahead and attach them prior to finishing so the patina on your ear wires will match the rest of the earring.
Finishing Suggestions for Your Chalice Earrings
I antiqued the Portico Pendants that I made while writing this tutorial with Liver of Sulfur (LOS). Then I burnished the patinated pieces with super fine steel wool (Grade #0000) in a warm bath of water and original Blue Dawn dish soap. The steel wool brings back the bright copper highlights on the high spots.
Once that’s done, I rinsed my jewelry thoroughly to remove any particles of steel wool. Then I put the freshly washed pieces in tumbler barrels filled with warm water and a generous squirt of Blue Dawn. I tumble each barrel for a minimum of two hours.
Learn More About Finishing Wire Jewelry
If you’re nervous about finishing your jewelry, be sure to read this detailed tutorial that walks you through my 7-step patina process. And if you’re wondering why I recommend tumble polishing specifically, check out this post as well. Finally, be sure to clean your stainless steel shot regularly. Clean shot is necessary to achieve the best finish on your tumble-polished jewelry.
One last bit of tumbler advice before you go. Always make sure that any beads or stones that you use for your jewelry are safe to tumble. I don’t recommend tumbling natural pearls, soft gemstones, ceramic beads, or glass beads with polymer coatings, such as glass pearls and certain frosted-look glass. If you’re not sure if your beads can handle the tumbler, run a test tumble with a bead that you’re willing to sacrifice.
Variations of the Chalice Earrings
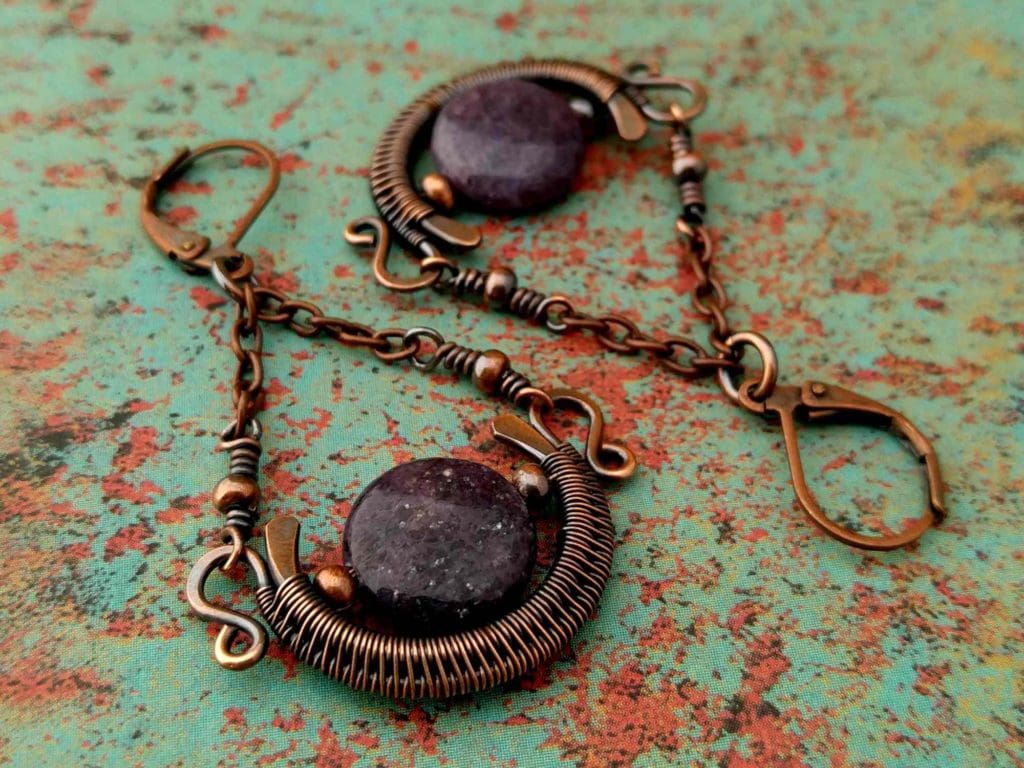
This design can be adapted to virtually any size round beads, including coin-style beads with center side-drilled holes. The smallest frame you can make comfortably with a gauged ring mandrel will fit a 12mm bead. For smaller beads, you can use a 12mm frame and use spacer beads to fill the gap on either side of your focal bead, as I did here with these pretty 8mm Lepidolite coin beads.
If you’re really up for a challenge, you can reduce the gauge of your core wires from 16ga/18ga to 18ga/20ga (or even 20ga/22ga) in order to make frames smaller than 12mm.
I provide more detailed information about resizing this bead frame in the downloadable PDF version of this tutorial, which is available in my Etsy shop.
Discover More Behind Door 44
Thanks so much for joining me today. I hope you enjoyed my Chalice Earrings tutorial. Would you like more free tutorials and wire jewelry tips?
I like to share useful wire weaving tips and tricks on my social media channels, and we have some great conversations about wire jewelry in my private Facebook Group. Also, be sure to connect with me @door44studios on Instagram, and Facebook to keep up with everything that’s happening behind Door 44. And if you haven’t already done so, be sure to subscribe to my YouTube channel where you’ll find new wire jewelry videos weekly.
Until next time, go make something beautiful!

Pin This Post for Later
Beautiful earrings! Going to give this a try later today! Thanks for sharing!