

How to Patina Wire Jewelry in Seven Easy Steps

Let’s talk about patina. There was very little information available about how to patina and polish handcrafted jewelry when I started making wire jewelry many years ago.
Having worked with stained glass for many years prior to switching to wirework, I’m familiar with the concept of changing the appearance of metal with patina. But the patinas used for aging the lead and zinc came used for stained glass and the patinas used for aging copper and silver wire are quite different. So, I made tons of mistakes. And I experimented. A lot.
Eventually, I came up with a process that works well for me. And I’ve continued to tweak my process a little, here and there, through the years. This is my most current process.
First and foremost, I’m not a chemistry expert. The process I’m about to describe is just what I use, personally. It’s a process that can be achieved easily in my kitchen, which is important to me because I don’t have a dedicated studio presently. For that reason, I strive to keep the use of toxic chemicals to a minimum.
Always use common sense when working with chemicals, and dispose of chemicals appropriately. When in doubt, refer to the manufacturer’s recommendations for disposal.
This post may contain affiliate links. If you click on a link and then make a purchase, I may earn a small commission (at no cost to you). As an Amazon Associate I earn from qualifying purchases. To learn more, please see my full disclaimer.
Okay. With that said, let’s get started!
What is Patina?
Patina is the result of a natural oxidation process. The natural patina we’re most familiar with is rust. Have you ever battled rust on your steel patio furniture or on your favorite cast iron skillet?
This oxidation process also happens naturally to non-ferrous metals, such as copper and silver. Again, you may have battled natural oxidation on your silver candlesticks or your copper cookware. In these particular instances, we usually strive to slow the oxidation process because we prefer a bright metal finish. Or in the case of the cast iron skillet, we don’t want rust in our food (yuck!).
The aged and worn patina of heavily tarnished metals is often desirable for jewelry, however. And, in order to achieve the look of natural patina, we can use chemicals to almost instantly produce a dark patina that would take months to achieve naturally.
Liver of Sulfur (LOS): The most common jewelry patina
The most common type of patina used for metal jewelry is Liver of Sulfur or LOS. This patina works well on silver, copper, bronze, and brass jewelry. However, it will not work on most plated or coated craft wires because those wires typically have a clear polymer coating that resists the patina.
Always do your own research to determine if the patina you choose is suitable for the metal you wish to age. You can learn more about the types of wire I recommend for my jewelry tutorials here. Since I work almost exclusively with copper and occasionally with silver, LOS is the only patina that I use.

Tools & Materials
- 2 clear plastic or glass containers – I use the 32-ounce Ziploc containers that you can buy at the grocery store. 32-ounce Mason jars would work well, too.
- 1 small glass or stainless steel bowl – glass is probably best, but I use an old stainless steel bowl that I had on hand. You’ll want to dedicate this bowl to the patina process. Do not use it for food prep or any other purpose.
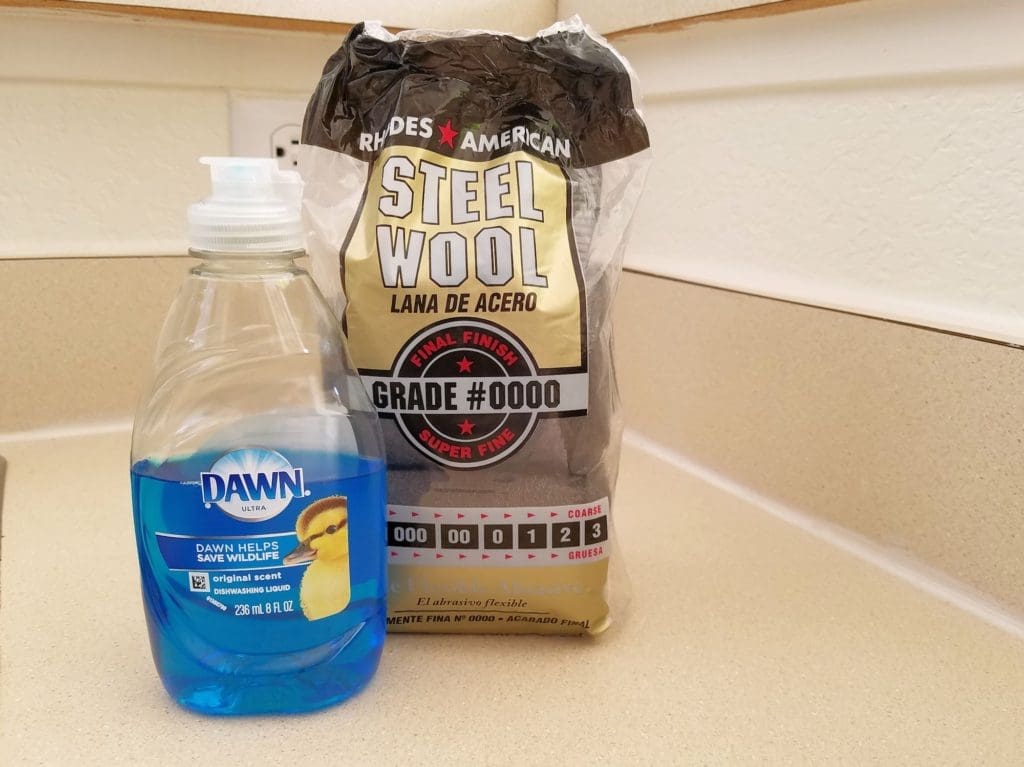
- Very Fine (Grade #0000) Steel Wool – I buy mine in the paint department at my local hardware store.
- LOS* – I use Extended Life Gel LOS, which comes in a 2 oz. bottle (this lasts a really long time if you use as little as I do)
- Baking Soda
- Salt
- Distilled White Vinegar (5% acidity is fine)
- Dawn dish soap
- Wood or plastic utensil – I use a simple bamboo skewer
- Vinyl Gloves
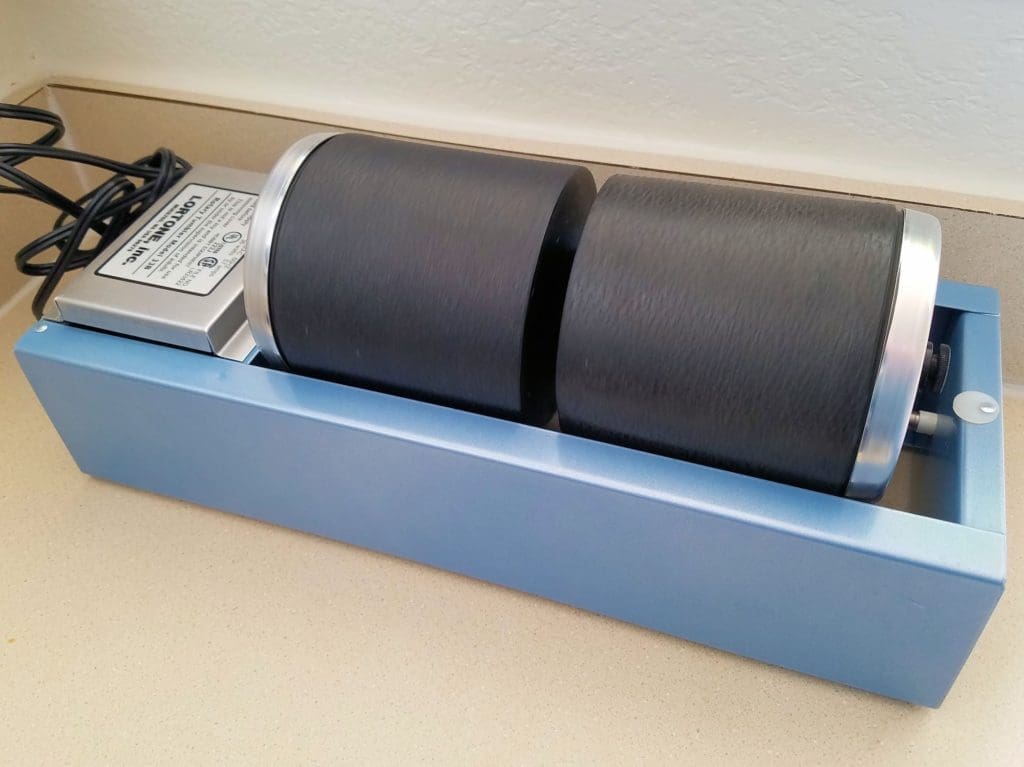
- Jewelry Tumbler – I use this dual barrel model, but a single barrel model like this one is perfect for hobbyists.
- Stainless Steel Shot – Also known as tumbling media. You’ll need one pound of shot per barrel.
- Fine Mesh Stainless Steel Colander – If you have a colander or strainer at home that you want to repurpose for jewelry making, make sure the mesh is tight enough to contain your steel shot. Some shot is small enough to slip through a standard mesh strainer and into your garbage disposal where it will cause serious damage.
- Sunshine Polishing Cloths – I buy mine in 10-packs from Rio Grande, but you can also find them on Amazon and Etsy. Be sure to shop around for the best price, and don’t forget to take shipping costs into consideration.
- Pro Polishing Pads – Again, I buy mine from Rio Grande, this time in 50-packs. But they’re also available on Amazon and Etsy.
- #103 – Patina Process Checklist – Available to subscribers in my free resource library – get a password instantly by completing the form below or at the bottom of this post.
join my newsletter and get my
FREE Patina Checklist!
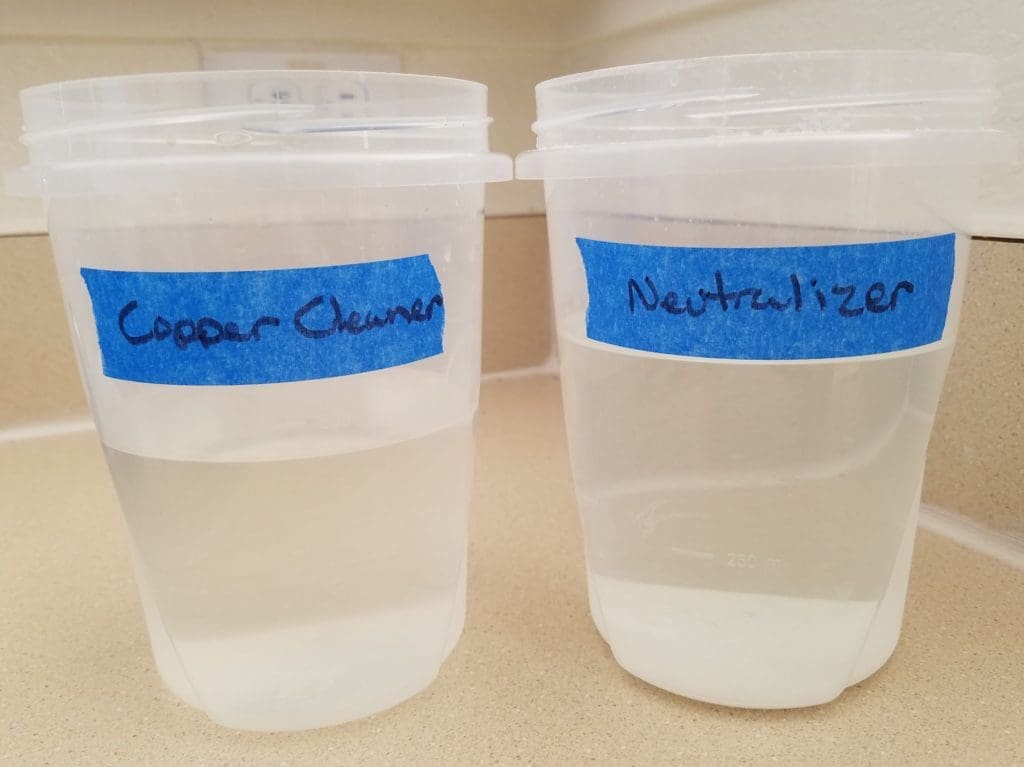
Prepare Your Metal Cleaner & Neutralizer Solutions
LOS, as you might have guessed by now, does not contain oxygen. It’s actually an acidic mixture of potassium sulfides that will mimic the natural oxidation process in a much faster and more controlled way. Because it’s a mild acid that will lightly etch the surface your wire, you need to make sure that the jewelry you want to patina is free of all wax or oil residue that might have accumulated during the fabrication process.
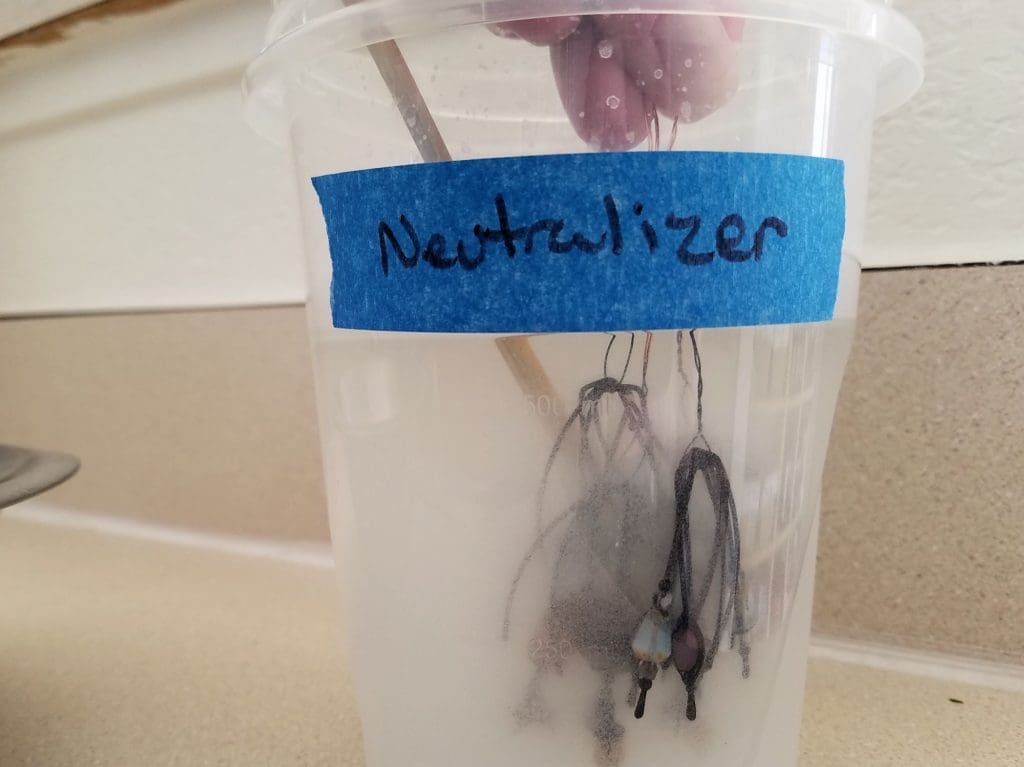
I prepare and store my metal cleaner and neutralizing solutions in two clearly-marked containers. I reuse my cleaning solution repeatedly until it’s no longer effective.
The neutralizer is a one-time use solution. Pour the used LOS solution into the neutralizer and seal the container. Once neutralized, dispose of the used neutralizer and mix a new neutralizer bath the next time you patina jewelry.
Metal Cleaning Solution Recipe
- 2 Tablespoons salt
- 2 Cups distilled white vinegar
Mix both ingredients in a sealable container. Stir or shake to fully dissolve the salt.
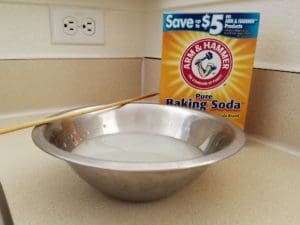
Neutralizer Solution Recipe
- 1/2 Cup baking soda
- 1 Cups water
Mix both ingredients in a sealable container. Stir thoroughly before each use.
How to Patina Wire Jewelry in Seven Easy Steps
The patina process is surprisingly simple. But it’s easier to demonstrate in a video than it is to describe in writing. Watch the video below to see exactly how it’s done.
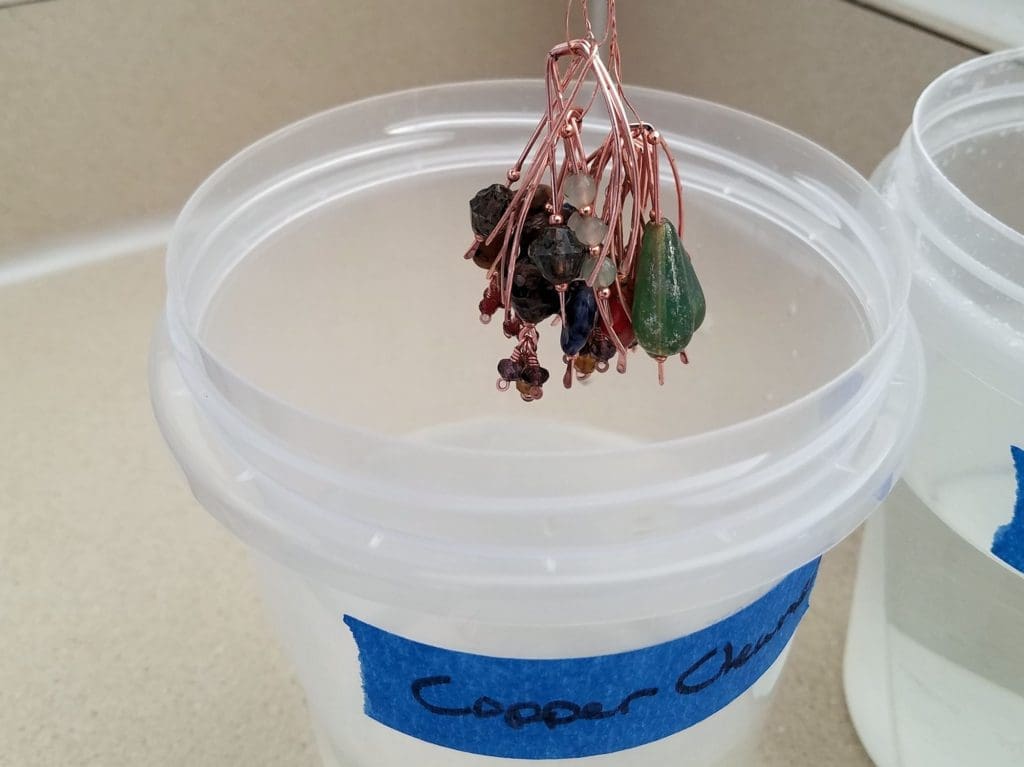
Step 1 – Clean your jewelry
Submerge your jewelry completely in the metal cleaning solution. Stir the jewelry in the cleaning solution for several seconds. The cleaning solution will remove both oxidation (tarnish) as well as oil residue from your hands or your tools.
Copper jewelry almost immediately returns to a bright copper color when using this cleaning solution. Cleaning is less evident on silver wire, but this mild acid solution will strip away any oils or waxes on the surface of your wire that could resist the patina.
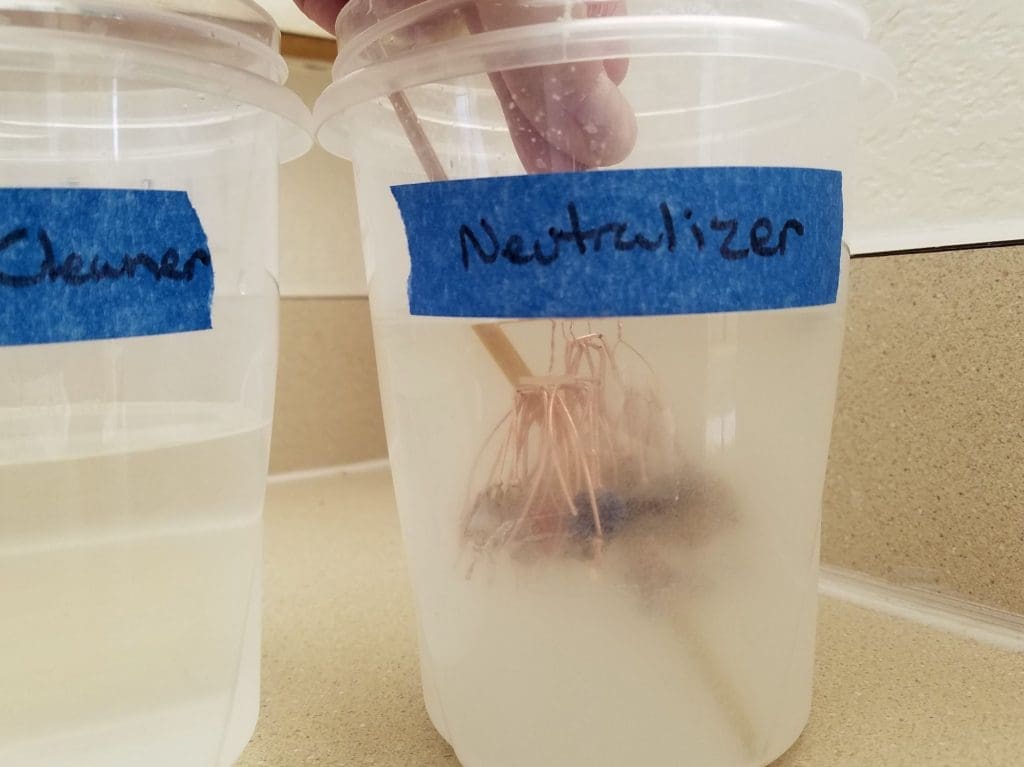
Step 2 – Neutralize the Cleaning Solution
Rinse your freshly cleaned jewelry under plain tap water to remove as much of the cleaning solution as possible. Then immediately submerge the jewelry in the neutralizing solution of baking soda and water. Stir it around for at least a minute or two. The goal is to expose every bit of wire to the neutralizing solution.
This stops the acid etching process. So, don’t rush this step. The longer you neutralize, the better your finish will be in the end.
Step 3 – Prepare Your Liver of Sulfur (LOS) Solution
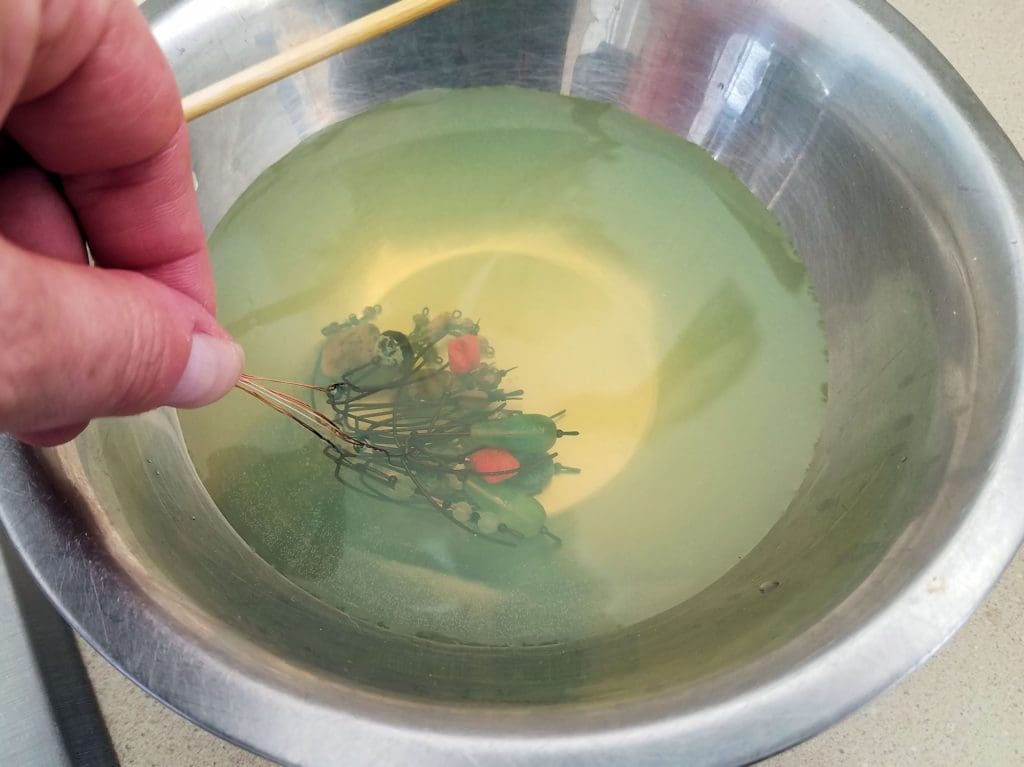
Rinse the neutralized jewelry under hot running tap water while you prepare your LOS solution. Fill your bowl with 8 to 10 ounces of very hot water. I usually use hot tap water, but if you want a faster reaction, you can boil your water instead. Then add a few drops of the LOS gel, as shown, and mix the solution thoroughly with a wood or plastic utensil (I use a bamboo skewer).
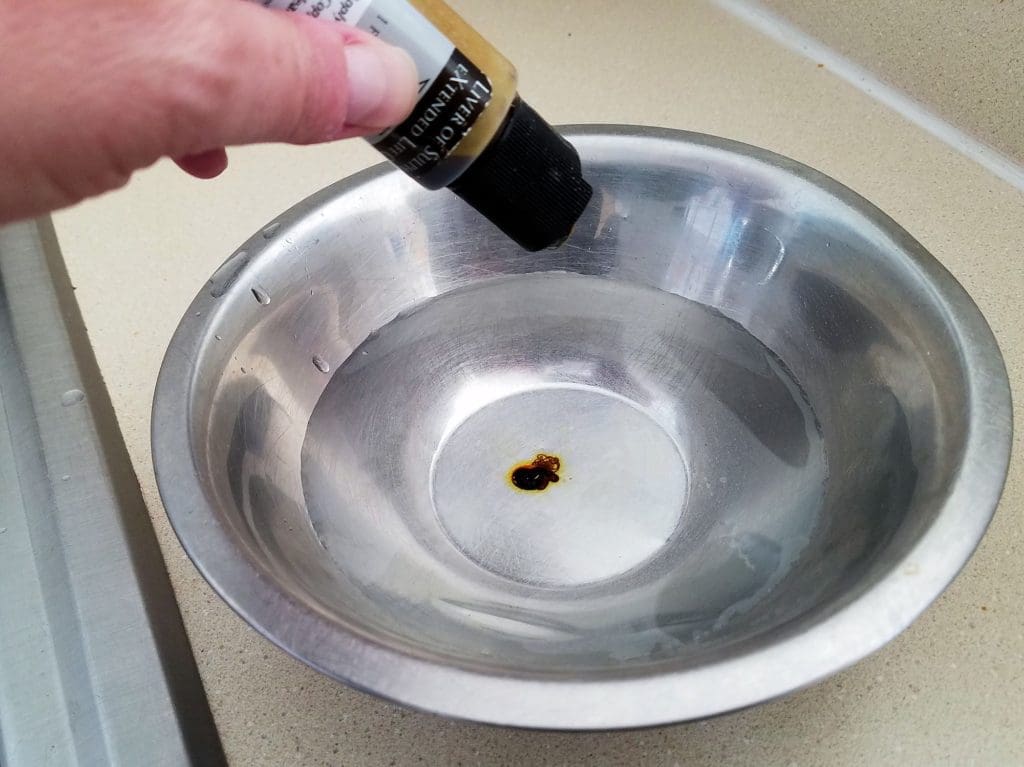
Note: The directions on the LOS bottle calls for 1 teaspoon of LOS gel to 12 ounces of water, but I find that I don’t need to use nearly that much LOS to achieve a finish that I like. Happily, this means that a 1-ounce bottle of LOS gel lasts a very long time.
Step 4 – Patina Your Jewelry with LOS
Submerge your pre-warmed jewelry in the hot LOS solution and swish it around until you achieve a very dark (nearly black) finish, as shown.
Step 5 – Neutralize Your Jewelry to Halt the Patina Process
Once satisfied with the patina, rinse your jewelry thoroughly under running tape water. Then submerge your jewelry in the neutralizing solution again. Stir it around in the neutralizer for at least minute or two. Again, the longer you neutralize your jewelry, the better your jewelry will hold its final finish.
Finally, rinse the jewelry again under running tap water to remove any baking soda residue. Just like the cleaning solution, LOS is a mild acid that will etch the surface of your wire. And it will continue to etch the wire surface as long as the acid remains there. This eventually causes pitting of the wire, which creates more surface area, which will cause your jewelry to oxidize naturally more quickly. Neutralizing those acids will halt that etching process.
Step 6 – Burnish with Steel Wool to Bring Back the Bright Metal Highlights
Prepare a warm bath of water and blue Dawn dish soap. I use a small bucket for this step, but you can just as easily do it in your sink. Using a small wad of wet steel wool, gently burnish your jewelry to bring back bright metal highlights on all the high spots.
This step can be tedious. It’s my least favorite part of the jewelry making process, but it’s so necessary if you want your jewelry to really pop.
Once satisfied with the highlights on your jewelry, thoroughly rinse the jewelry under clean running water to remove any small particles of steel wool. An old toothbrush comes in very handy at this point to help remove all traces of steel wool.
Step 7 – Tumble Polish Your Finished Jewelry
Load your freshly burnished and cleaned jewelry into a tumbler barrel. Fill the barrel to just above the surface of your jewelry with hot tap water and add a generous squirt of Dawn dish soap.
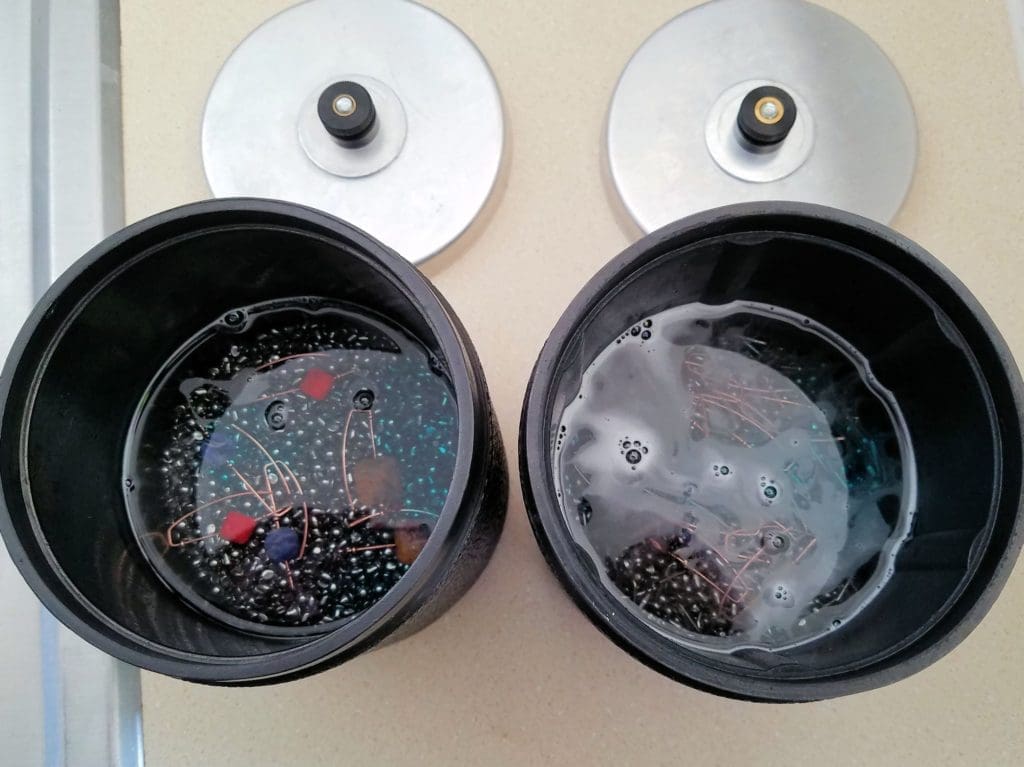
Carefully seal your barrel, put it on the tumbler. Plug your tumbler in and let it run uninterrupted for at least two hours.
That’s it! Dump the contents of your tumbler into a fine-mesh kitchen colander after tumbling. Rinse the jewelry and the shot thoroughly, and pick out your jewelry. I lay my jewelry out to dry on a clean towel, and I air dry my steel shot completely in the colander before putting it back in the barrel for storage.
Tumbler Tips
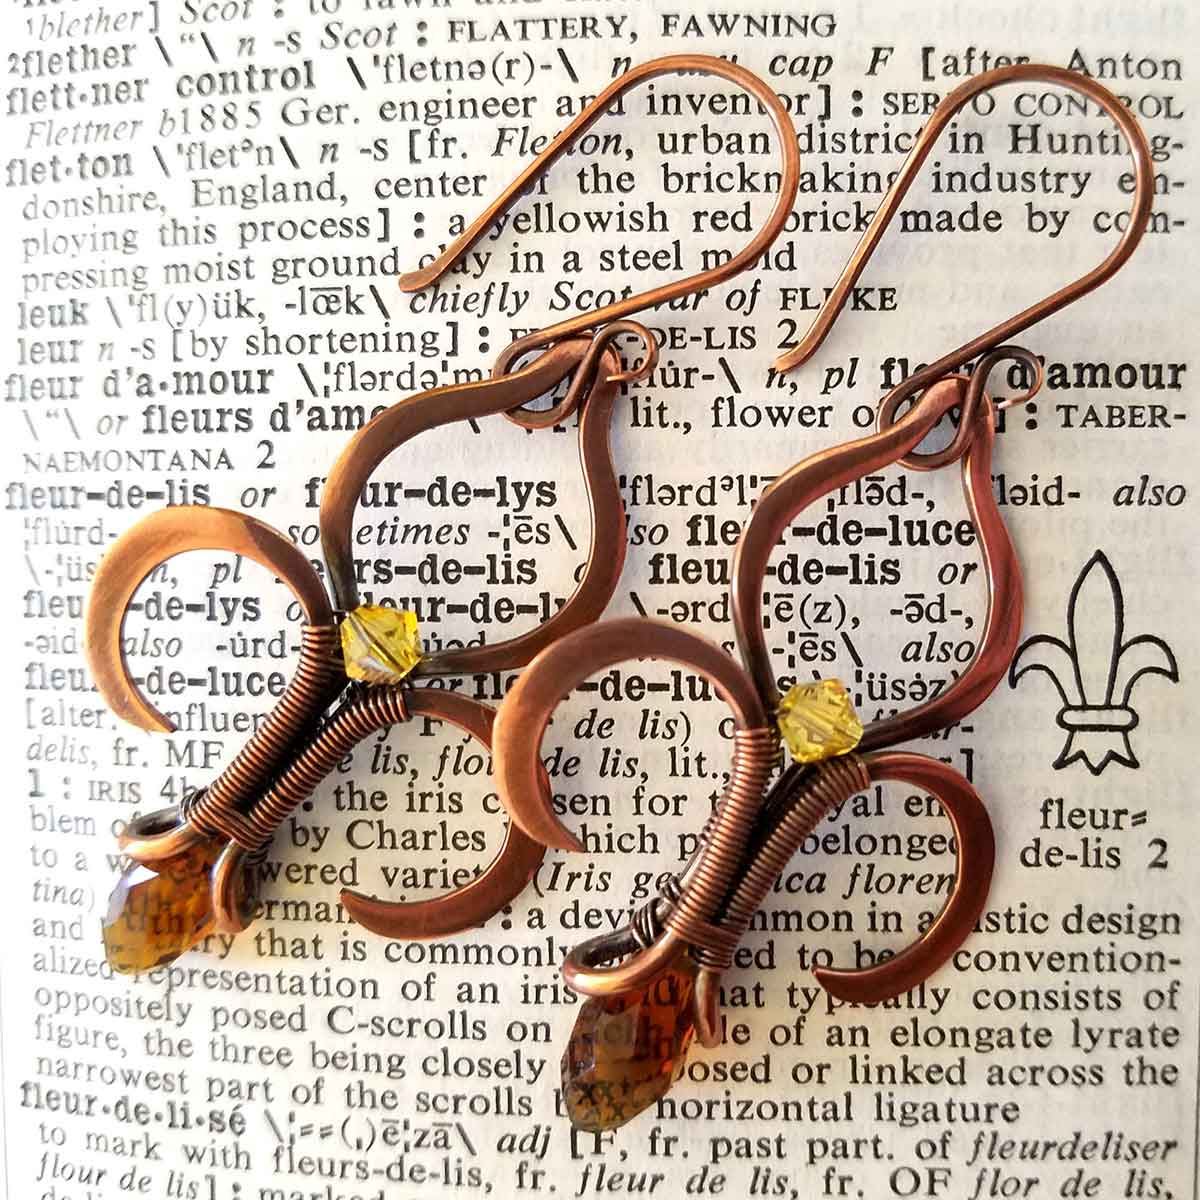
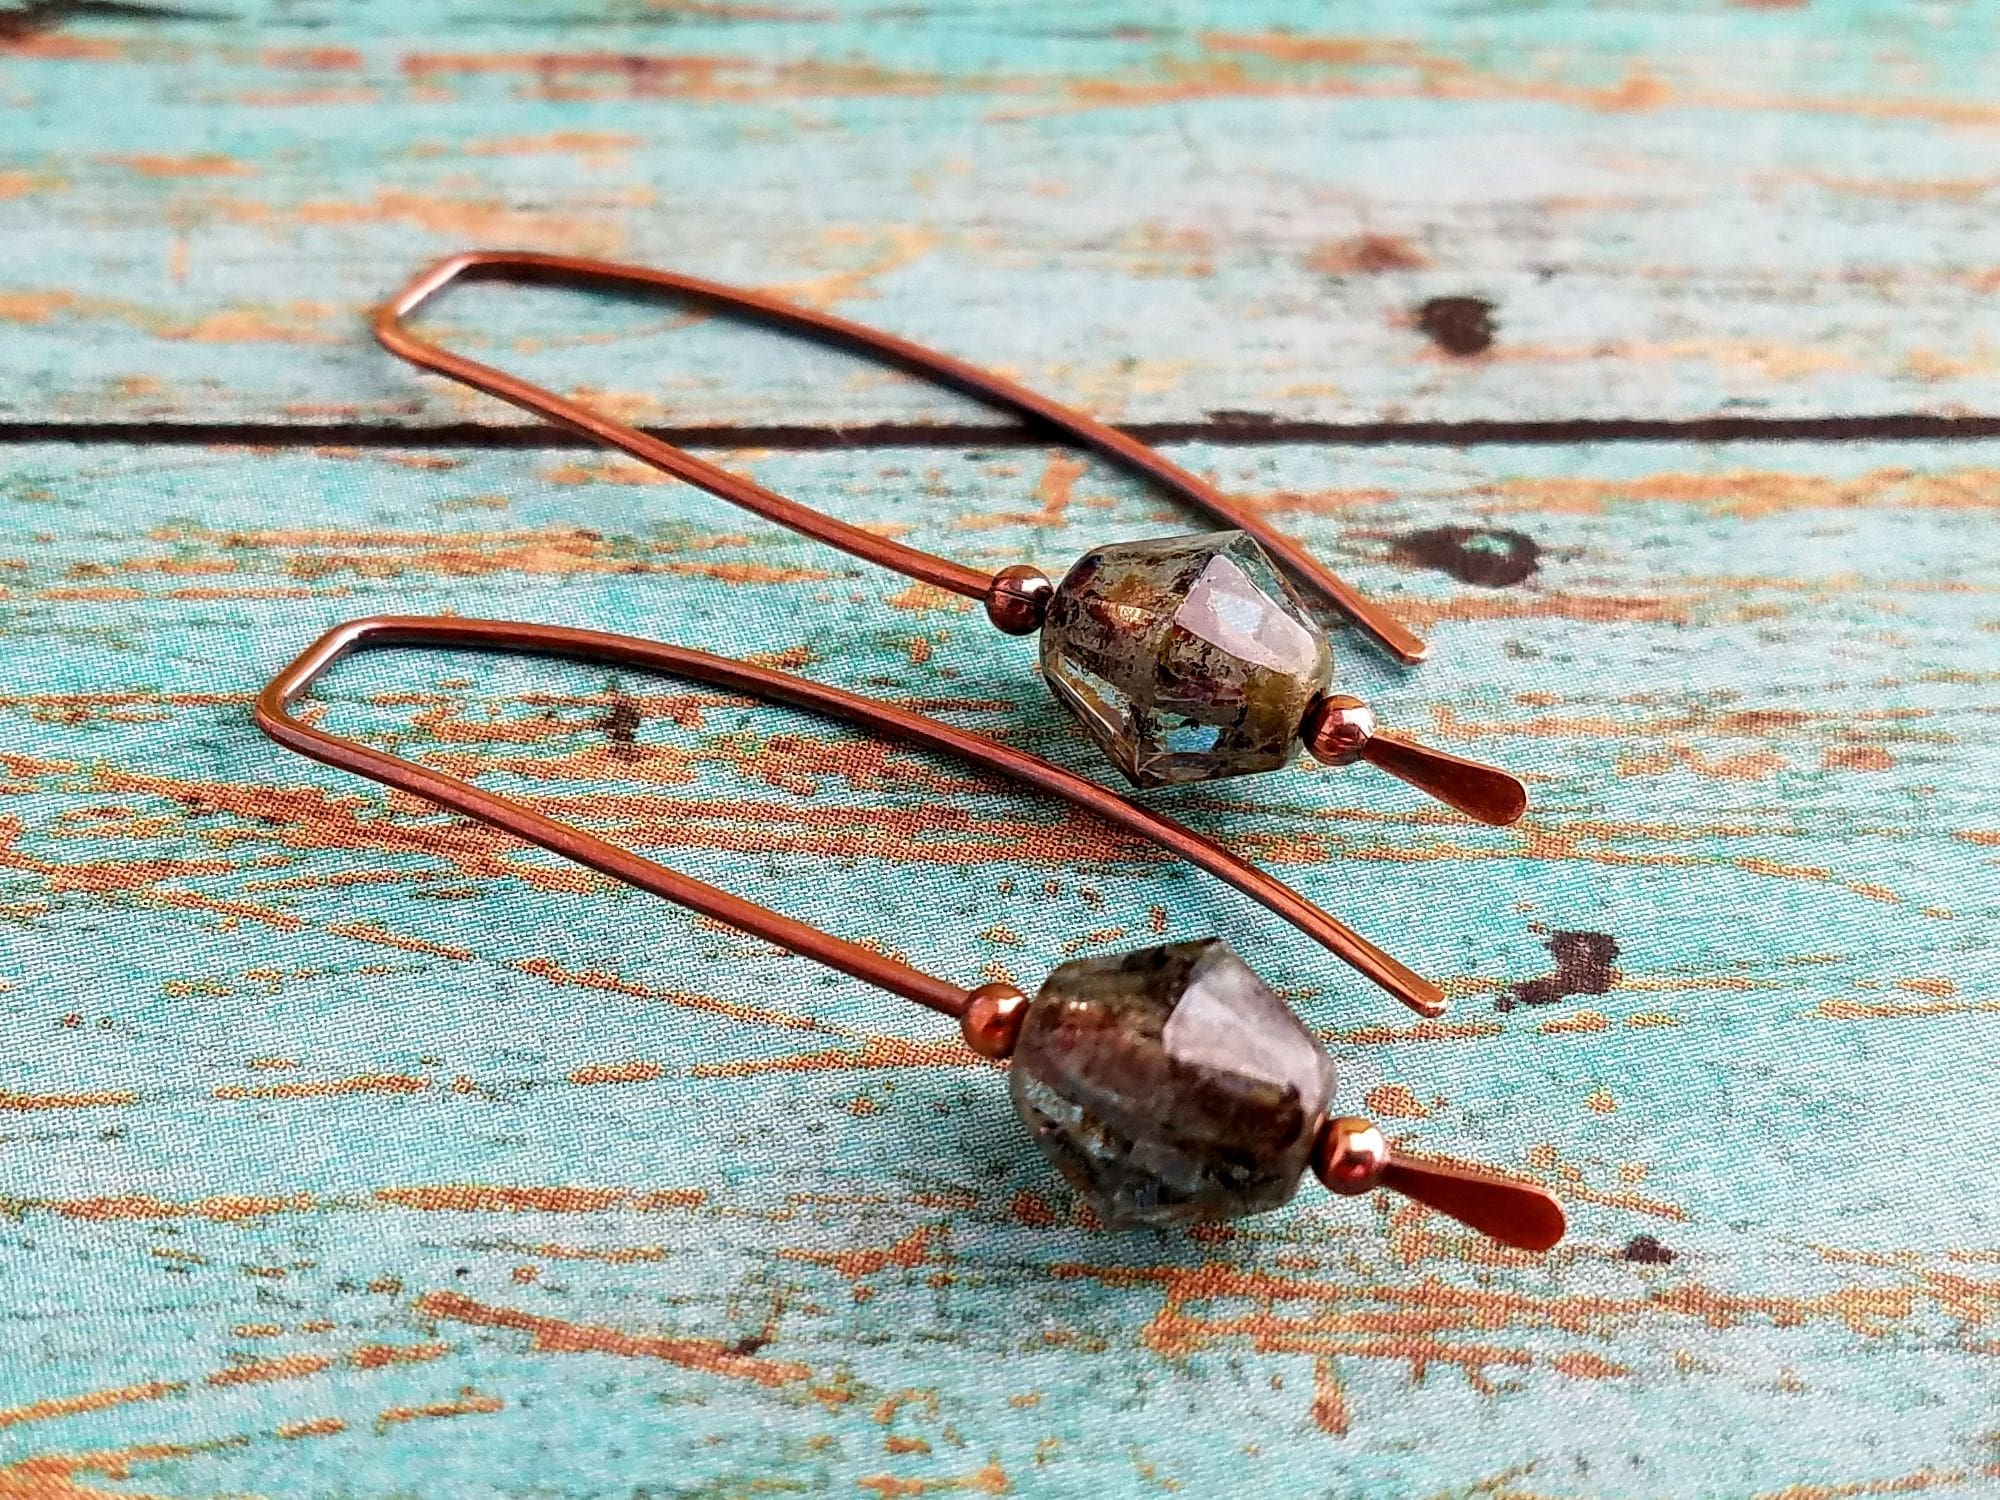
The longer you tumble your jewelry, the better your polish will be. But first determine if the gemstones or beads in your jewelry are safe to tumble. The orange Apple Coral beads in the main image above, for instance, are quite soft and porous. Coral beads don’t tumble well, so I put those earrings in a separate barrel and tumbled them for just one hour. I then finished polishing those earrings by hand.
Be sure to clean your stainless steel shot regularly so you’ll achieve a perfect finish every time you use your tumbler. Wondering how? I have a tutorial for that! If you’d like to learn more about why I recommend tumble polishing specifically, check out this post.
Important Finishing Tips
The cleaning solution I use is the exact same solution that I use to remove fire scale on torched copper or sterling silver wire. The only difference is that I heat that solution (aka pickle) in a small crock pot. The heat helps to more quickly break up the fire scale. Here’s what you need to be aware of whenever using this acidic solution on copper and/or silver:
Cross-Metal Contamination
Never use steel utensils in your cleaning or pickle solution. Because this solution is mildly acidic, it actually etches away the surface of your metal jewelry. If you use it long enough, your cleaning solution will begin to turn blue. That’s because it now contains copper sulfates. Those copper sulfates can bond with and discolor your silver jewelry if you introduce steel into the solution. If I need to fish a piece of jewelry out of my cleaning solution, I always use a clean bamboo skewer. They work wonderfully for this sort of task, and they won’t induce the electroplating effect that steel tools can induce.
Always rinse your sink thoroughly after cleaning and burnishing your jewelry with steel wool. Otherwise, you’ll end up with rust spots. Also, carefully remove all traces of steel wool before putting your jewelry in the tumbler or you’ll contaminate your steel shot, your tumbler barrels, and anything else you use to process the contents of your tumbling barrels.
Common Forms of LOS
LOS comes in two different forms: the dry lump form, which comes in a small plastic tub, and the extended life gel form, which comes in a small metal container (like a paint can) or a plastic bottle. I do not recommend buying the dry lump form as it is not shelf-stable. This LOS is highly susceptible to changes in heat and humidity, and it will go bad on you very quickly.
The gel form is much more stable and will keep indefinitely. It’s also much easier to control the strength of your patina solution with the gel form. So, read the product descriptions carefully — especially when shopping online — to make sure you get the extended life gel form.
Safe Disposal of Toxic Waste
Do not pour your LOS solution down the drain. You need to neutralize it first before you dispose of it. I neutralize my LOS solution by dumping it into my neutralizer solution as soon as I’ve finished processing a batch of jewelry.
Seal the container and allow it to neutralize for a couple of days. You can identify neutralized LOS in two ways. It becomes clear and it no longer smells like sulfur. You can safely dump neutralized LOS down your drain.
As you continue to use your metal cleaning solution, copper sulfates will continue to build up. You’ll know this is happening when the solution begins to turn blue. You can continue to use the solution as long as it’s effective. When you notice that it’s no longer working well, dispose of the cleaner according to the toxic waste disposal guidelines for your community. This applies to your pickle solution as well. Never pour this solution down the drain as high levels of copper sulfates can be highly toxic to humans and animals.
So, are you ready to patina and polish your first batch of jewelry? If so, grab my free Patina Process Checklist. It’ll help you stay organized! Just complete the form below, and you’ll receive your password instantly. Then go to my Resource Library, where you can download the Patina Checklist along with lots of other free resources!
in my resource library
FREE Patina Process Checklist
Subscribe to my newsletter and get instant access to my resource library where you’ll find this file (#103) and so much more!
Discover More Behind Door 44
Thanks so much for joining me today. I hope this tutorial has been helpful.
Want to learn more about making wire jewelry?
I like to share useful wire weaving tips and tricks on my social media channels, and we have some great conversations about wire jewelry in my private Facebook Group. Also, be sure to connect with me @door44studios on Instagram, and Facebook to keep up with everything that’s happening behind Door 44. And if you haven’t already done so, be sure to subscribe to my YouTube channel where you’ll find new wire jewelry videos weekly.
I like to share useful wire weaving tips and tricks on my social media channels, and we have some great conversations about wire jewelry in my private Facebook Group. Also, be sure to connect with me @door44studios on Instagram, and Facebook to keep up with everything that’s happening behind Door 44. And if you haven’t already done so, be sure to subscribe to my YouTube channel where you’ll find new wire jewelry videos weekly.
Until next time, my friend, go make something beautiful!

Pin This Tutorial for Later


Thank you for all you share!❤️
You’re so welcome. Thanks for reading! 😊
Great instructions, but I don’t get how the steel shot in the tumbler doesn’t destroy the glass or stone beads?
Steel shot can damage some glass or stone beads. It depends on the hardness of those beads and the finish. For instance, some glass beads with an acrylic colored or iridescent coating (like glass pearls, for instance) can be damaged in the tumbler. Not so much by the shot itself, but by being immersed in water for an extended period of time. Also, softer gemstones like Howlite, which is a soft, chalky gemstone that’s often dyed to mimic the look of turquoise, will also lose its luster and absorb stains from Liver of Sulfur in the tumbler because those stones are so soft and porous. Again, this isn’t necessarily because of the steel shot, which gently brushes against the stones in a tumbler. These problems are more often caused by being immersed in water for an extended period of time. So, I always recommend that you know the quality of your beads and make the decision to tumble or not accordingly.
I tend to use a lot of quartz and jasper gemstones in my work, and both of those families of gemstones are generally hard enough to withstand a good long tumble. I’m also very particular about the quality of glass beads that I use, and I tend to avoid anything that obviously has a colored or iridized coating (sometimes it’s not always easy to tell the difference, which makes tumbling a bit of a gamble now and then).
When in doubt, refer to the Mohs hardness scale for gemstones. Anything with a hardness of 6 or higher is likely to tumble well without any issues. Gemstones in the 5.5 to 6 range can be more of a gamble. I don’t recommend tumbling anything with a Mohs hardness of 5 or below. For glass beads, your best bet is to test the durability of the finish by tumbling one bead to see how well it holds up to the tumbling process. So, I certainly don’t recommend tumbling every piece of jewelry that you make without question. Sometimes, you’ll inevitably have to polish a piece by hand because the beads are too fragile for tumbling. Personally, I prefer tumbling over hand polishing, so I tend to select beads that I know, through experience and research, are safe to tumble.