

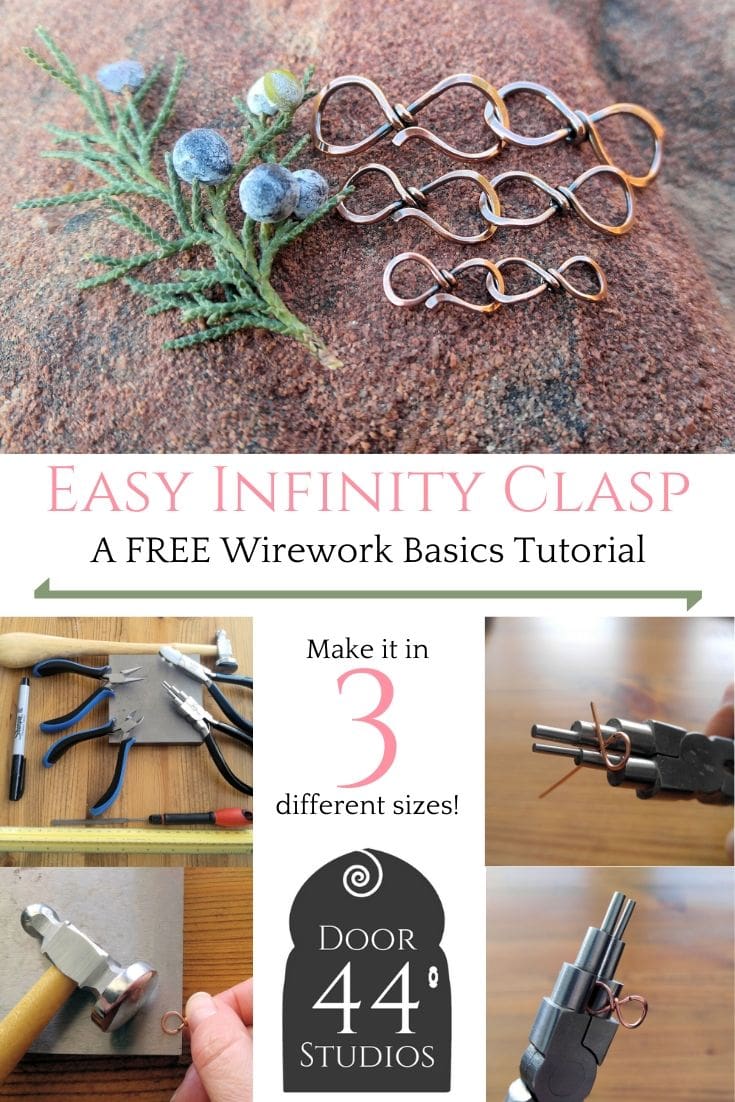
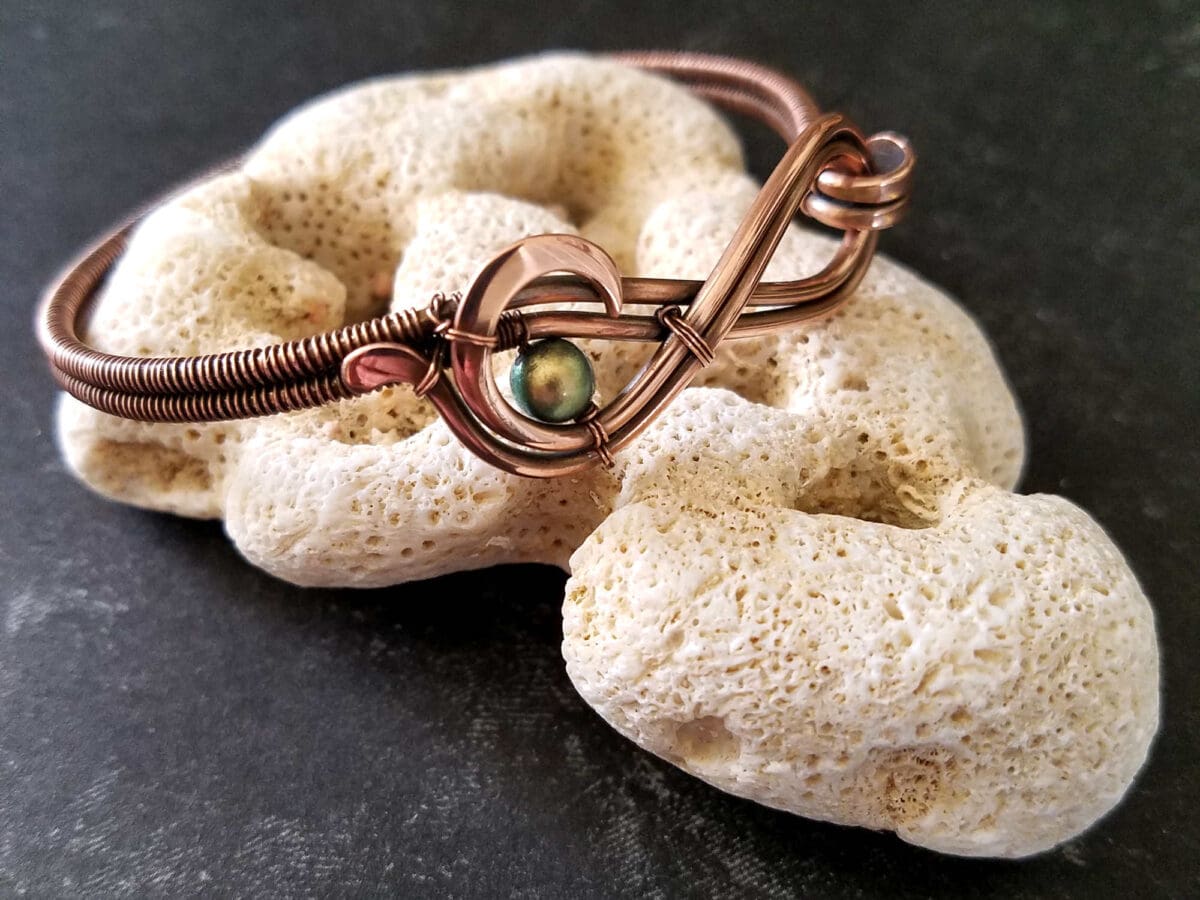
How to Make a Quick & Easy Wire Infinity Clasp
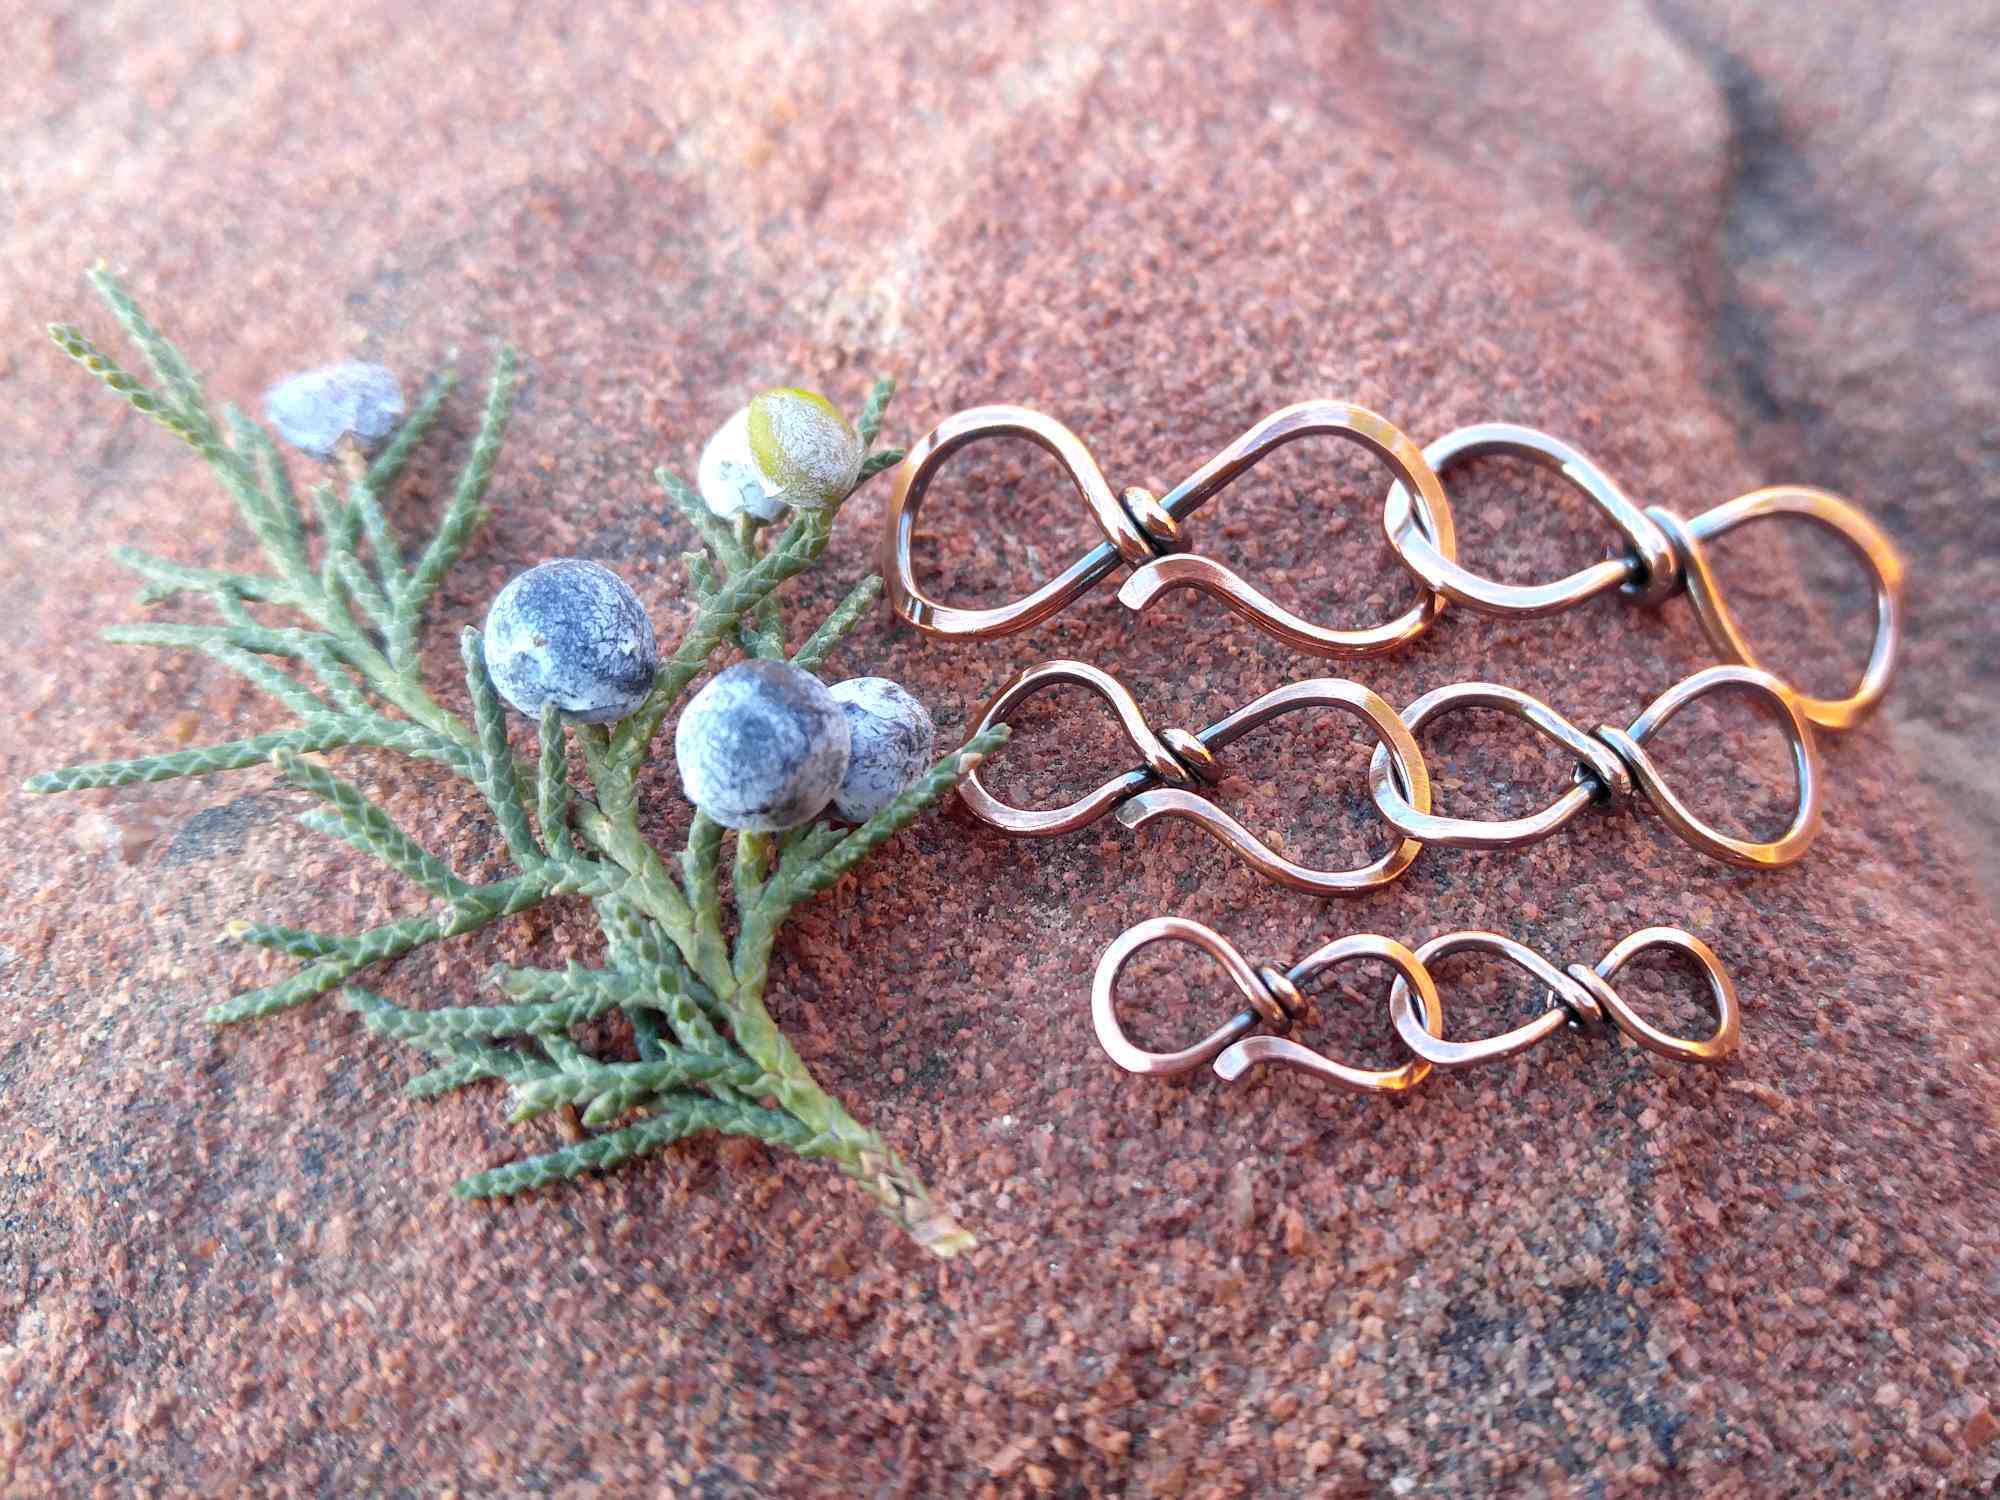
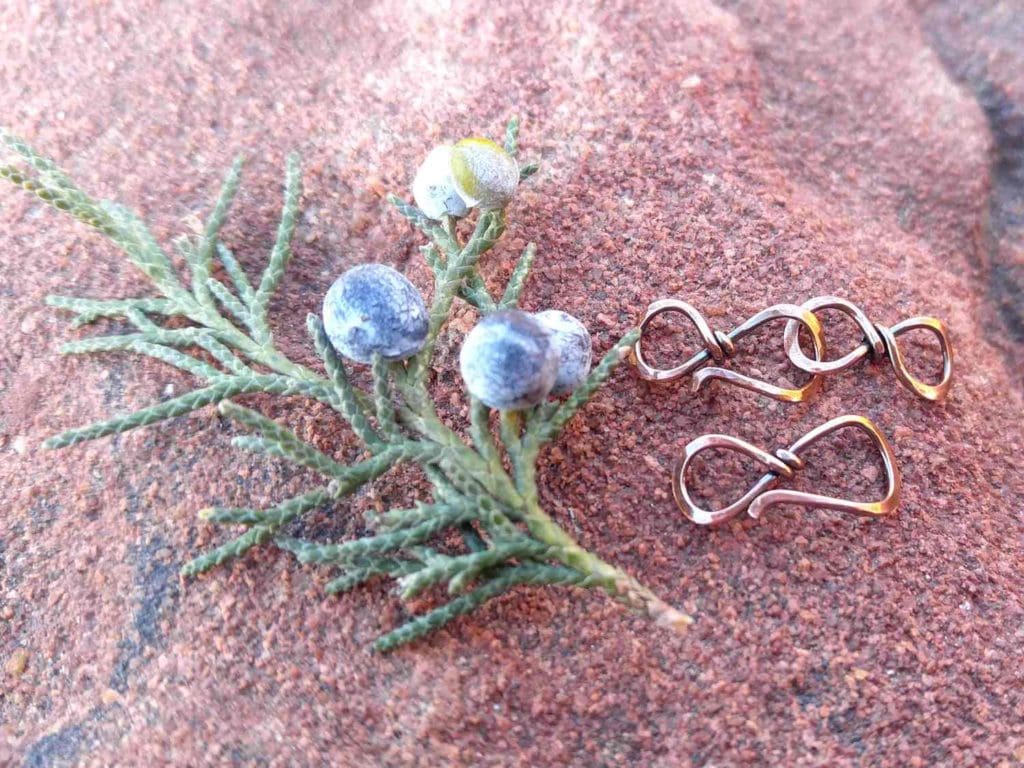
Let’s start with something super simple. This easy infinity clasp was my go-to clasp design when I was making finished jewelry for sale, and I still use it on most of the jewelry I make for myself. I make it in three different sizes and wire gauges, and it works beautifully for everything from my biggest and boldest statement necklaces to my dainty little bar pendant.
I chose this clasp as my first tutorial because I hoped it would be an easy one to write. But because I make this clasp in three different sizes, it presented an unusual challenge. I’ve never seen a single wirework tutorial written for three different sized pieces before, so I had to get creative in my approach to writing this tutorial. I found that the clearest way to communicate three sizes at a time was to borrow a common technique used in crochet patterns.
Let me know how it works for you. If it’s easy to follow, I might extend the technique to future patterns for pendants, earrings, and bracelets that can be made in different sizes.
Copyright & Disclosure
As always, you’re welcome to make and sell products from this tutorial on the condition that you credit Wendi of Door 44 Studios for the design and link back to this page.
When it comes to my written tutorials, however, I reserve exclusive rights to all images and written content. You may not reproduce or redistribute any portion of the Easy Infinity Clasp tutorial in any way, shape, or form. Furthermore, you may not teach the designs contained within this tutorial without my written permission.
This copyright applies to the printable PDF version of the Easy Infinity Clasp tutorial as well, and it’s included therein. Don’t forget, you may share the free version of this tutorial only by linking directly to this page.
This post may contain affiliate links. If you click on a link and then make a purchase, I may earn a small commission (at no cost to you). As an Amazon Associate I earn from qualifying purchases. To learn more, please see my full disclaimer.
Getting Started on the Easy Infinity Clasp
For best results, I recommend using half-hard solid copper or sterling silver wire for this clasp.
If you choose to use a filled wire, be advised that this clasp is finished and hardened by hammering the wire. Hammering may expose the wire core in filled wires, which will affect your final finish.
I don’t recommend using plated or anodized craft wire for this clasp as those finishes will be destroyed through this process.
A clasp is the most vulnerable part of any necklace or bracelet, and it tends to get more wear and tear. So you want your clasp to be a strong and durable as possible. If you choose to use dead soft wire, be sure to spend some extra time work hardening your clasp before using it for a finished necklace or bracelet.
How to Choose the Right Jewelry Wire
Jewelry wire is a constant source of confusion for beginners. I remember those days well! If you’d like to learn how to choose the right jewelry wire for wire weaving, be sure to read this post. In it, I share everything you need to know about jewelry wire as you set out on your wire weaving journey.
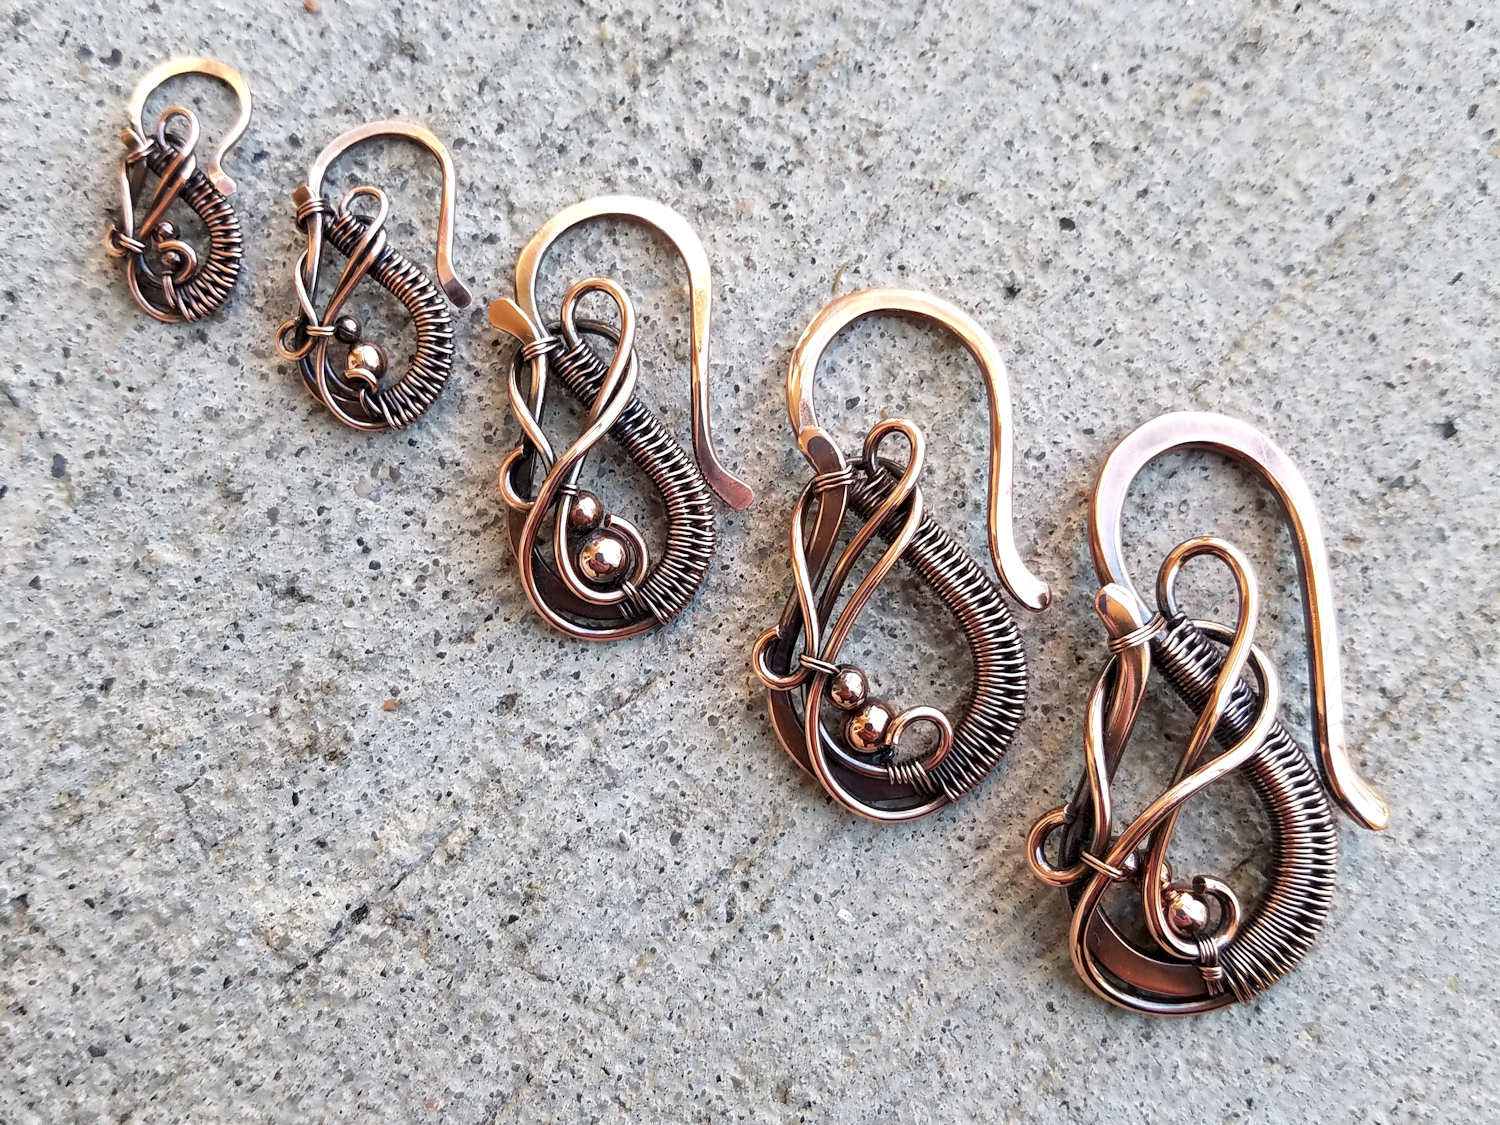
As I mentioned earlier, I make this clasp in three different sizes. And I use a different wire gauge for each size. I’ll refer to those sizes as Small (S), Medium (M) and Large (L) to keep things simple. I’ve included the wire gauges, wire usage, and finished size specifications below.
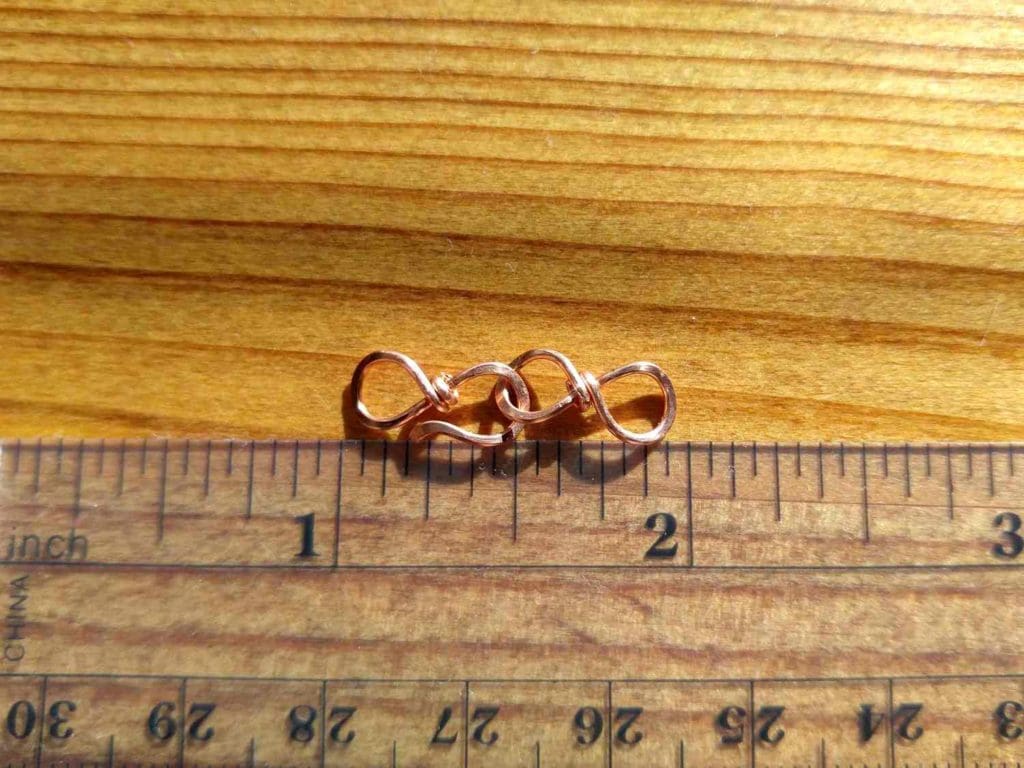
Finished Size: Small (S)
- Wire Gauge: 20g
- Approximate Wire Usage: 5 inches (13 cm)
- Approximate Finished Size: 1 inch (2.5 cm)
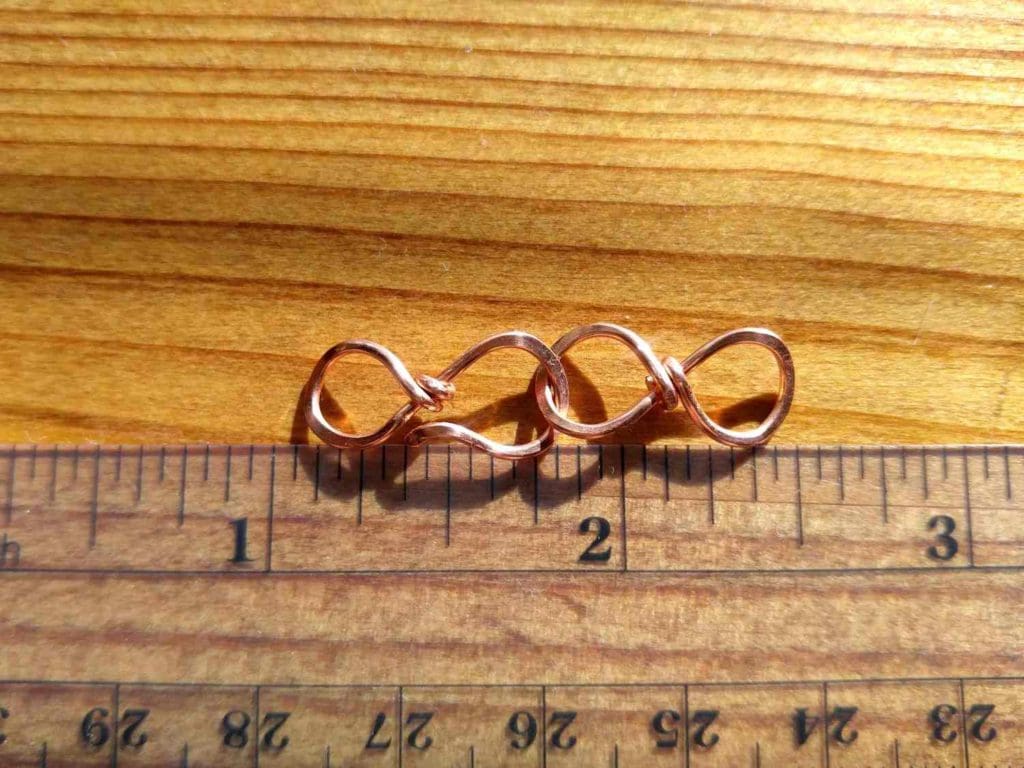
Finished Size: Medium (M)
- Wire Gauge: 18g
- Approximate Wire Usage: 6 inches (15 cm)
- Approximate Finished Size: 1 1/2 inches (3.5 cm)
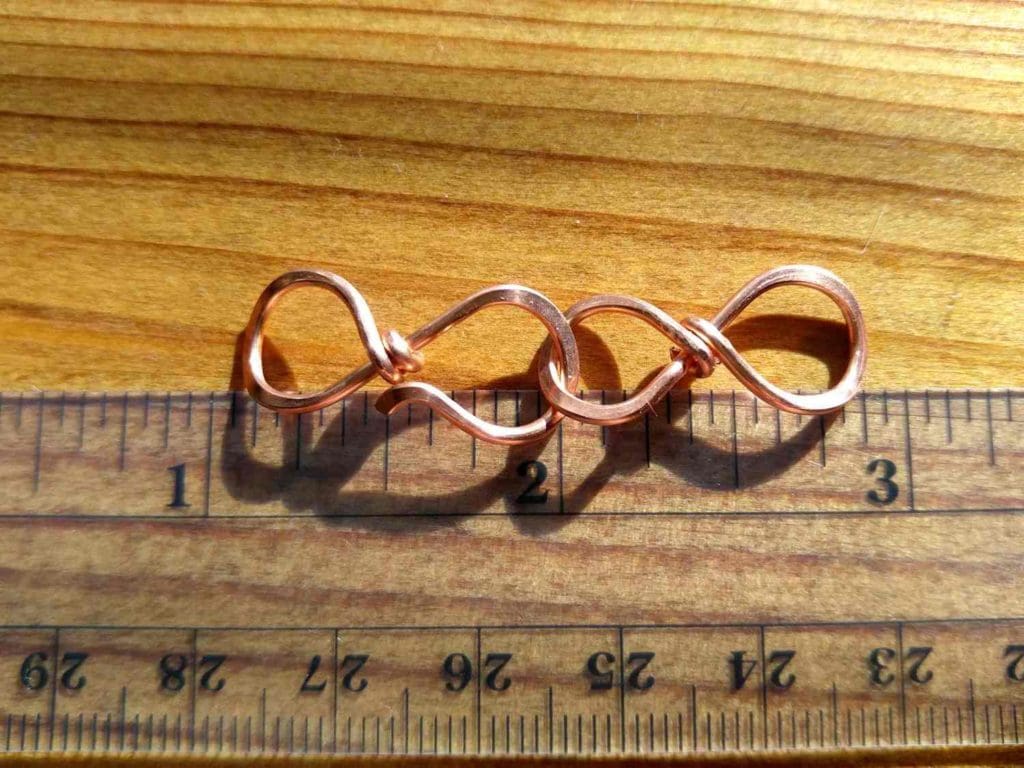
Finished Size: Large(L)
- Wire Gauge: 16g
- Approximate Wire Usage: 8 inches (20 cm)
- Approximate Finished Size: 1 7/8 inches (4.5 cm)
Abbreviations
- RS = Right Side
- WS = Wrong Side
- LOS = Liver of Sulfur (an optional finishing material)

Tools & Materials
- Solid Copper Dead Soft Jewelry Wire (20g, 18g, 16g)
- Wire Cutters
- Chain Nose Pliers
- Stepped Bail-Making Pliers
- Nylon Jaw Pliers
- Needle File
- Chasing Hammer
- Bench Block
- Ruler
- Fine Point Permanent Marker
- Sunshine® polishing cloths (optional). These are the polishing cloths that I use for dry polishing jewelry.
Instructions
This tutorial is written for all three sizes of the Easy Infinity Clasp with the wire gauges and measurements for each size shown throughout this tutorial as S (M-L). Where only one measurement is shown, it applies to all three sizes. The medium-sized clasp, which uses 18g wire, is what is shown in all work-in-progress images.
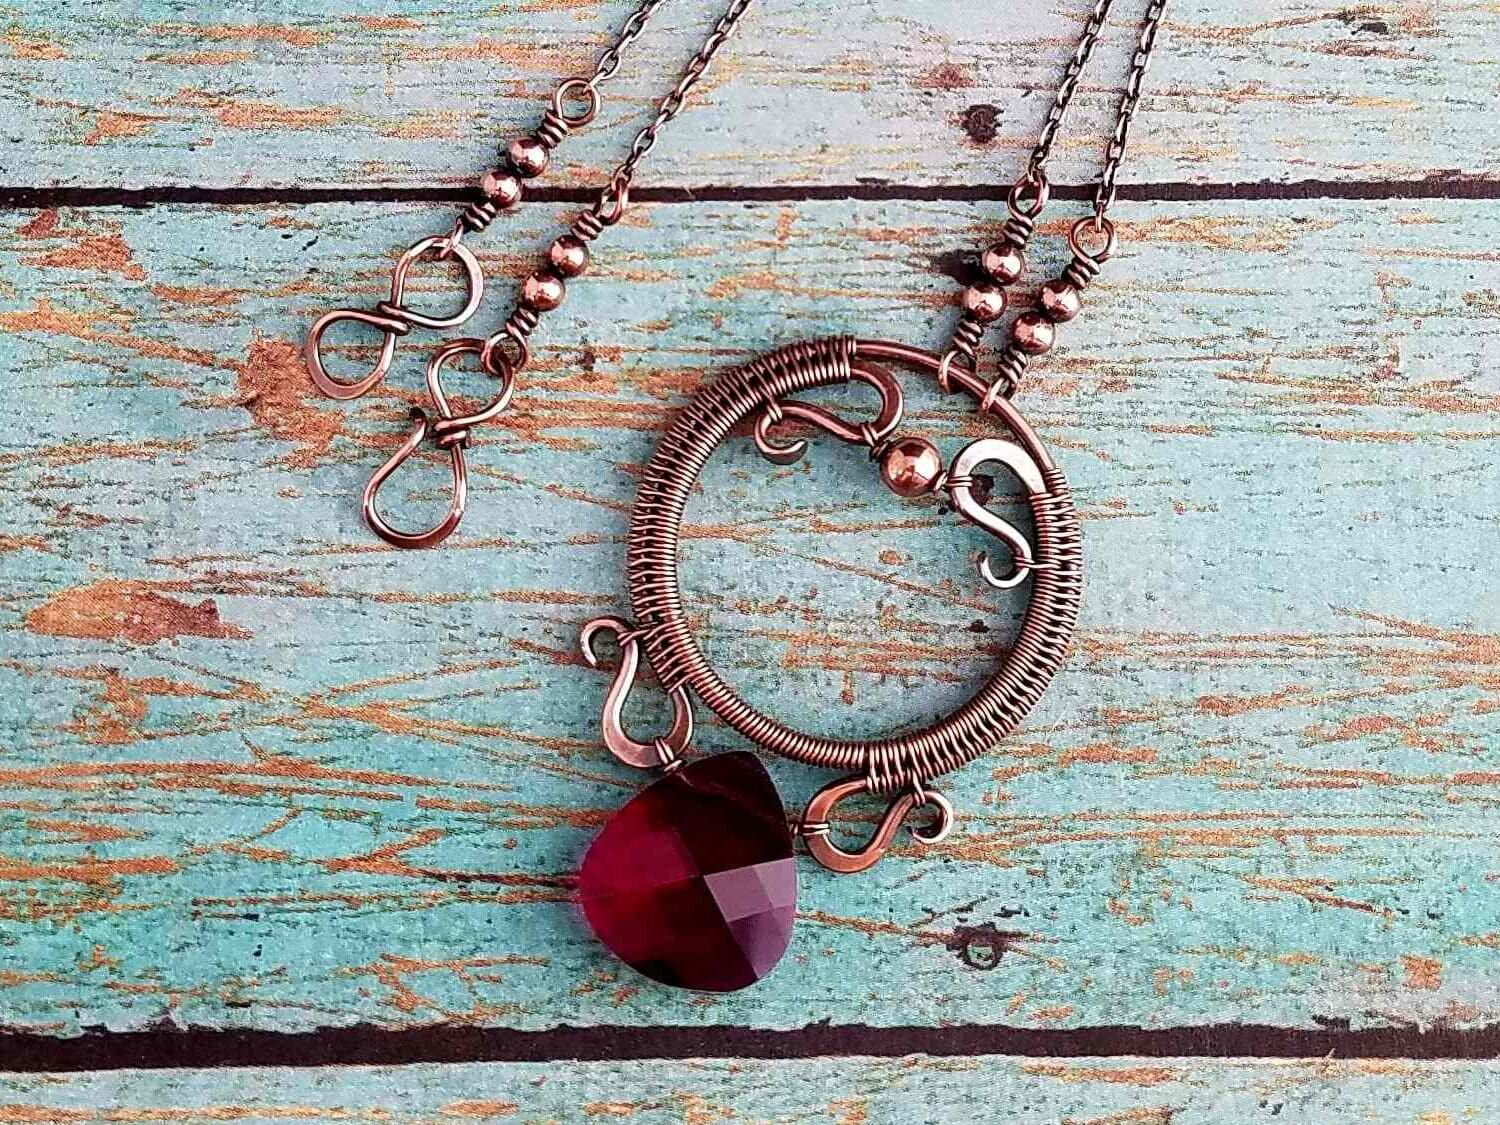
This is a two-piece clasp design with both hook and loop components. However, the closed loop component is optional. If you wish to use only the hook, skip the following section and proceed directly to the Infinity Hook instructions below.
Infinity Loop
Step 1
Cut one piece of 20g (18g-16g) wire 2 1/2 inches (3 inches-4 inches) long. Mark the wire at 1 inch (1 1/4 inch-1 1/2 inch) from one end.
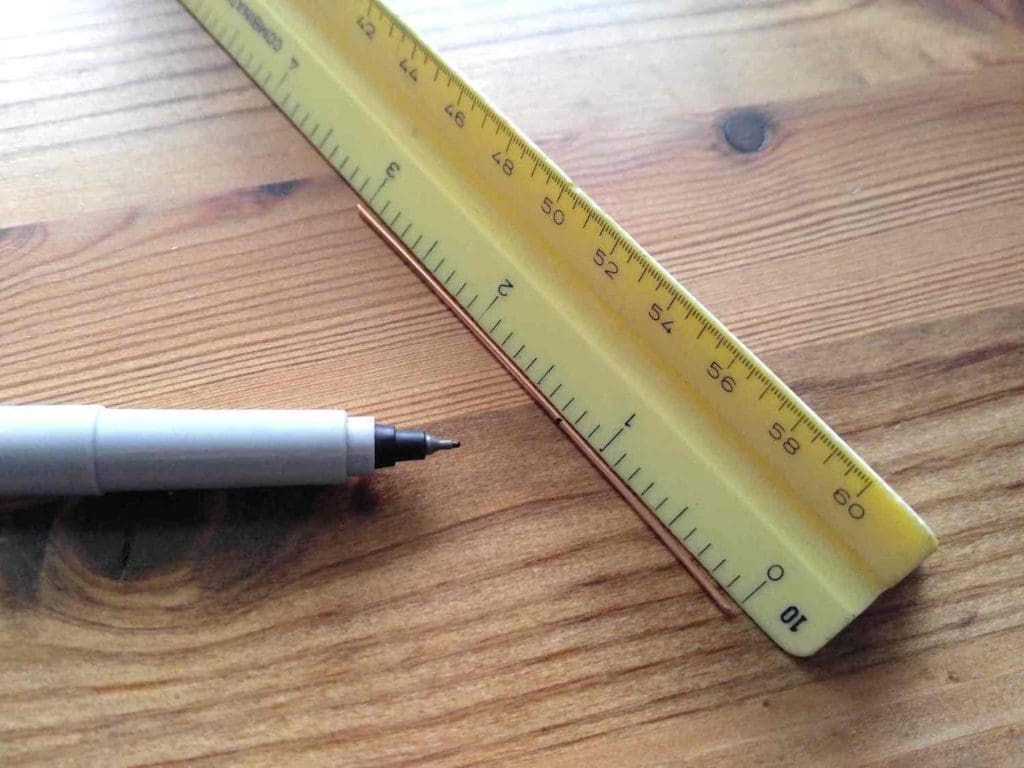
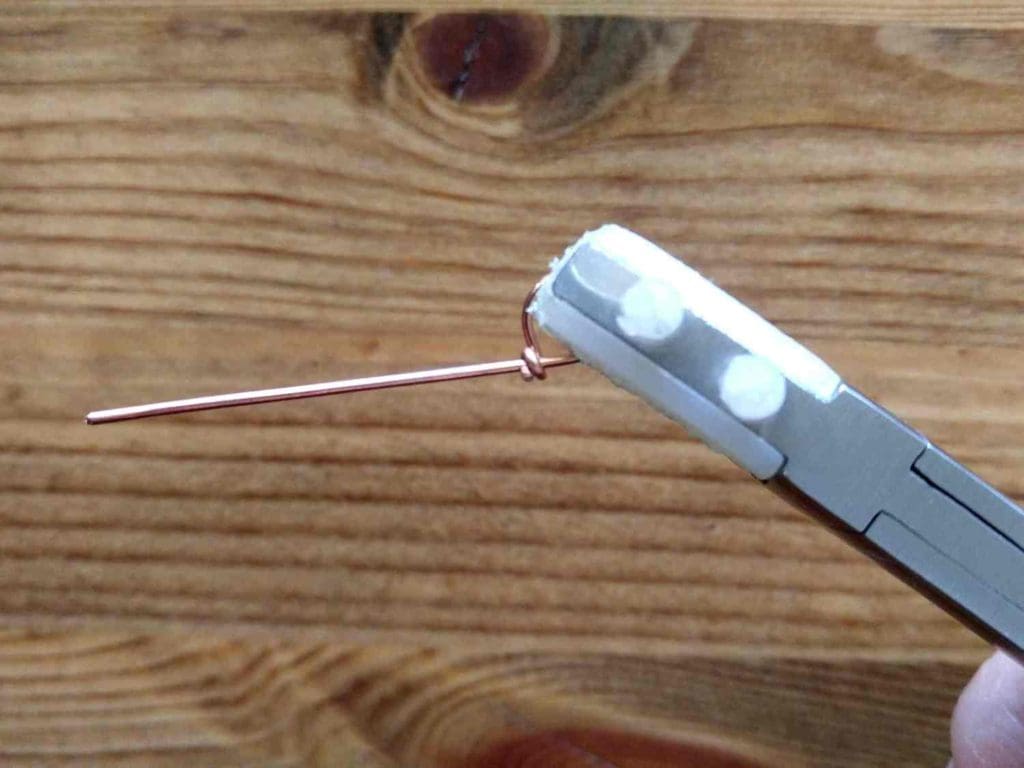
Step 2
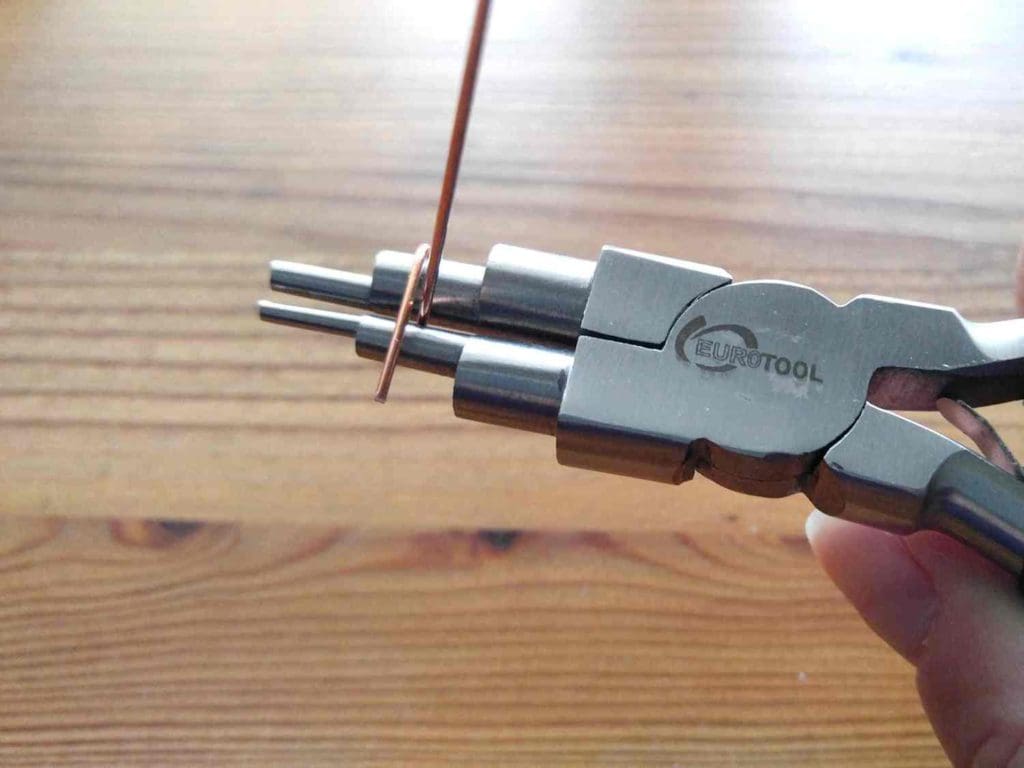
Using the bail making pliers (or mandrel), place the 4 mm (6 mm-8 mm) tip at the mark made in Step 1. Using your thumb and index finger, wrap the short end of the wire around the tip and across the long end of the wire until the cross in the middle forms a 90-degree angle, as shown.
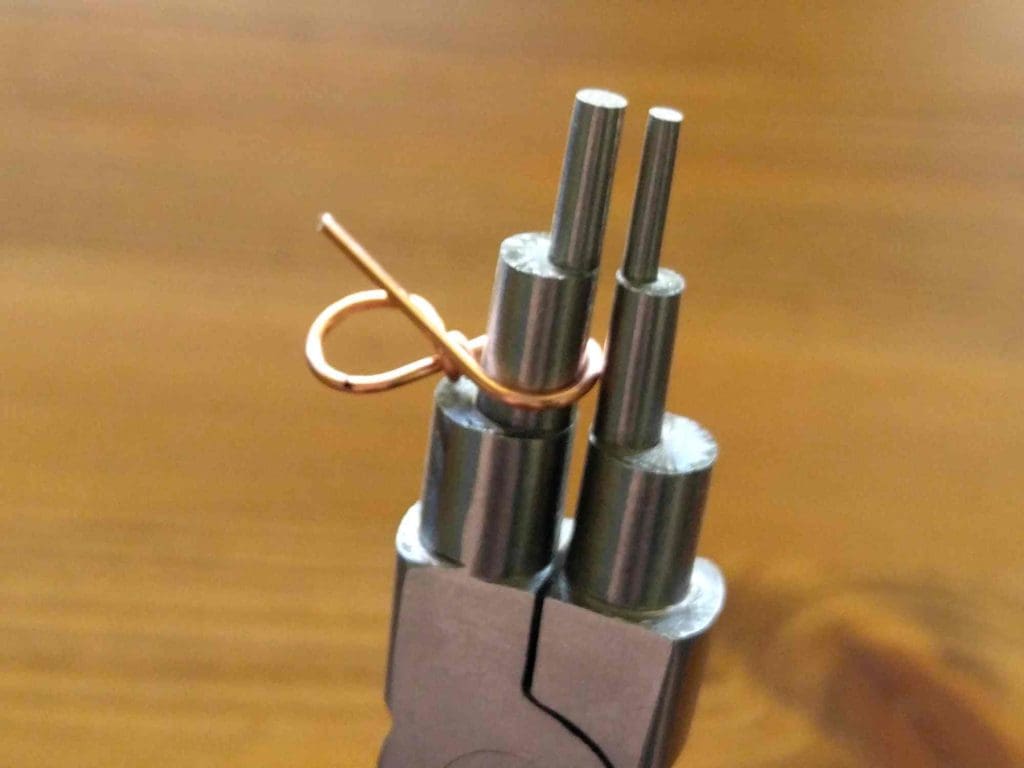
Step 3
Remove the loop from the tip of the mandrel and grasp the long end of the wire with the bail making pliers. Place the 4 mm (6 mm-8 mm) tip close to the point where the wires are crossed, making sure that your mandrel is positioned so you can wrap the wire in the opposite direction of the first loop.
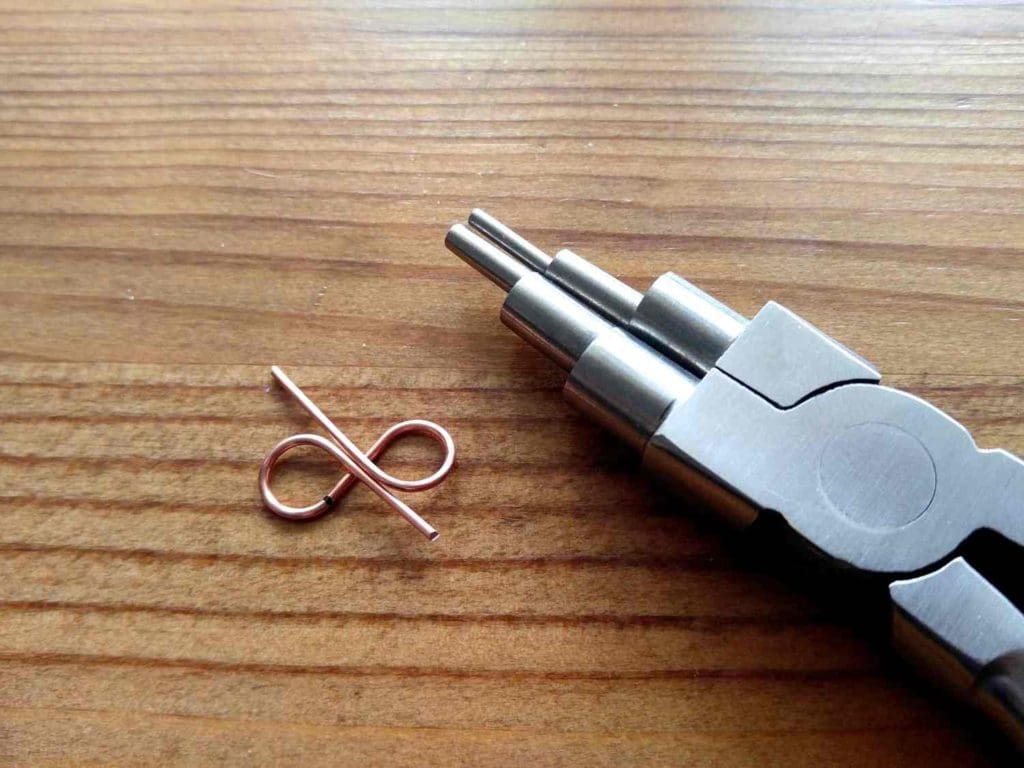
Remember, you’re forming a figure 8 with the wire, so make sure you wrap the wire in the direction necessary to complete that figure. Using your fingers, wrap the straight end of the wire around the tip and across the center until the wires cross to form a 90-degree angle and the two cut ends of the wire lay parallel to one another.
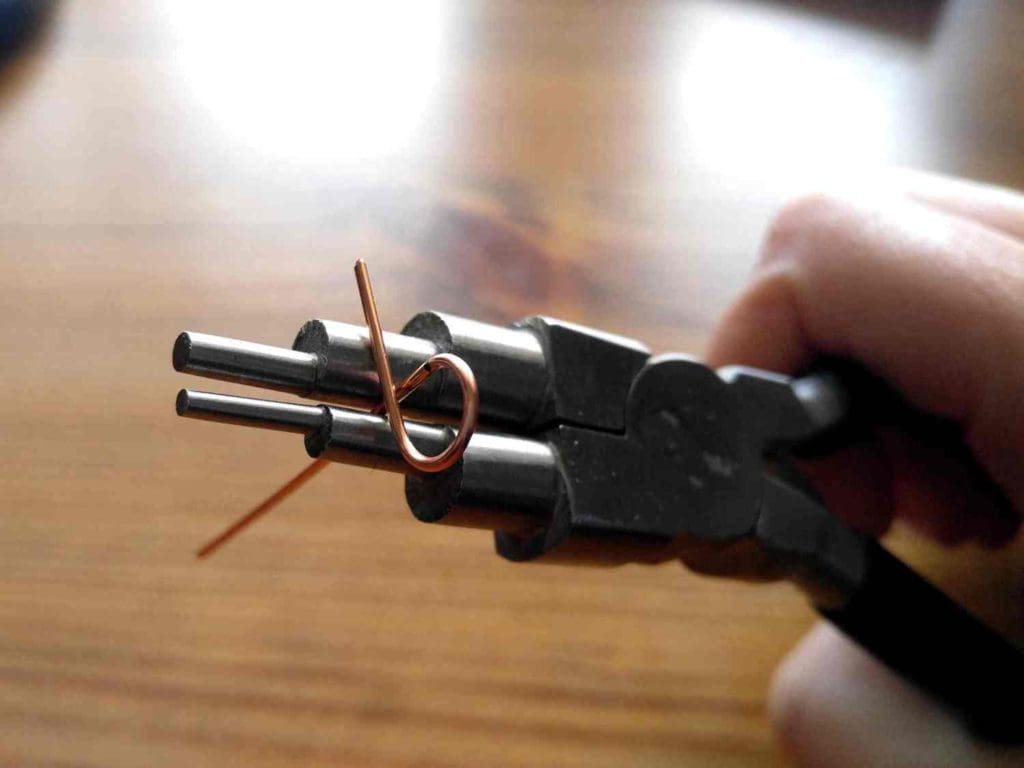
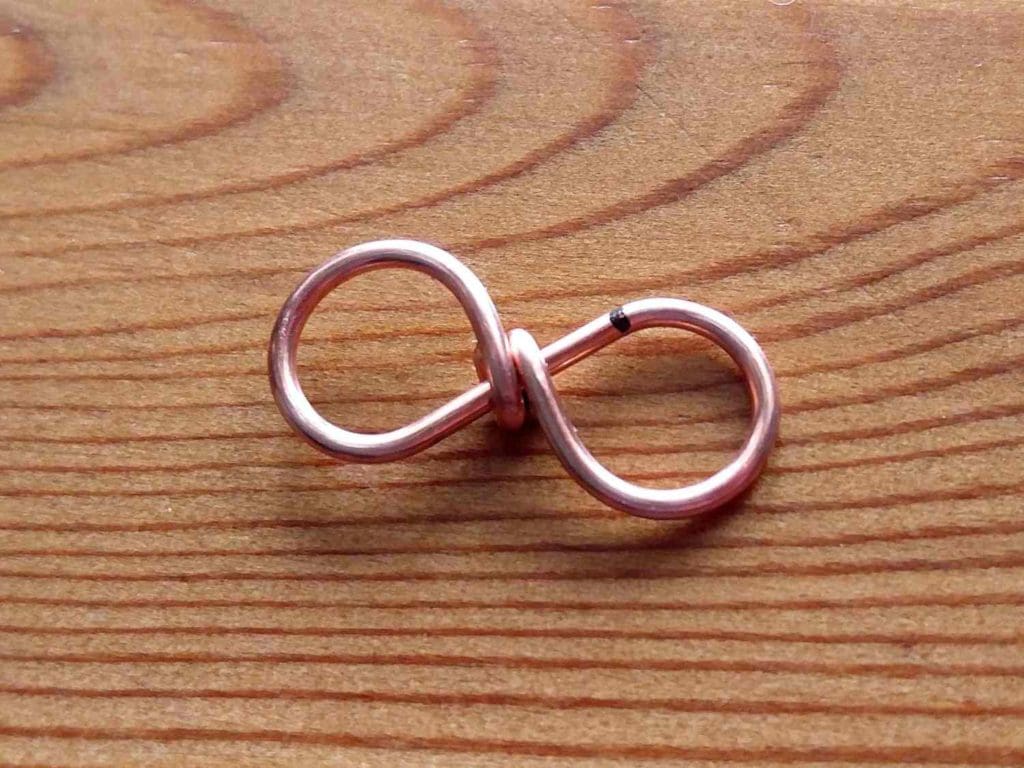
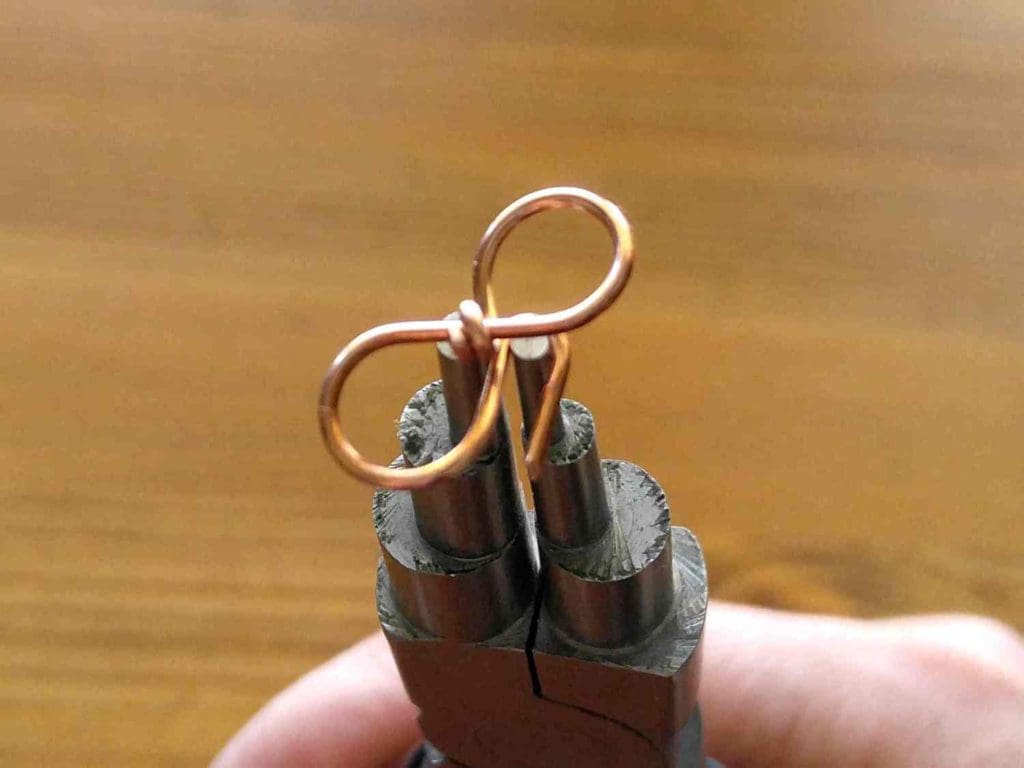
NOTE: Both ends should cross over on the same side, as shown below. This is the Right Side (RS) of your component.
Step 4
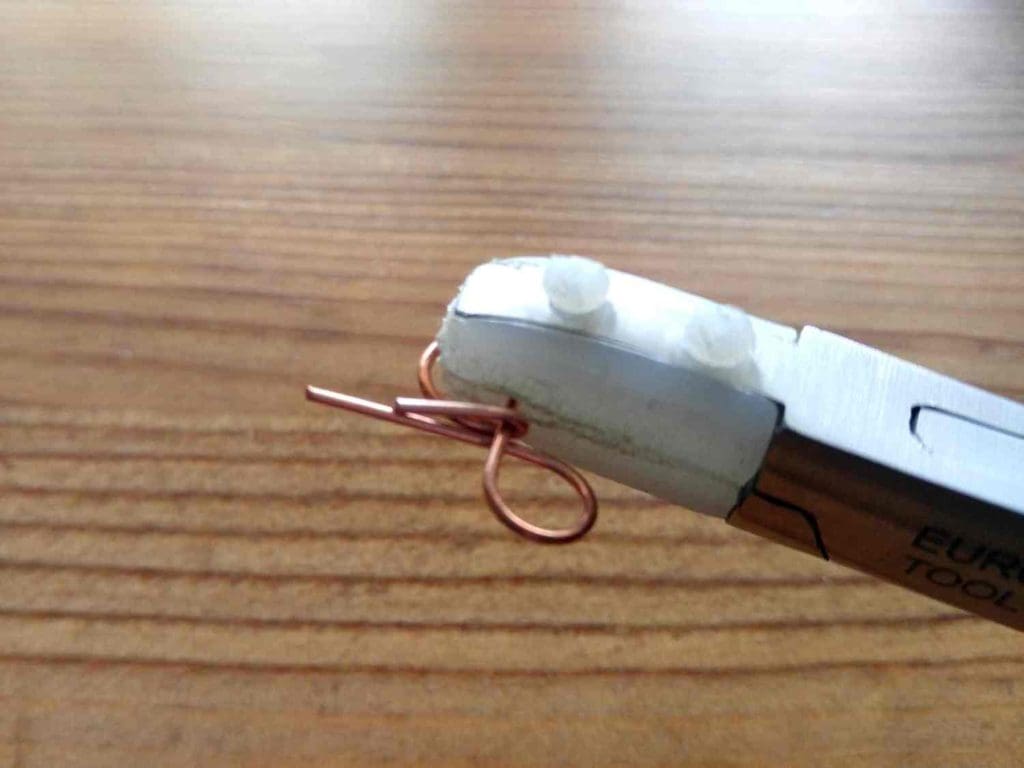
Using your nylon jaw pliers, grasp one loop tightly, as shown, and wrap the end of the wire around to the Wrong Side (WS) of the component.
Trim the end of the wire close to the intersection with your wire cutters, and complete the wrap with your chain nose pliers. Remove any sharp burrs with your needle file, if necessary. The finished wrap should be very tight and secure on the WS of the component.
Step 5
Repeat step 4 for the second closed loop. Looking at the RS of your component, you should now have two clean wraps around the center point. Use your chain nose pliers to squeeze the wraps together if there is a gap between them. Tighten each wrap now, if necessary, to make sure they remain snug and that the cut ends aren’t visible from the RS of the clasp.
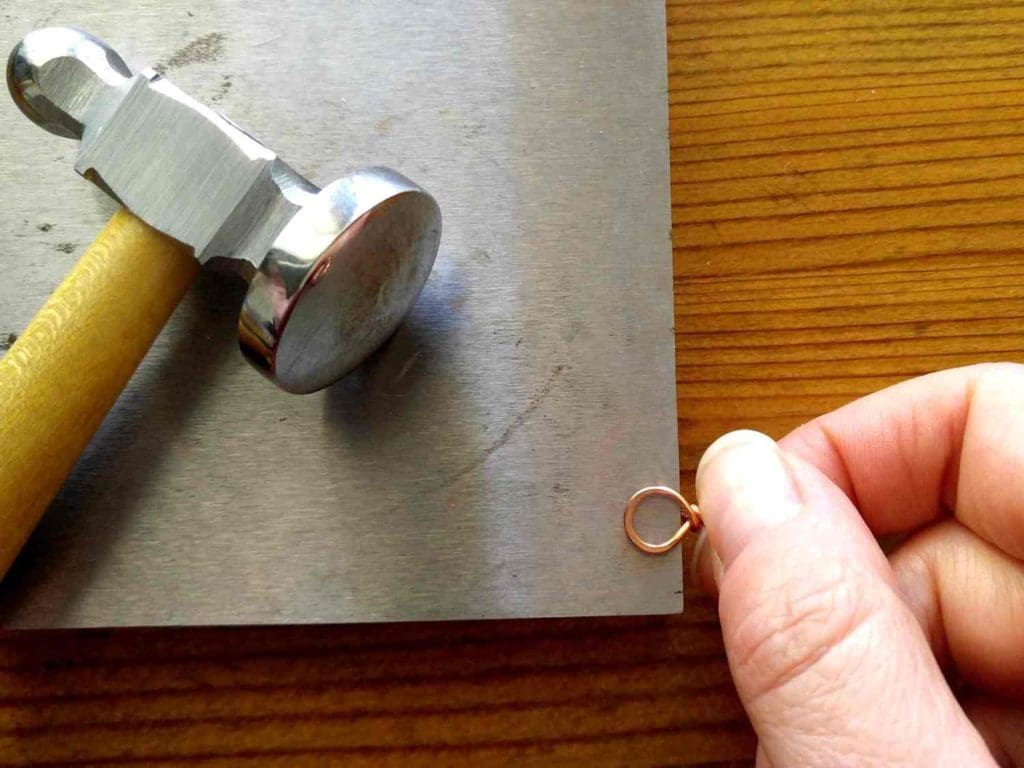
Step 6
Using the chasing hammer and bench block, carefully flatten the loops on each side of the component. Be careful not to mark the center wraps with the hammer.
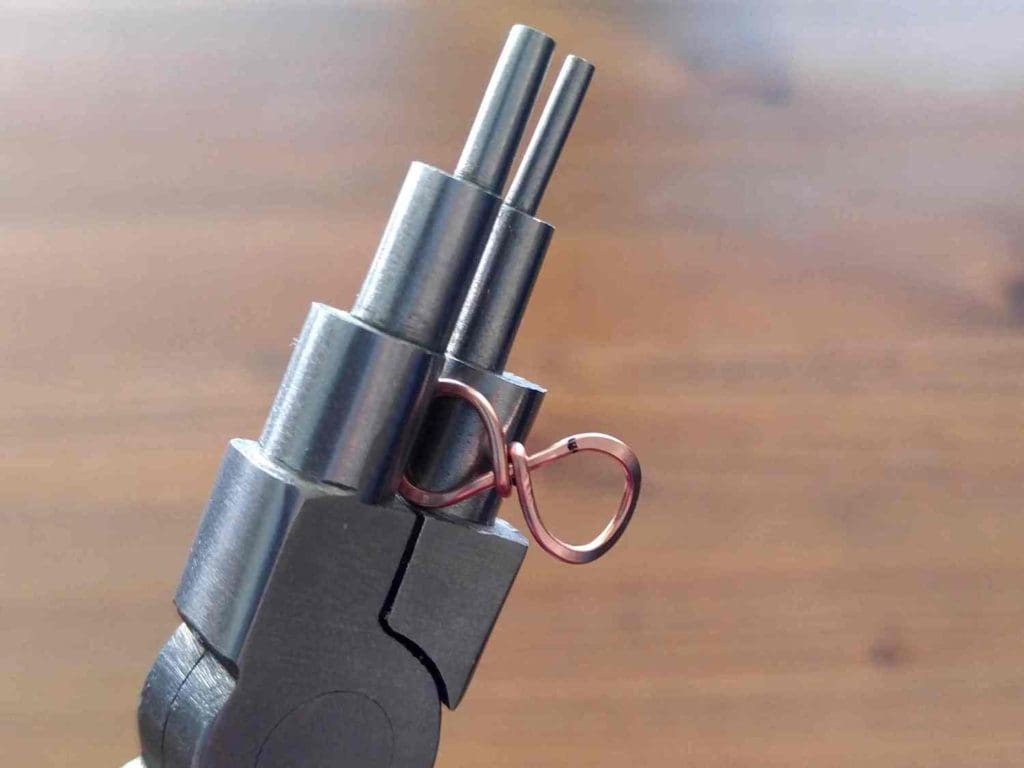
Step 7
Place the 6 mm (8 mm-9 mm) tip of your bail pliers or mandrel beneath the RS of one loop. Use your fingers to gently shape the loop around the mandrel to form a gentle convex curve. Repeat on the second loop.
Infinity Hook
Step 1
Cut a piece of 20g (18g-16g) wire 2 1/2 inches (3 inches-4 inches) long. Mark the wire at 1 inch (1 1/4 inch-1 1/2 inch) from one end.
Step 2
Using the bail making pliers (or mandrel), place the 4 mm (6 mm-8 mm) tip at the mark made in Step 1. Use your fingers to wrap the short end of the wire around the tip and across the long end of the wire until the cross in the middle forms a 90-degree angle, as shown.
Step 3
Using your nylon jaw pliers, grasp the loop you just made, as shown, and wrap the short end of the wire twice around the core (center) wire.
Trim the excess with your wire cutters, smooth the cut end with your needle file, and tuck the trimmed end firmly against the core wire with your chain nose pliers. The side with the trimmed end is now the WS of the hook. Make sure the cut end isn’t visible from the RS and that the two wraps are compressed neatly together.
Step 4
Grasp the long end of the wire with the bail making pliers. Place the 4 mm (6 mm-8 mm) tip close to the point where the wires are crossed, making sure that your mandrel is positioned so you can wrap the wire in the opposite direction of the first loop.
Remember, you’re forming a figure 8 with the wire, so make sure you wrap the wire in the correct direction to complete that figure. Use your fingers to wrap the straight end of the wire around the tip and across the center until the wires cross to form a 90-degree angle and the cut end of the wire lays parallel to the two wraps on the loop you just finished in step 4.
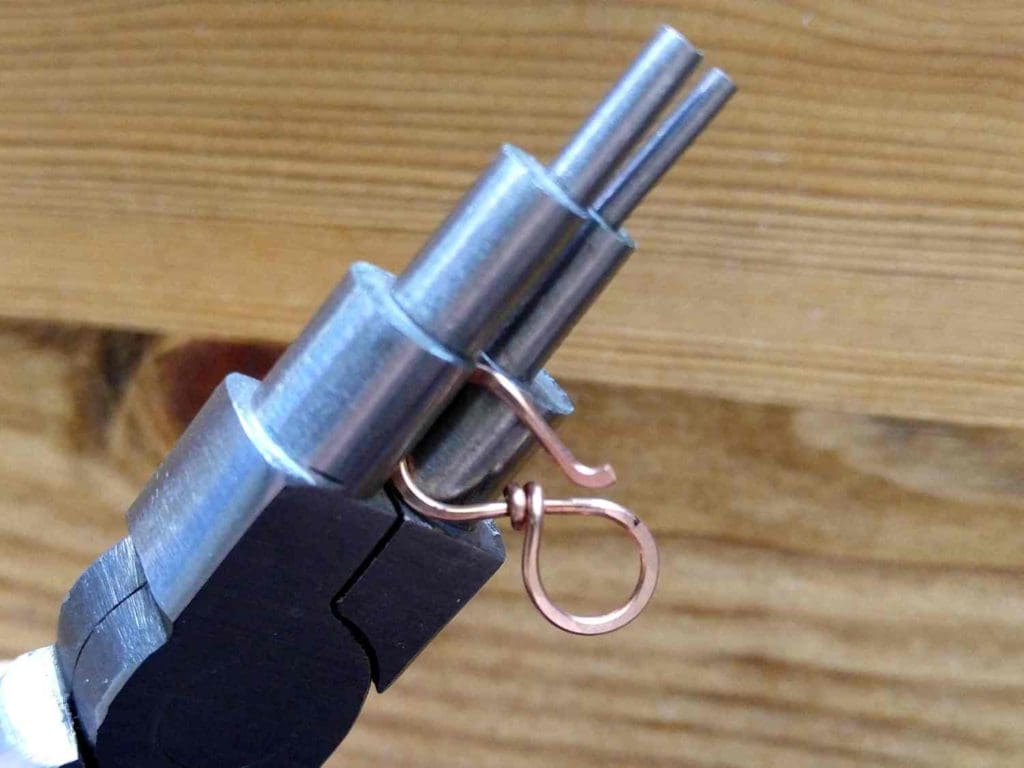
NOTE: The unfinished end should cross over on the RS, as shown.
Step 5
Grasp the unfinished end of your wire at the point where it crosses the center wraps with the tip of your bail making or round nose pliers. Then wrap the end of the wire in the opposite direction of the unfinished hook. Continue to pull the wire around the tip of your pliers until it is parallel to the edge of the hook. Then trim the excess with your wire cutters in the center of the small curve you just made. Smooth the cut end with your needle file.
Step 6
Use the chasing hammer and bench block to carefully flatten the loops on each side of the component as well as the tip of the hook. Be careful not to mark the center wraps with the hammer.

Step 7
Place the 6 mm (8 mm-9 mm) tip of your bail pliers or mandrel beneath the RS of one loop. Use your fingers to gently shape both the closed loop and the open hook around the mandrel to form a gentle convex curve. Grasp the tip of the hook with the 2 mm tip of the bail pliers or the tip of your round nose pliers and gently form a soft curve toward the WS of the hook.
Your Easy Infinity Clasp components are now complete. If you used half-hard wire, the components should be quite solid. However, you can further harden them by gently flexing and twisting the loops. If the two center wraps have slipped apart on your closed infinity loop, you can correct that by gently twisting the looped ends in opposite directions until the gap between the wraps closes.
The slightly convex curve of the components does two things: First, it keeps any sharp points or burrs off the skin of the neck, making the clasp more comfortable to wear. Secondly, it gives the clasp a sculptural quality unique to hand-forged jewelry findings.
Handmade components, when done well, can elevate the perceived value of your jewelry. So, it pays to make your own jewelry findings whenever possible. That extra handcrafted detail will undoubtedly make your jewelry stand out in a very crowded marketplace.
Variations of the Easy Infinity Clasp
Add a light-catching texture to your Easy Infinity Clasp by using the ball end of your chasing hammer to lightly facet the flattened portions of your clasp components. Not only does faceting give your finished clasp a bit of bling, it can also hide unsightly tool marks on your components.
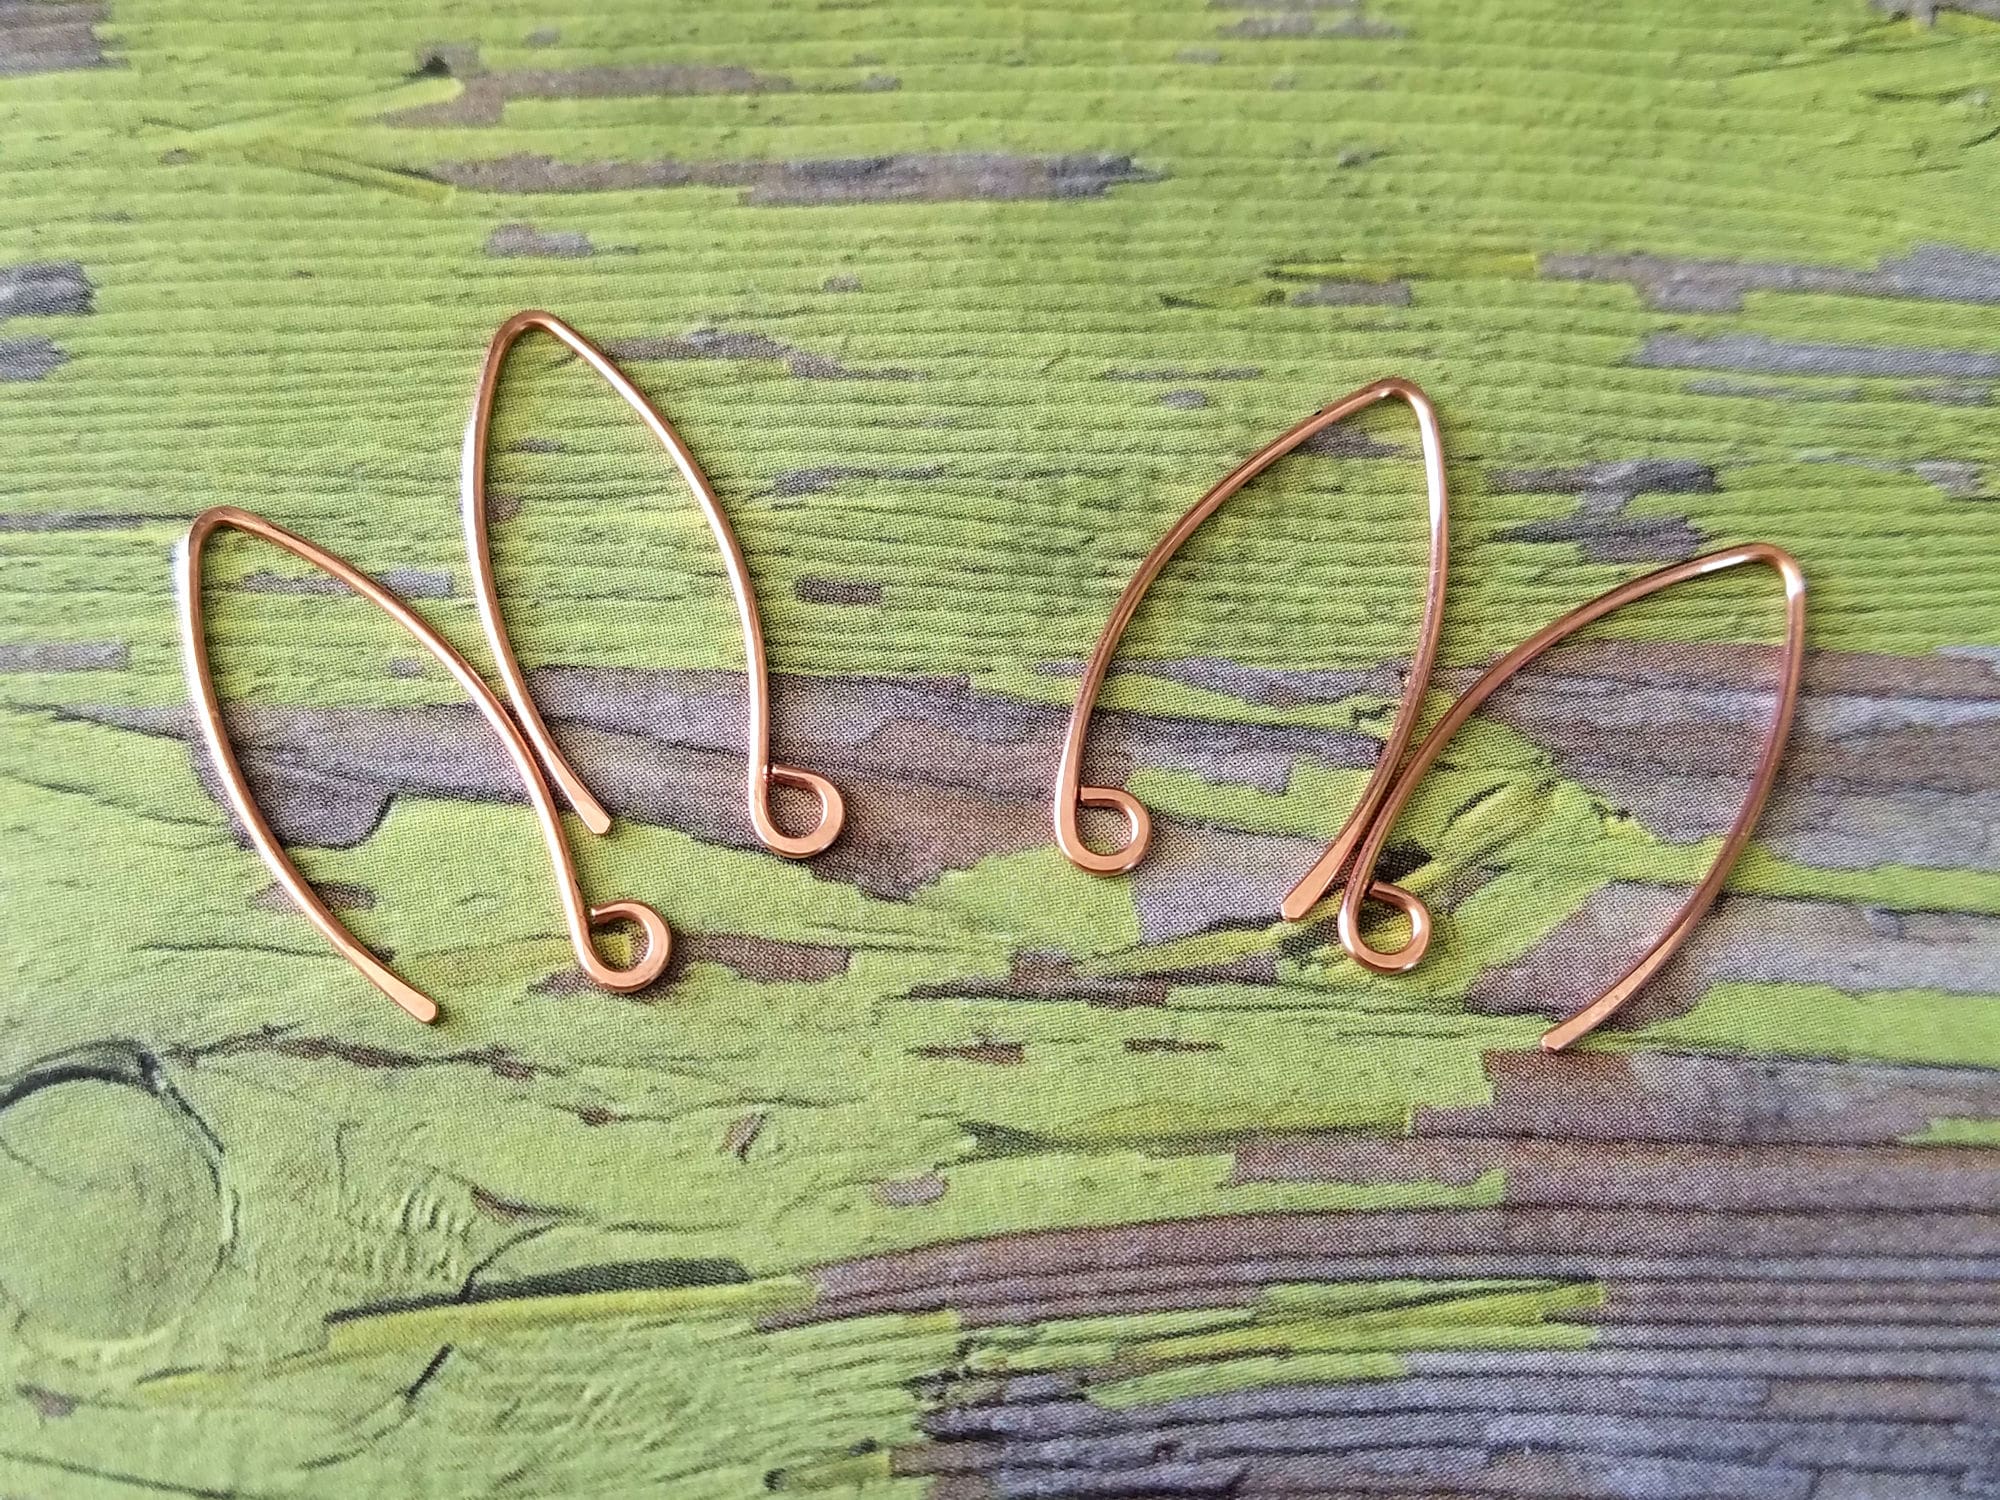
You can also make a more slender and elongated component by shortening the angle of the center cross of your loops to around 45-degrees. This works well when you want to use just the hook component without the wrapped loop.
If you make finished jewelry for sale, you may want to make small batches of the Easy Infinity Clasps to keep on hand. When I made finished jewelry for sale, I made these clasps by the dozen. This is particularly useful if you offer chain length variations as you can quickly assemble custom length chains for your handmade pendants.
Finishing Suggestions
I patina all of my copper and silver jewelry with Liver of Sulfur (LOS). And then I burnish the patinated pieces with super fine steel wool (Grade #0000) in a warm bath of water and original Blue Dawn dish soap. The steel wool brings back the bright copper highlights on the high spots.
Once that’s done, I rinse the jewelry thoroughly to remove any particles of steel wool. Then I put the jewelry in a tumbler barrel filled with warm water and a generous squirt of Blue Dawn. As a general rule, I tumble all of my finished jewelry for a minimum of two hours.
If you’re new to wirework, read this detailed tutorial that walks you through my 7-step patina process. And if you’re wondering why I recommend tumble polishing specifically, check out this post. Also, be sure to clean your stainless steel shot regularly. Because clean shot gives you the best possible final finish on your jewelry.
Discover More Behind Door 44
I hope you enjoyed the Easy Infinity Clasp tutorial. Want more free wire jewelry tutorials like this?
I like to share useful wire weaving tips and tricks on my social media channels, and we have some great conversations about wire jewelry in my private Facebook Group. Also, be sure to connect with me @door44studios on Instagram, and Facebook to keep up with everything that’s happening behind Door 44. And if you haven’t already done so, be sure to subscribe to my YouTube channel where you’ll find new wire jewelry videos weekly.
Until next time, go make something beautiful!

Pin This Post for Later

Thank you for sharing your beautiful wire work. It is inspiring!
You’re very welcome and thank you! Thanks also for visiting my blog. I appreciate your patronage! 😊
Just wanted to give you some feedback on the pioneering multi-size instructions. I could follow them effortlessly. What’s more, I could look at them and extrapolate to make this in 12 gauge copper on the first try, which is pretty cool, because I use salvaged wire and I pretty much only have one shot to get it just right before I have to anneal and try again 🙂 And I am *not* a mathy person who can do math accurately in my head. I’d say this approach to instructions worked beautifully and I think you had a great idea.
(I don’t crochet, though I do occasionally knit, fwiw.)
Thank you so much for the great feedback! I’m working on some new tutorials that will involve sizing (rings, bracelets, and also some new bracelet clasps), so it’s good to know that this system is works.
Hi Wendi! I am re-visiting this tutorial for the ump-teenth time. I have made many of these, and even used the loop for “infinity links” in bracelets. The multiple sizes are a godsend and work beautifully. You have an amazing teaching talent. Hope to see more from you soon.
I’m so glad you’re enjoying this tutorial, and I love that you’re using the closed loops as bracelet links! That’s such a great idea. I will be back soon, I hope!
Best tutorial ever!
So glad you enjoyed it, Sylvi. Thanks for stopping by!