

Interchangeable Figure 8 Weave Bail Tutorial
Last week we learned to do the Figure 8 wire weave over two core wires. This week, we’re going to build on those skills by creating an interchangeable Figure 8 weave bail. This is a fun and practical project. Not only will it help you solidify your Figure 8 weaving skills, but it can also be used to show off your favorite large-hole pendants.
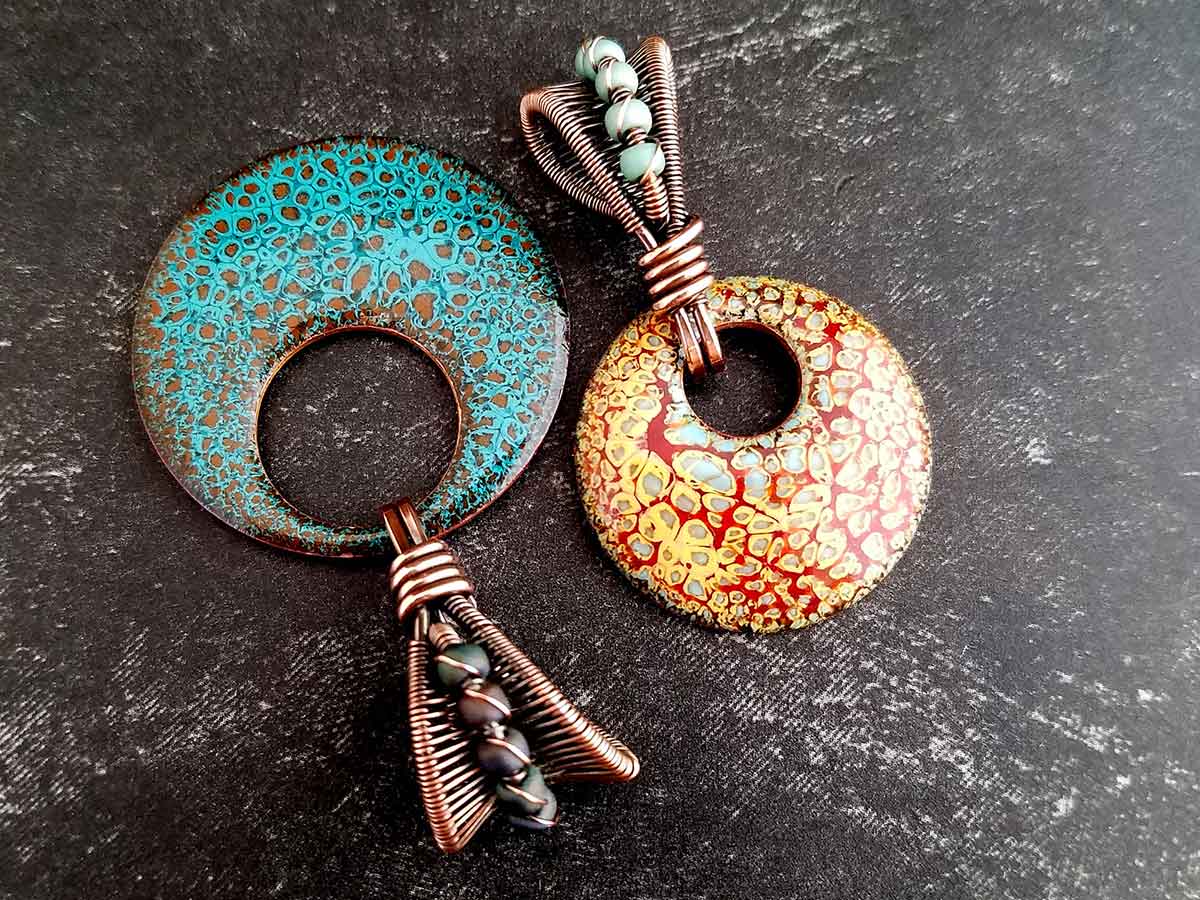
This project was a long time in the making. Several months ago, my friend and fellow jewelry maker, Dianne of DivellaDesigns.com, asked me to design a wire weave bail that would enhance her beautiful enamel pendants. I was super excited to take on this challenge. And it really was a challenge because I don’t typically use bails in my necklace designs.
Dianne graciously sent me two pretty enamel pendant samples to use while I worked out the bail design. Both of those pendants are featured in the photo above. Aren’t they cool? Well, let me tell you something — this project turned out to be MUCH more difficult than I anticipated.
Copyright & Disclosure
You’re welcome to make and sell products from this tutorial. Just credit Door 44 Studios for the design. And if you’re selling online, please link back to this page.
When it comes to this written tutorial, on the other hand, I reserve exclusive rights to all images and written content. You may not reproduce or redistribute any portion of this tutorial in any way, shape, or form. You may not claim this tutorial as your own and you may not teach this particular bail design or any variations of this design without my written permission.
This copyright applies to the printable PDF version of this tutorial as well, and it’s included therein. You may share the free version of this tutorial only by linking directly to this page.
This post may contain affiliate links. If you click on a link and then make a purchase, I may earn a small commission (at no cost to you). As an Amazon Associate I earn from qualifying purchases. To learn more, please see my full disclaimer.
About the Interchangeable Figure 8 Weave Bail
When I first accepted Dianne’s challenge, I thought how hard can it be to make a functional bail? People make them all the time. Even I made plenty of them in my early days of wire weaving when I burned through countless tutorials.
What I didn’t consider initially is that all of the bails I’d made in the past were either integrated into a larger pendant design or they were permanently attached to a pendant. But I wanted something interchangeable. Something I could use to show off different pendants. Or even multiple pendants layered together.
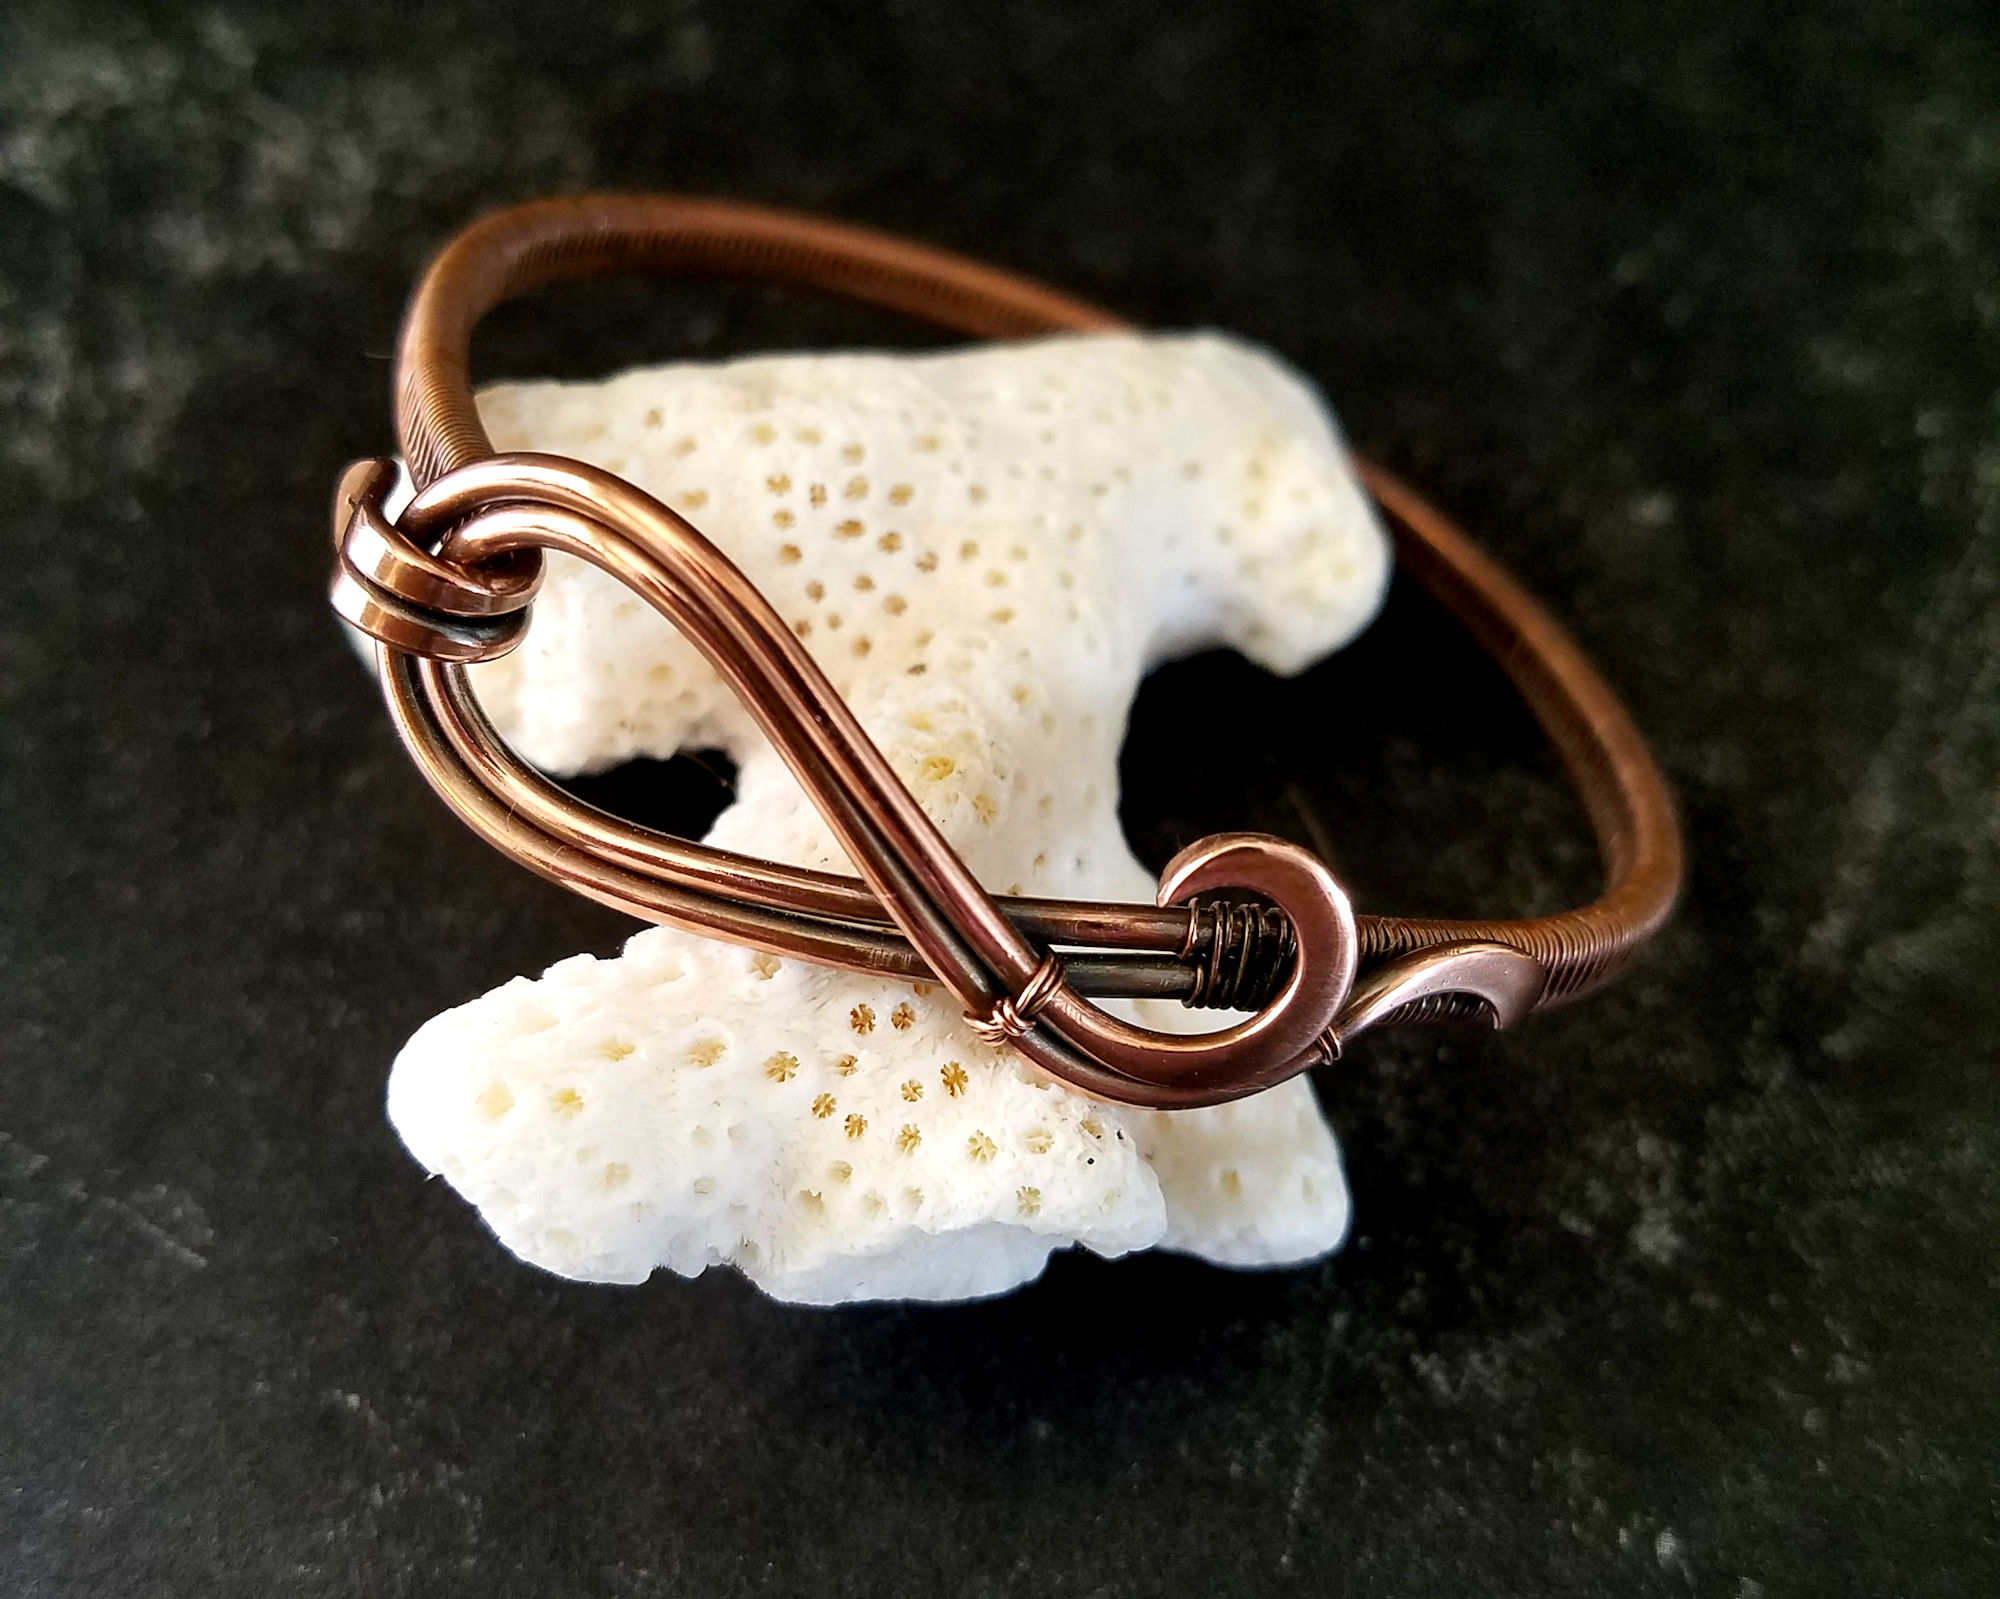
I wanted something that was more versatile than the typical wire weave bail. And try as I might, I couldn’t come up with an elegant solution to the interchangeable bail problem. That is until I created my Ride the Wave Bracelet. You see, that bracelet design is actually a prototype for a private commission.
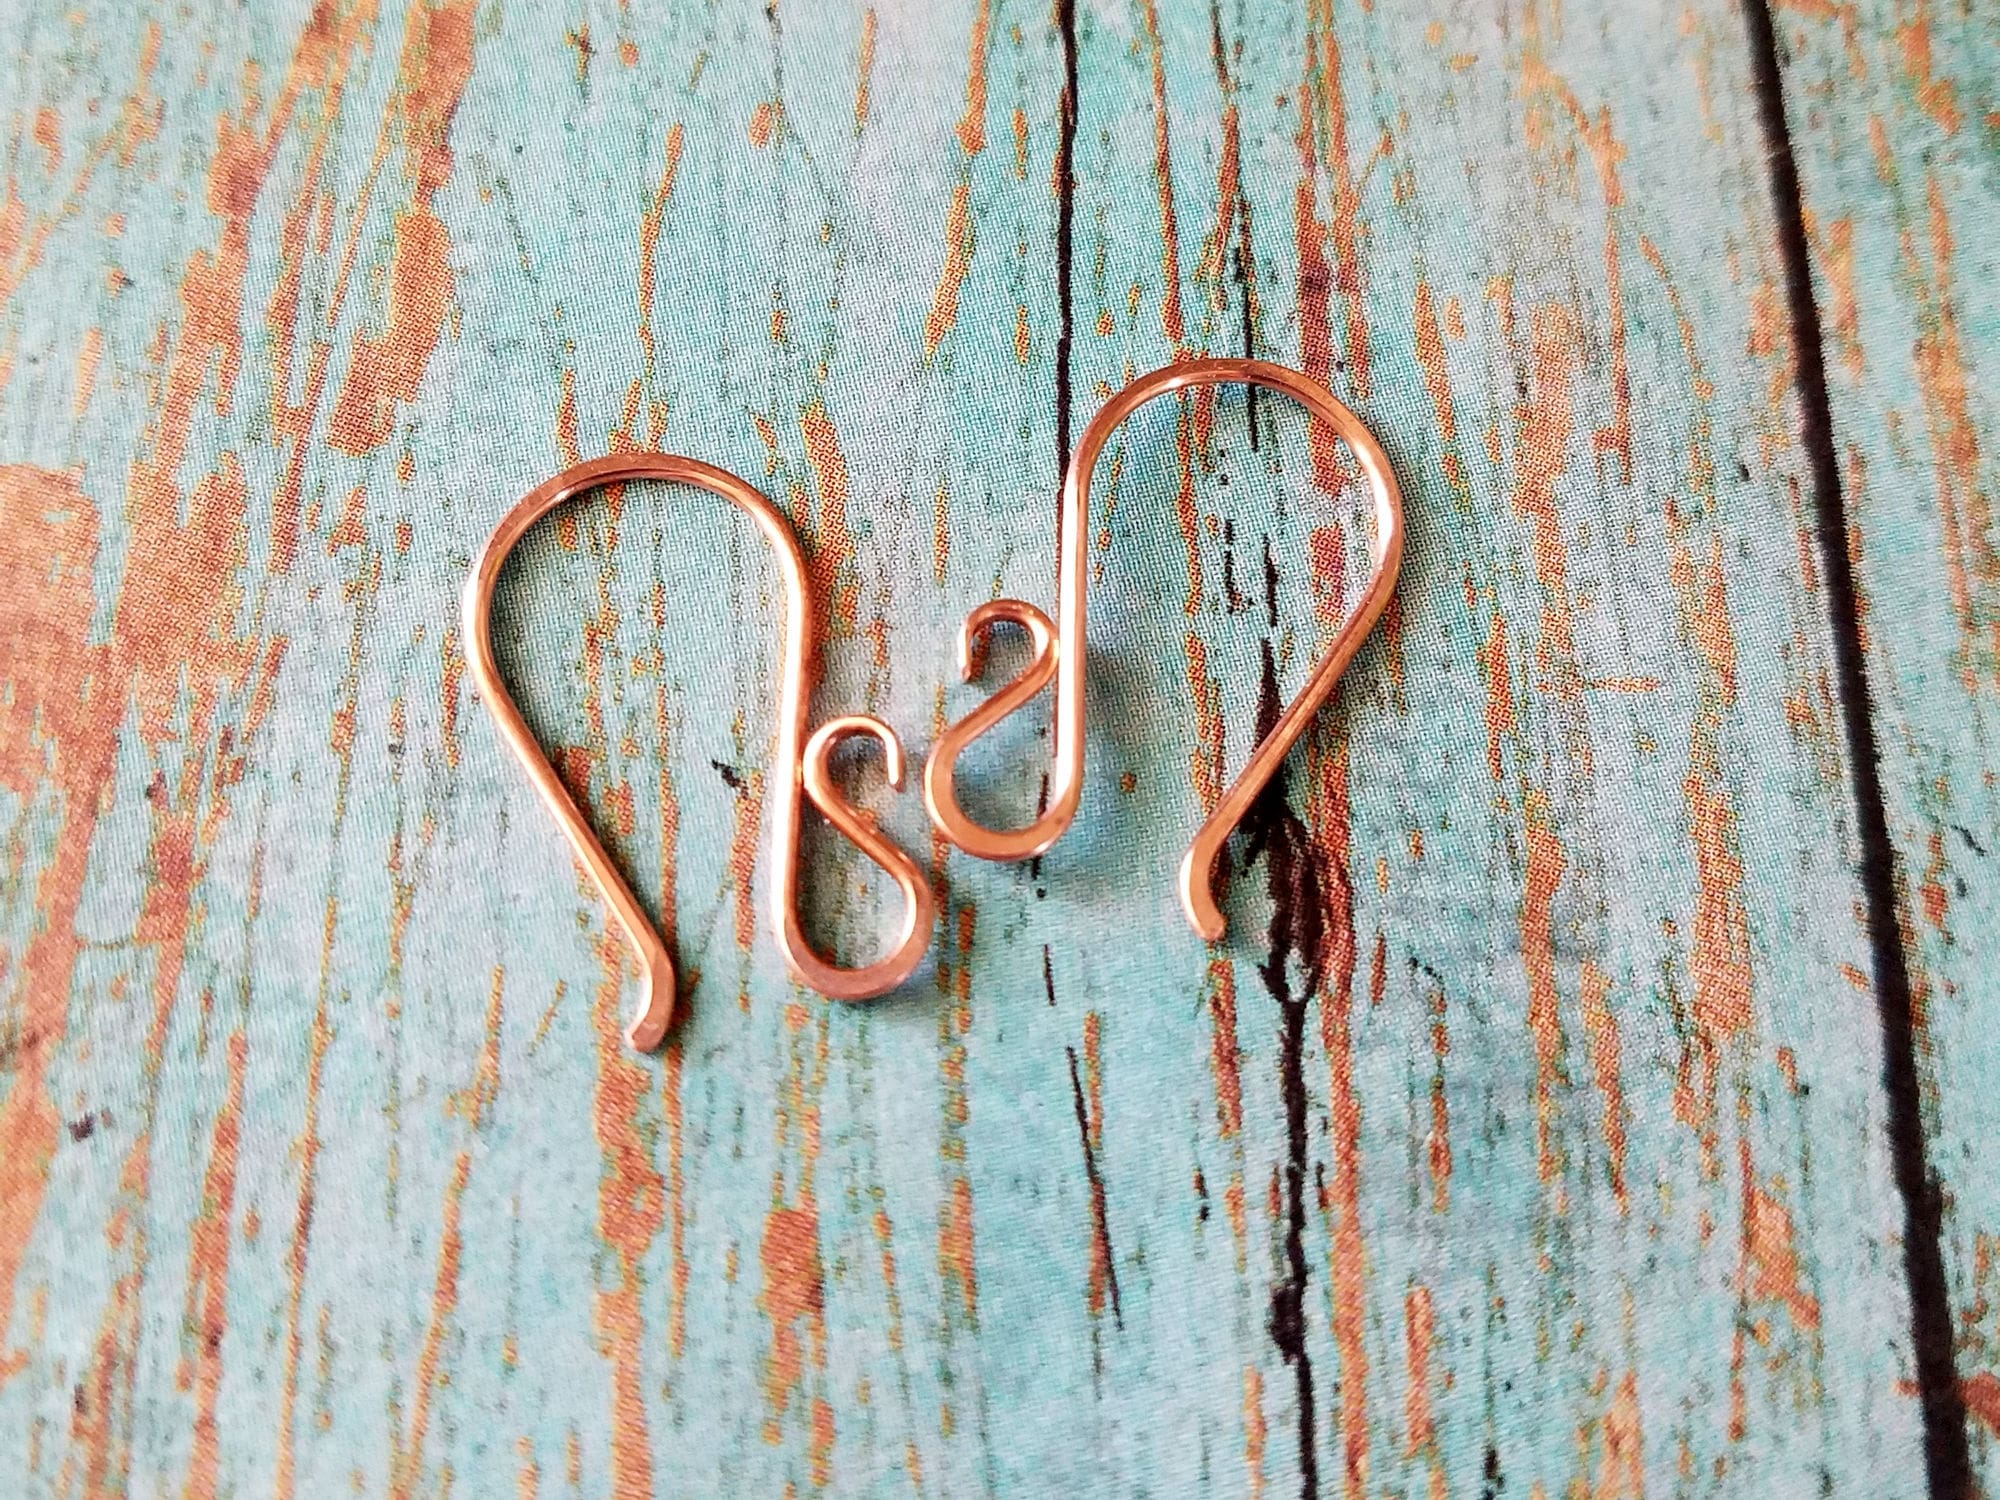
I need a sturdy hook for a clasp that will be used on a vintage velvet cloak. And Ride the Wave gave me an opportunity to test out the hook that I had in mind for that clasp. As it turned out, that same hook is also the perfect solution to the Interchangeable Figure 8 weave bail problem.
Getting Started on the Interchangeable Figure 8 Weave Bail
I’ve made this bail with both 18ga and 20ga wire successfully. Choose the gauge best suits your pendant(s). I also recommend using half-hard wire for this project because it will be easier for you to maintain the lines of your bail while you complete the weave. That said, dead soft wire will work if that’s all you have on hand. You’ll just need to add in an extra step to harden your wire. And don’t worry. I’ll show you exactly when and where to do that if you’re using dead soft wire.
As usual, I chose dead soft 28ga wire for weaving.
If you’d like to learn more about which jewelry wires work best for my tutorials, you’ll find a helpful discussion in this post, Jewelry Wire: Everything you need to know to make the best choice.

Tools & Materials
- 18ga wire – 9 inches
- 28ga wire – 6 feet
- Small accent beads of your choice (I used 8/0 seed beads)
- Any type of pendant with a large front-to-back hole (I used a colorful enamel pendant from Divella Designs)
- Stepped Bail-Making Pliers
- Wire Cutters
- Flat Nose Pliers
- Needle File
- Chasing Hammer
- Rawhide or Nylon Mallet
- Bench Block
- Fine Point Permanent Marker
- Ruler
- Ring Clamp
- Kumihimo Bobbin
- 10mm and 6mm mandrels (I use knitting needles)
Finished Size
- WIDTH: about 1/2 inch (1.3 cm)
- LENGTH: about 1 inches (2.5 cm)
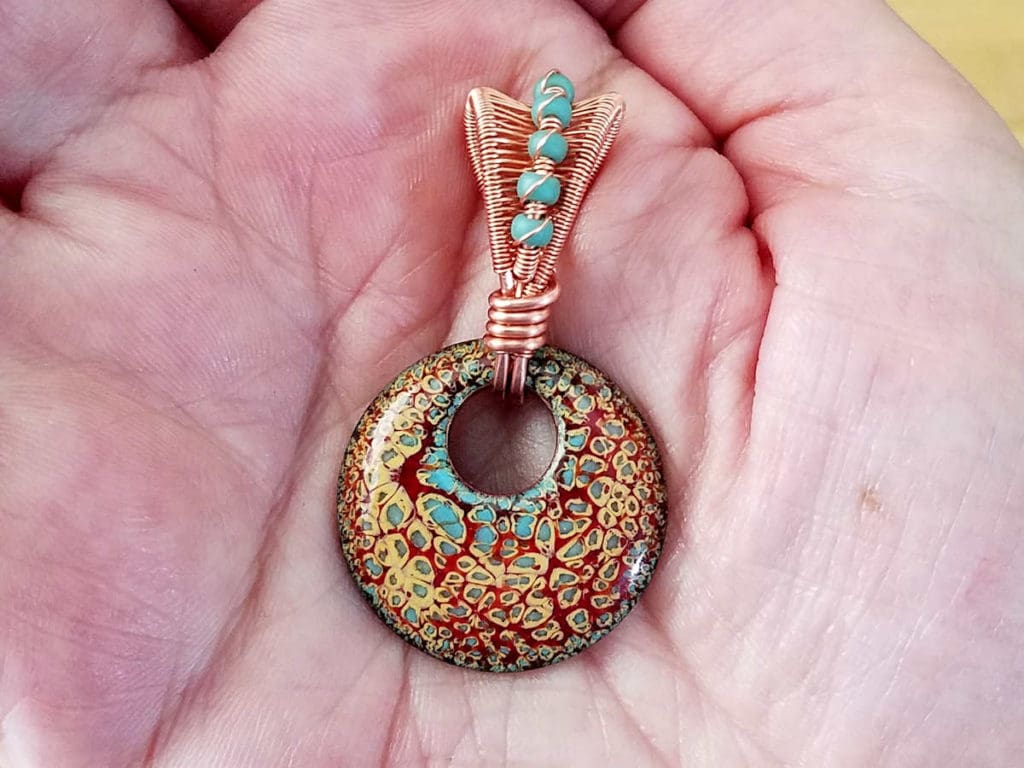
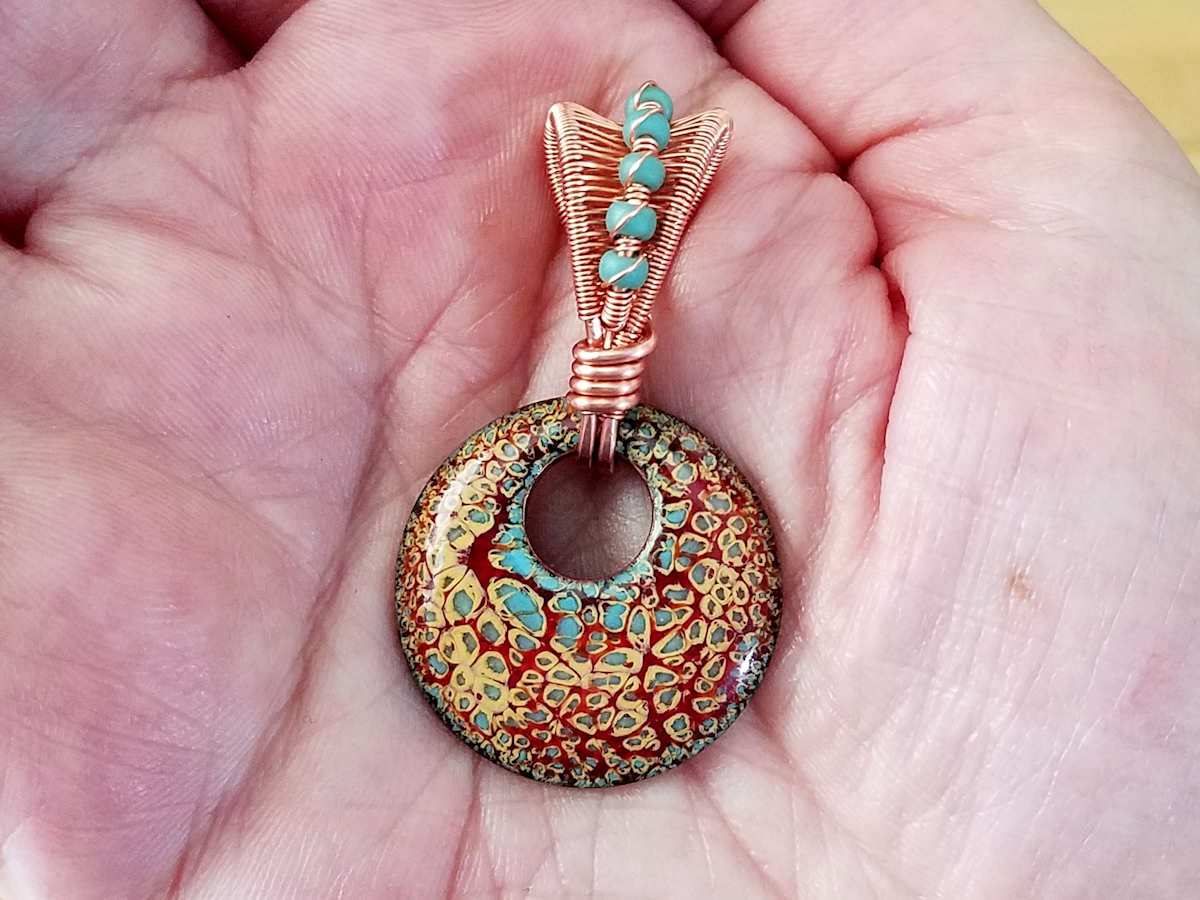
The finished size of this bail ultimately depends on the size and type of pendant that you plan to suspend on the bail. But don’t worry. I’ll tell you exactly how to measure your pendant and modify the bail design to fit your pendant perfectly.
The bail I created while writing this tutorial (pictured above) works perfectly for both of my enamel pendants. The larger pendant has a diameter of 1-1/4-inches and the smaller pendant has about a 1-inch diameter.
Skill Level: Beginner
This is a basic wirework project that can be achieved by someone who has never worked with wire before.
This tutorial uses the Figure 8 wire weave over two core wires, and it requires using a chasing hammer. If you’re unfamiliar with either of these techniques, I’ve written some skill-based tutorials that will help you work through this interchangeable Figure 8 weave bail project. Just click the links above to review those tutorials.
We’re also going to slightly modify the Figure 8 weave in this tutorial to make it a little easier to achieve a neat and tidy weave. I’ll show you how to do that in this tutorial when we get to the weaving section of the instructions.
How to Make the Interchangeable Figure 8 Weave Bail
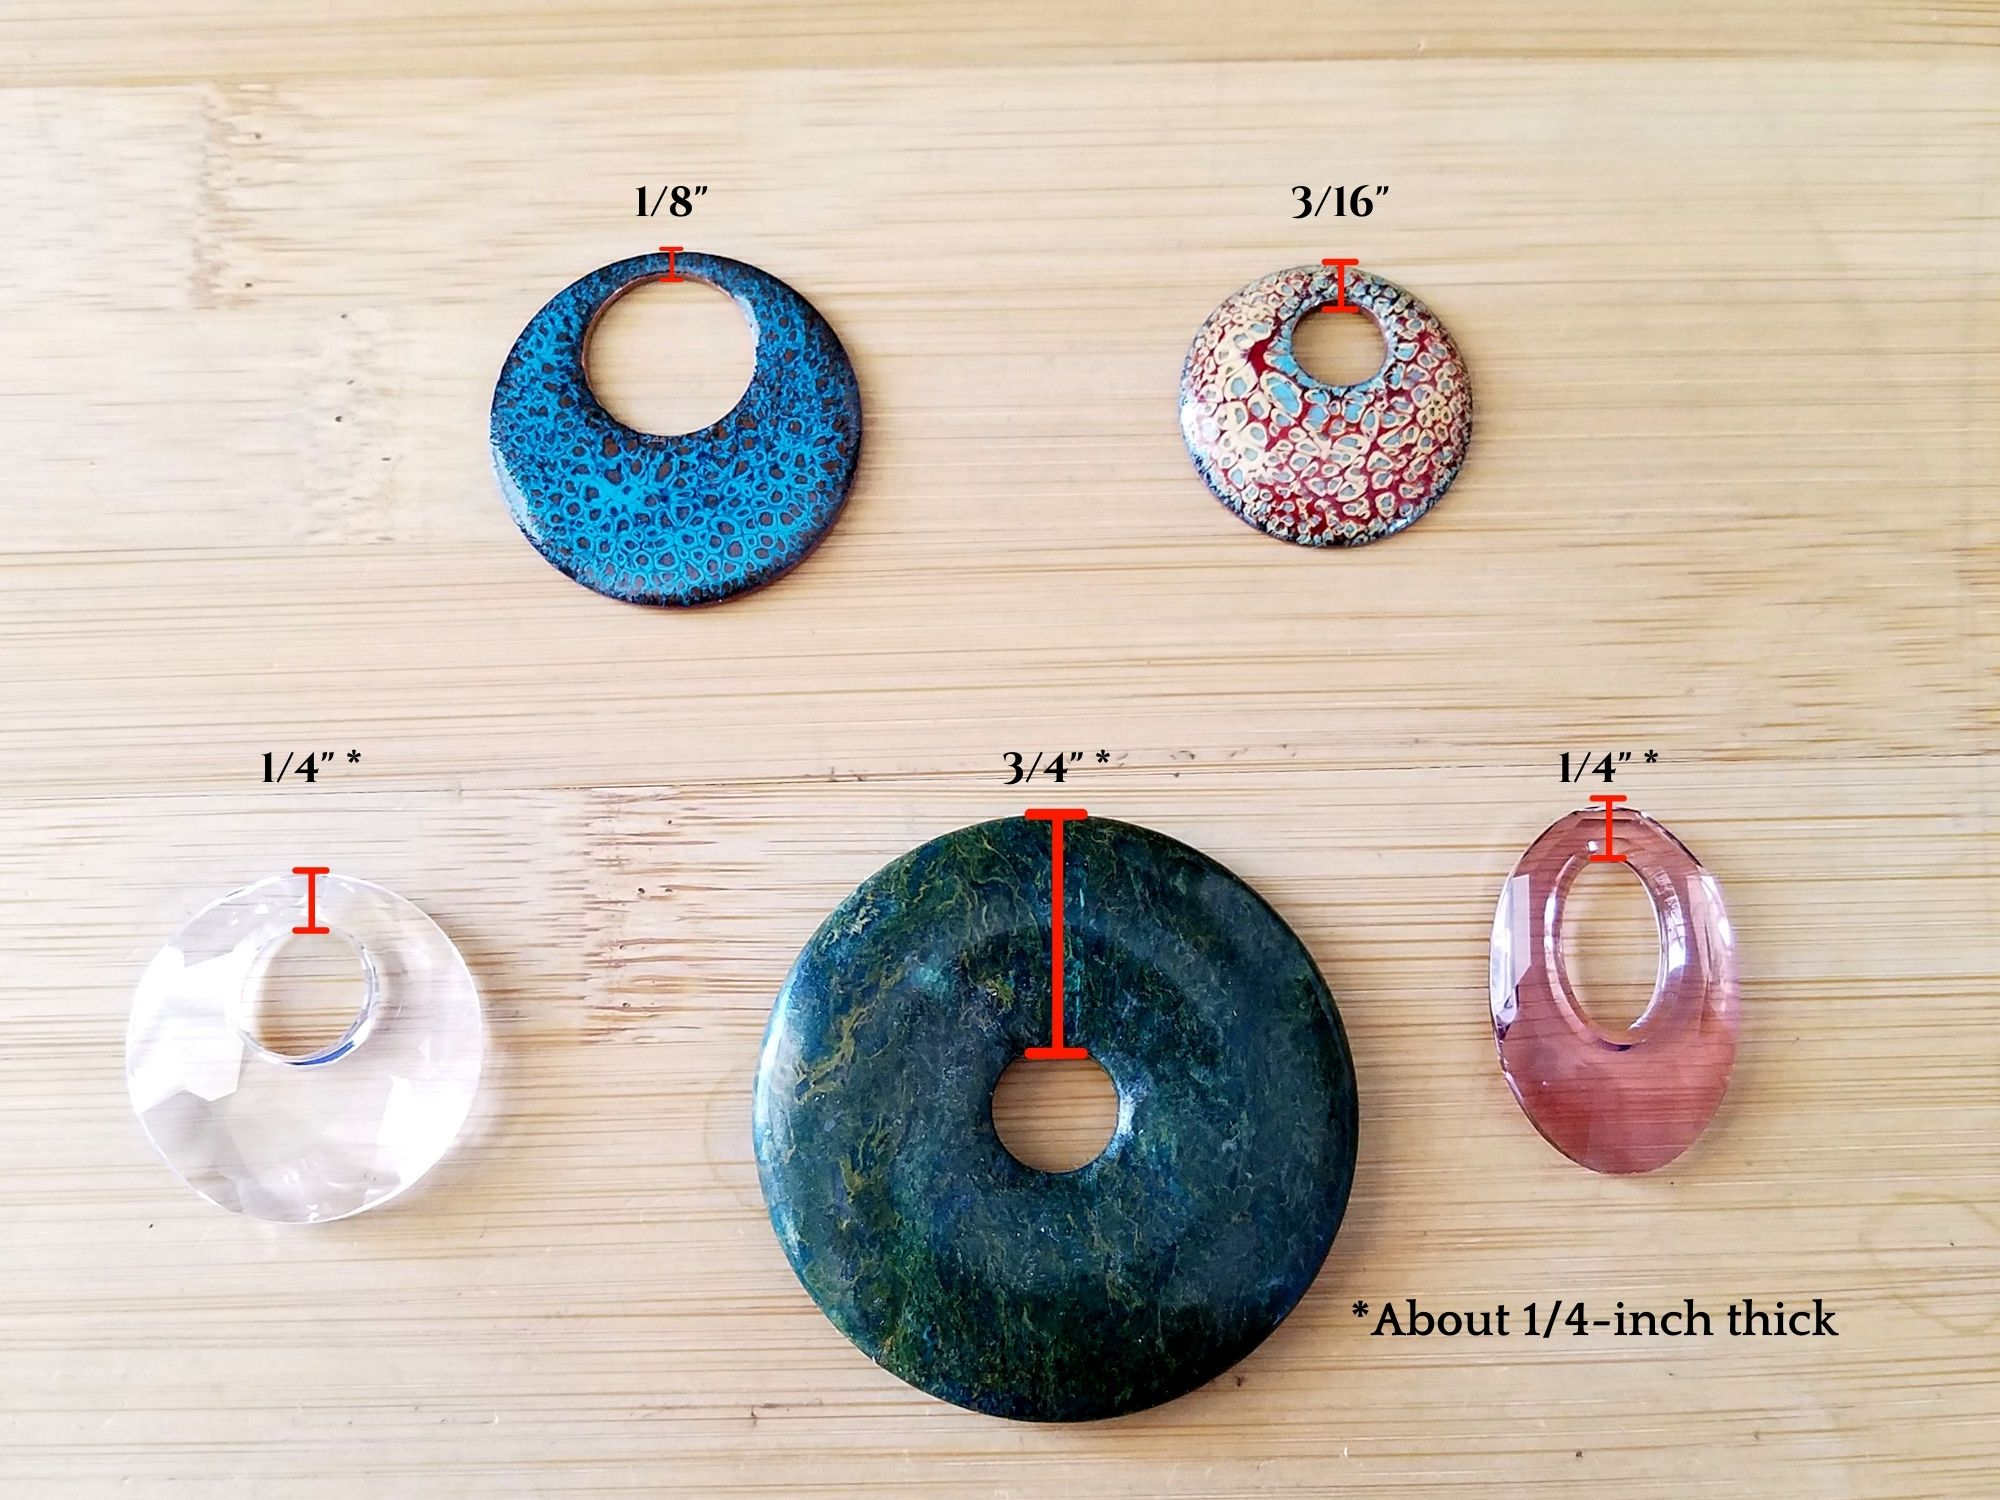
Before we start building the frame for our bail, it’s important to measure the depth of your pendant from the outer edge to the top of the hole within the pendant. If you’re using something like a Swarovski Helios or Victory pendant or a gemstone donut (pictured below, bottom row), you’ll also need to measure the thickness of your pendant. We’ll use these measurements to determine the length of the wire needed for the bail frame.
I’ve included five different pendant types and shapes in the image below so you can see exactly how I measured them before creating a customized bail for each unique pendant.
Make the Bail Frame
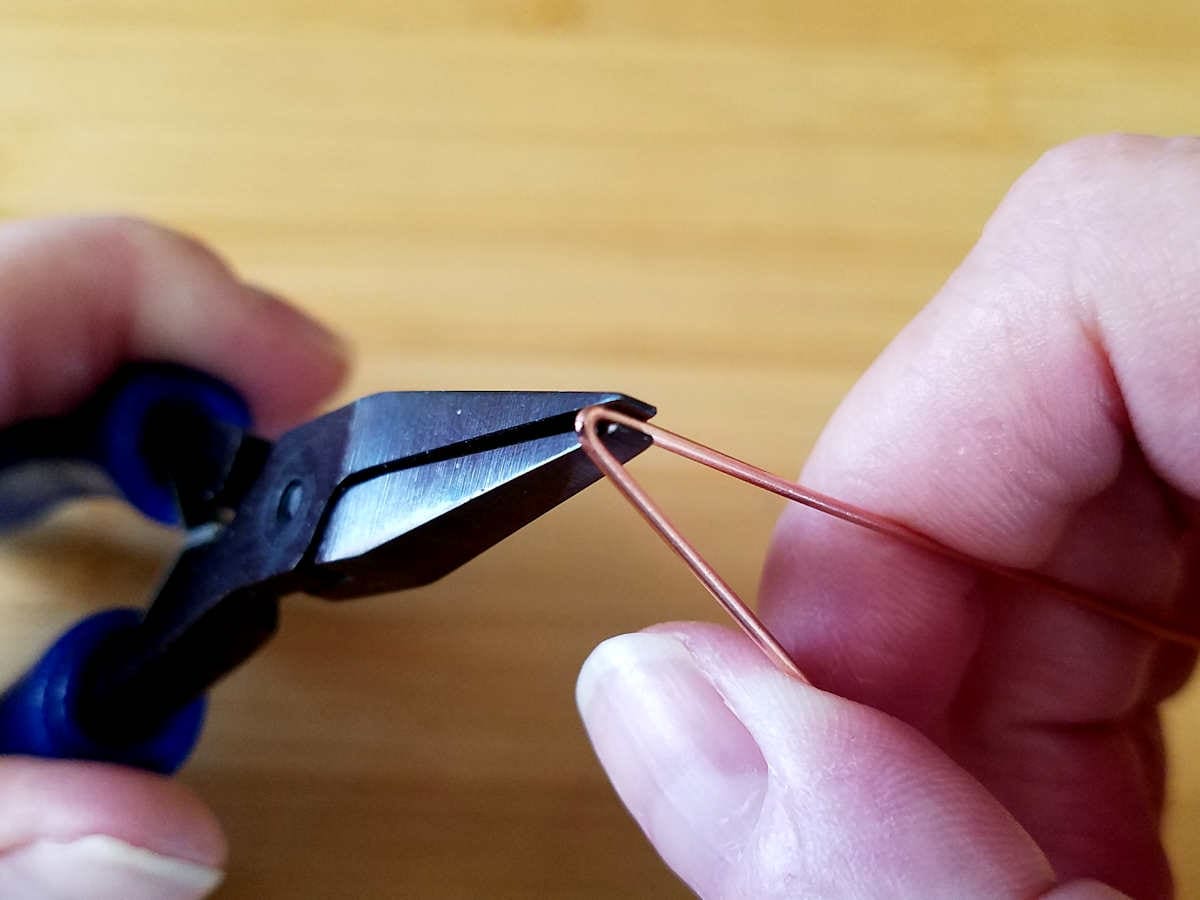
Step 1
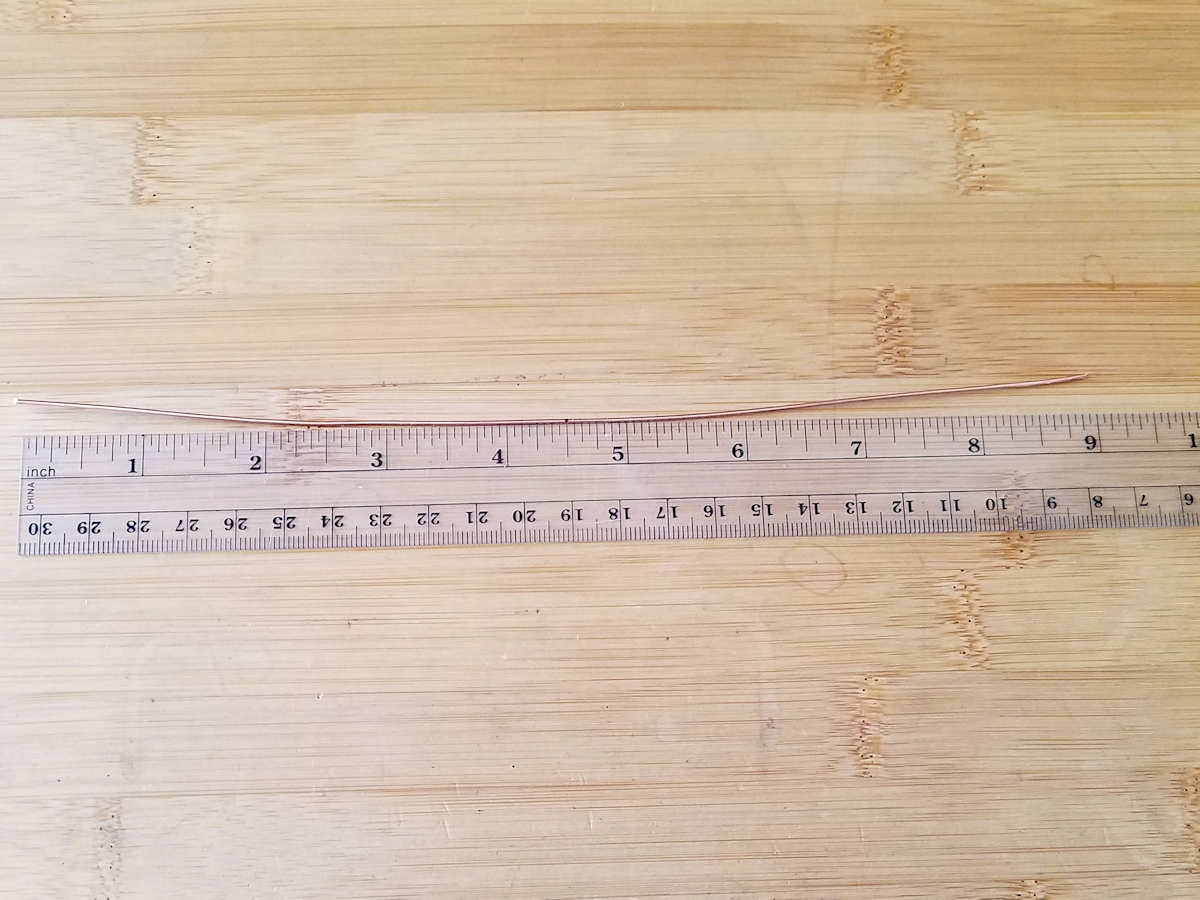
Cut a piece of frame wire (18ga or 20ga) to nine inches long and mark the center point of your wire.
Step 2
Use your flat nose pliers to fold the wire in half at the center mark, as shown.
Step 3
Press the fold firmly with your flat nose pliers to completely close that bend.

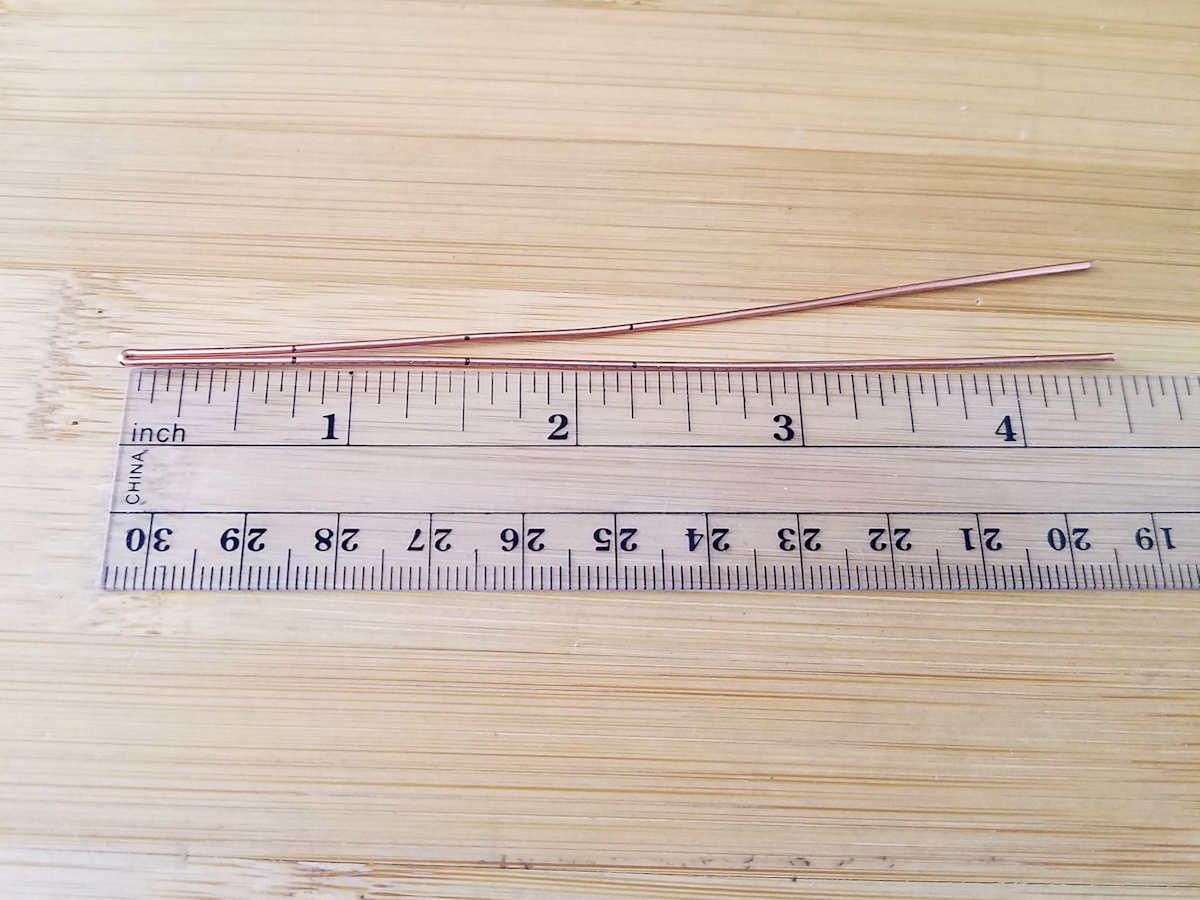
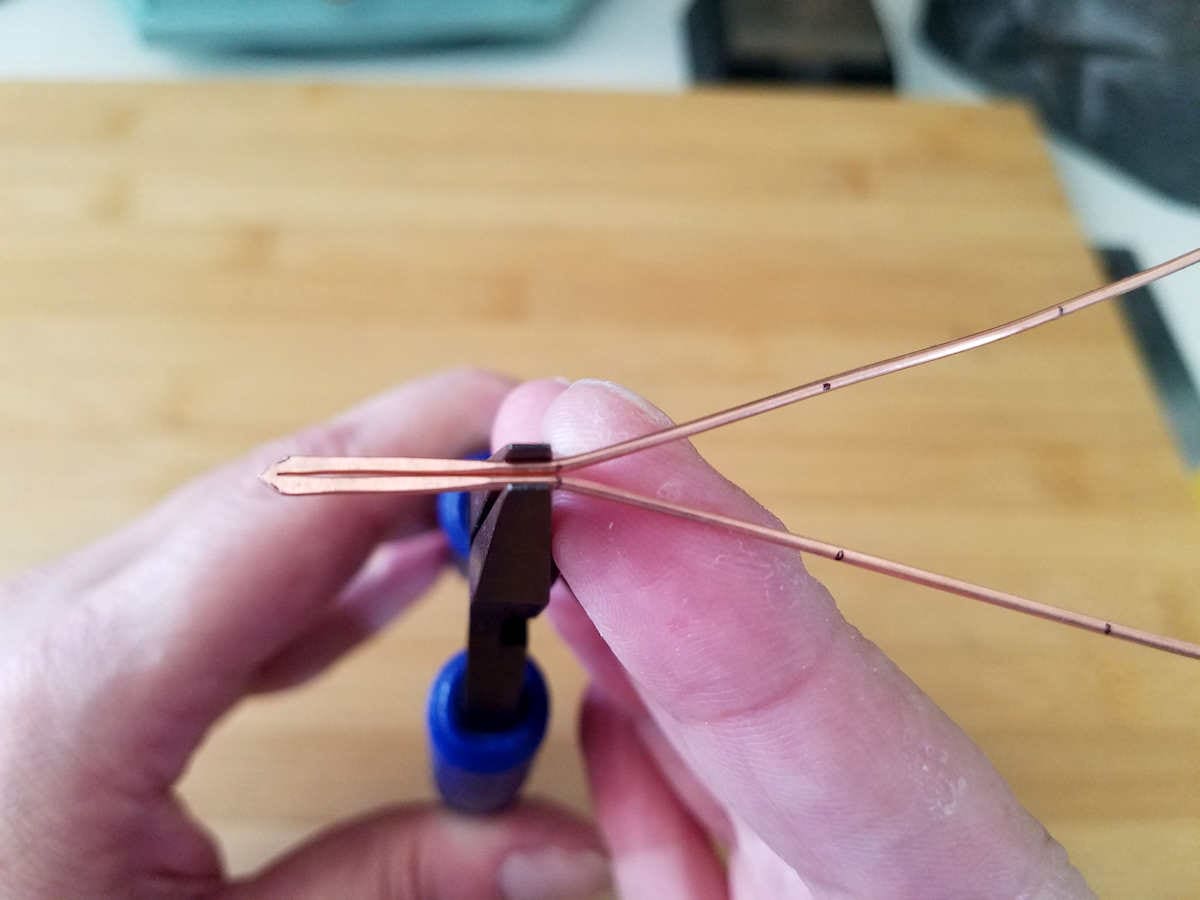
Step 4
Measuring from the folded end, mark your wire at 3/4-inch, 1-1/5-inches, and 2-1/4-inches, as shown.
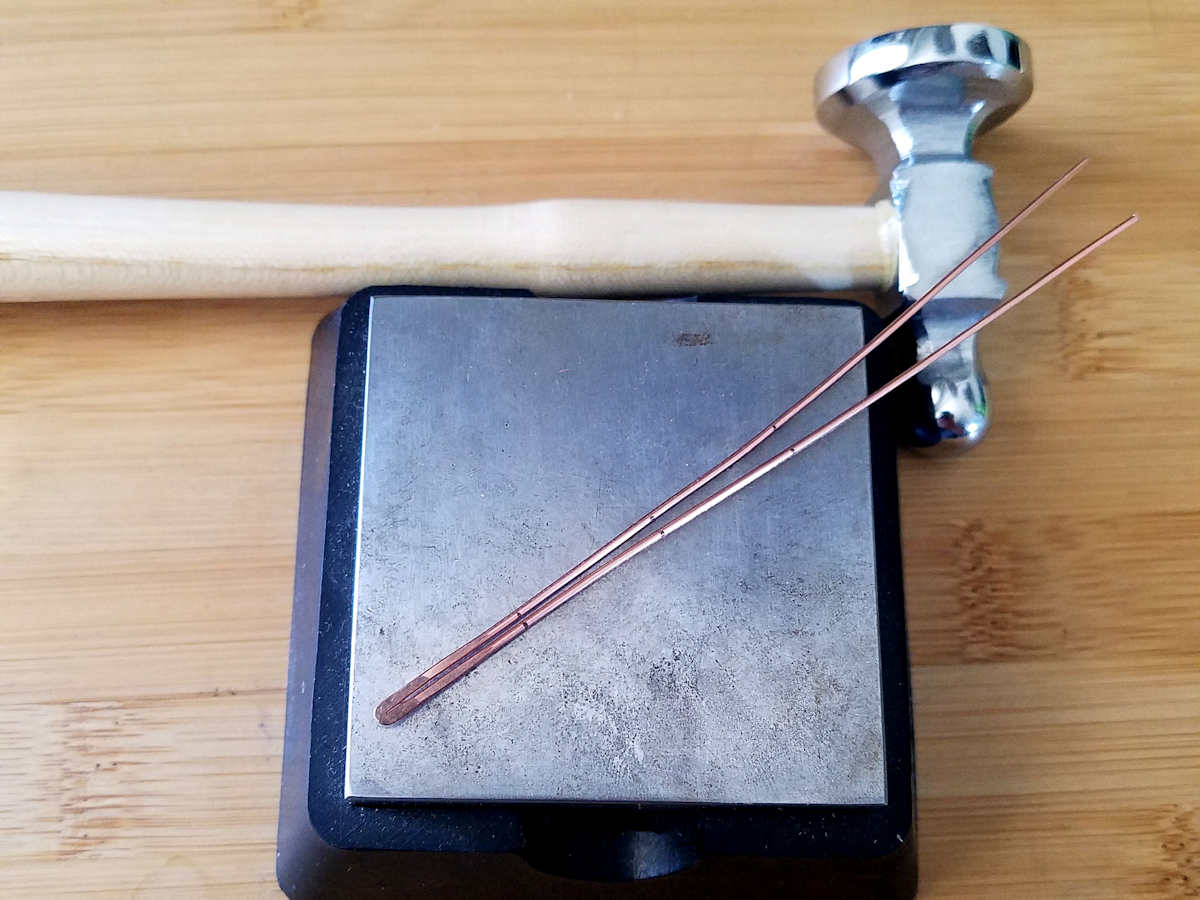
Step 5
Use your chasing hammer and bench block to flatten the folded end of your frame wire, as shown.
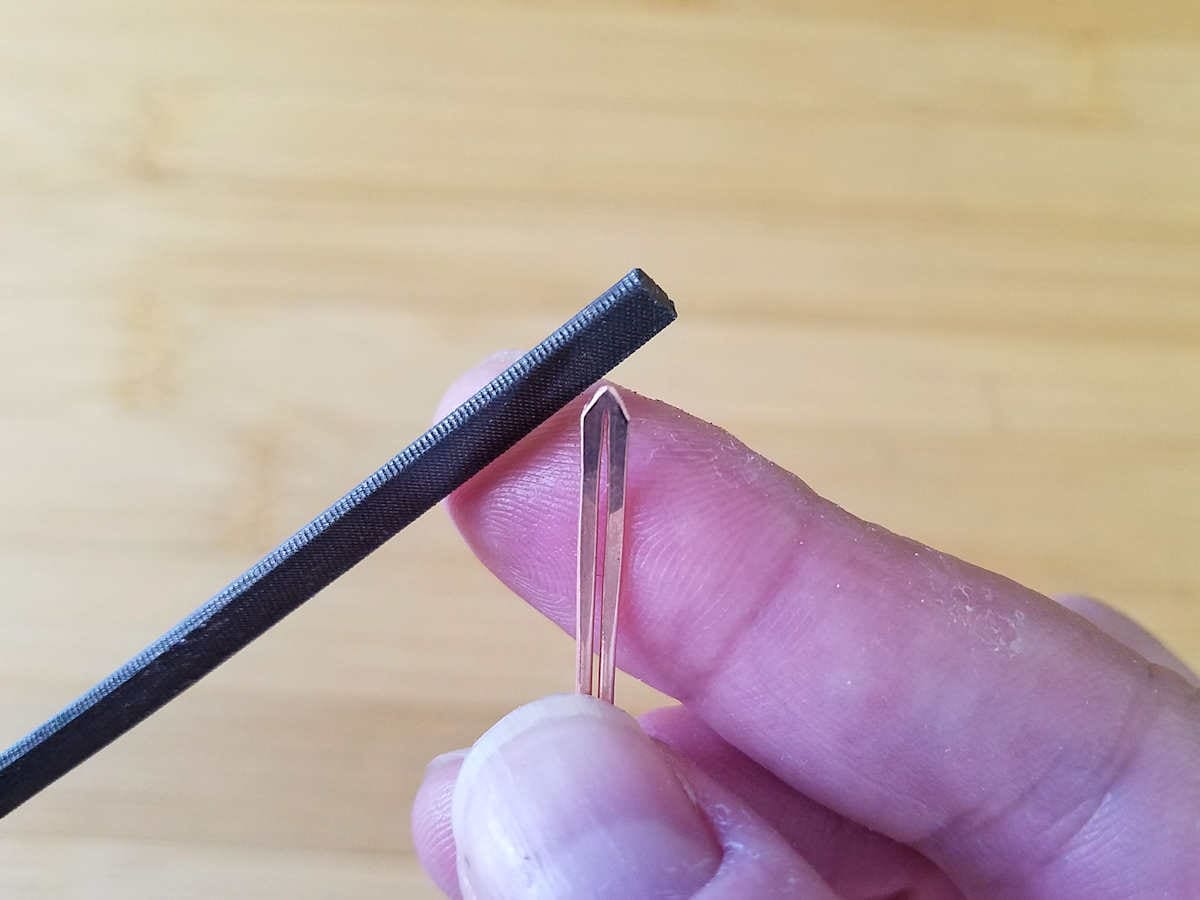
Step 6
Use a needle file to shape the point on the folded end of your frame wire, as shown.
We’re going to make a hook at the bottom of the bail that will allow you to easily slip the pendant on and off of the bail.
Step 7
Grasp your wires at the 3/4-inch mark with your flat nose pliers. Then spread the two arms of the bail frame into an even V-shape, as shown.
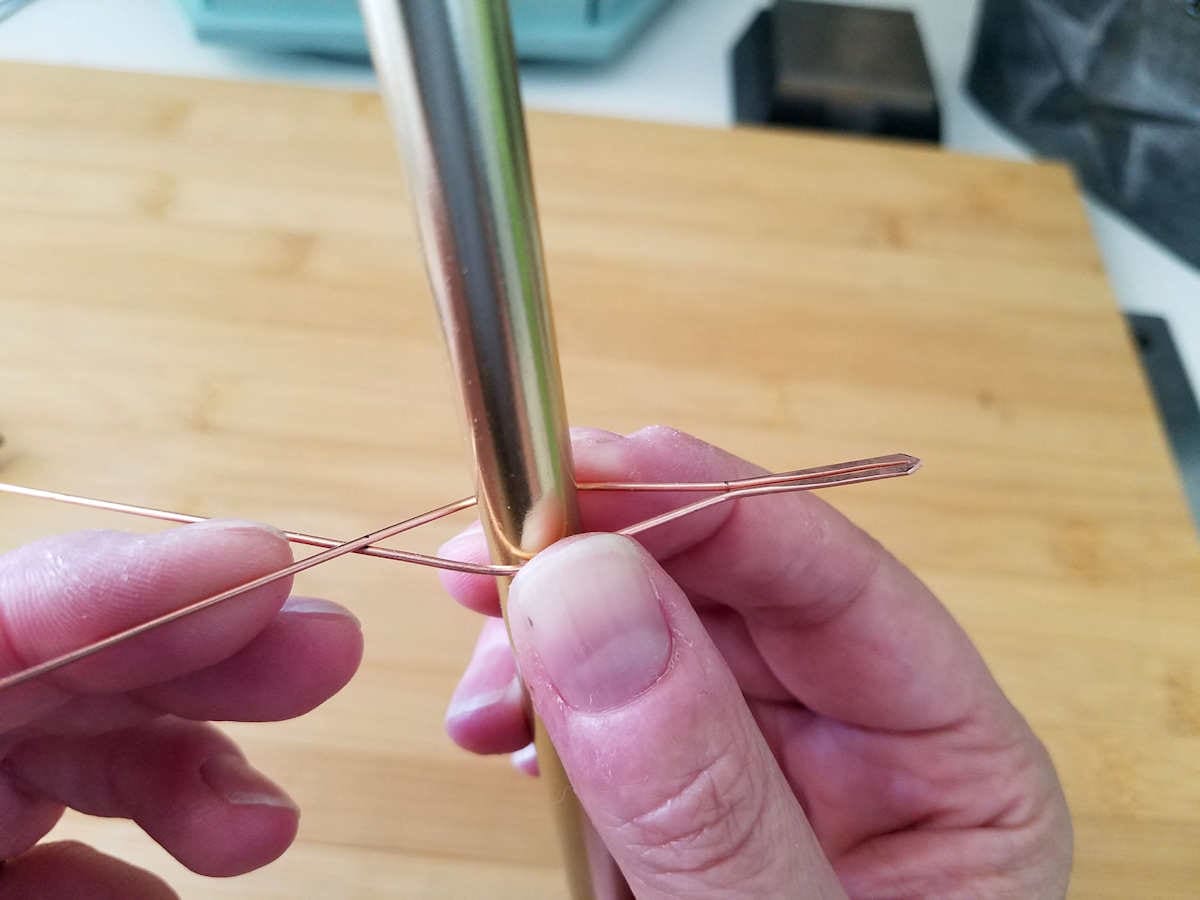
Step 8
Now place your 10mm mandrel between the frame wires at the second mark that you made in Step 4. Then bend the ends of the wires back toward the center until the wires cross at the third point that you marked in Step 4.
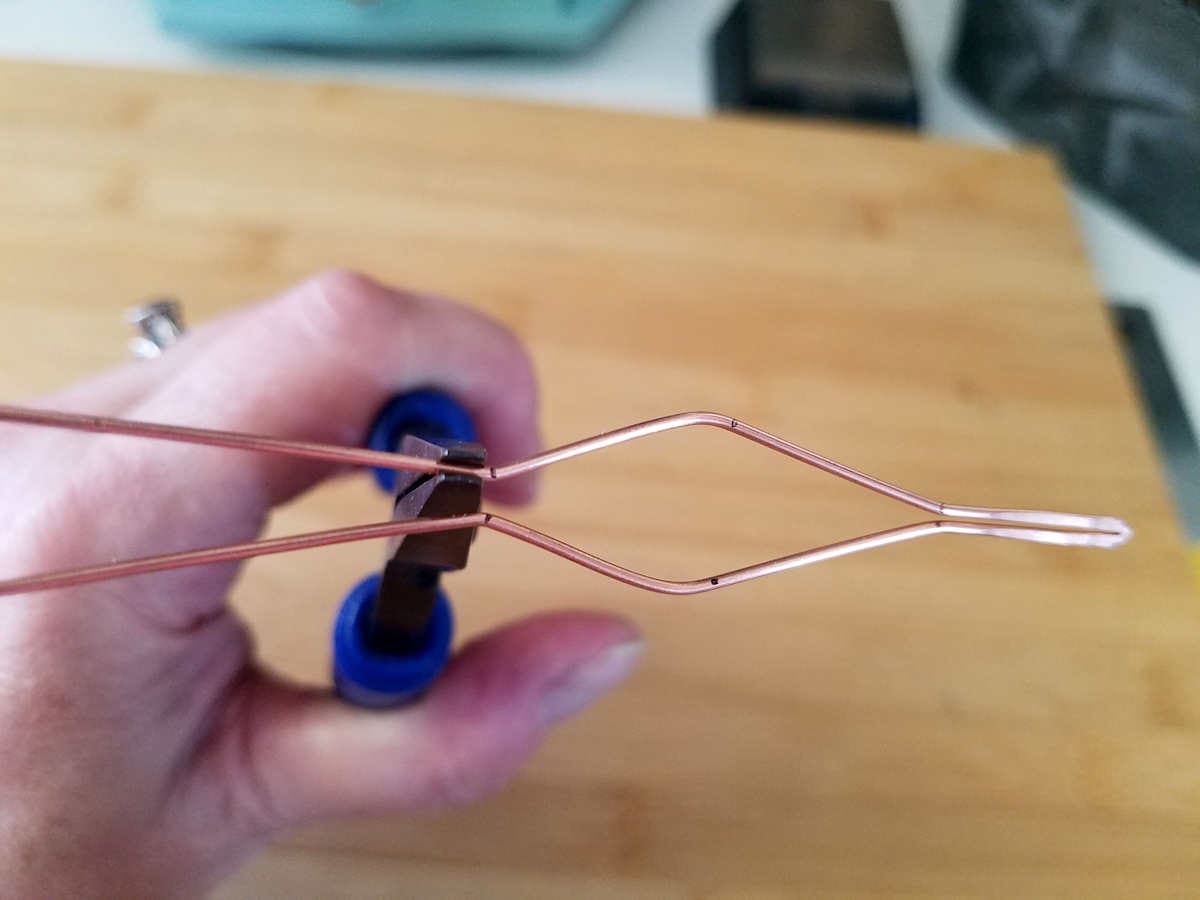
Step 9
Use your flat nose pliers to bend the tails of both wires back toward the center line of your bail frame. Your frame should now look something like the one shown below.
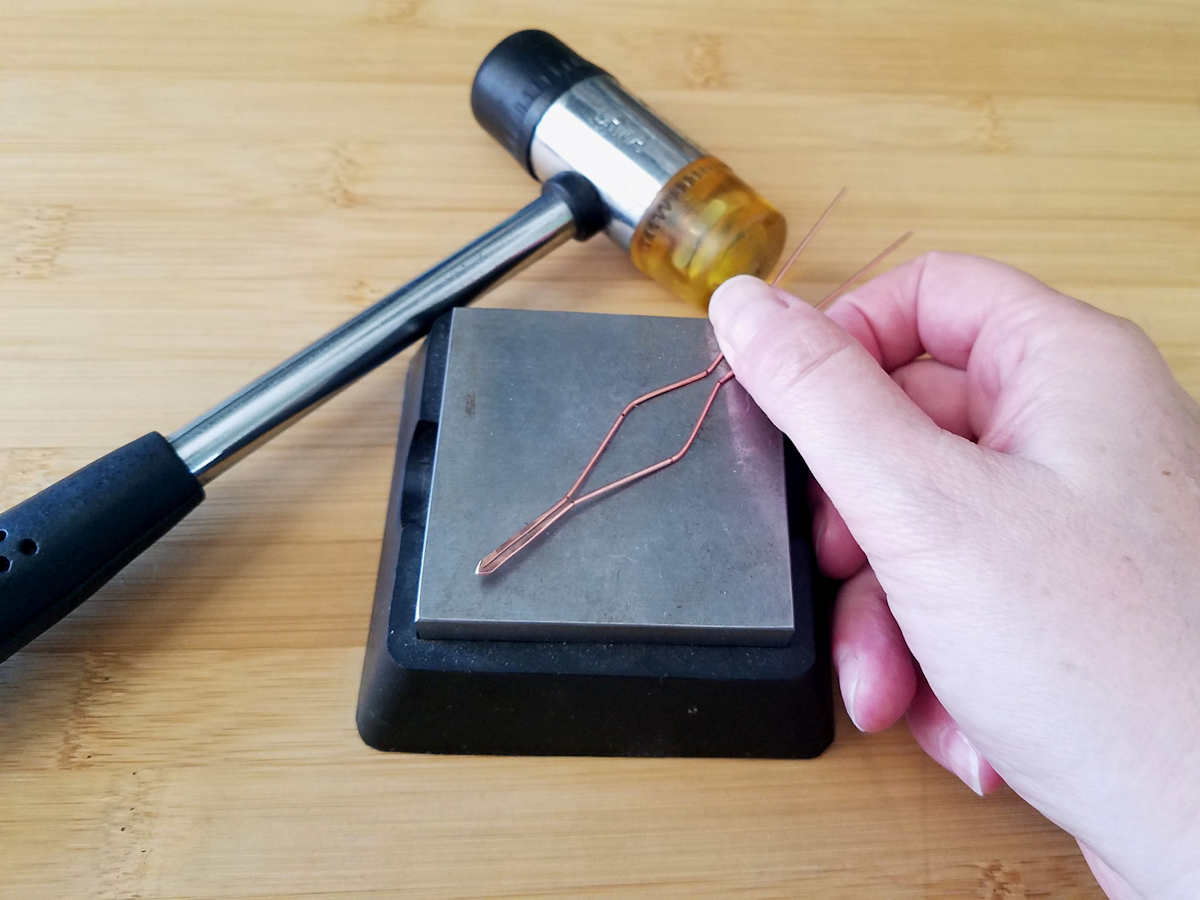
Step 10 (Optional if using half-hard wire)
If you’re using dead soft wire (or even if you’re using half-hard wire) it’s helpful to work harden the flared portion of your bail frame at this point.
Use a bench block and soft mallet to hammer the flared section of your frame. Continue hammering until your wires are noticeably more rigid and springy.
Weaving across an open space is always a challenge. Hardening your frame wires will help maintain the shape of your bail as you complete the weave in the next section of this tutorial.
Weave the Bail Frame
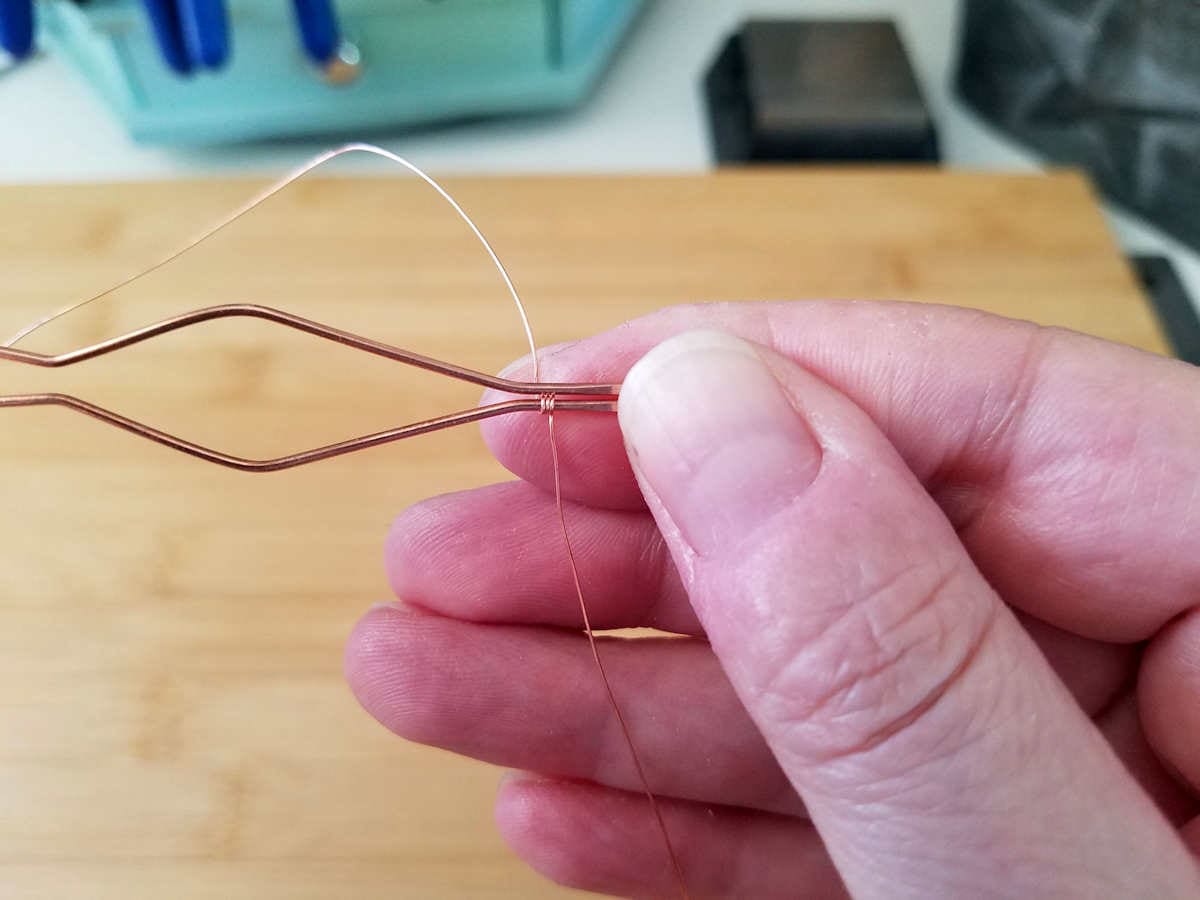
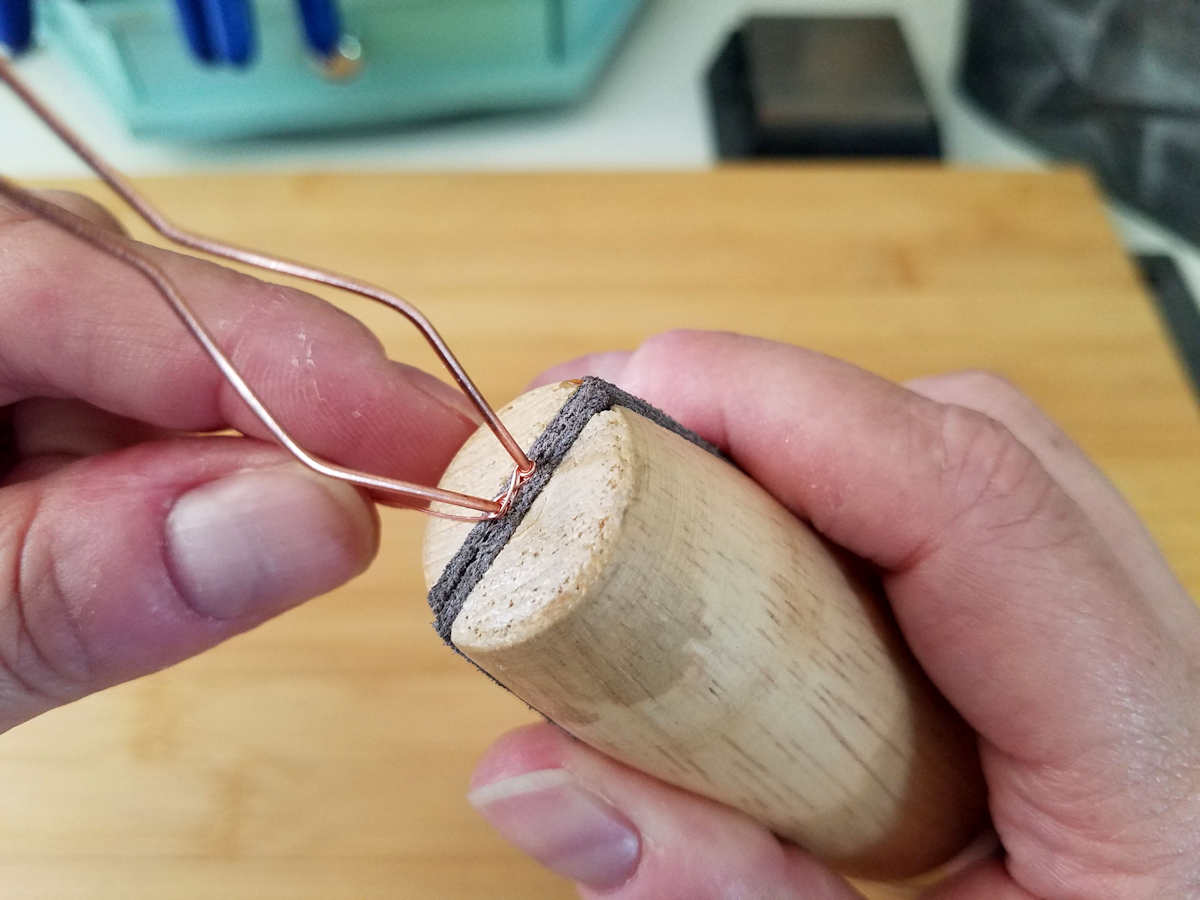
Step 1
Starting with your weaving wire behind the core wires, leave a 3-inch tail and secure the weaving wire with three snug wraps around the bottom core wire of your frame, just below the flared portion on the folded end of the frame, as shown.
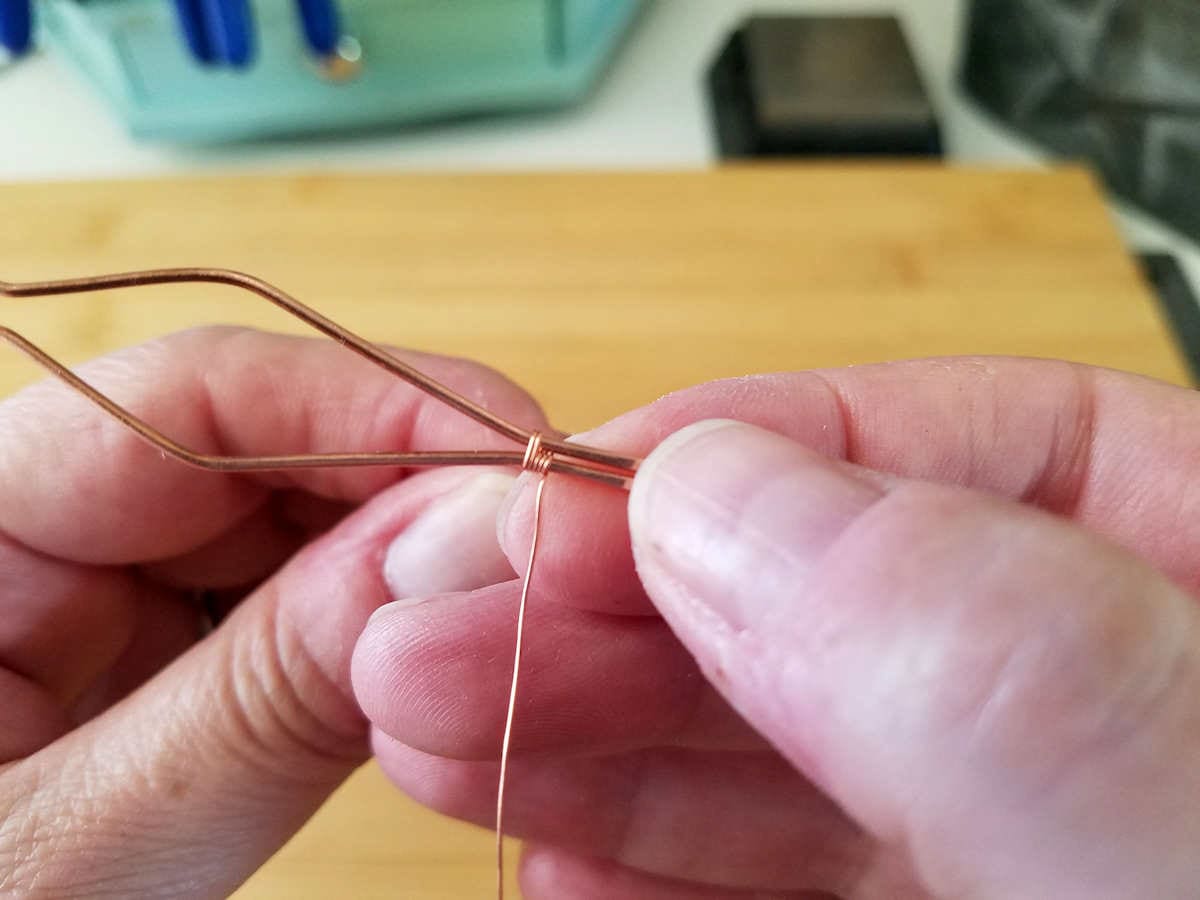
Step 2
Now lash the two core wires together with a couple of wraps, as shown.
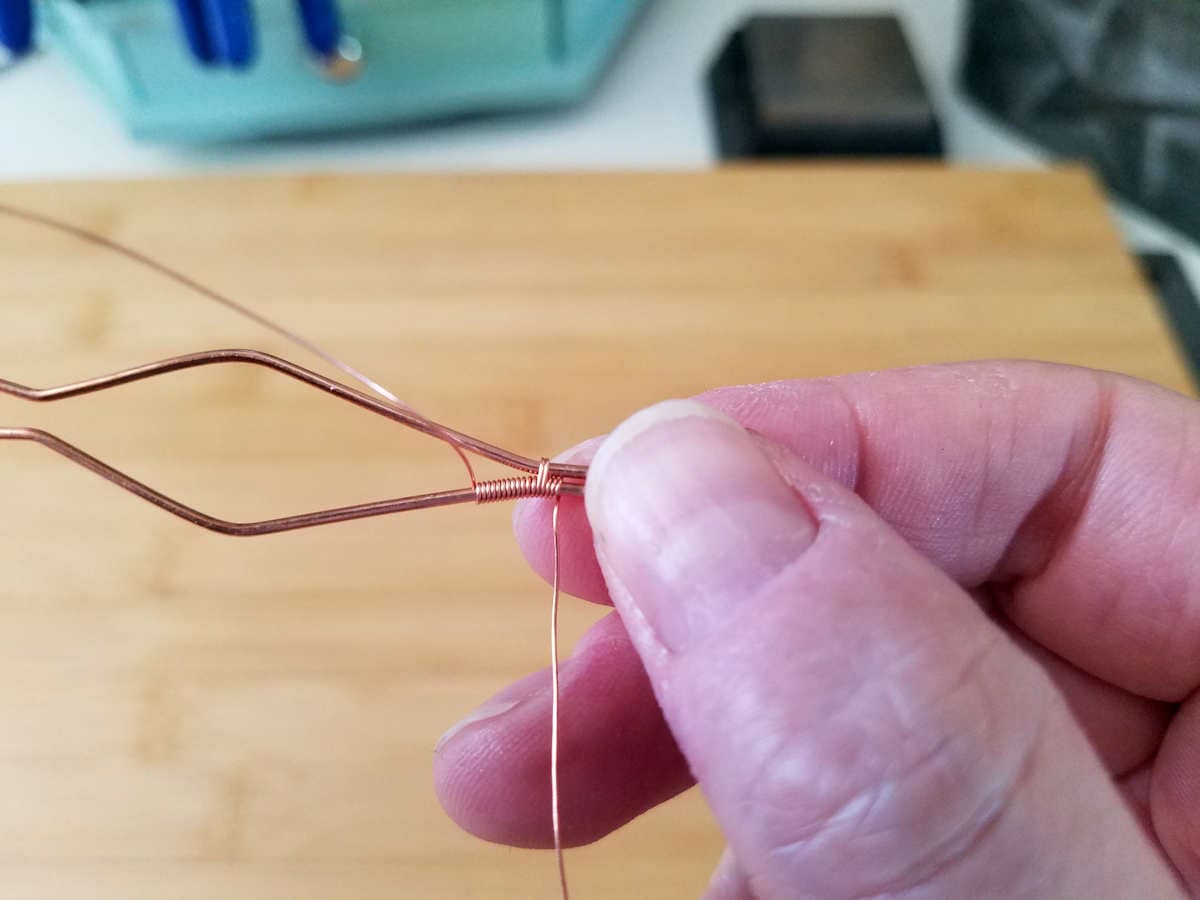
Step 3
Coil your weaving wire about 12 times around the bottom core wire, as shown.
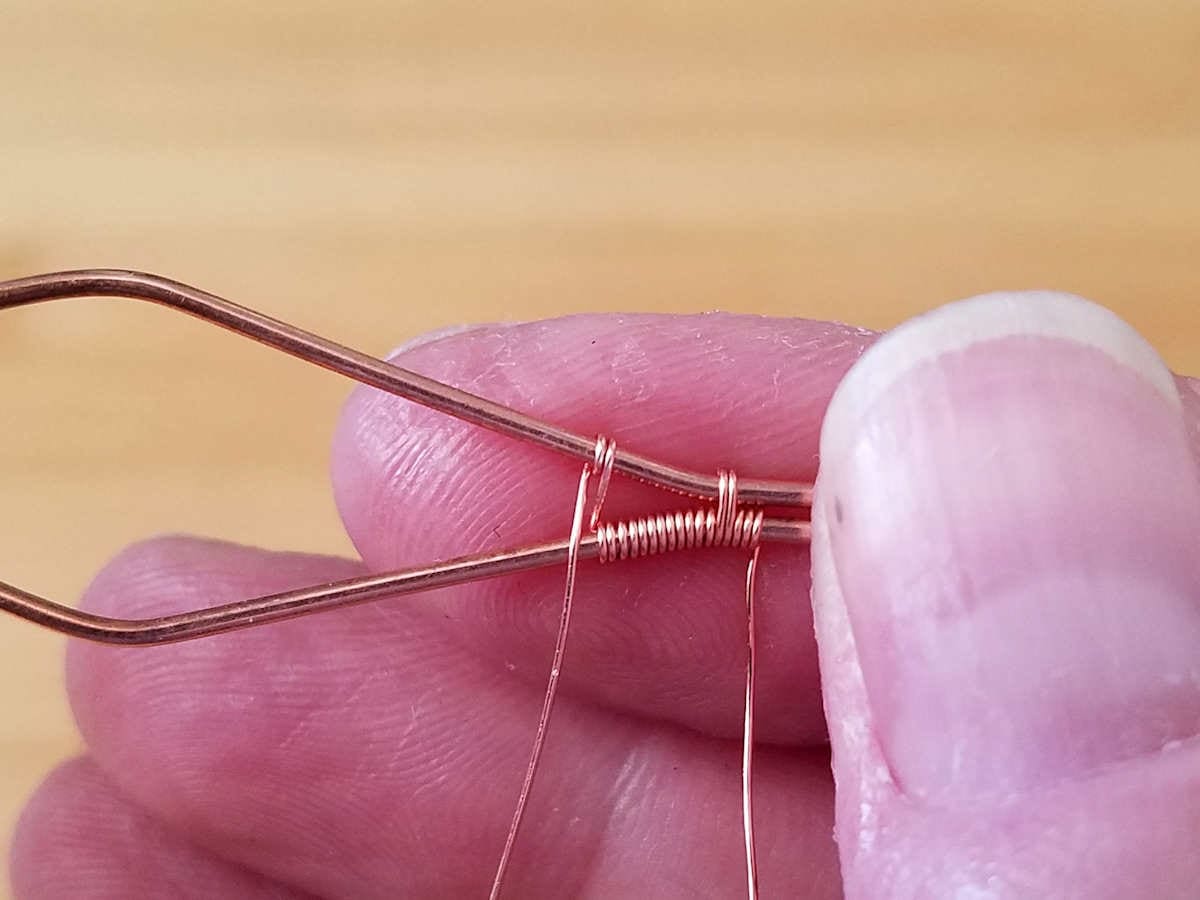
Step 4
At this point, we’re going to begin the Figure 8 weave with a minor modification. Add one complete wrap around the core wire between every crossover between the two sides of the frame, as shown.
This extra wrap gives the weave a cleaner look and helps stabilize the weave when wrapping across the open space in the flared portion of the bail.
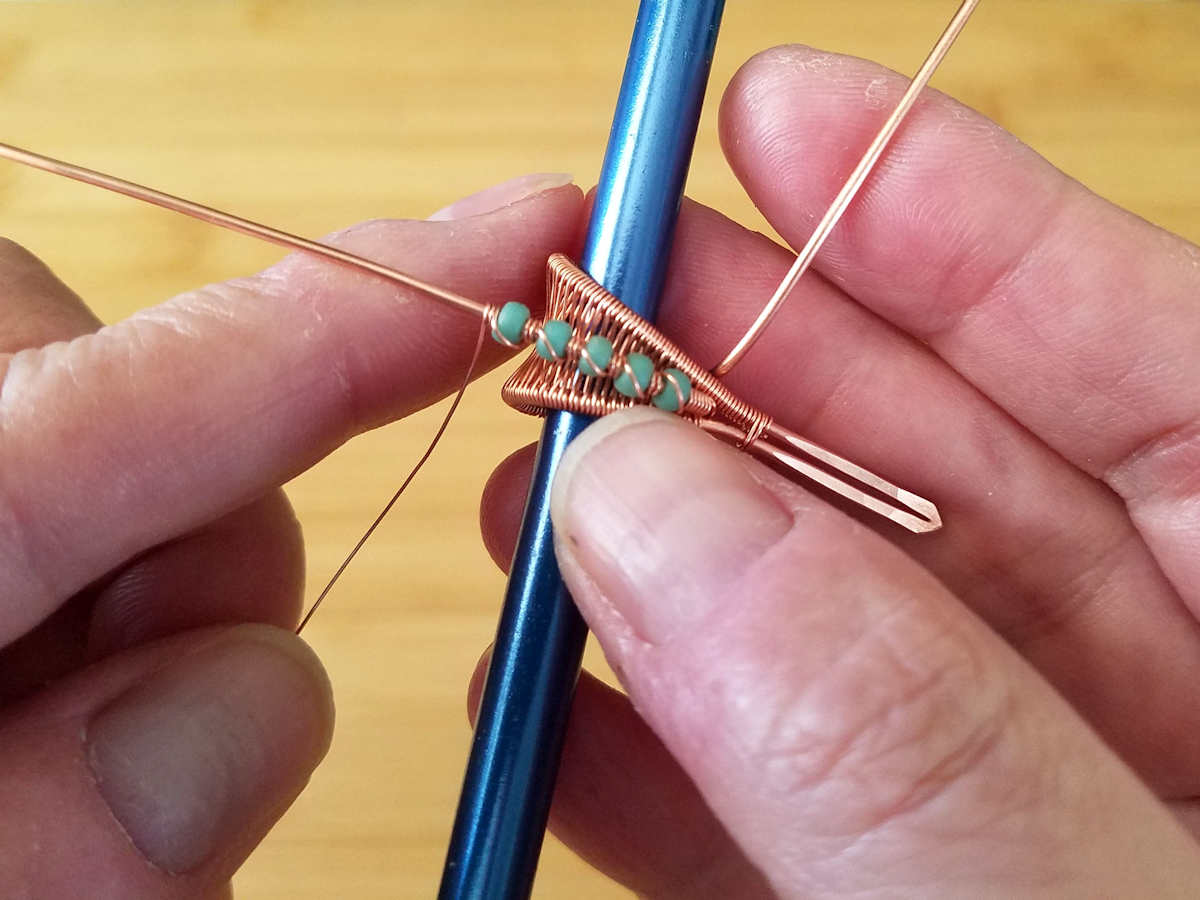
Step 5
Continue the weave for a couple more pattern repeats. Remember to add a complete wrap around each core wire between every crossover.
Once you’ve established a few pattern repeats, place your weave into you ring clamp as shown. The Figure 8 weave is challenging when weaving across an open space as we are here. The ring clamp will help stabilize the weave while you work through the flared portion of the bail.
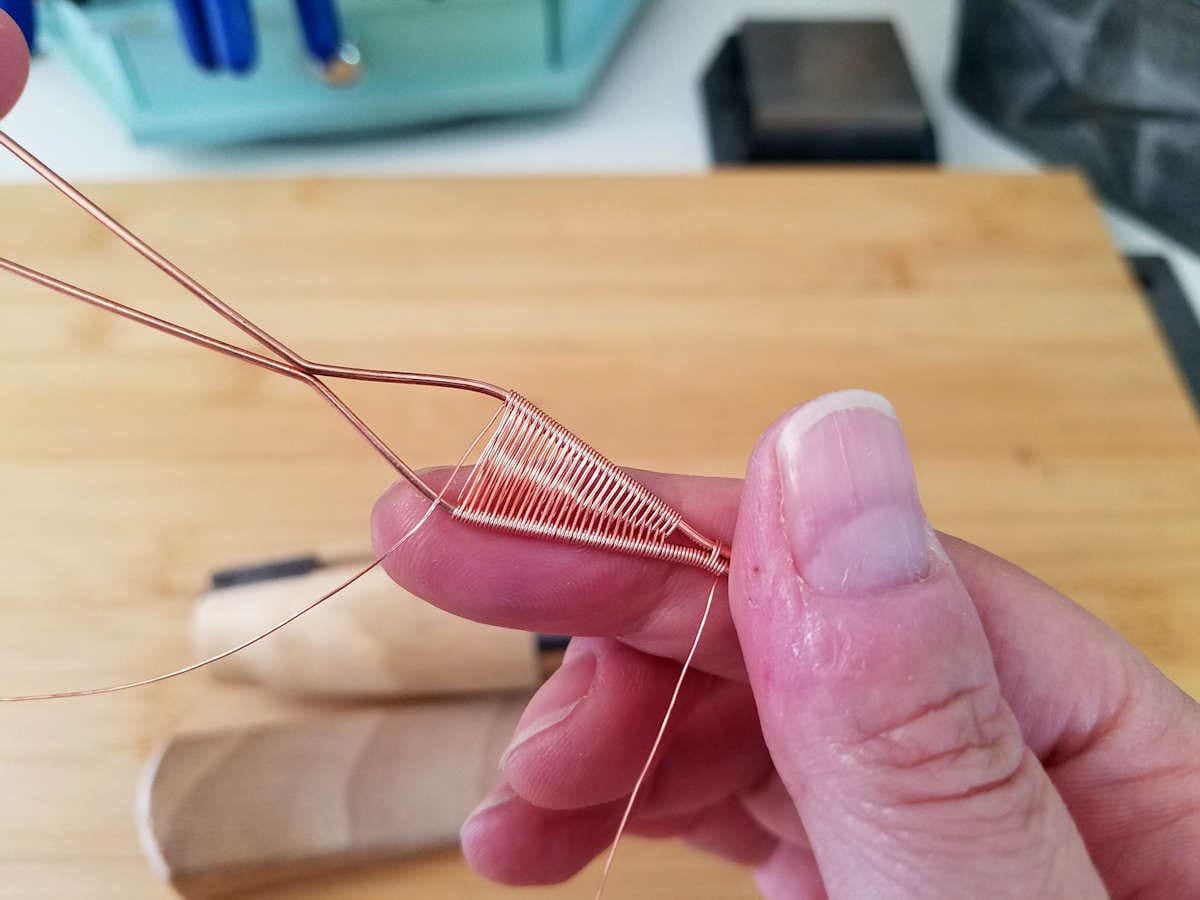
Step 6
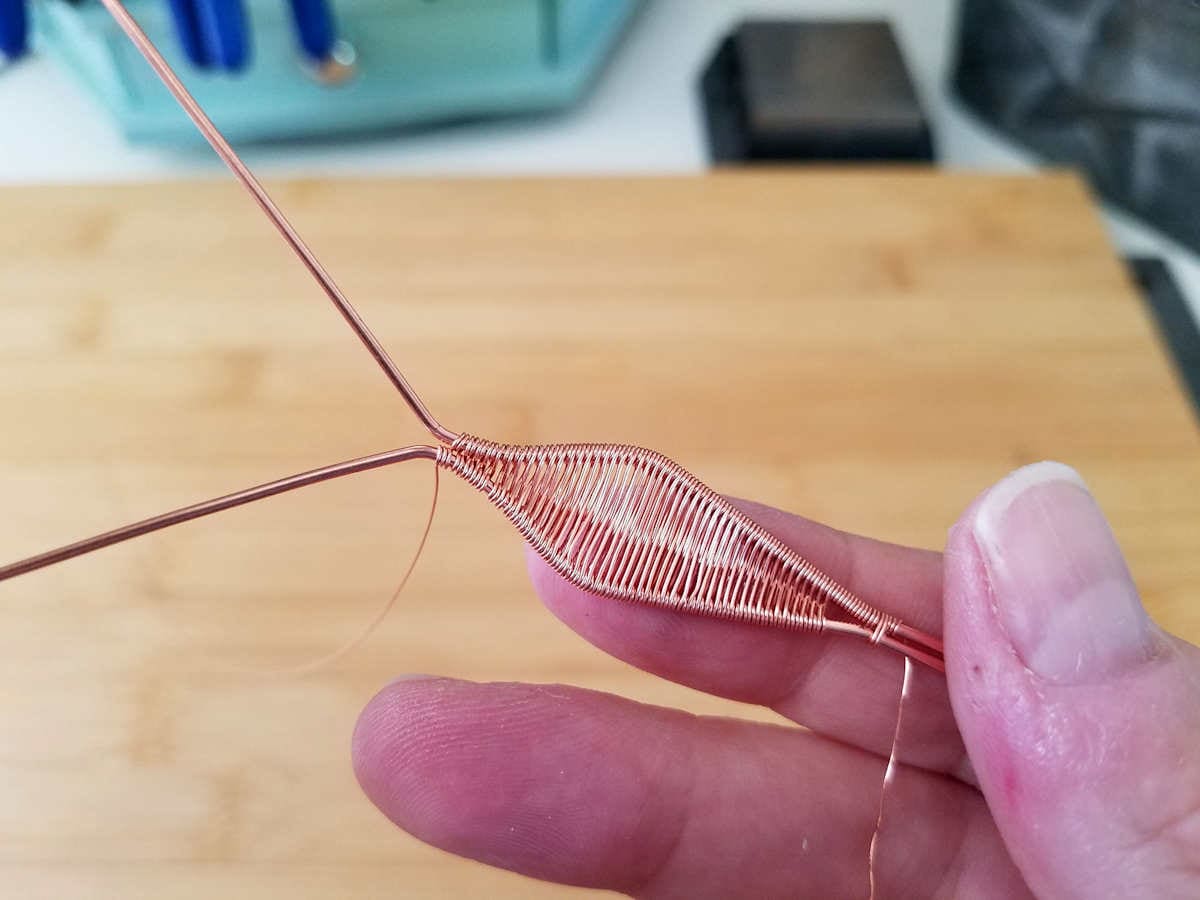
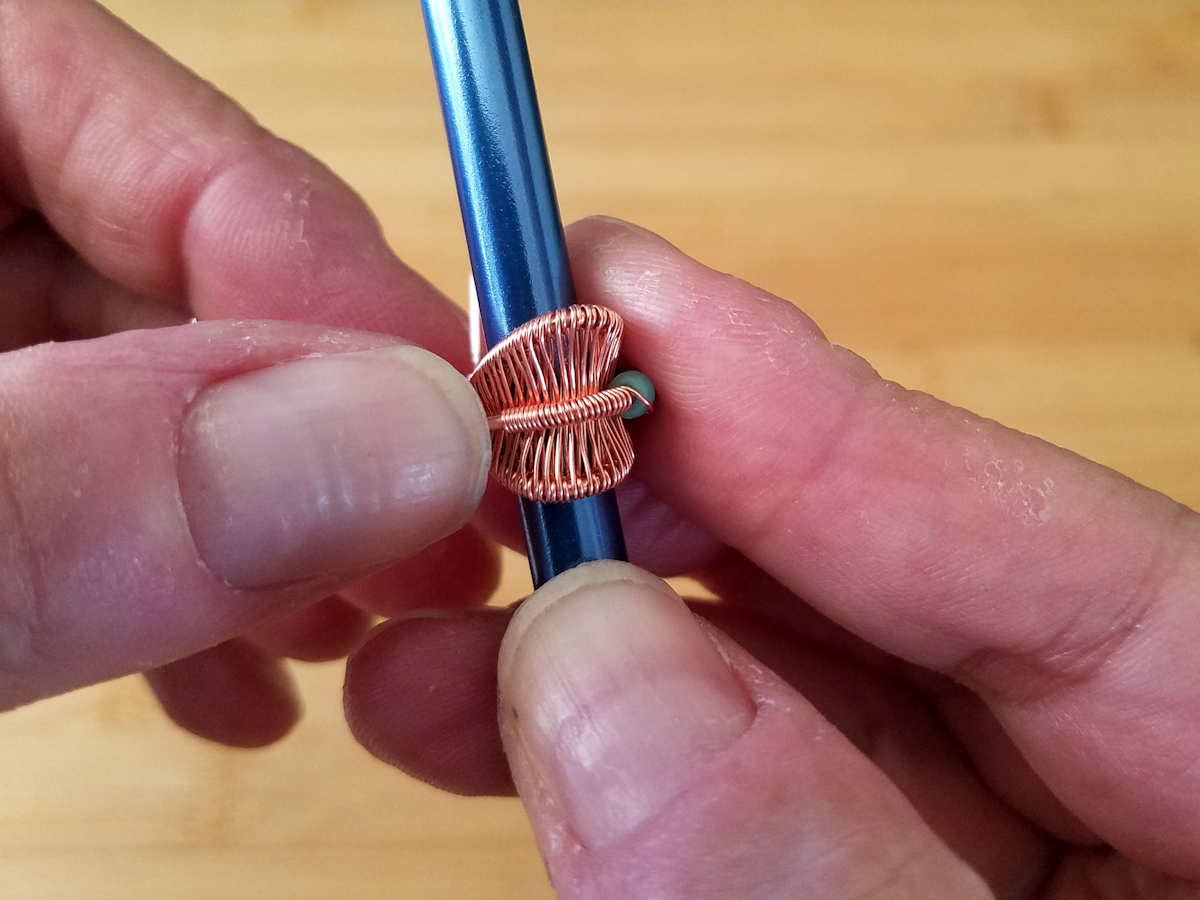
Continue weaving in pattern until you reach the widest part of the frame. Remember to compress your weave frequently and move your ring clamp up to secure the weave. The clamp will keep your weave neatly compressed without damaging the wire.
At this point, your frame should look something like the one shown below.
As we begin weaving the decreasing side of the bail, you may notice that your weaving wire starts to slip a bit. That’s simply the nature of this weave.
It’s not a reflection on your ability at all. So don’t take it personally and don’t beat yourself up if you struggle with this part.
I’ll show you the technique that I use to combat the instability of this weave. But as you’ll see, not even I manage to get my weave to look perfect on the decreasing half of the bail.
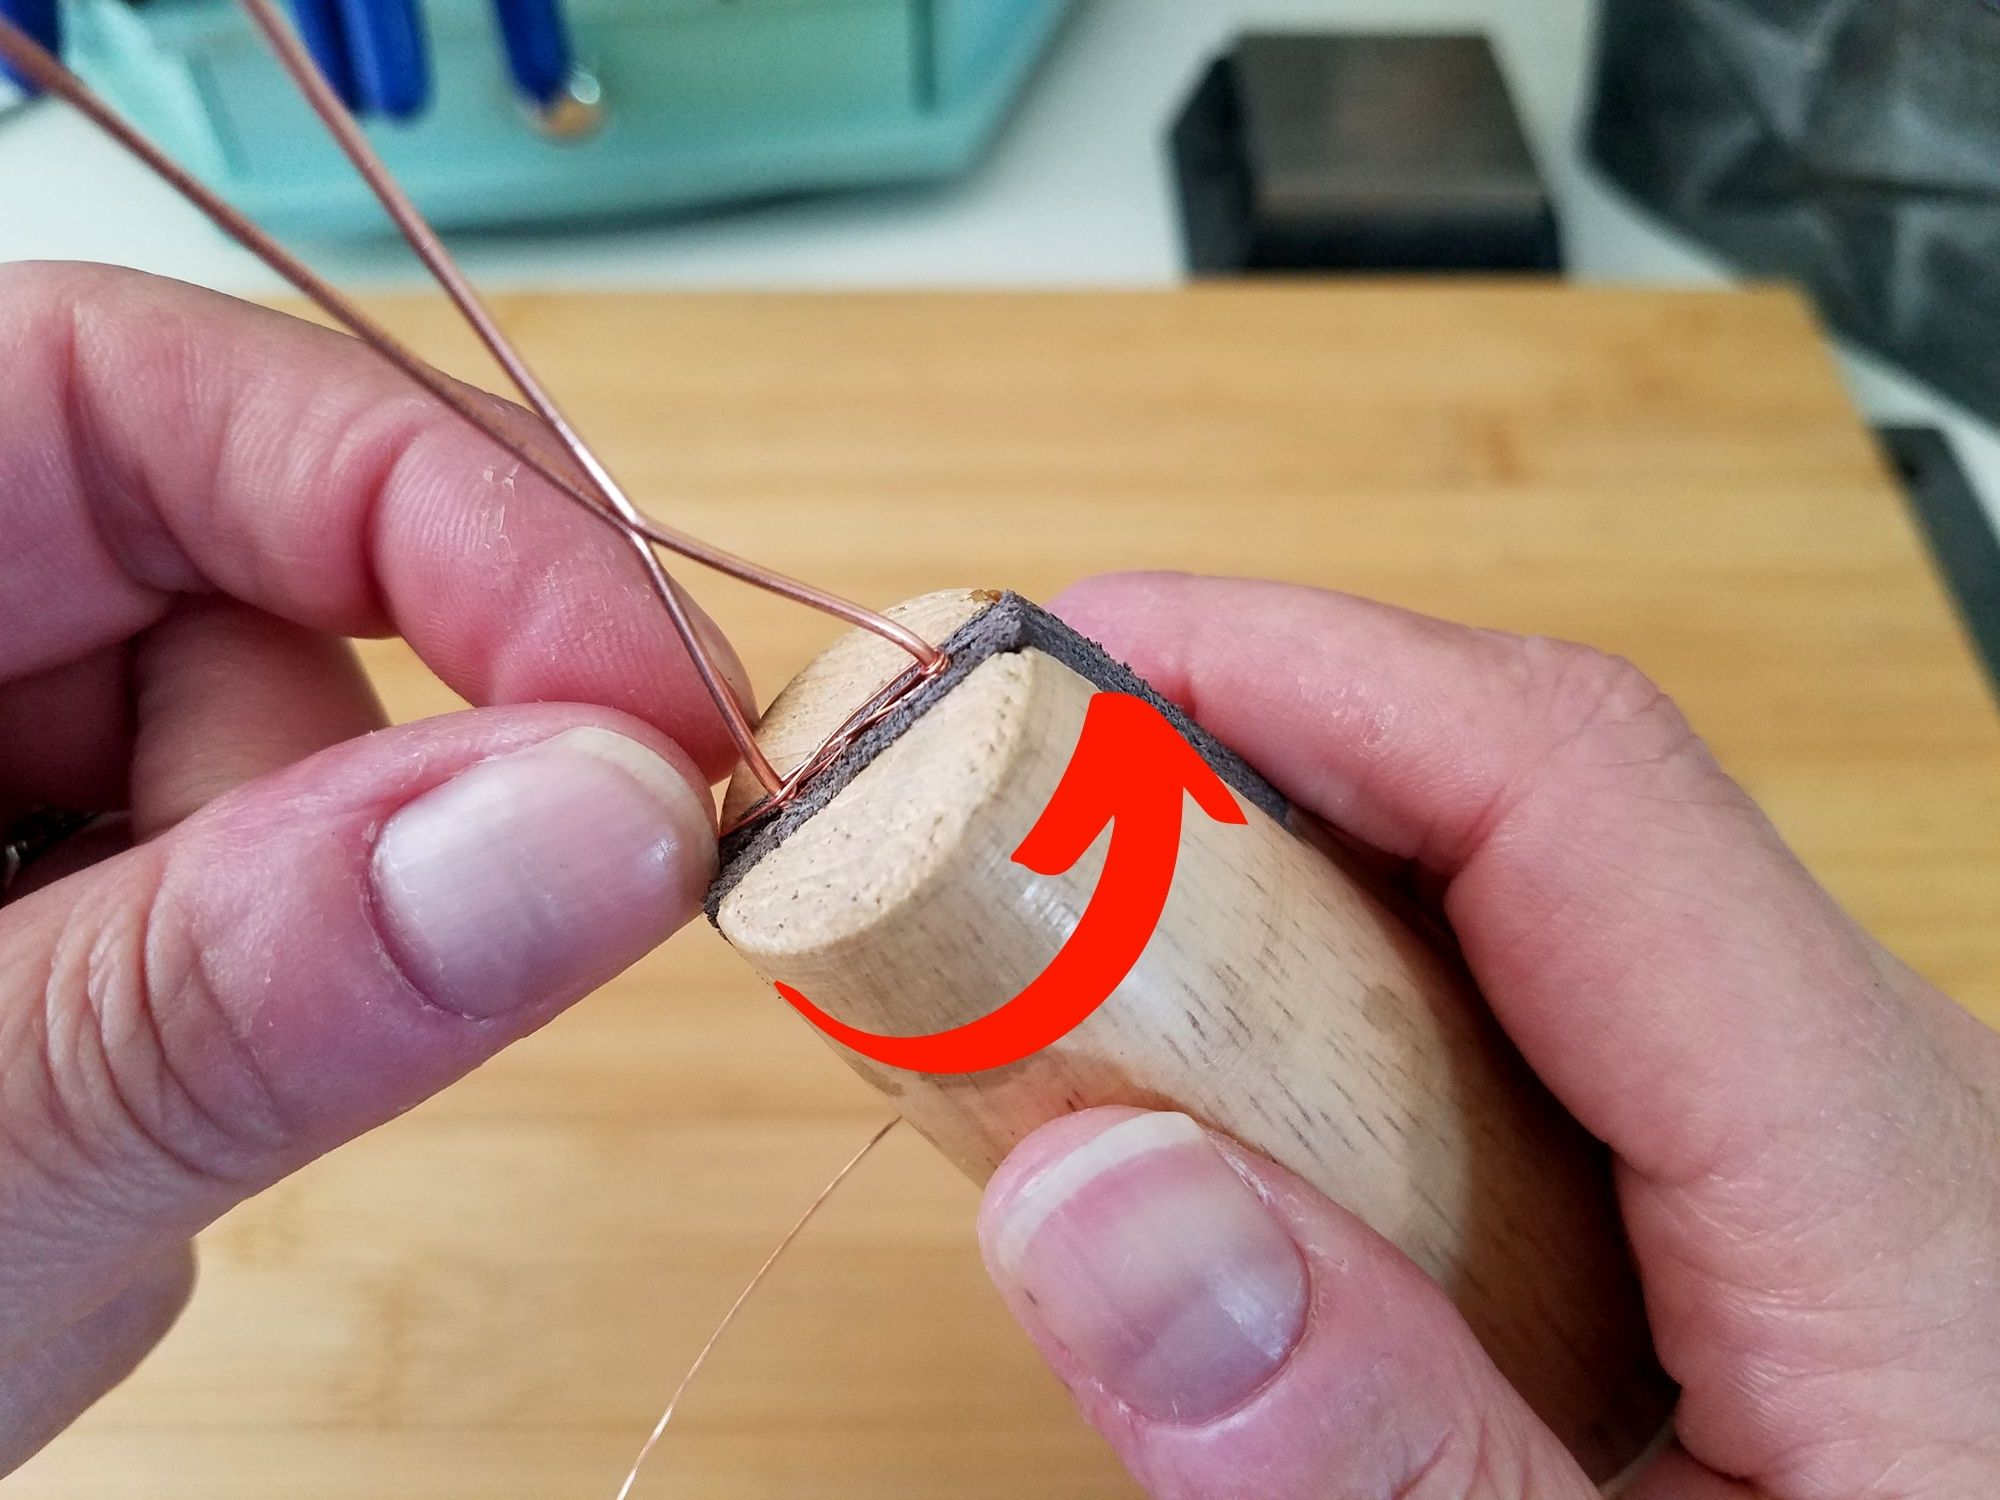
Step 7
Make sure your weave is tightly compressed and that your ring clamp is positioned at the top of the weave, as shown.
Hold the weaving wire firmly with your first finger and thumb as close to the core wire as you can get, as shown. Then gently roll the ring clamp to complete each wrap around the core wires, as indicated below.
This technique gives you more control of the weaving wire. It’s also more work though, so I don’t recommend using this technique all the time. But it will help you get a neater weave on this more challenging half of the bail.
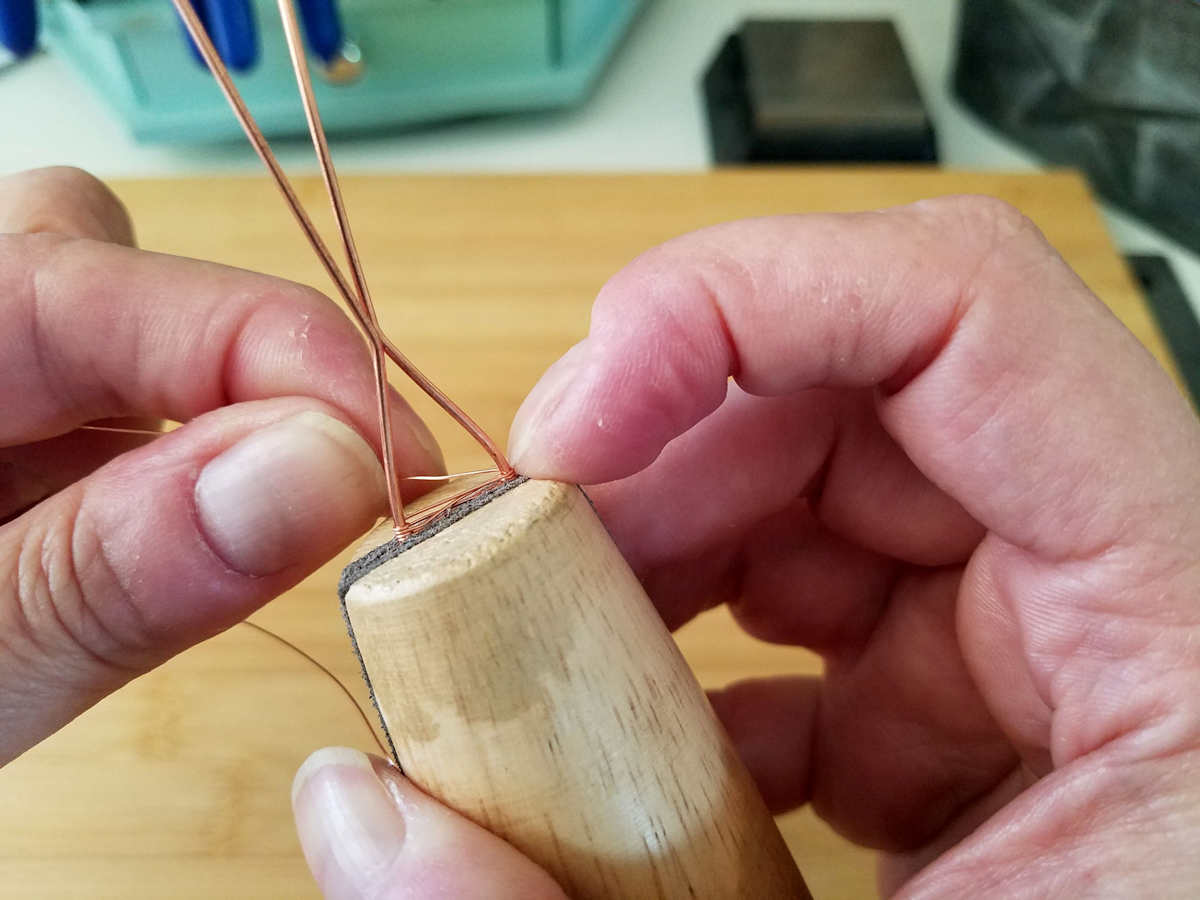
Step 8
Continue carefully and slowly working your weave on the downward slope of the bail.
Use the index finger on your non-dominant hand to hold your wire in place as you complete the next wrap, as shown.
Also, be sure to compact your weave and reposition your ring clamp every two or three pattern repeats. This will help keep your weave neat and compact.
Step 9
Continue slowly and carefully weaving until you reach the point where the two core wires merge again.
Then secure your weaving wire with three wraps around the lower core wire, as shown.
Measure out about 12 inches of weaving wire and cut it off the bobbin. We’ll use that extra wire to finish off the beaded portion of the bail.
Congratulations! You made it through the most challenging part of this tutorial. Don’t worry if your weave doesn’t look perfect. Notice that mine doesn’t either at this point.
There are some gaps in my weave on the decreasing side of the bail and the frame wires curved inward a bit because I used too much tension. But, again, this is going to be the backside of your bail. I promise it’ll look great when you’re finished!
Shape the Bail Frame
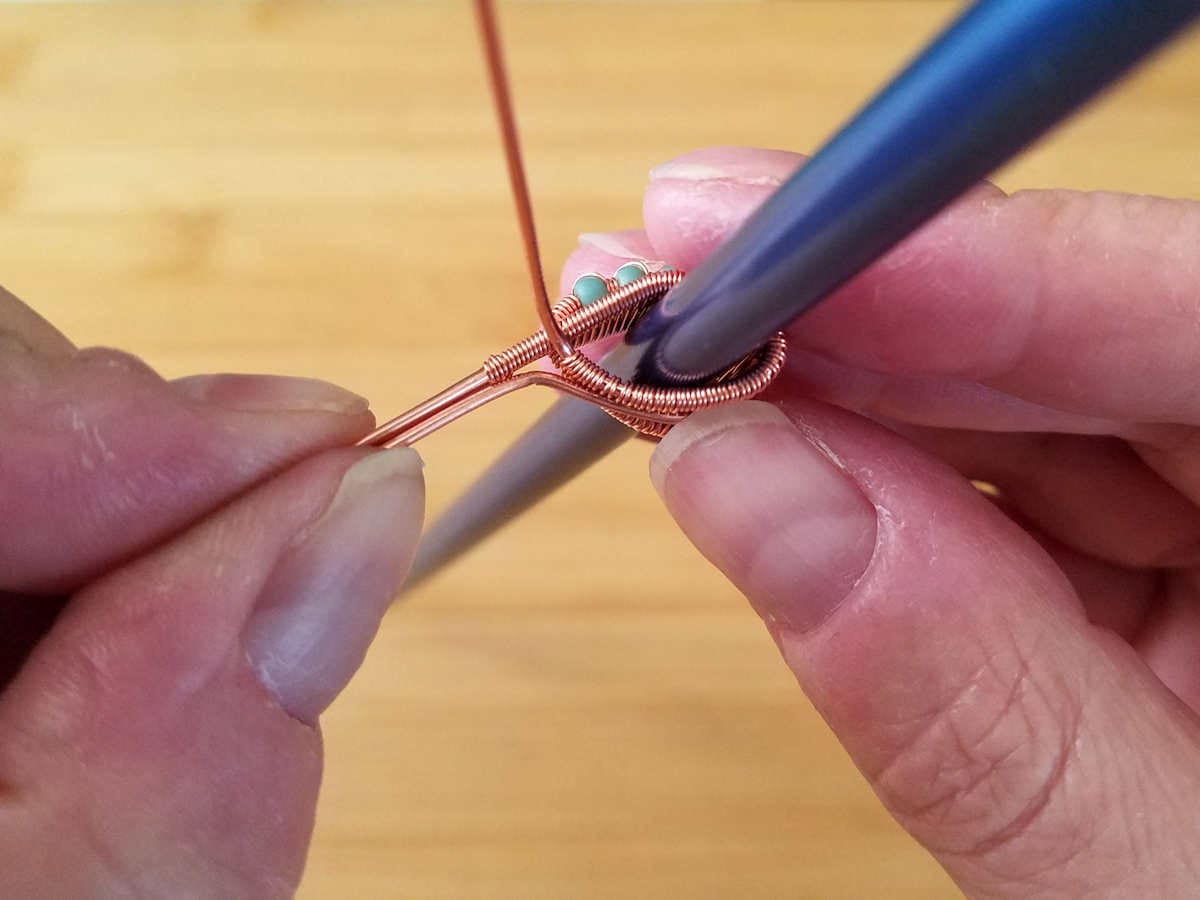
Step 1
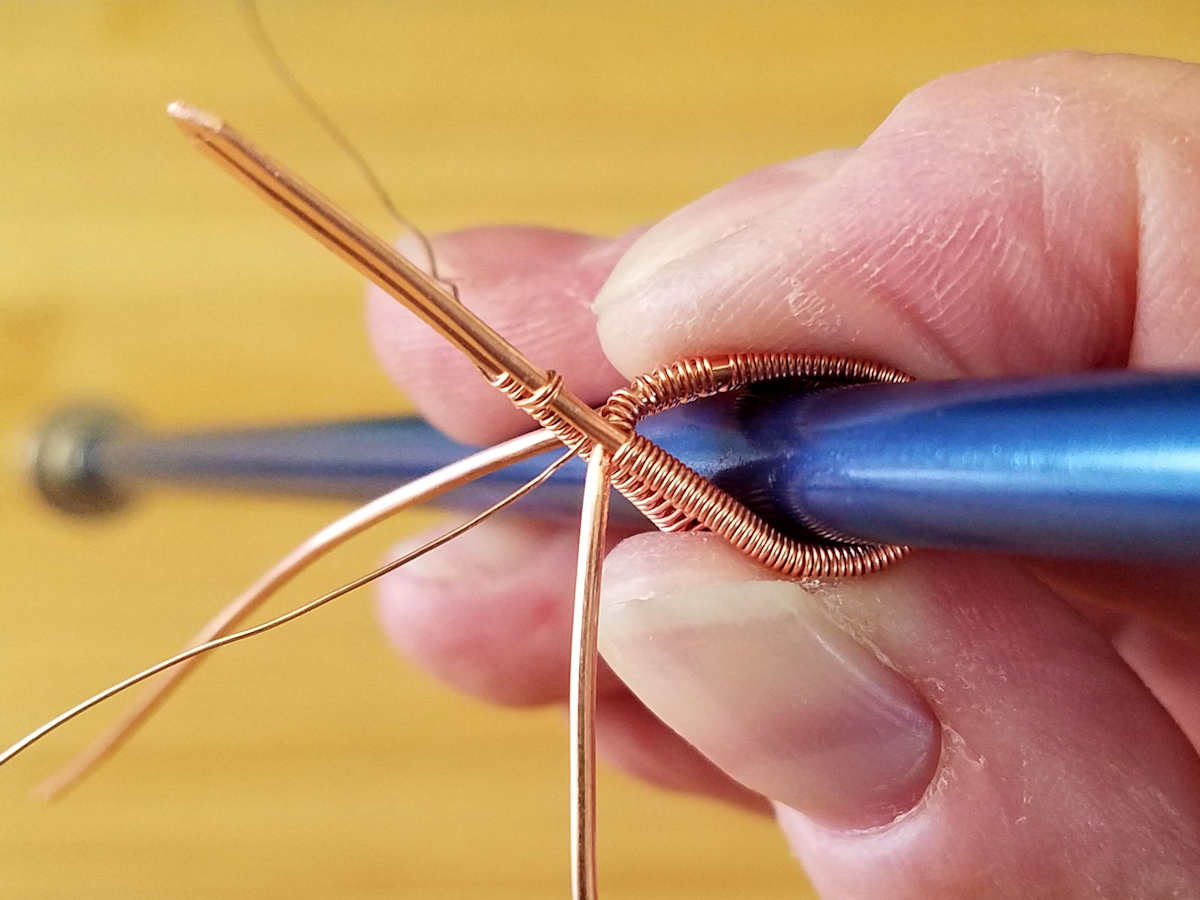
Place your 6mm mandrel at the widest point of the frame. Then roll the bail into a soft curve around the mandrel.
Feed the core wire that the weaving wire is secured to through the gap in the “V” at the beginning of your weave. Feed the weaving wire through that gap as well.
Continue tightening the bend around the mandrel while pulling the wire tail further through the front of the bail until the two points of the bail frame meet, as shown.
Step 2
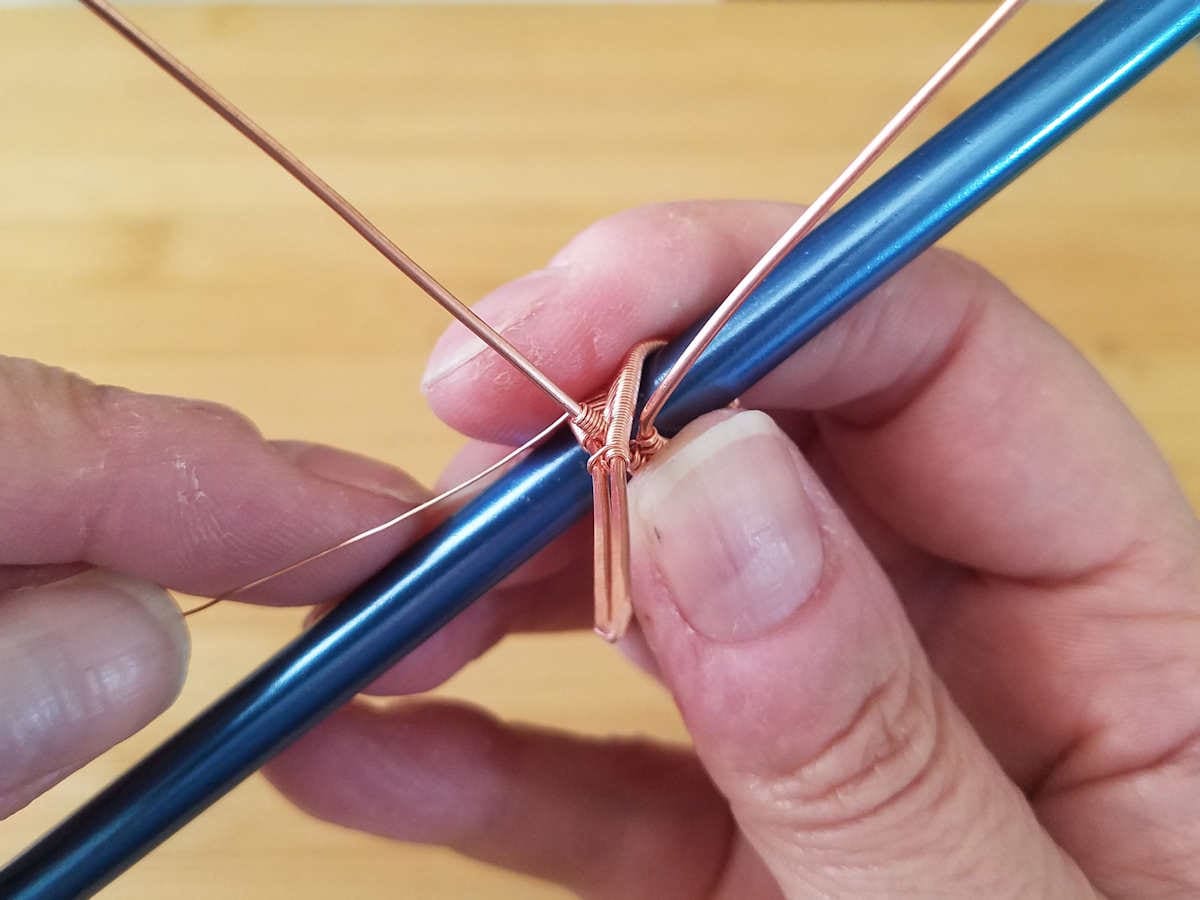
Straighten the core wire that’s coming out the front of your bail and move the remaining core wire off to the side so it’s out of your way for now. Then coil your weaving wire around the center core wire five or six times, as shown.
Step 3
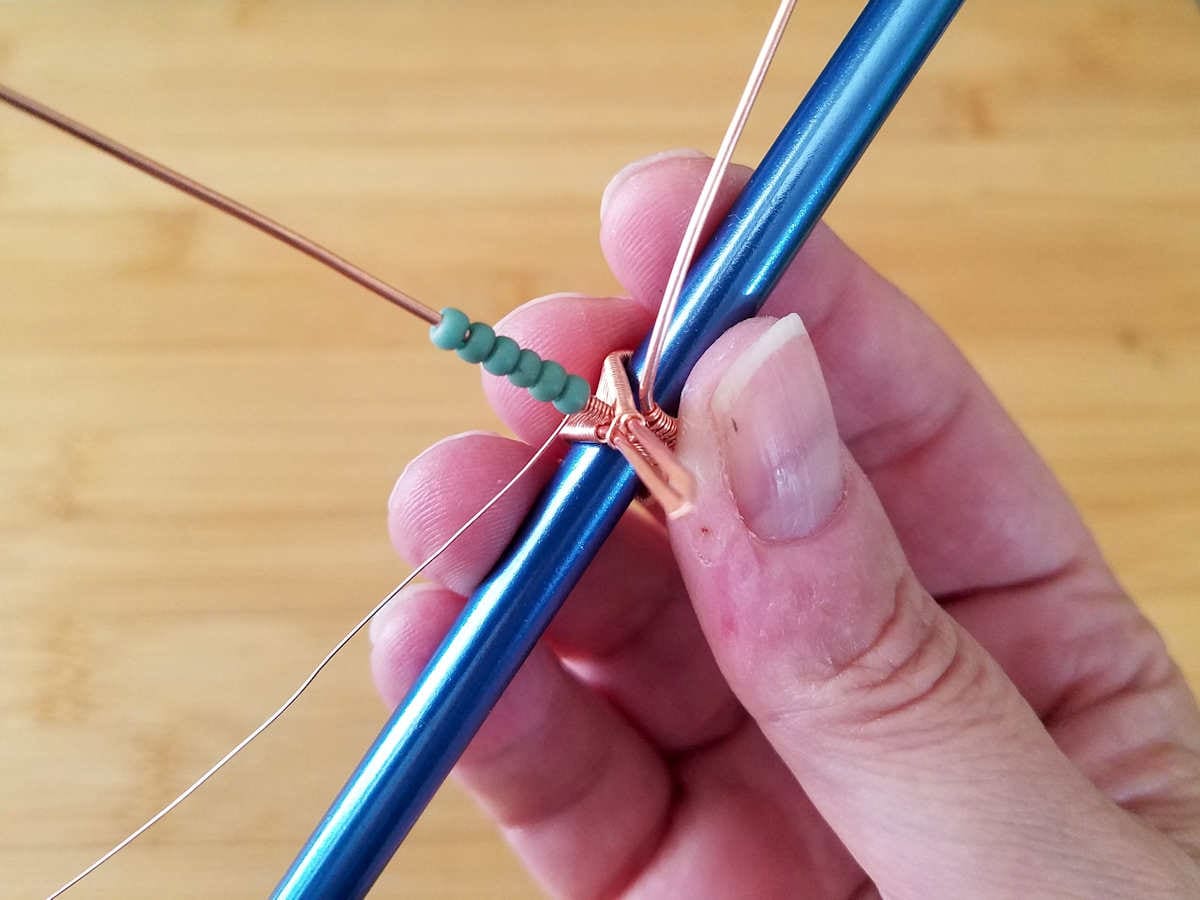
Thread five or six beads onto the center core wire. I used 8/0 seed beads which have holes that are large enough to slip over an 18ga wire.
If the holes on your beads are too small to fit over your wire, you can string them onto your weaving wire and wrap them over the center wire instead.
Step 4
Now securely wrap your beads with the weaving wire.
I wanted the wire that crosses over my beads to be visible from the front of the bail. So I made sure to wrap over each bead on the front side of the core wire, as shown.
I spaced the beads with two snug wraps around the core wire between each bead.
Step 5
Once you get four or five beads wrapped, start folding the beaded core wire over your bail, as shown.
You want to end up with just enough beads to embellish the front and top surfaces of the bail. Add more beads, as needed.
Five beads worked out perfectly for my bail.

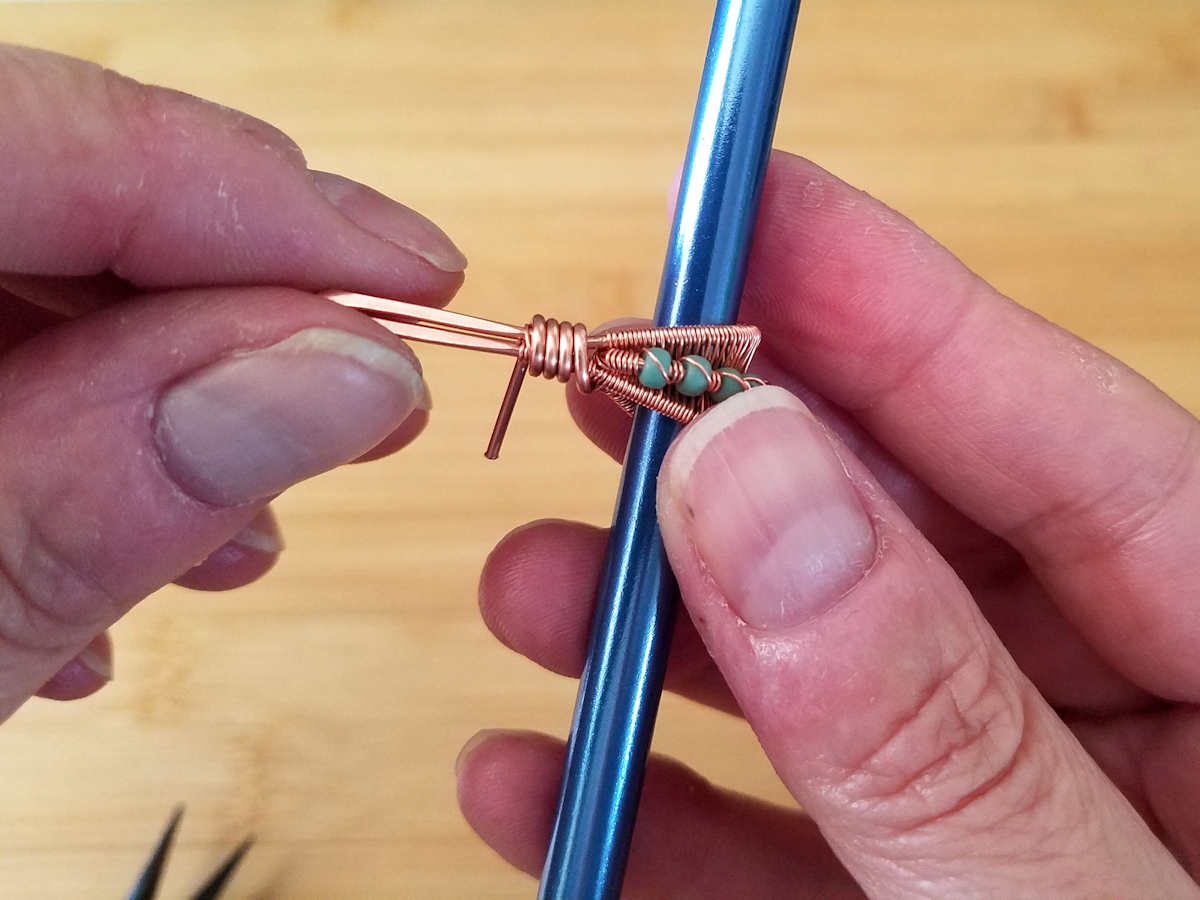
Step 6
Once you’re satisfied with the beaded section of your wire, continue coiling the remaining 28ga wire around the remaining core wire, as shown.
Keep bending the core wire down and around the the backside of the bail as until it’s parallel with the folded point of your bail.
Step 7
Use your flat nose pliers to press a tight bend into the wire at the base of the bail so the remaining tail of the core wire fits securely against the back of the folded point of your bail, as shown.
Step 8
Coil the remaining core wire to securely bind the beaded core wire to the folded point of your bail, as shown.
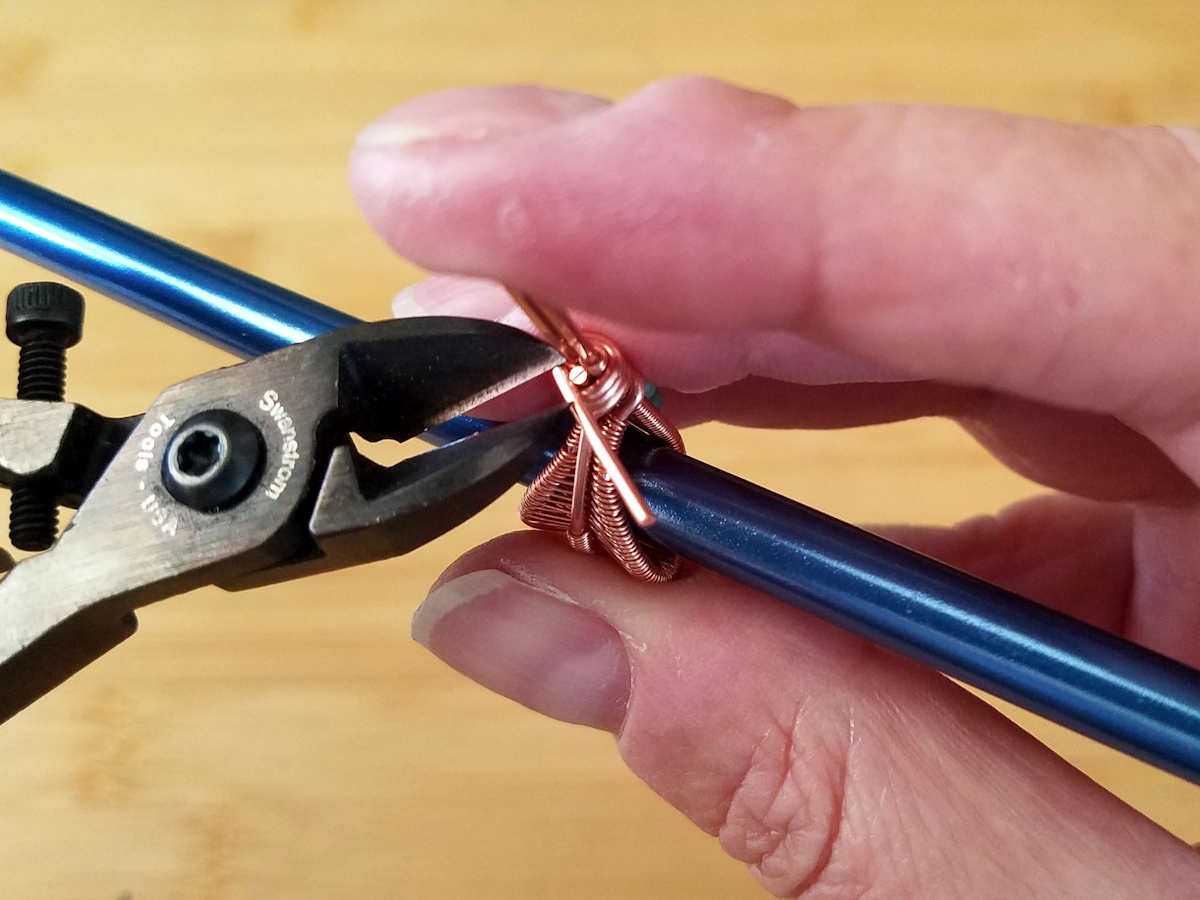
Step 9
Before you complete the final wrap, carefully trim the central core wire flush with the coil, as shown. Be careful to avoid nicking the folded point of your bail with your wire cutters.
Step 10
Trim the coiled core wire on the back of the bail. Use your flat nose pliers to tuck the cut end securely against the central core wire, as shown.
Form the Pendant Hook
Step 1
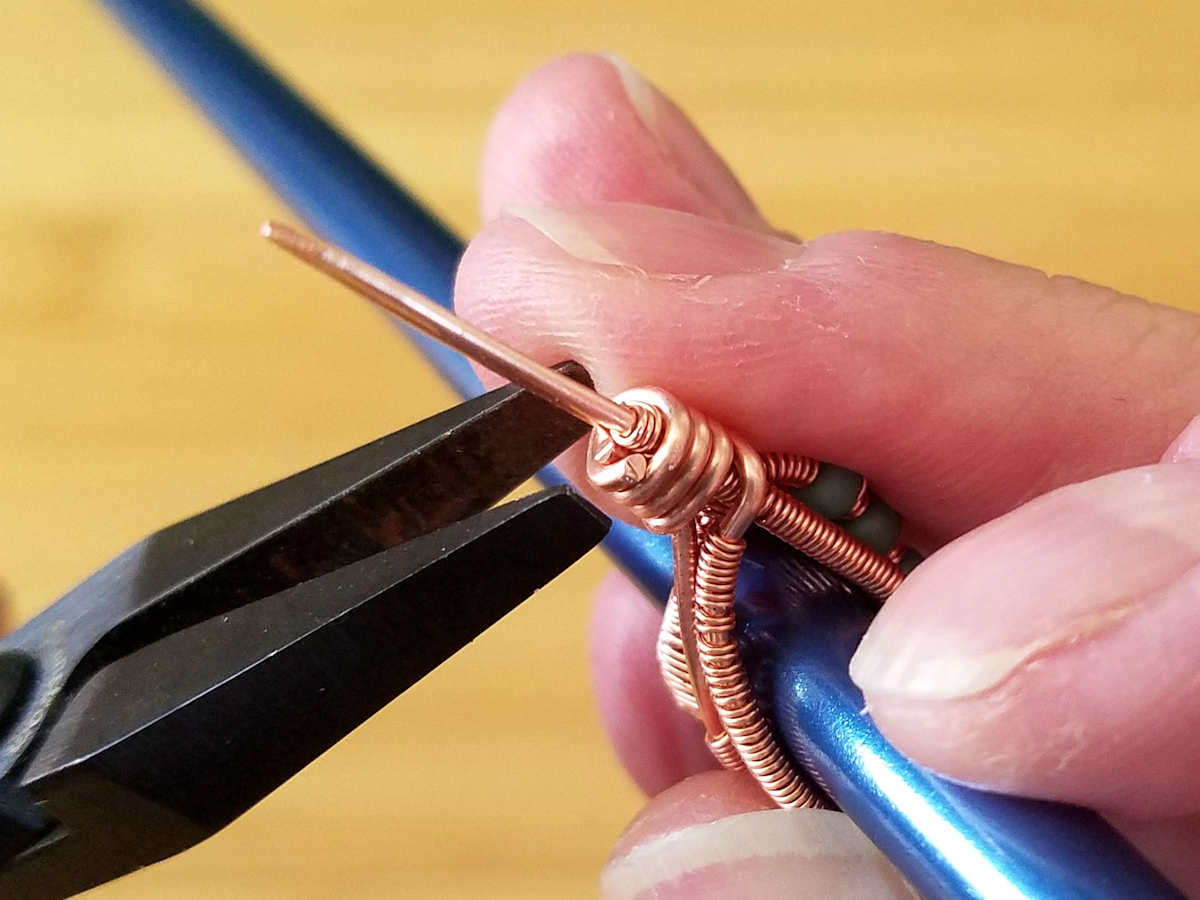
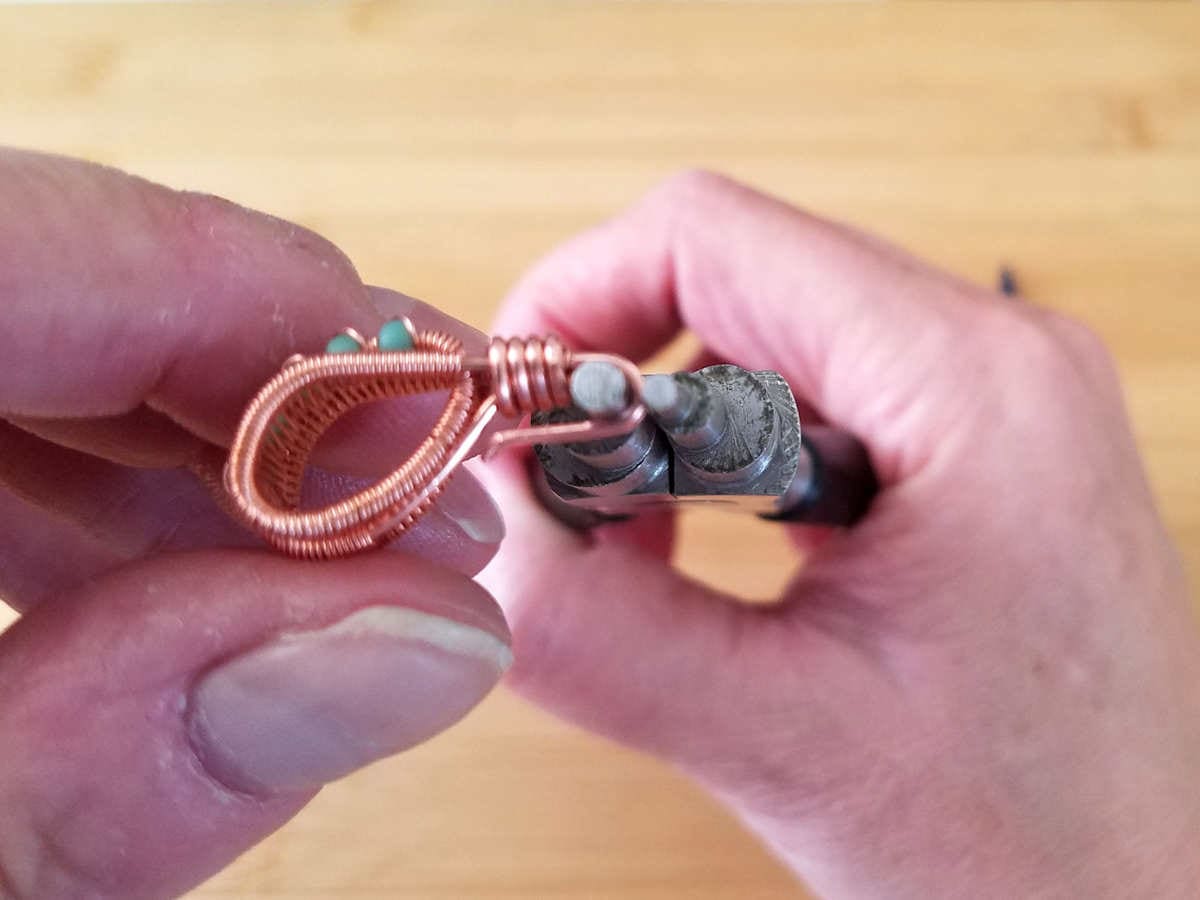
Use the 2mm step (the smallest step) on your stepped bail making pliers to form a slight curve on the folded point. Make sure you bend the point toward the front face of your bail.
You can’t see it in this image because my thumb is in the way, but I’m rolling the point of the fold toward me and my thumb is resting against the beaded face of the bail.
Step 2
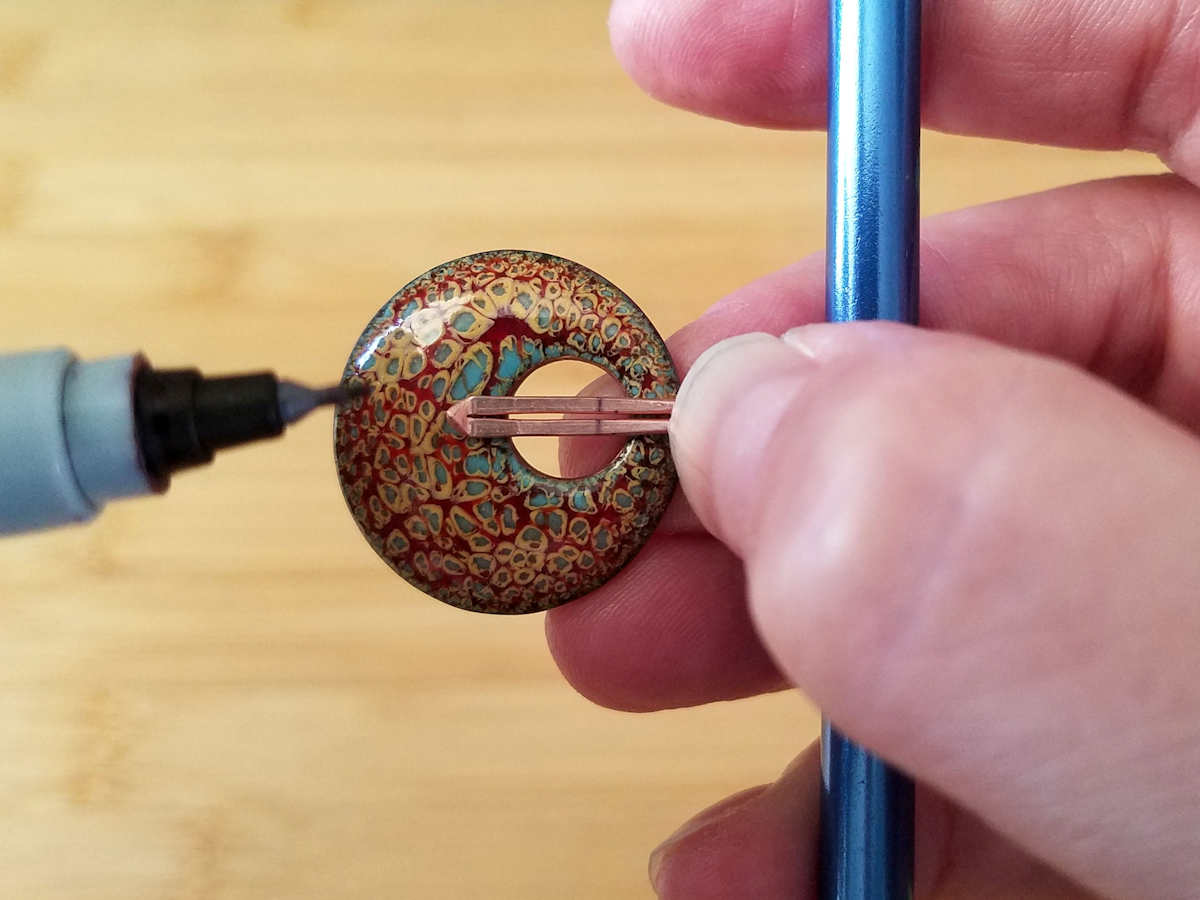
Place your pendant behind the folded point of your bail to gauge where you need to create the bend on your hook.
Mark the point where you want to make the bend with a permanent marker, as shown.
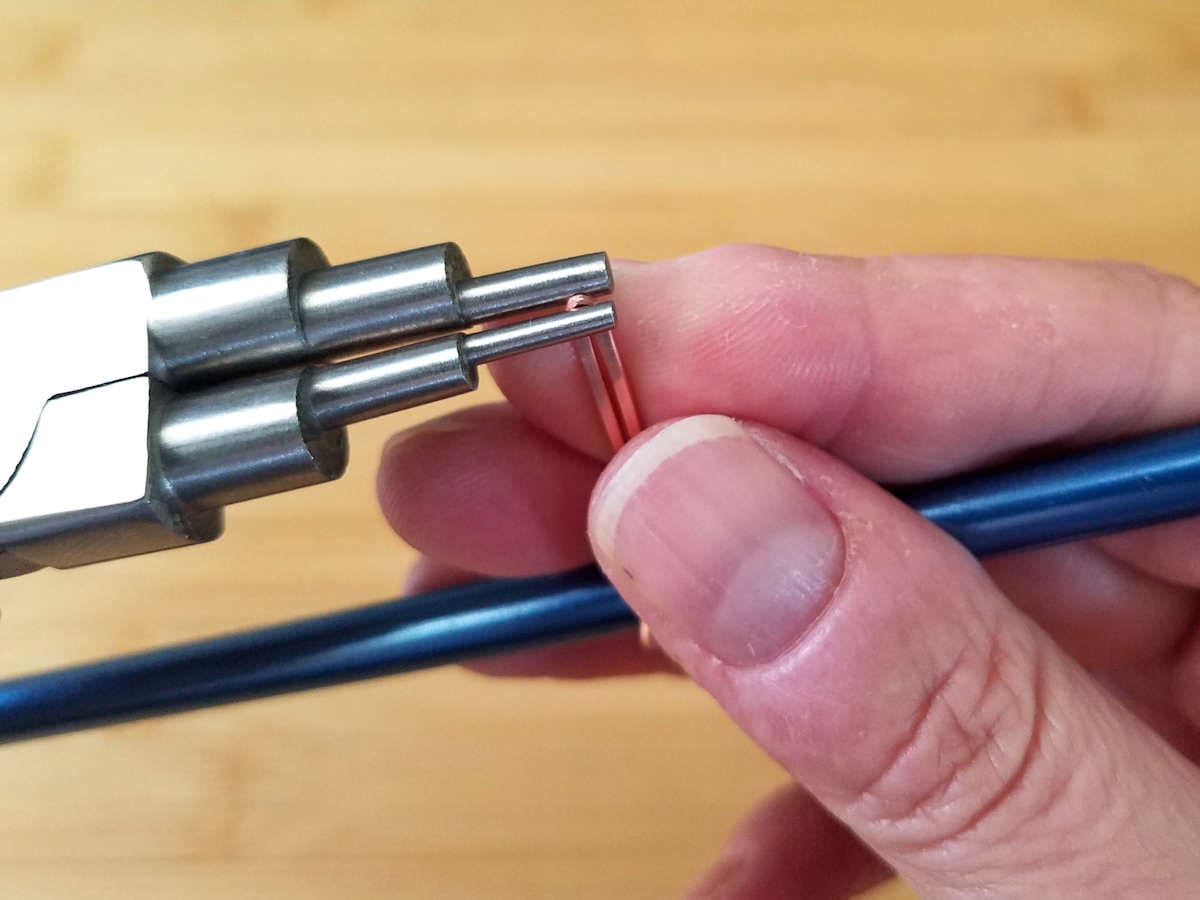
Step 3
Use the 3mm step (the second step) on your bail-making pliers to form the final bend on the hook, as shown.
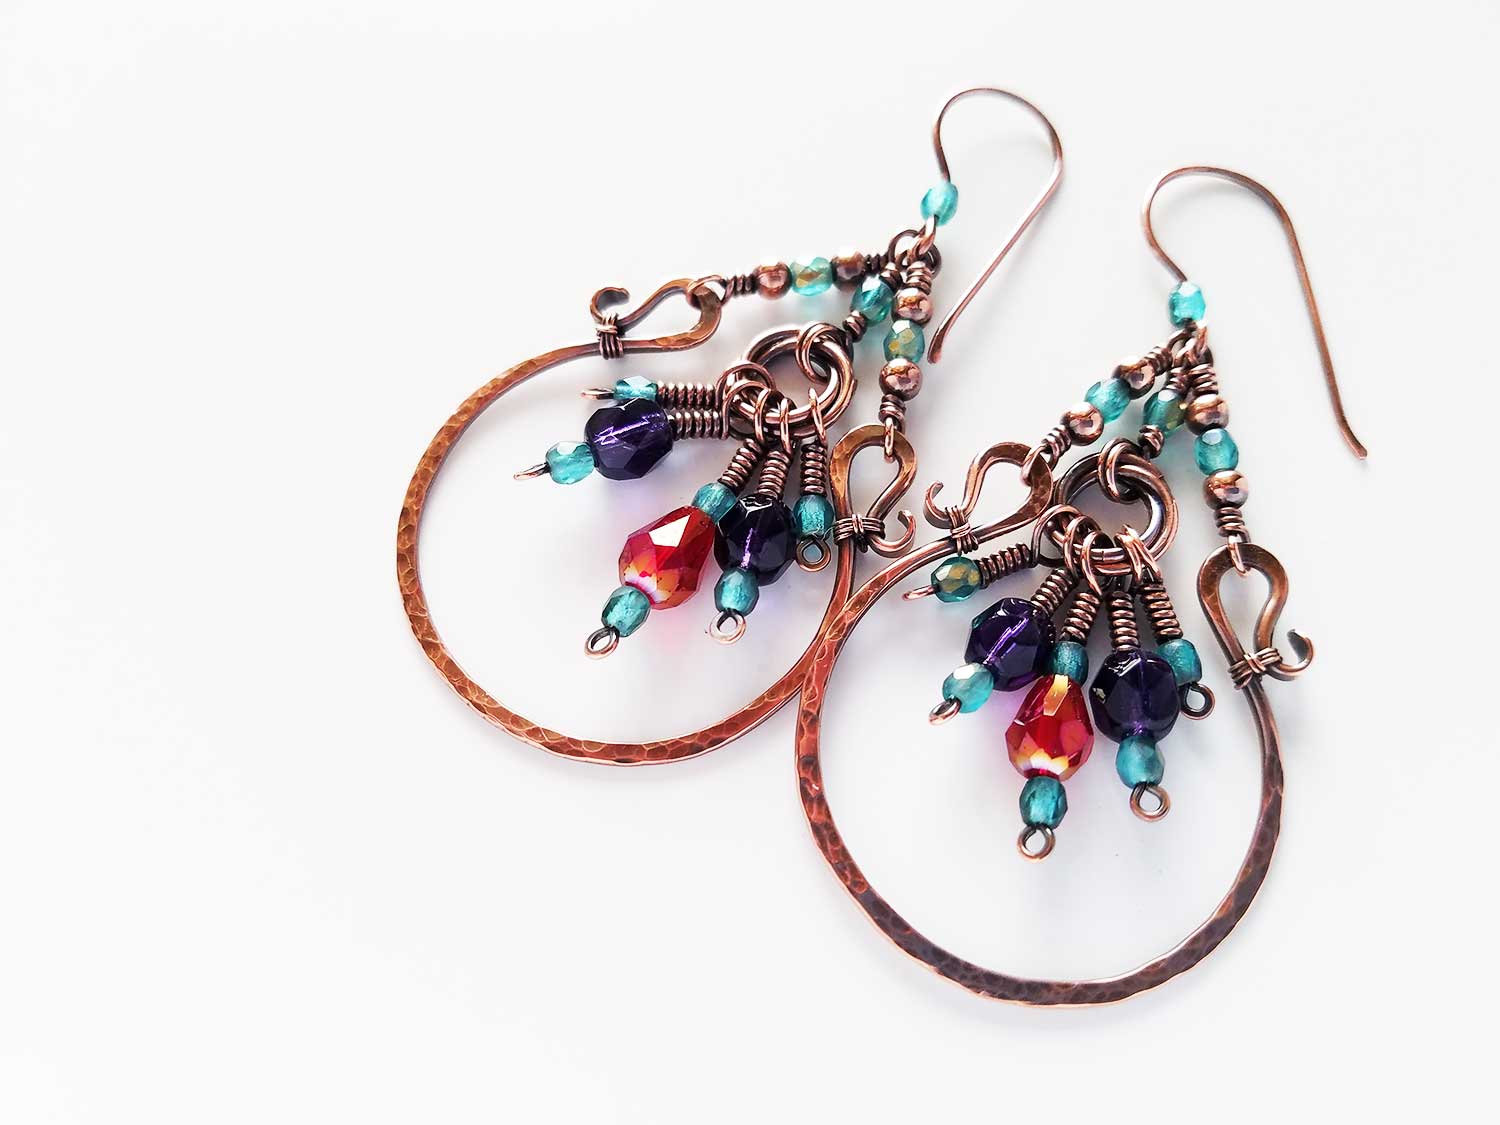
That’s it! Your interchangeable Figure 8 weave bail is now finished and ready to patina and polish. To hang a pendant on your bail, just gently open the hook enough to slide your pendant onto the bail. Then push the hook closed to secure the pendant.
Finishing Suggestions
I antiqued the bails that I made while writing this tutorial with Liver of Sulfur (LOS). And then I burnished them with super fine steel wool (Grade #0000) in a warm bath of water and original Blue Dawn dish soap. The steel wool brings back the bright copper highlights on the high spots.
Once that’s done, I rinsed the bails thoroughly to remove any particles of steel wool. And then I put them in a tumbler barrel filled with warm water and a generous squirt of Blue Dawn. I tumbled them for about three hours.
If you’re new to wire weaving, be sure to read this detailed tutorial that walks you through my 7-step patina process. And if you’re wondering why I recommend tumble polishing specifically, check out this post. Also, be sure to clean your stainless steel shot regularly. Clean shot is necessary to achieve the best finish on your tumble-polished jewelry.
One last bit of tumbler advice before you go. Always make sure that any beads or stones that you use for your jewelry are safe to tumble. I don’t recommend tumbling natural pearls, soft gemstones, ceramic beads, or glass beads with polymer coatings, such as glass pearls and certain frosted-look glass. As always, if you’re unsure if your beads can handle the tumbler, run a test tumble with a bead that you’re willing to sacrifice.
Variations of the Interchangeable Figure 8 Weave Bail
There are so many things you can do to make this bail uniquely yours. And you can easily modify the interchangeable Figure 8 bail to fit almost any pendant.
Here are some of the variations I made while working out this design.
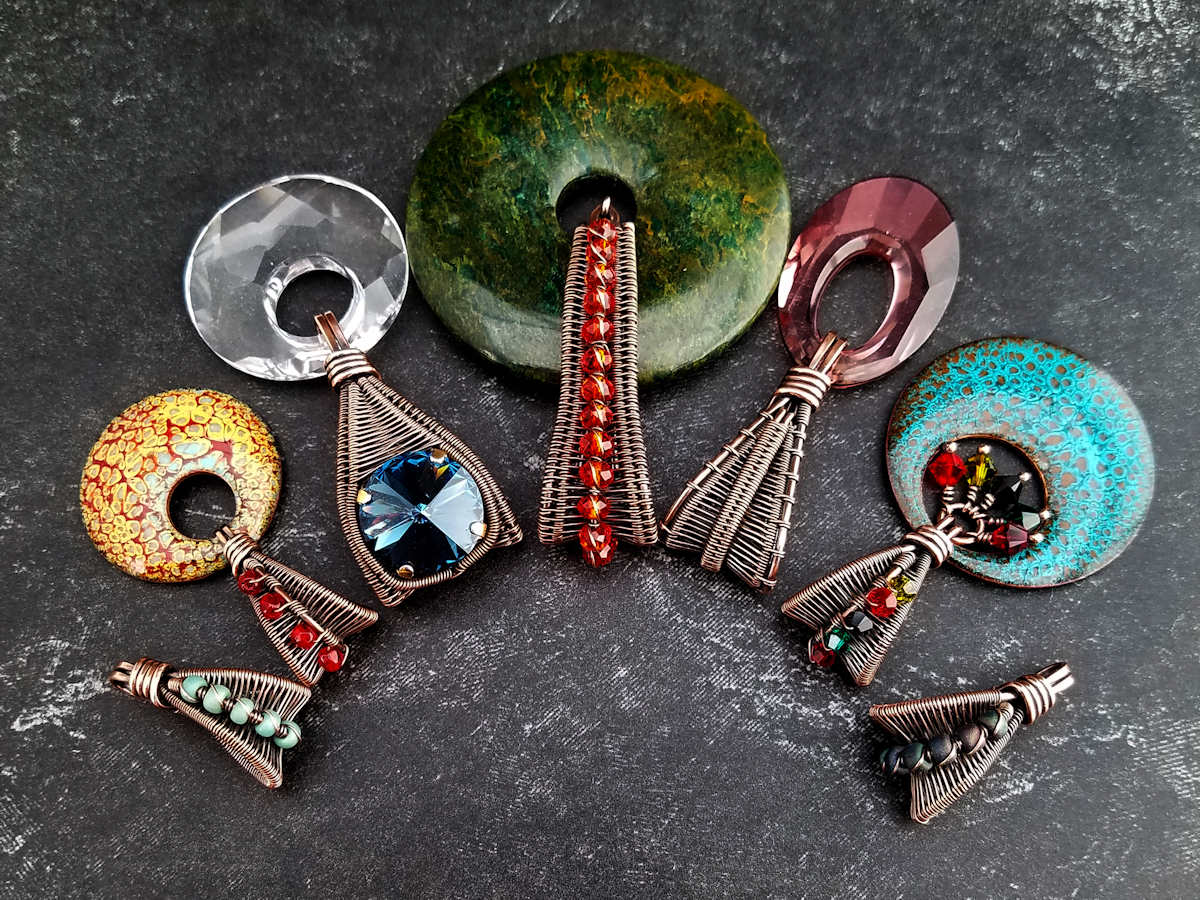
Notice what a difference it makes when you choose different accent beads or when you add an additional core wire and vary the weave on the outer edges, as I did on the three bails in the center of the image above.
We’ll talk more about combining weaves in future tutorials. But in the meantime, experiment with this technique. See what sort of fun variations you can make on your own with this versatile bail design.
Resizing Your Interchangeable Figure 8 Weave Bail
To resize the bail hook to fit different pendants, you’ll need to measure the distance between the top edge of the pendant and the top of the hole within the pendant. And for thicker pendants, such as a gemstone donut or a Swarovski crystal pedant like those pictured above, you’ll also need to measure the thickness of your pendant.
Once you have those measurements, simply add enough length to your frame wire for it to comfortably wrap all the way around the front and back of the pendant. Don’t forget to add a bit of additional length to accommodate the width of your pendant.
Then when you form your hook, be sure to use a mandrel size that is larger than the thickness of your pendant so the pendant will dangle freely on the hook. All other aspects of the design remain basically unchanged unless you want to modify the height or width of the woven section of your bail.
In that case, just change the measurements that we marked on the folded frame wire before forming the bail frame.
Discover More Behind Door 44
Thanks so much for joining me today. I hope you enjoyed creating the interchangeable Figure 8 weave bail. If you’d like an expanded PDF version of this tutorial, you can find it here. My PDF tutorials always include more detailed instructions and more process images. I also include more tips and tricks in my PDF tutorials. That extra instruction will help you achieve better results.
Want more great wirework tips and tutorials?
I like to share useful wire weaving tips and tricks on my social media channels, and we have some great conversations about wire jewelry in my private Facebook Group. Also, be sure to connect with me @door44studios on Instagram, and Facebook to keep up with everything that’s happening behind Door 44. And if you haven’t already done so, be sure to subscribe to my YouTube channel where you’ll find new wire jewelry videos weekly.
Until next time, go make something beautiful!

Pin the Interchangeable Figure 8 Weave Bail for Later
Thank you for this tutorial! I’ve tried making a bail with this weave, using YouTube videos, but I’ve never seen it explained so exactly before. And acknowledging that you have struggles with it too, really helps build my own confidence. You’re an excellent teacher. Thank you!
Yes, this weave isn’t easy to keep neat when you’re weaving shaped bails. I’m so glad you found this post helpful! We’ll be looking at another technique that will help stabilize this weave on a bail. So, stay tuned.
Thank you for this detailed tutorial! I’m always looking for tutorials on elements that I can incorporate into my own designs. I’m trying to figure out how you did the variations on the outer edge. You said to add another core wire, but it looks like only two going around the pendant. That may be too much to explain here! But I, for one, would love a tutorial on some more advanced variations on things like that. Thanks again for sharing your experience with everyone!
Hi, Alison. I’m glad you enjoyed this tutorial. I do plan to make some more advanced tutorials for variations of this design because it really is a very versatile and customizable design that can easily be adapted to a lot of different applications.
Simply grateful that you give away these tutorials for free. They’re beautiful a little bit harder than normal, and I just love them. Thank you so much for being you
I’m so glad you’re enjoying my tutorials! I’m hoping to get back to creating jewelry again soon, so stay tuned for lots more new content in 2025!