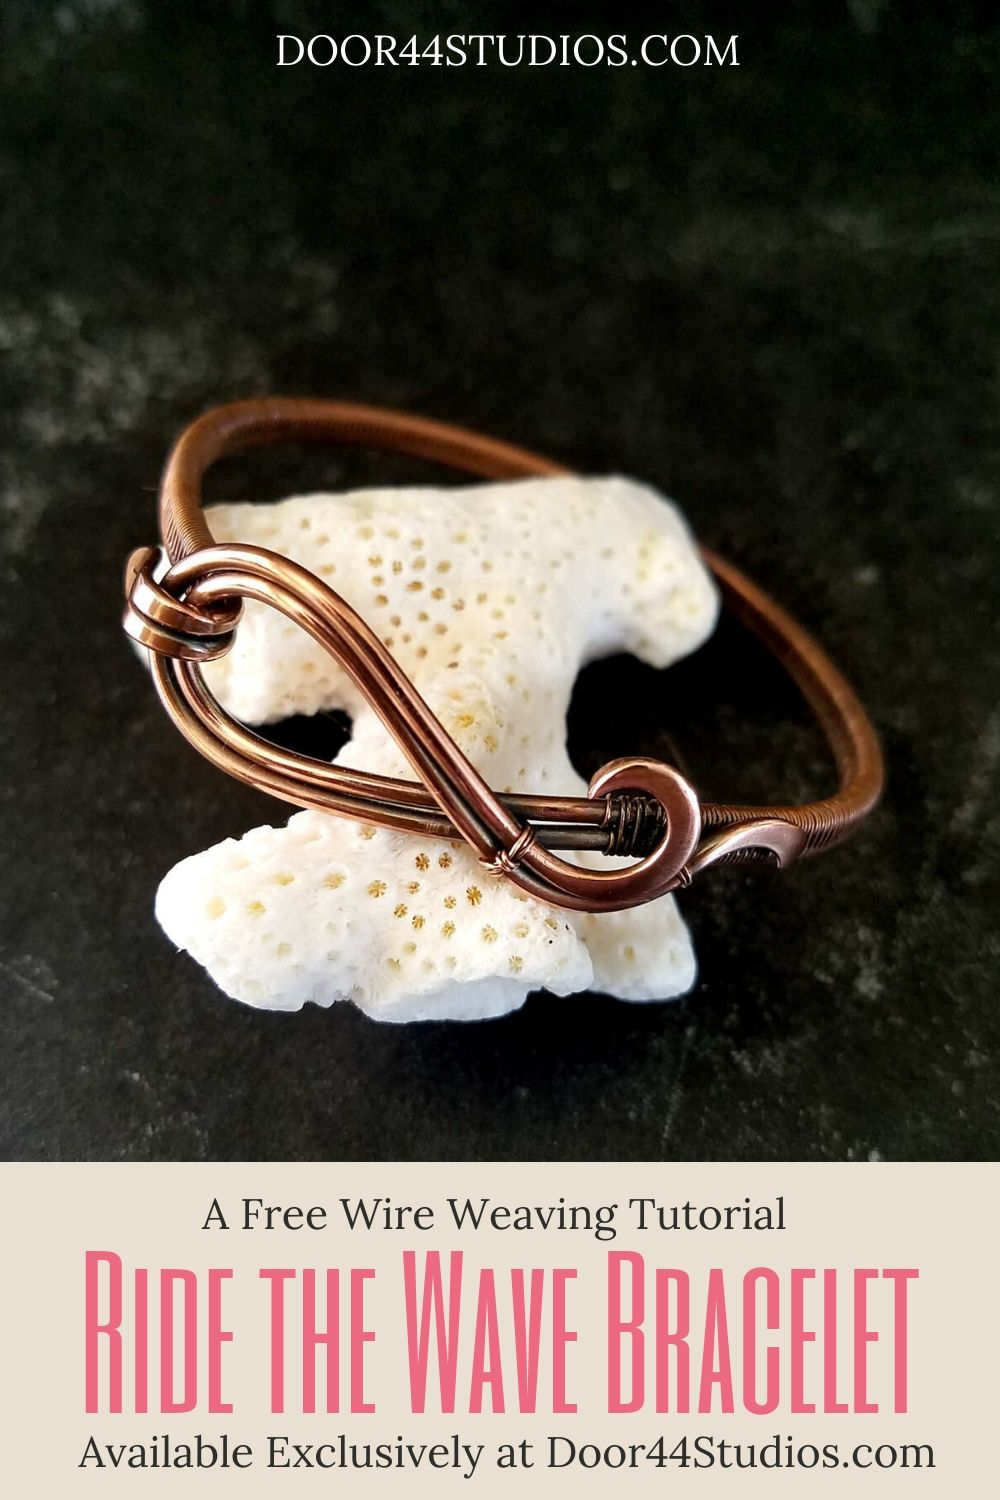
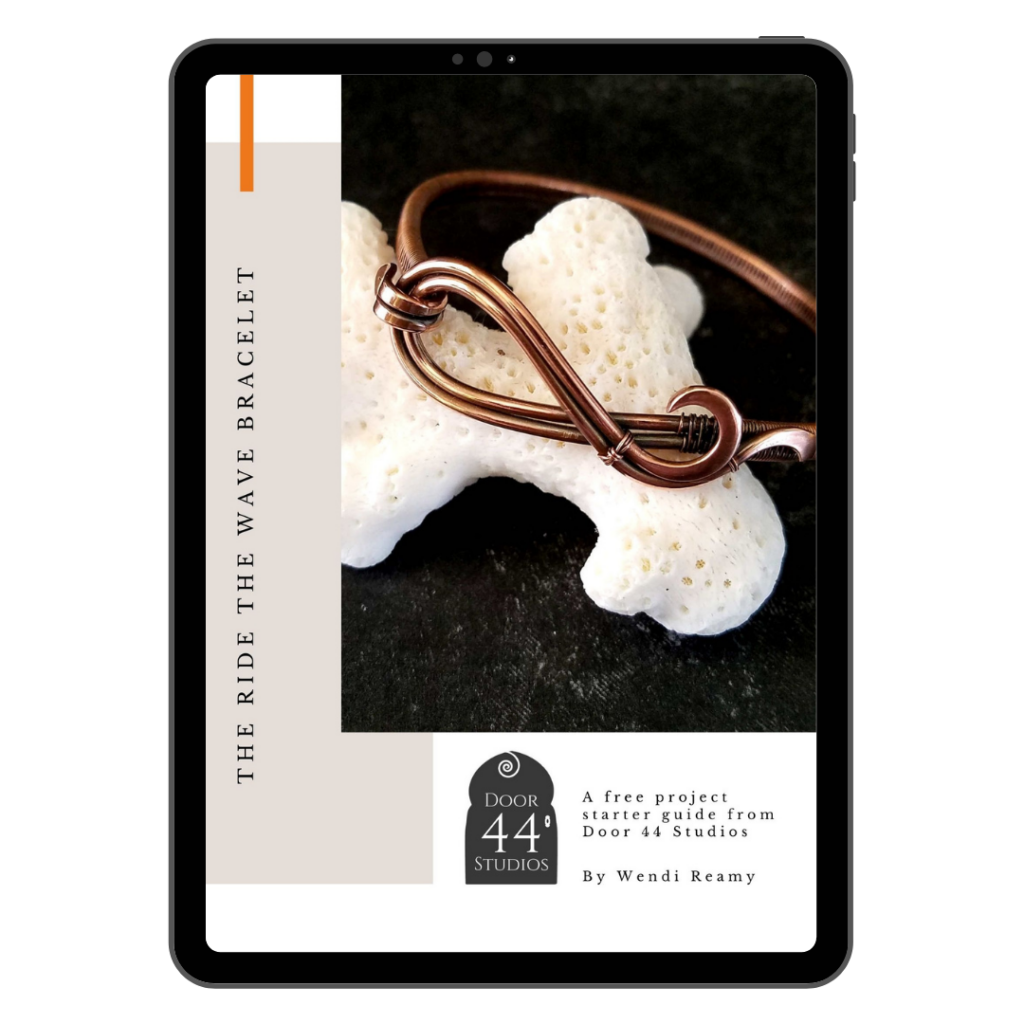
The Ride the Wave Bracelet: A Wire Weaving Make-Along Tutorial Series
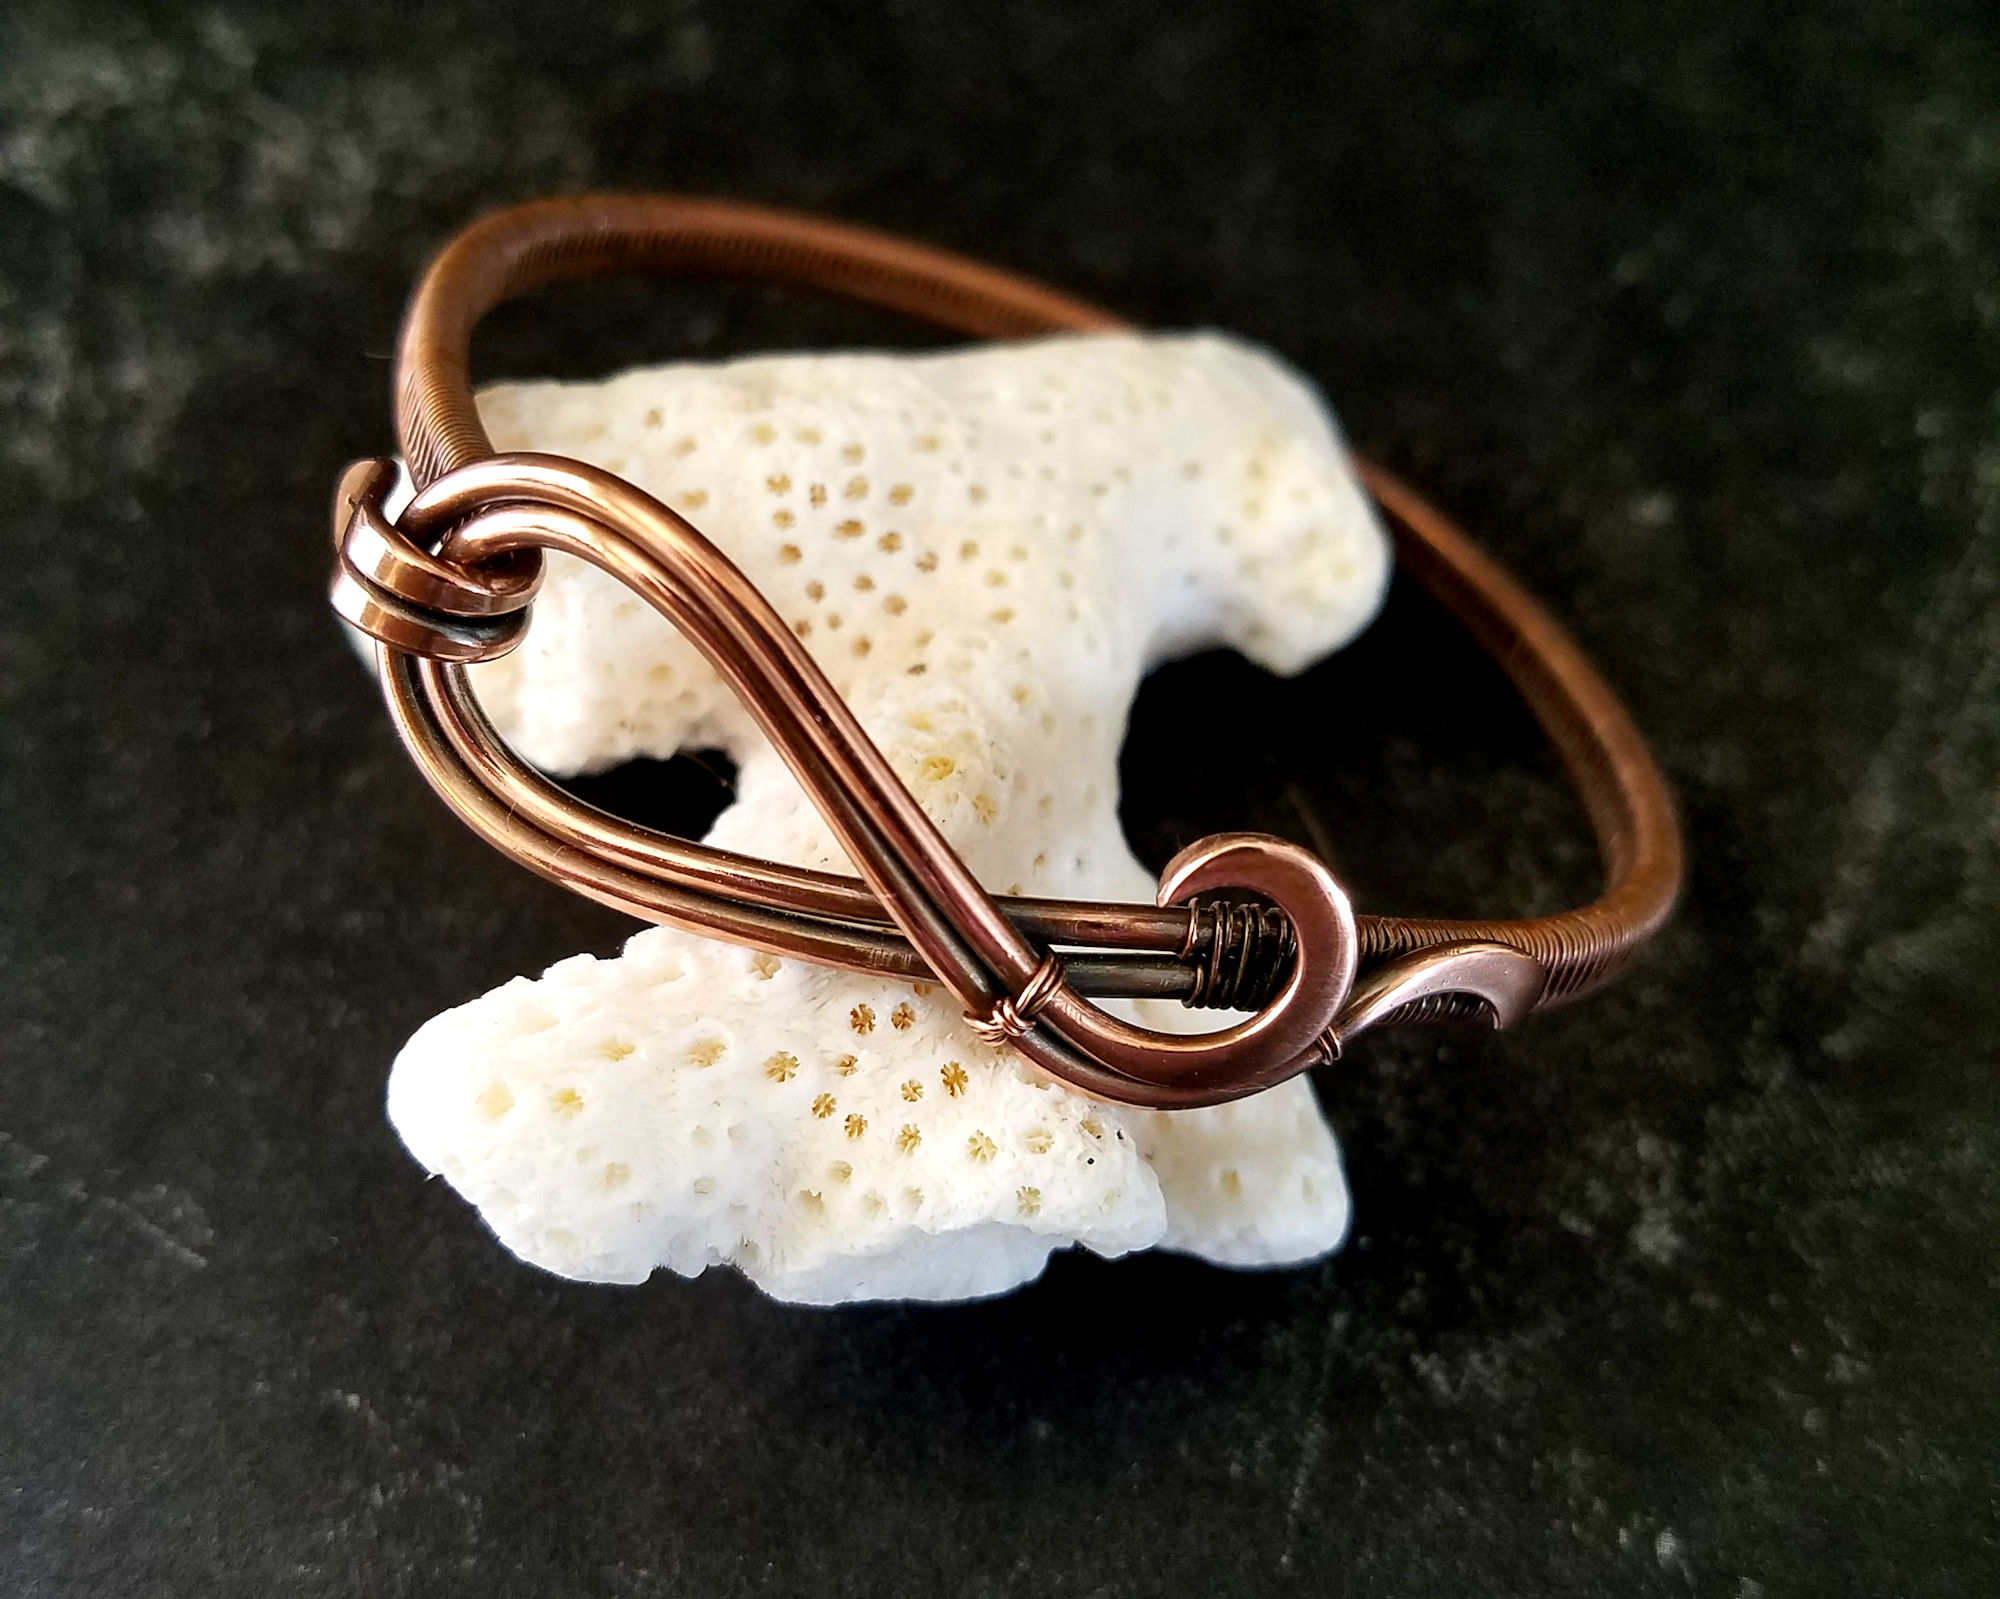
2020 felt a bit like a wild ride on stormy seas to me. And the Ride the Wave bracelet design, which I designed in 2020, will forever serve as a reminder for me of that wild ride. Now that the strangest year of our times is behind us, my hope is that this bracelet will also serve as a reminder that sometimes we just need to ride out the storms that come crashing into our lives. Once those storms finally pass, the sunshine always returns.
I hope this fun and easy wire weaving project provides a welcome creative distraction from any storms that might be stirring in your life today. Secondly, I hope that as you wear your own Ride the Wave bracelet, it will remind you of your own resilience. My guess is that you’ve already weathered a few storms in your life. And you’re going to get through this one, too.
How the Ride the Wave Bracelet Make-Along Works
The make-along is actually a video tutorial series. You’ll find links to those videos below, but first let’s gather all the tools and supplies that you’ll need to successfully complete the make-along.
For a limited time, you can save 25% on the Ride the Wave MAL Companion Tutorial. Just click the button below to grab that tutorial.
ride the wave bracelet tutorial
Download the Full Tutorial & Save!
Save 25% on the Ride the Wave bracelet tutorial today! This full-color project workbook provides instant access to everything you’ll need to make this design successfully. All in one printable document!
Skill Level: Intermediate
This is a more challenging project that involves wire weaving. It can be achieved by someone who has some basic wirework skills.
Step 1 – Download the FREE Ride the Wave MAL Starter Guide
Don’t want to pay for the full tutorial? I’ve created a FREE Project Starter Guide for this make-along series, which you’ll find in my resource library. That guide contains all the basic information you’ll need to make this project successfully (for free) using just the video instruction alone.
There, you’ll find a complete list of all the tools and materials that you’ll need for this design. You’ll also find some helpful notes about the design, such as finished size and skill level recommendations, along with links to additional tutorials and resources that you might find helpful.
Do you need a password to get into my resource library? No problem! Just complete and submit the form below (or the one at the bottom of this page) and you’ll receive a password instantly.
Join my Newsletter to receive the free Project Starter Guide
Subscribe to have posts delivered straight to your inbox!! PLUS get instant access to my free resource library, which includes this Project Starter Guide (#106)
If you’d like a detailed printable tutorial, you can buy the Ride the Wave Bracelet MAL Companion Tutorial, which contains all of the information included in the free starter guide plus detailed step-by-step written instructions and loads of detailed process photos. The tutorial also contains tips and tricks that aren’t covered in the free video tutorials.
Do you prefer to work from written instructions? Or do you like to take notes while watching video tutorials online? Either way, the written tutorial will be useful for your!
If you bought the original Ride the Wave tutorial, you may be wondering, what’s changed? Do I really need the upgraded guide?
Well, as far as the bracelet construction goes, not much has changed. I’ve clarified some details in the instructions, I’ve updated some of the images, and I’ve created space for you to record notes on any modifications you’ve made to the design. But I’ve also added more helpful tips and easy access to additional training resources. Such as the Modified Soumak Weave, the Figure 8 Weave, and the How to Use a Chasing Hammer videos, for instance.
These skills are essential for the Ride the Wave design. But one of the issues with the original tutorial is that I couldn’t find great outside references for those skills. So, I had to create my own!
Download the Ride the Wave Bracelet Companion Tutorial today and save 25%. Just click the button below to grab your copy of this fun tutorial.
ride the wave bracelet tutorial
Download the Full Tutorial & Save!
Save 25% on the Ride the Wave bracelet tutorial today! This full-color project workbook provides instant access to everything you’ll need to make this design successfully. All in one printable document!
Step 2 – Gather Your Tools and Supplies
You’ll find shoppable links to most of the tools and supplies that you’ll need for this project below. Wherever possible, I’ve linked to the same sources that I use myself. I’ve also linked to at least one alternative source for each item as well. Just in case you can’t find what you need through my primary source. Or maybe you simply prefer to shop elsewhere.
This post may contain affiliate links. If you click on a link and then make a purchase, I may earn a small commission (at no cost to you). As an Amazon Associate I earn from qualifying purchases. To learn more, please see my full disclaimer.

Tools & Materials
- Wire Cutters – Any sharp side cutters will do. Just make sure that your wire cutters are designed to cut heavy gauges of wire. I have an old pair of heavy duty wire cutters that I use just for cutting wire that’s heavier than 16ga.
- Stepped Bail-Making Pliers
- Round Nose Pliers
- Flat Nose Pliers
- Needle File
- Chasing Hammer
- Bench Block
- Ruler
- Fine-Point Permanent Marker
- Shop Amazon
- Ring Clamp (Optional)
- Kumihimo Bobbin (Optional)
- Sanding Boards (Optional)
- Shop Rio Grande
- Sandpaper (Optional)
- Shop Amazon
- Bracelet Mandrel (Optional)
- Soft Mallet (Optional)
- 14ga Dead Soft Wire – about 24 inches (61 cm) per bracelet
- Rio Grande
- Etsy
- 28ga Dead Soft Wire – about 60 inches (152 cm) per pendant
- Rio Grande
- Etsy
I buy my wire on one-pound bulk spools almost exclusively from Rio Grande. You can also buy 4-ounce spools for some wires through Rio Grande, and that’s perhaps a better option if you’re not ready to commit to buying in bulk.
Also, please note that I use solid copper wire almost exclusively. So, all the links above are for copper wire. That being said, these sellers also carry other jewelry wire alloys, including silver, brass, and bronze. My advice is to shop around to see where you can get the best price on your preferred wire.
Finished Sizes
I’ve provided all the information that you’ll need to create three common bracelet sizes: Small (7 inches), Medium (7.5 inches), and Large (8 inches) in the free project starter guide. These measurements are based on the inner circumference of the bracelet.
Bracelet size is a very personal choice for people. Some like a close fit (that would be me). Others like a looser fit. If you need a larger size or a half size in between the three sizes specified, use the material specification for the next size up to make sure you have enough wire to achieve the fit that you’re after.
For more detailed instructions for resizing this bracelet, refer to the the free project starter guide, which is available in my resource library.
Don’t have a password yet? Get your password for my resource library instantly by completing the form below.
Join my Newsletter to receive the free Project Starter Guide
Subscribe to have posts delivered straight to your inbox!! PLUS get instant access to my free resource library, which includes this Project Starter Guide (#106)
Skills Needed to Make the Ride the Wave Bracelet
You’ll need to know how to use a chasing hammer for this tutorial. And you’ll also need to know at least one 2-core wire weaving pattern. You can use any pattern you like for this design. I’m particularly fond of the Modified Soumak Weave and the Basic Figure 8 Weave.
Step 3 – Let’s Make a Ride the Wave Bracelet Together!
Now that you’ve downloaded your free project starter guide and/or the full printable tutorial, and you’ve gathered all the tools and supplies that you’ll need, let’s get started! Just click the video thumbnail below to watch Part 1 of the Ride the Wave Make-Along Series.
In this video, well form the clasp and the waves on our bracelet frame. And we’ll also sand and polish the frame to perfection. Then we’ll finish our bracelet in Part 2 of this series.
In Part 2 of the Ride the Wave Make-Along, we’ll finish the bracelet that we started in Part 1 of this series. We start by weaving the two sides of the bracelet frame together. Then we’ll finish off the bracelet by securing the waves in place and forming the woven band into a bracelet.
Want to be among the first to know when new videos are released? Be sure to subscribe to my YouTube channel and turn on notifications.
Finishing Suggestions
I antiqued the Ride the Wave bracelet that I made while writing this tutorial with Liver of Sulfur (LOS). And then I burnished the antiqued piece with super fine steel wool (Grade #0000) in a warm bath of water and original Blue Dawn dish soap. The steel wool brings back the bright copper highlights on the high spots.
Once that’s done, I rinse the bracelet thoroughly to remove any particles of steel wool. And then I put it in a tumbler barrel filled with warm water and a generous squirt of Blue Dawn. I tumble each bracelet for at least two hours.
If you’re new to wire weaving, be sure to check out my 7-step patina process. And if you’re wondering why I recommend tumble polishing specifically, check out this post. Also, be sure to clean your stainless steel shot regularly. Clean shot is necessary to achieve the best finish on your tumble-polished jewelry.
One last bit of tumbler advice before you go. Always make sure that any beads or stones that you use for your jewelry are safe to tumble. I don’t recommend tumbling natural pearls, soft gemstones, ceramic beads, or glass beads with polymer coatings, such as glass pearls and certain frosted-look glass. As always, if you’re unsure if your beads can handle the tumbler, run a test tumble with a bead that you’re willing to sacrifice.
Don’t forget to grab the free Ride the Wave Bracelet Project Starter Guide, which provides all the specifications for this design, along with some additional helpful resources.
You’ll find the free guide in my resource library, which is password protected. Need a password? Just complete the form below and you’ll receive your password instantly!
Join my Newsletter to receive the free Project Starter Guide
Subscribe to have posts delivered straight to your inbox!! PLUS get instant access to my free resource library, which includes this Project Starter Guide (#106)
Discover More Behind Door 44
Thanks so much for participating in the Ride the Wave Bracelet Make-Along! I hope this project resource guide and the accompanying video tutorials help you master all of the skills you’ll need to put your own unique twist on this fun design.
Want to learn to make more versatile wire jewelry designs like this one?
I like to share useful wire weaving tips and tricks on my social media channels, and we have some great conversations about wire jewelry in my private Facebook Group. Also, be sure to connect with me @door44studios on Instagram, and Facebook to keep up with everything that’s happening behind Door 44. And if you haven’t already done so, be sure to subscribe to my YouTube channel where you’ll find new wire jewelry videos weekly.
Until next time, my friend, go make something beautiful!

Pin the Ride the Wave Bracelet Tutorial for Later