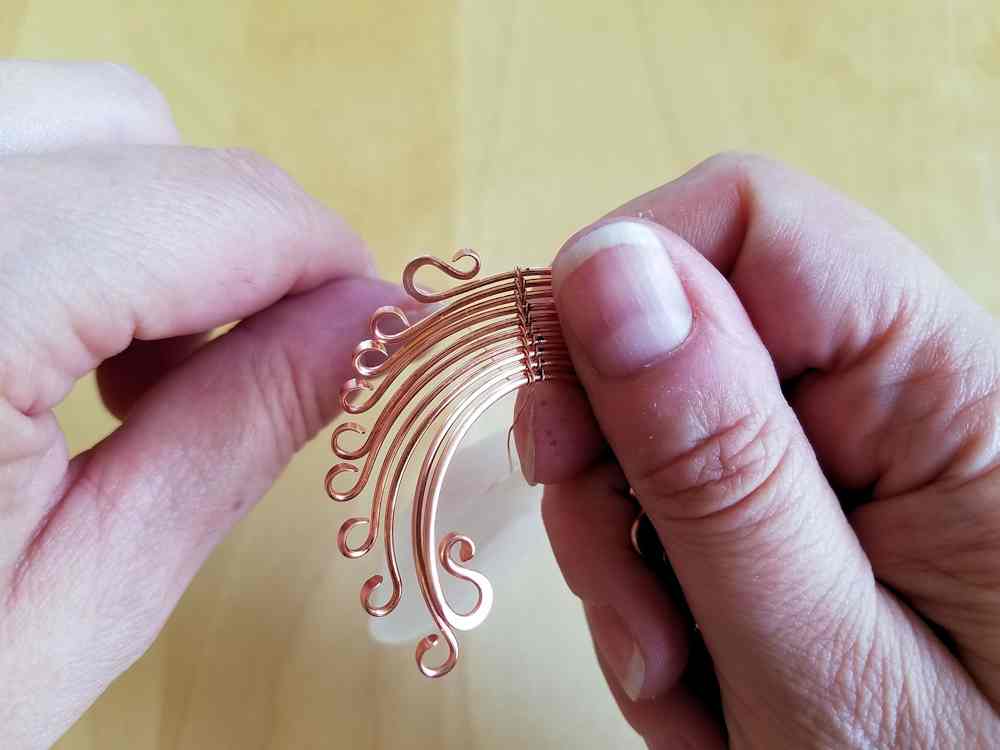
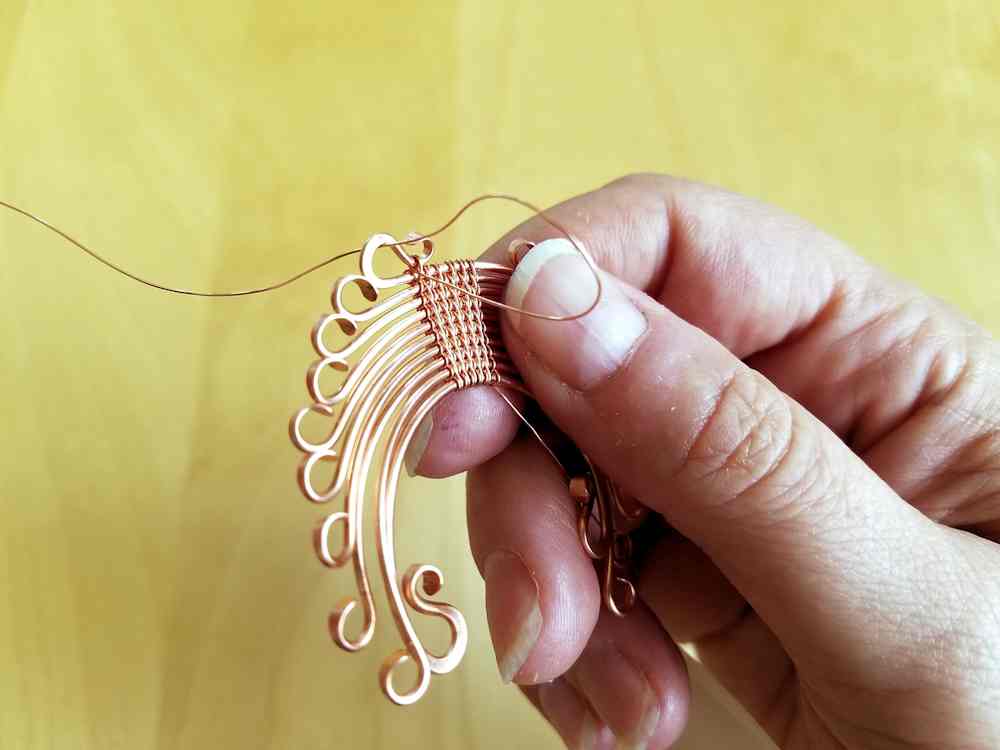
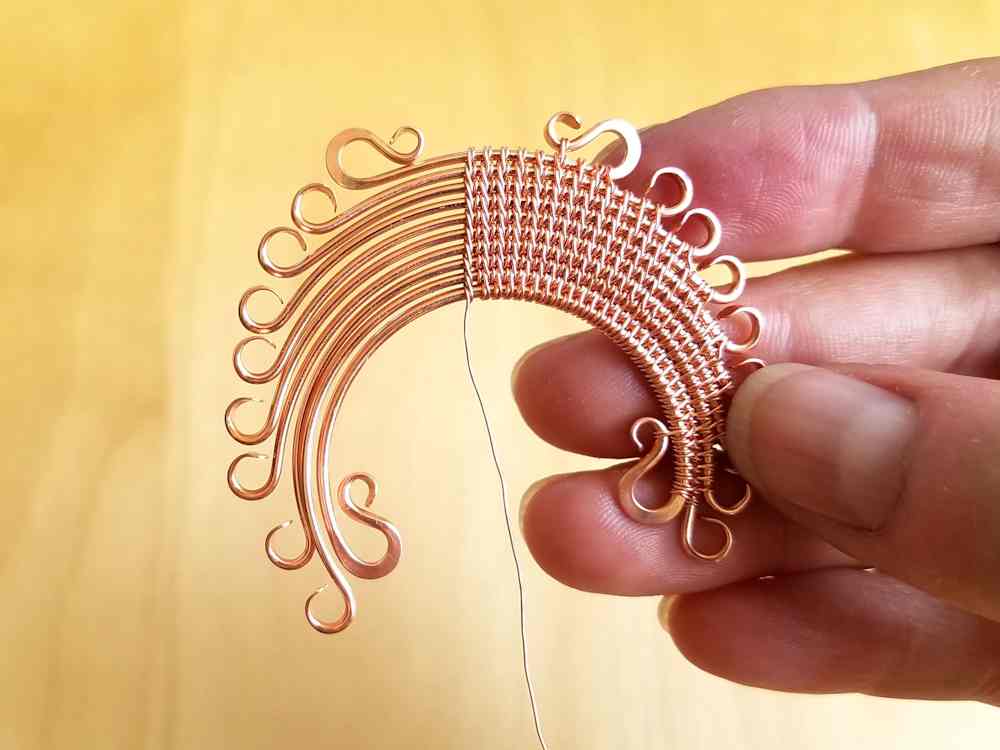
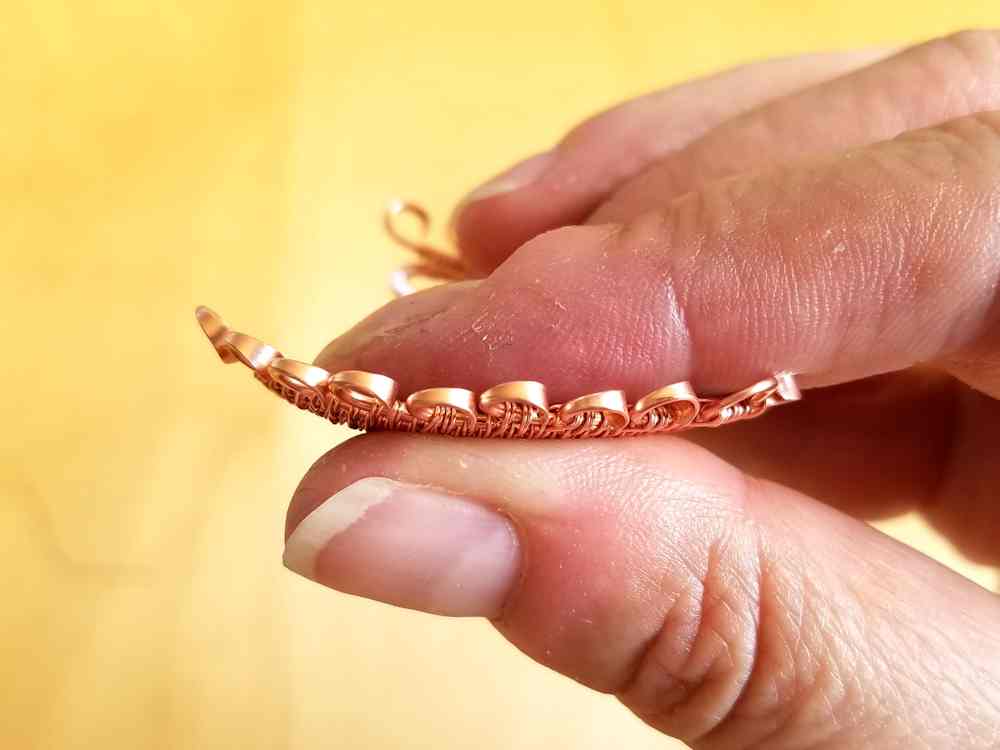
The Ancestor Pendant Wire Weaving Tutorial
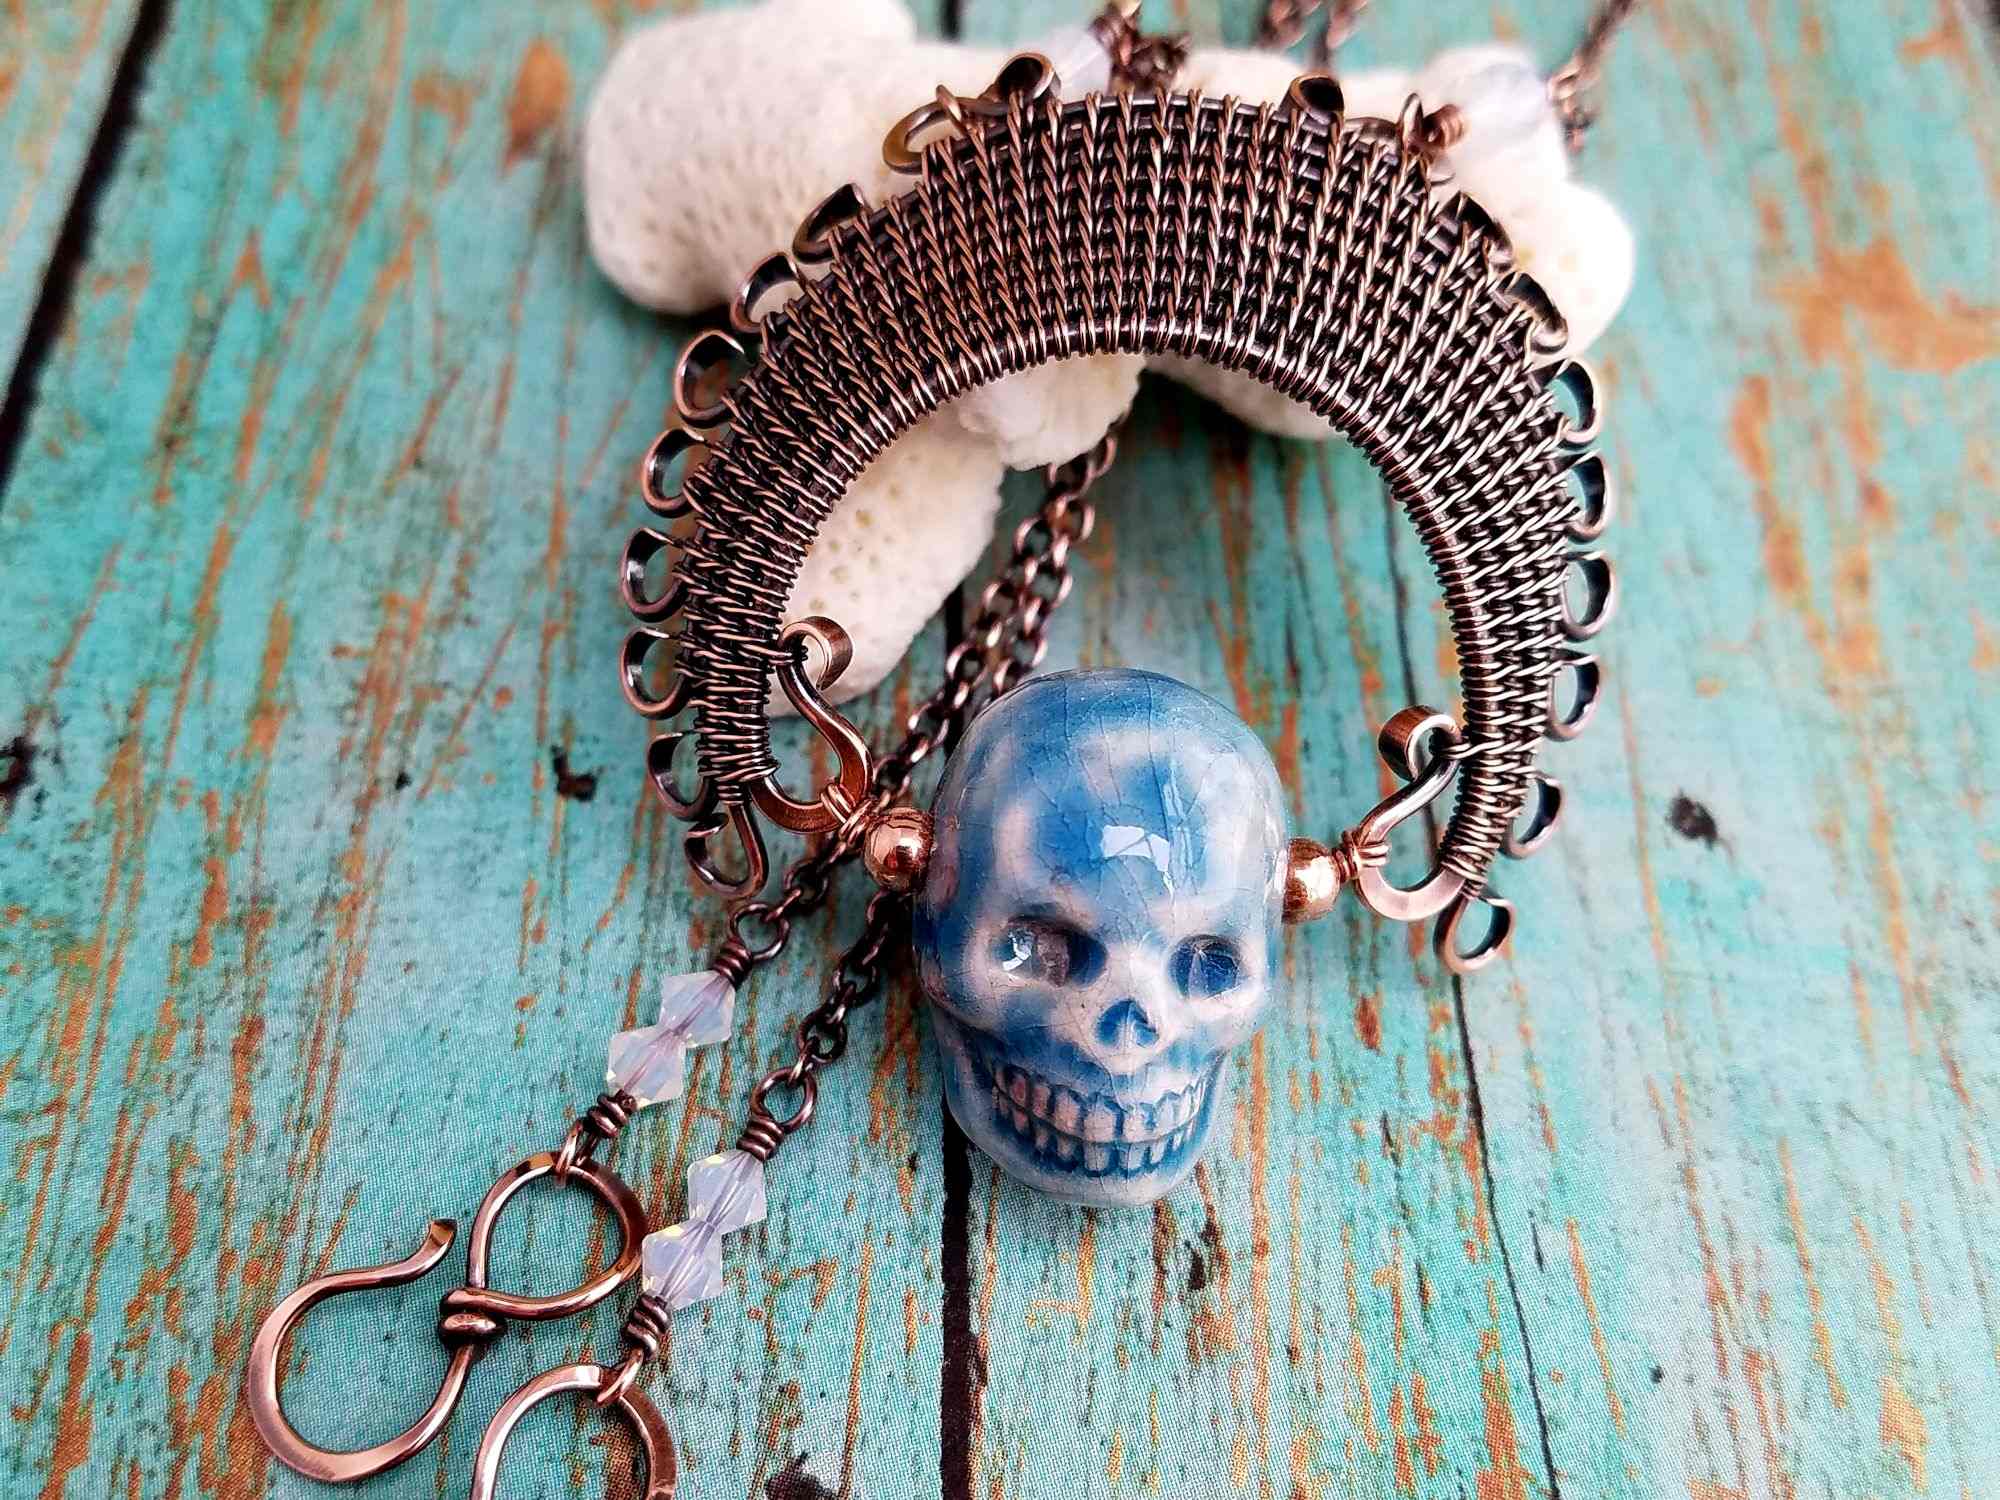
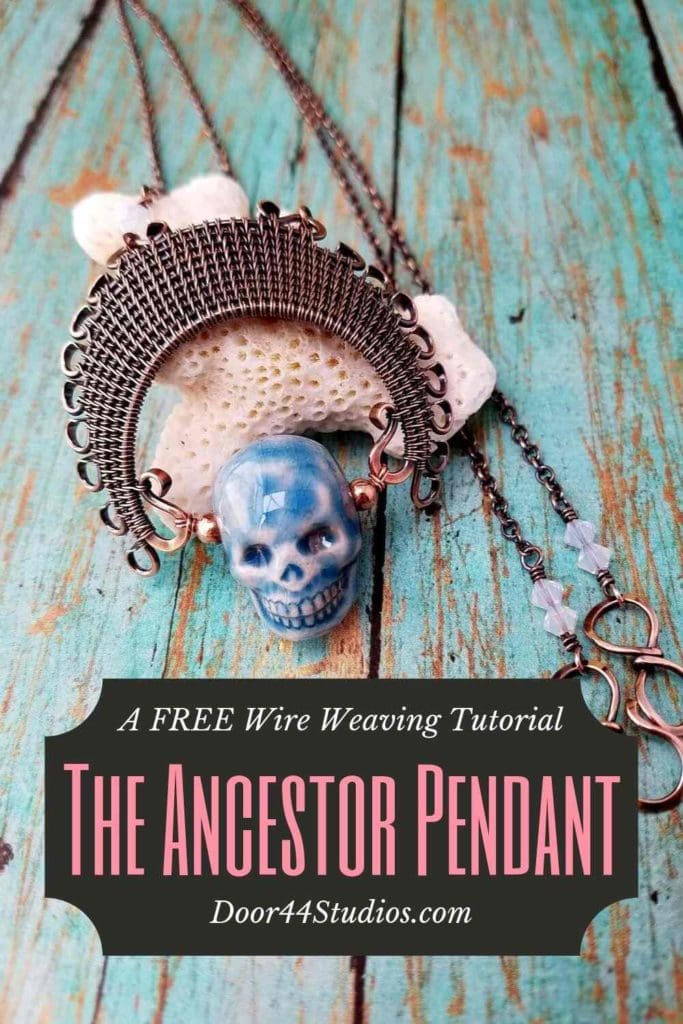
The Ancestor Pendant is, perhaps, the edgiest of all my designs so far. And because its theme ties so closely with my personal heritage, it’s a design that’s close to my heart. The Ancestor Pendant makes me think of my Grandma Lola who was the most influential person in my creative life. She’s the one who first taught me to work with my hands, and to this day, I think of her often while I’m working with my hands, whether it’s in the kitchen or while I’m crocheting or making jewelry.
Of all my designs, this is the one that’s most frequently requested as a tutorial. And with Autumn rapidly approaching, now seems like the perfect time to finally release the Ancestor Pendant tutorial.
Gemstone skull beads can be difficult to find, but they seem to be more readily available through sources like Etsy and online rock shops during late summer and early fall. With Halloween and the Day of the Dead approaching, skull beads
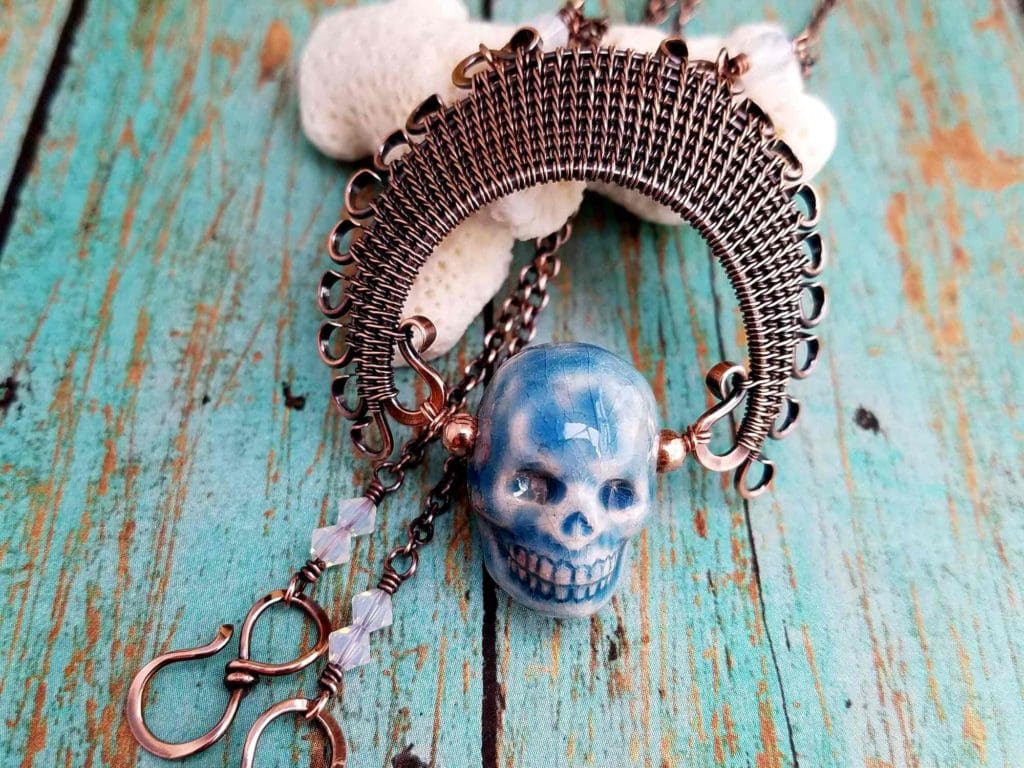
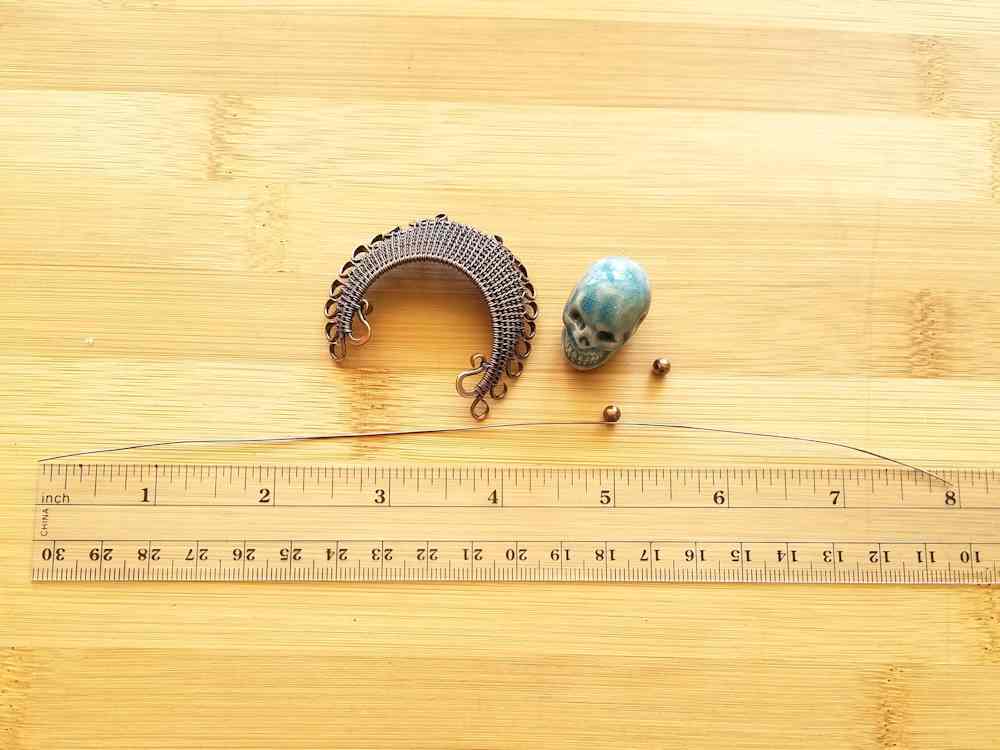
These handmade ceramic beads measure approximately 17mm wide x 22mm high. I recommend using a similarly sized bead to create your first Ancestor Pendant. You’ll find that this design adapts readily to almost any side-drilled bead, however, so feel free to experiment with different beads.
If you’re familiar with my tutorials, you’ll notice that this design is actually a variation of my Lyonesse Pendant, which means that the Ancestor Pendant’s headdress can be easily modified to work with almost any top-drilled bead as well. I provide a more in-depth discussion about modifications to this design in the Variations section of this tutorial.
Copyright & Disclosure
You’re welcome to make and sell products from this tutorial on the condition that you credit Wendi of Door 44 Studios for the design and link back to this page.
When it comes to my written tutorials, on the other hand, I reserve exclusive rights to all images and written content. You may not reproduce or redistribute any portion of the Ancestor Pendant tutorial in any way, shape, or form. Furthermore, you may not teach the designs contained within this tutorial without my written permission.
This copyright applies to the printable PDF version of the Ancestor Pendant tutorial as well, and it’s included therein. You may share the free version of this tutorial only by linking directly to this page.
This post may contain affiliate links. If you click on a link and then make a purchase, I may earn a small commission (at no cost to you). As an Amazon Associate I earn from qualifying purchases. To learn more, please see my full disclaimer.
Want a printable version of this tutorial?
Getting Started
For best results, use half-hard solid copper or sterling silver wire for your core wires and dead soft copper or fine silver wire for weaving. If you choose to use a filled wire, be aware that the bead frames are finished and hardened by hammering the wire. Even light hammering can expose the base metal core in filled wires, which can negatively affect your final finish. I don’t recommend plated or anodized craft wire for this necklace as those coatings will be ruined with this construction process.
If you’d like to learn more about the jewelry wire that I recommend for all of my tutorials, be sure to read this post.
I’ve included links to my sources for all the materials and tools used in this tutorial in the resources section below. The skull beads that are central to my Ancestor Pendants tend to be available seasonally, so I’ve provided multiple sources for those beads along with some tips for finding skull beads locally.

Tools & Materials
- 16g wire – 4 inches plus an additional 6 inches for a medium sized Easy Infinity Clasp (optional)
- 18g wire – 25.25 inches
- 22g wire – 10 inches for four closed loop beaded connectors (optional)
- 24g wire – 8 inches
- 28g dead soft wire – 14 feet
- 17mm x 23mm side-drilled skull bead – 1 each*
- 4mm round copper beads – 2 each
- 3mm to 8mm accent beads of your choice – 4+ each (optional). These are the beads that I chose while writing this tutorial.
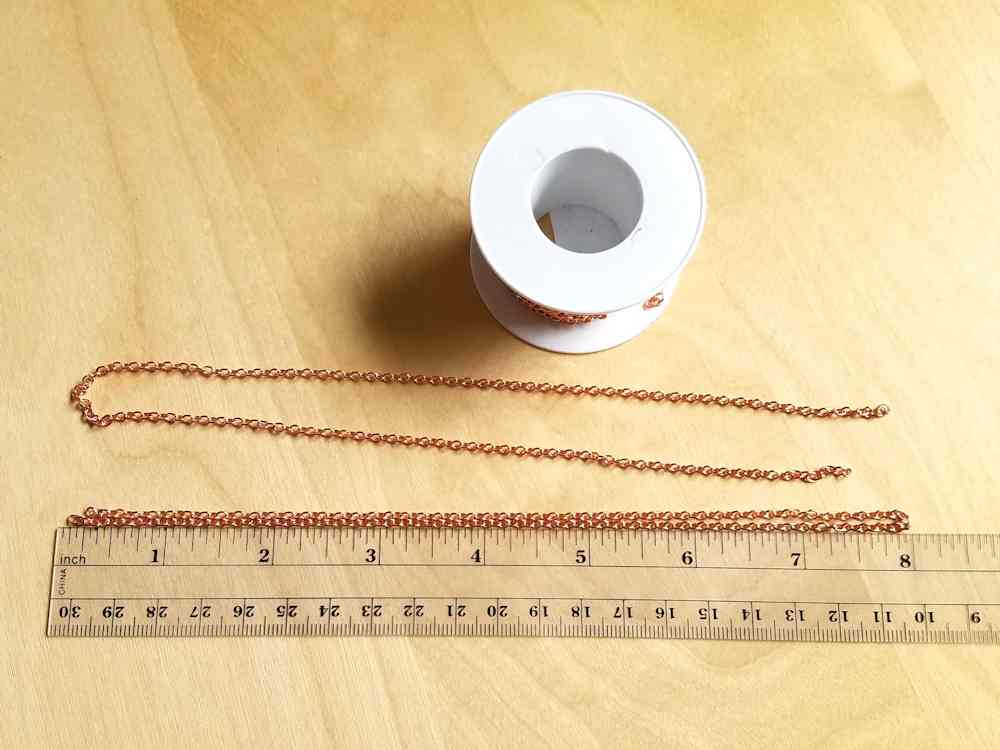
- Medium to heavyweight copper or sterling silver necklace chain (optional). Here’s a link to the copper chain that I used while writing this tutorial.
- Wire Cutters
- Chain Nose Pliers
- Stepped Bail-Making Pliers
- Nylon Jaw Pliers
- Needle File
- Chasing Hammer
- Bench Block
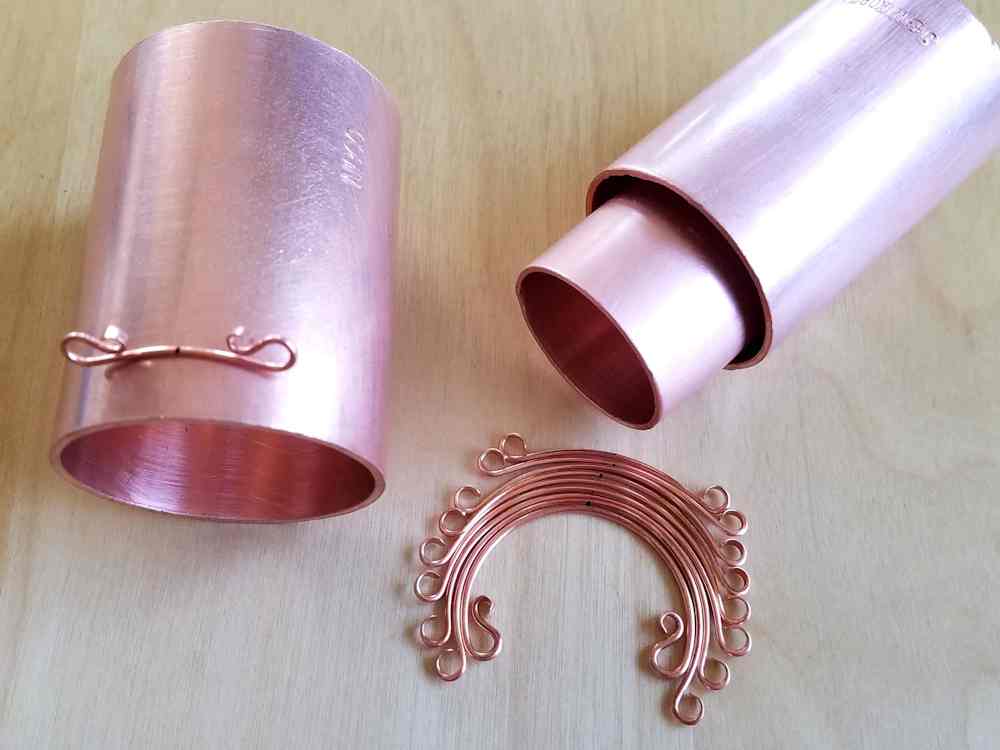
- 1-inch, 1-1/4-inch, and 1-1/2-inch mandrel. I use copper pipe fittings that I picked up at my local Lowe’s store. I’ve linked directly to those items here for your convenience. These tools are optional but helpful for this tutorial as well as many other Door 44 Studios tutorials coming soon.
- Ruler
- Fine Point Permanent Marker
- Sunshine® polishing cloths (optional). These are the polishing cloths that I use for dry polishing jewelry.
*Because skull beads can be difficult to find year round, I’ve put together a list of Skull bead options on Etsy for you. Be sure to check there if the Peruvian ceramic beads that I linked to above are either not your style or they’re out of stock.
Finished Size
- WIDTH: about 2 inchs (5.08 cm)
- LENGTH: about 2 inches (5.08 cm)
I added a sturdy 34-inch chain embellished with 4 mm
You can easily change the length of your necklace by changing the length of the two chain segments. Embellished chains are a great way to express your unique personality and style, so feel free to experiment.
Skill Level: Intermediate
This is a more challenging project that involves wire weaving. It can be achieved by someone who has some basic wirework skills.
This tutorial uses the Modified Soumak weave, and it requires using a chasing hammer. If you’re unfamiliar with either of these techniques, be sure to review these skill-based tutorials, which will help you work through this project.
Other skills required are making wrapped loop connectors, working in closed spaces, and weaving six or more core wires.
Instructions
The following instructions assume that you’re using a side-drilled 17 mm x 23 mm ceramic skull bead, as specified in the materials list. The core wire measurements for this pendant must be adjusted if your skull bead is significantly larger or smaller than the bead that I used in this design. You may also need smaller or larger mandrels to accommodate a different sized bead. Finally, the number of core wires you’ll need to complete the wire woven headdress will vary depending on the size of your bead.
The Smoky Quartz Ancestor pendant pictured below (right) is from my personal jewelry collection. Notice that it has just seven core wires while the pendant I made while writing this tutorial has ten core wires. The Smoky Quartz gemstone bead measures 14mm x 21mm. As a result of that 3mm difference in the bead width, the core wire measurements are a full inch shorter than those specified in this tutorial. I also shaped the main (16g) core wire for the quartz pendant with a 3/4-inch mandrel rather than the 1-inch mandrel specified in this tutorial.
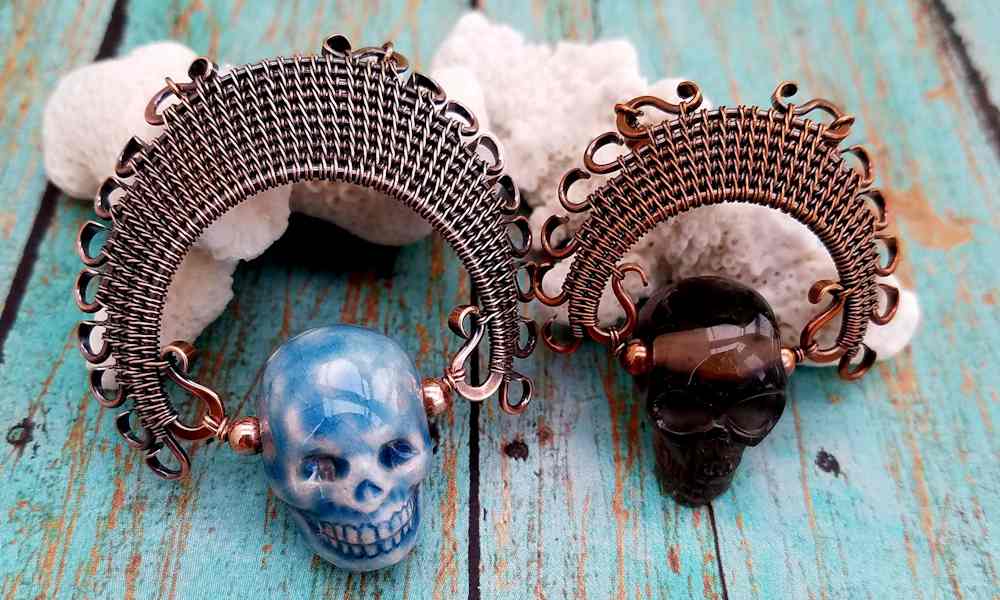
This design can be easily adapted to virtually any side or top-drilled bead. Just be aware that you may need to experiment with different core wire lengths and mandrel sizes to achieve the right fit for your unique bead. And that really is the best way to get the look that you’re after. Experiment! Try different wire gauges, lengths, and mandrel sizes until you end up with a headdress that is sized perfectly for your unique focal bead. Be sure to keep good notes so you can repeat your modified design if you plan to create multiples.
I’ve provided a more in-depth discussion about resizing the bead frame to fit larger or smaller beads in the Variations section at the end of this tutorial. Refer to that section now if you’ve chosen to use a focal bead that’s substantially different than the 17mm x 23mm Peruvian ceramic bead that I used while writing this tutorial. Otherwise, proceed with the instructions for the bead frame, as written.
How to Make the Door 44 Studios Ancestor Pendant
- Measure and cut the base core wire
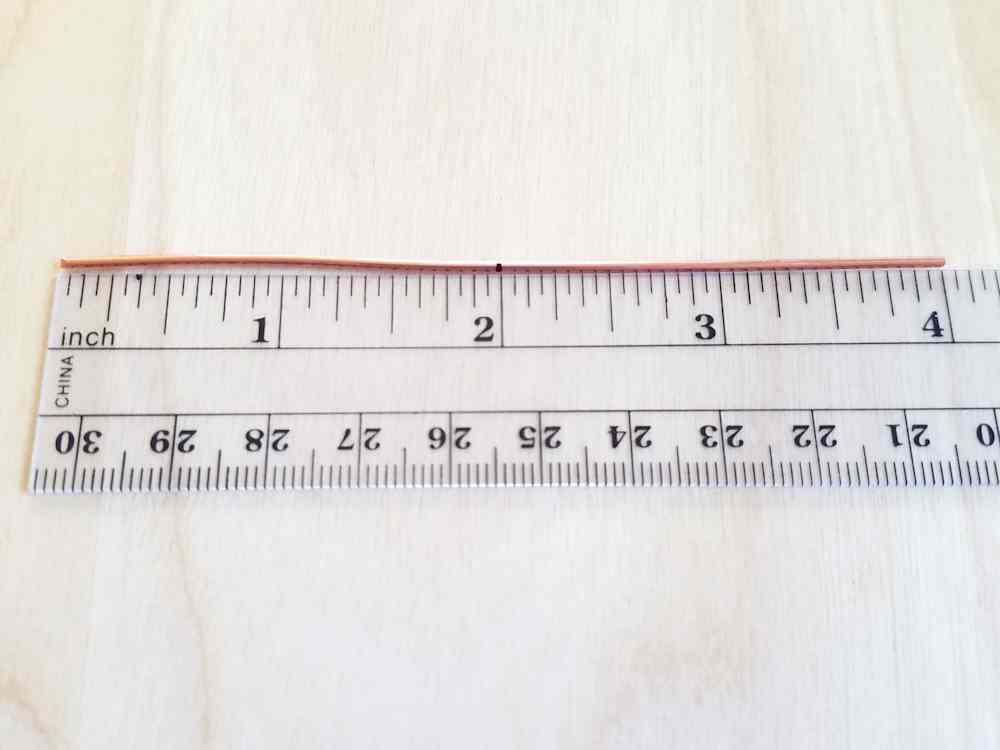
Measure and cut one piece of half-hard 16g wire 4 inches long. This is the wire that will hold your focal bead, and it forms the foundational row of your headdress. I’ll refer to this wire as Wire 10 throughout this tutorial.
File the ends smooth, if necessary, and mark the center of Wire 10 with your fine point permanent marker.
- Measure and cut the rest of the core wires
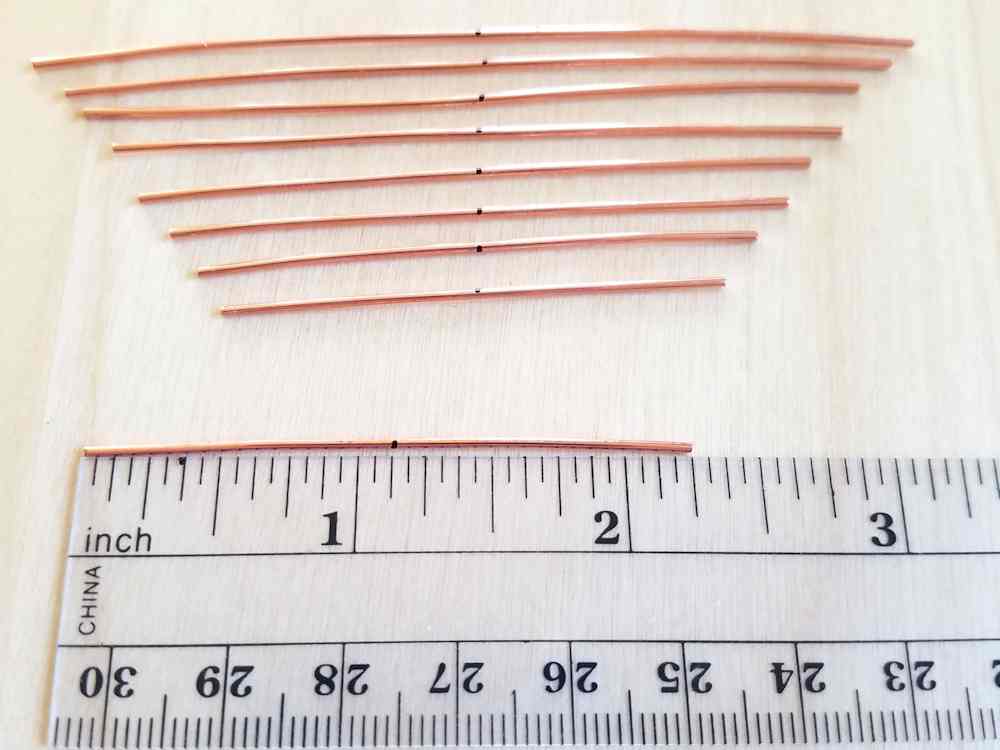
Cut nine pieces of half-hard 18g wire to the following lengths:
1) 3.75 inches
2) 3.5 inches
3) 3.25 inches
4) 3.0 inches
5) 2.75 inches
6) 2.5 inches
7) 2.25 inches
8) 2 inches
9) 2.25 inches
File the ends smooth, if necessary, and mark the center of each wire with your fine point permanent marker.
- Paddle the ends of all 10 core wires
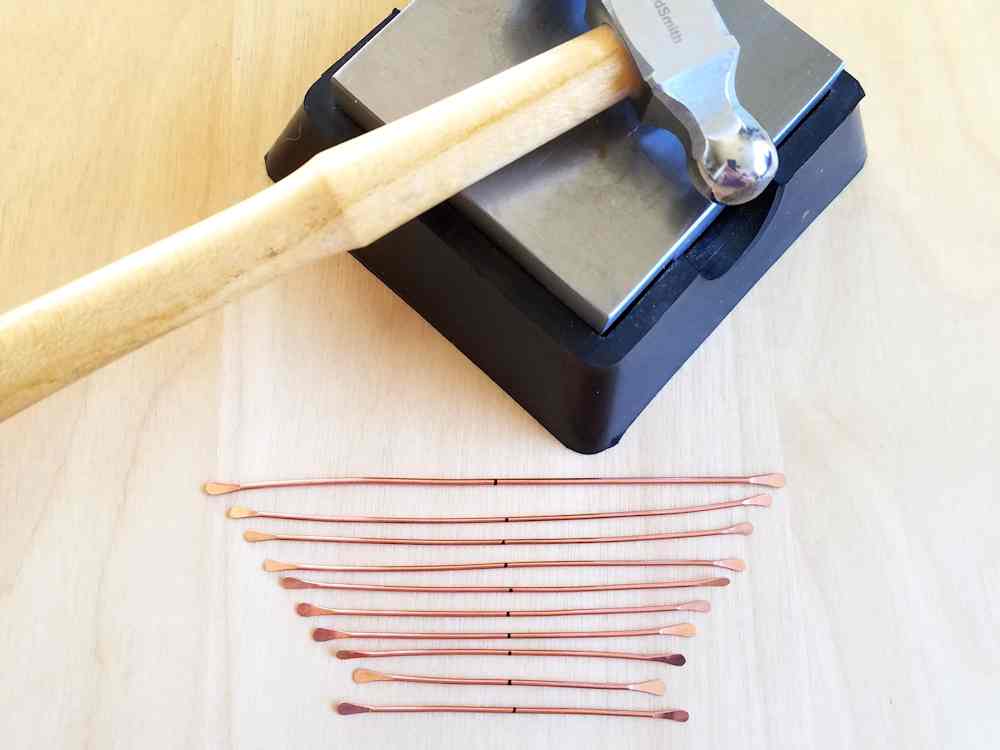
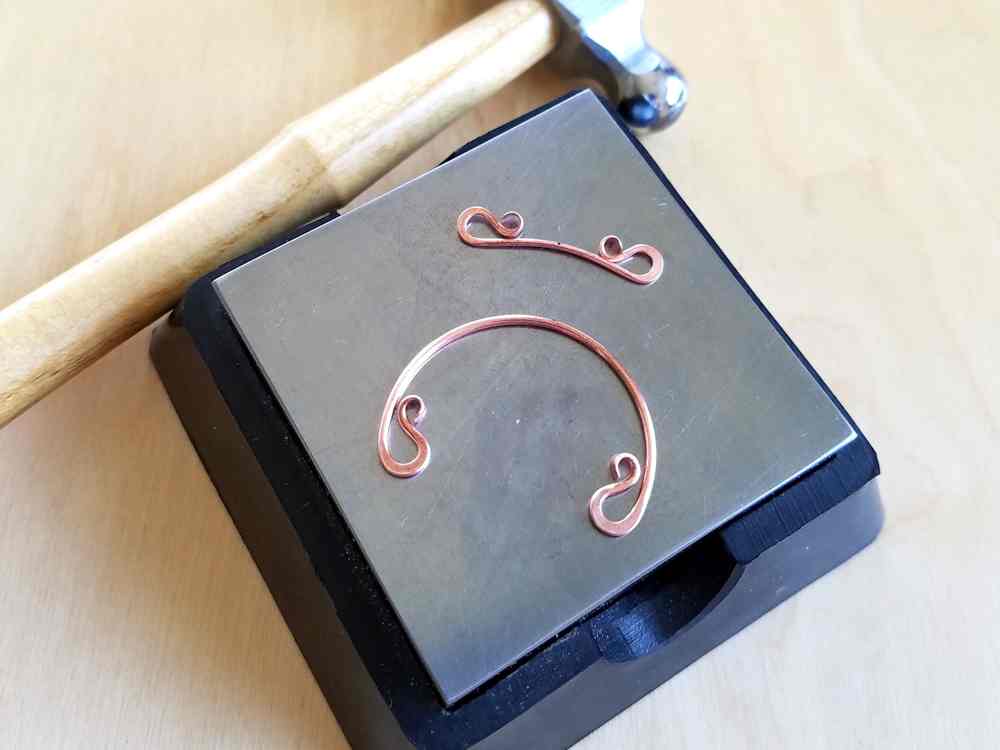
Use your bench block and chasing hammer to paddle the ends of all 10 wires. You want just a slight paddle on about 1/4 inch of each wire end.
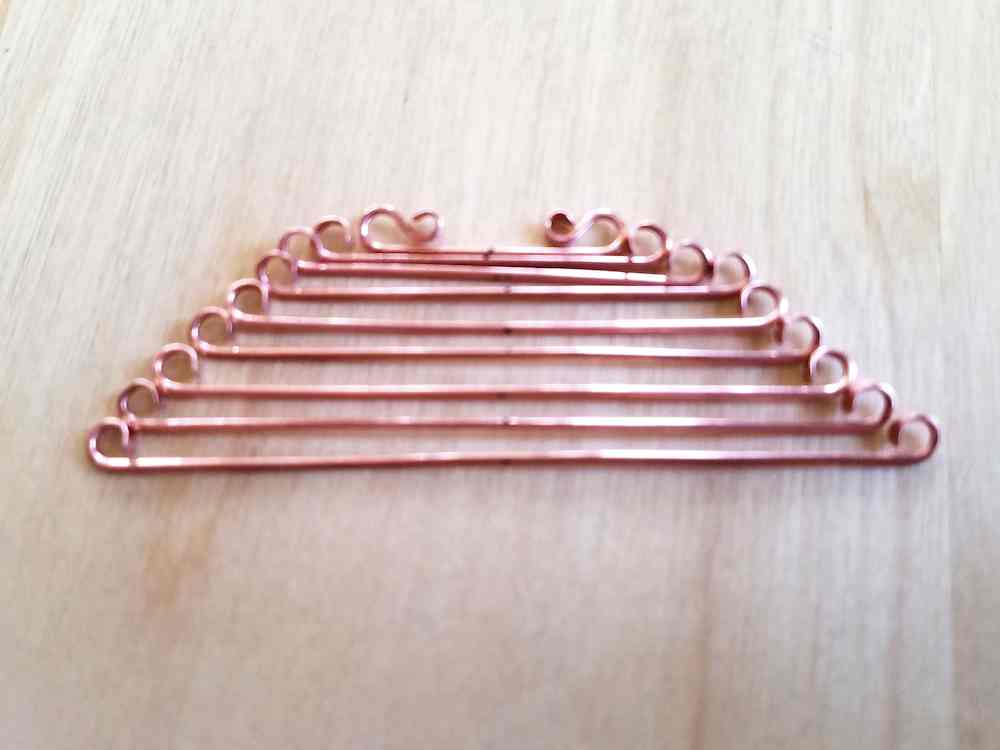
Smooth and shape the paddles with your needle file, if necessary, until your ten core wires look like those pictured below.
- Begin shaping Wire 1
We’re now going to shape the core wires, one at a time. Start with one of the 2.25-inch 18g wires. We’ll call this Wire 1.
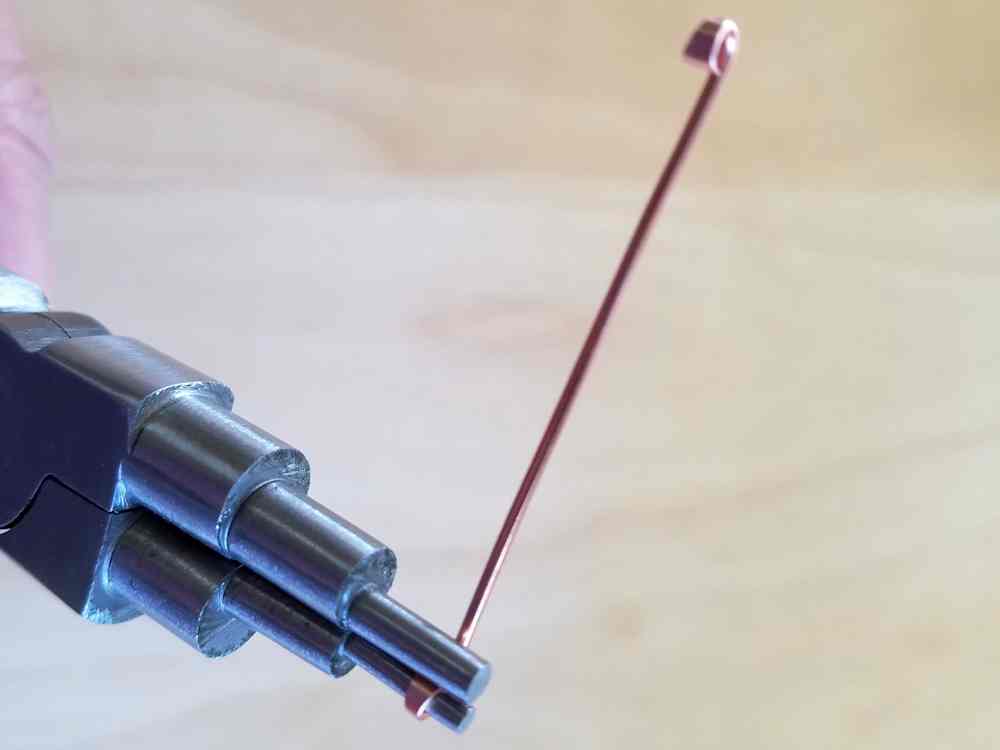
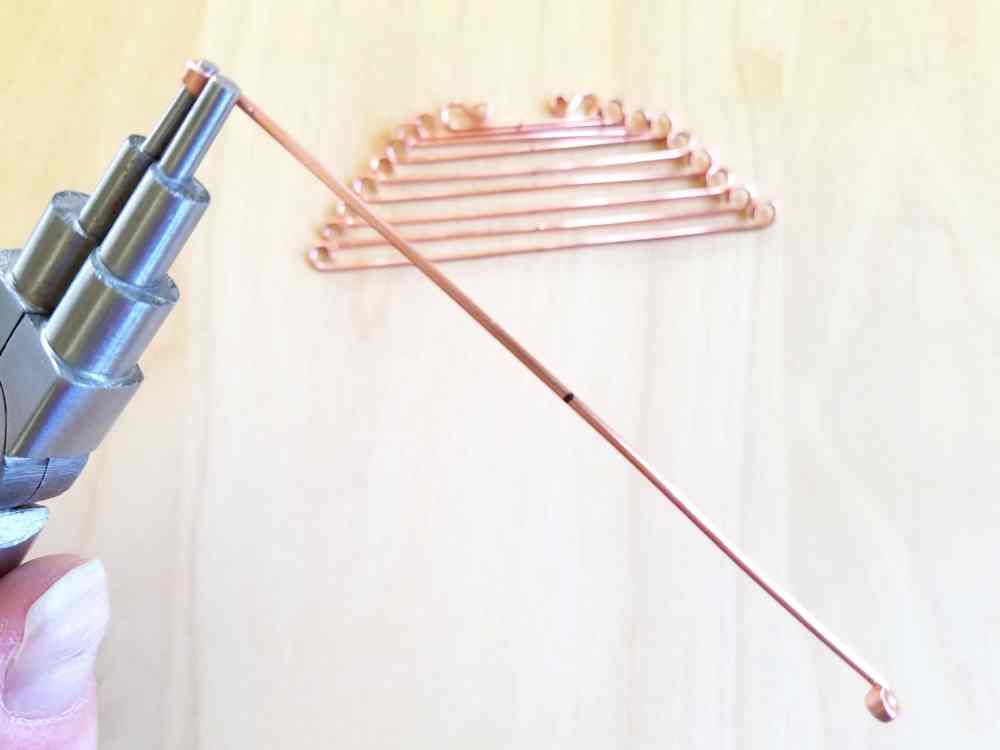
Using the 2mm mandrel (the smallest step) on your bail making pliers, grasp the tip of one paddled end and gently curl it around the mandrel until the tip of the curl just touches the core wire.
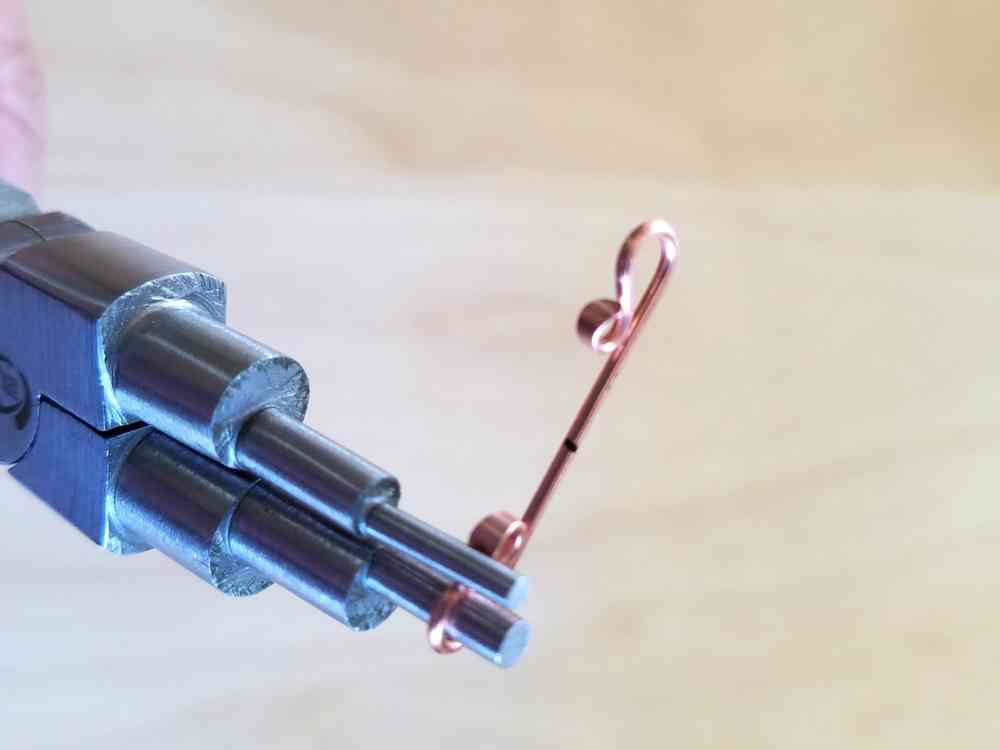
Repeat on the other end making sure that the two curls face one another, as shown.
- Finish shaping Wire 1
Take the same wire you just formed in Step 4 (Wire 1) and position one curled
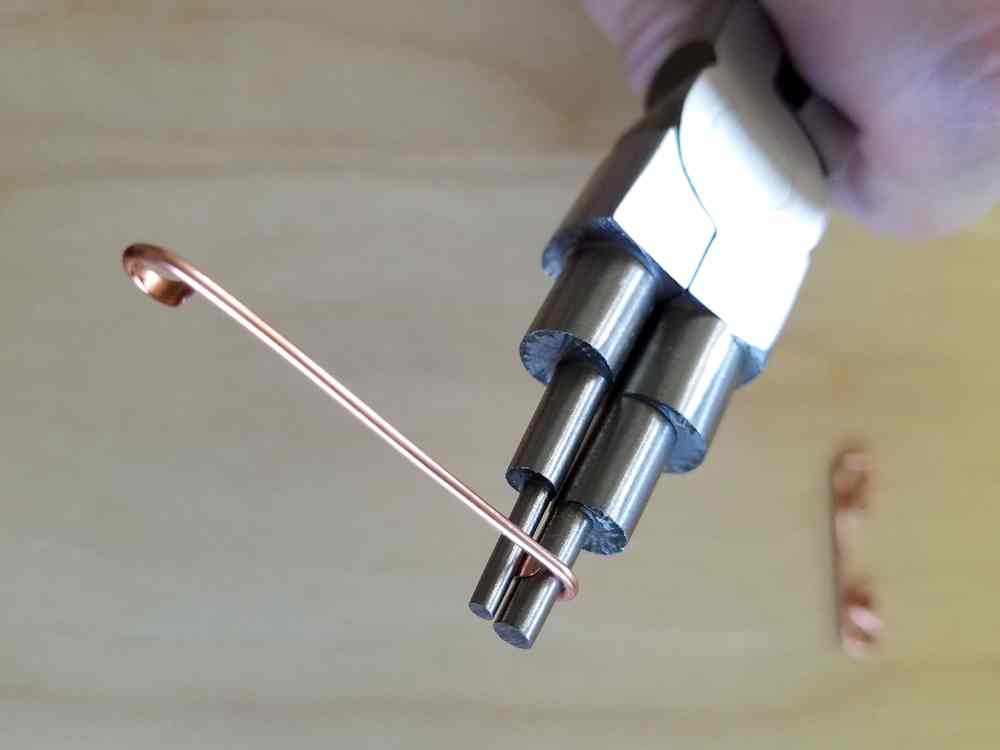
end of the wire at the center of the 3mm step (the second step) of your bail-making pliers. Grasp the wire just under the tight curl you made in Step 4. The rounded face of the curl should be facing you.
Use your fingers to push the long end of the wire all the way around the 3mm mandrel until the small curl made in Step 4 touches the straight length of wire, as shown.
Repeat on the other end of the wire to complete your shape. Set that wire aside for now.
- Curl the ends of Wire 2
Wire 2 is the 2-inch piece of 18g wire. Use the 3mm step (the second step) of your bail-making pliers to curl each end of the wire. As in Step 4, grasp the very tip of the paddle and gently curl it around the 3mm mandrel until the tip of the paddle just touches the straight part of the core wires.
Repeat on the other end making sure that the two curls face one another, as shown. Set Wire 2 aside.
- Curl the ends of Wire 3
Wire 3 is the remaining 2.25-inch piece of 18g wire. Use the 3mm step (the second step) of your bail-making pliers to curl each end of the wire just as described in Step 6.
Make sure that the two curls face one another, as shown and set Wire 3 aside for now.
- Curl the ends of Wires 4 through 9
The remaining six 18g wires are Wires 4 though 9 (shortest to longest).
Use the 3mm step (the second step) of your bail-making pliers to curl the ends of each wire as described in Step 6.
- Curl the ends of Wire 10
You should have one piece of wire remaining — the 4-inch piece of 16g wire, which is Wire 10.
Using the 2mm step (the smallest step) on your bail-making pliers, curl the paddled ends of the wire just as you did for the other nine core wires.
Make sure the two curls face one another, as shown.
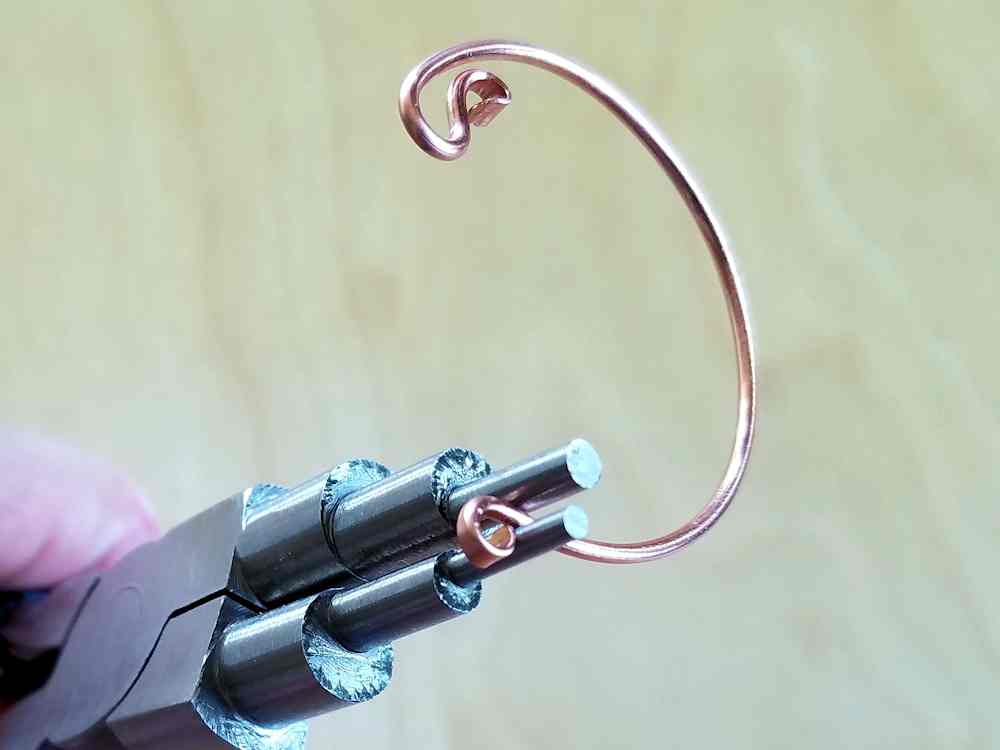
- Form the base curve on Wire 10
Now we’re going to form the core wires into nested curves starting with Wire 10 (the 16g wire), which will be the foundational support beam for the entire headdress.
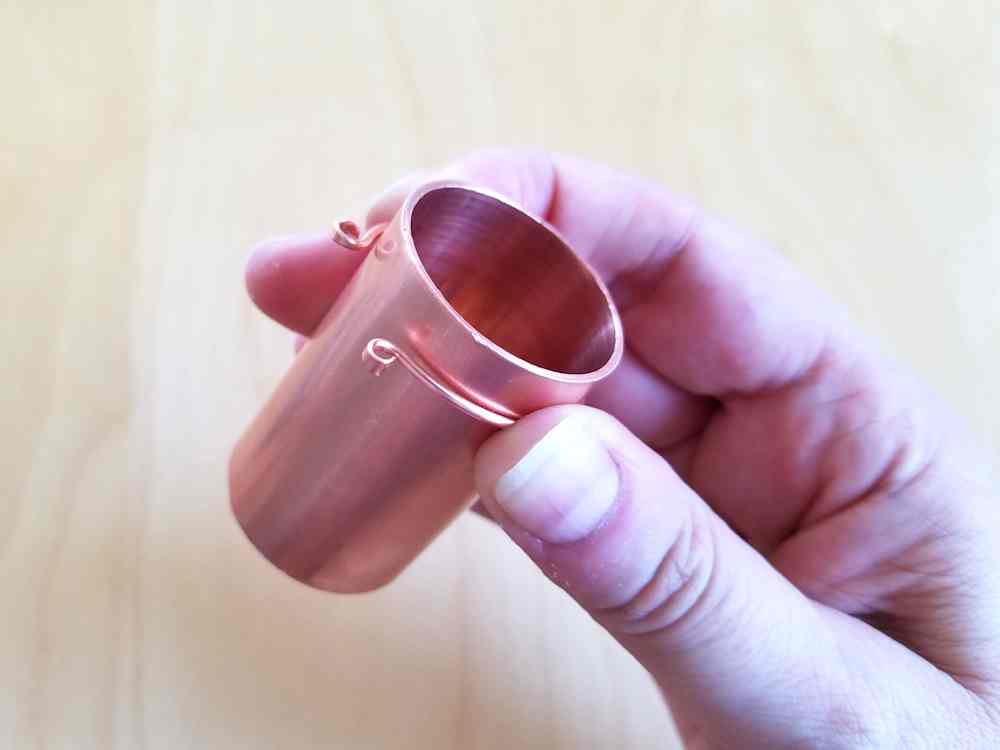
Position the center mark of Wire 10 at the center of your 1-inch mandrel. Make sure the curls are facing up and then gently form the wire around the mandrel as far as it will go.
You should have a smooth curve that forms a nearly complete circle, as shown.
- Finish forming Wire 10
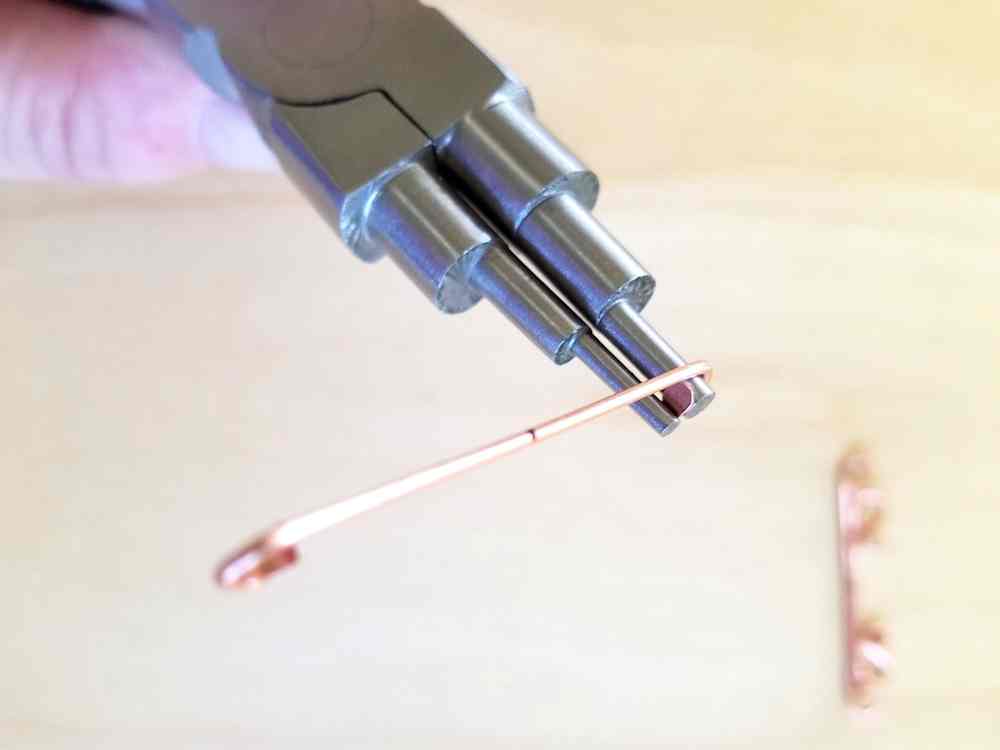
Take the wire you just formed (Wire 10) and position one curled end of the wire at the center of the 3mm step (the second step) on your bail-making pliers. Grasp the wire just under the tight curl that you made in Step 9. The rounded face of the curl should be facing you.
Use your fingers to curl the wire around the 3mm mandrel toward the inner curve of the wire. Bring it all the way around the 3mm mandrel until the small curl made in Step 9 touches the curved length of the wire, as shown.
Repeat on the other end to complete that shape and set Wire 10 aside.
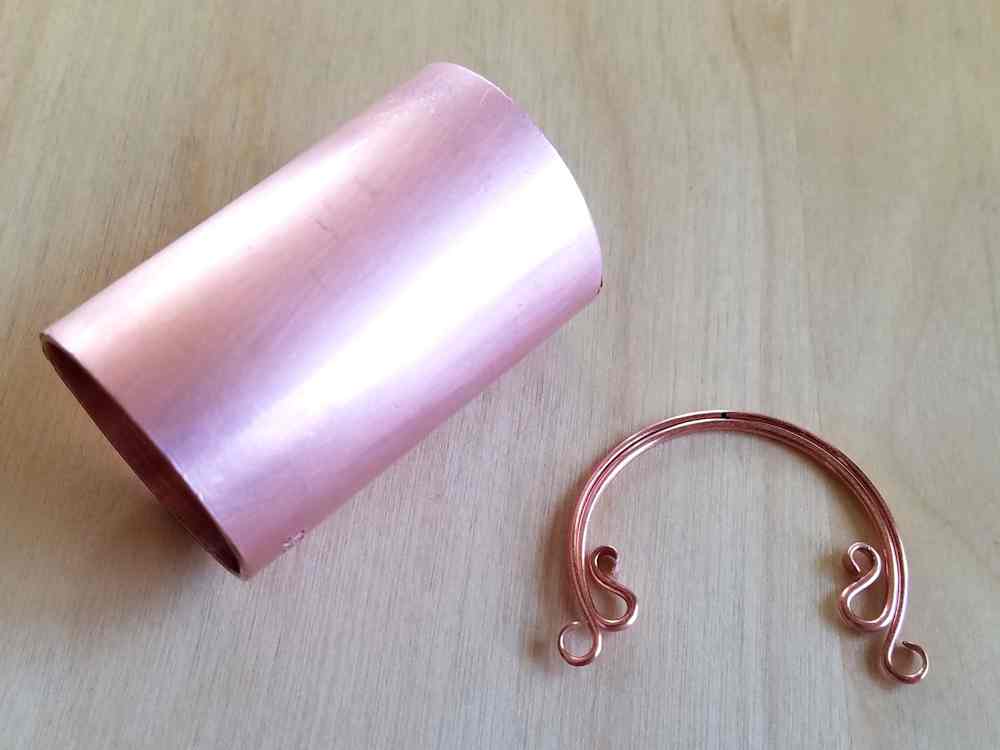
- Form Wire 9
Pick up Wire 9, which is the longest remaining core wire to be formed. Position the center mark of the wire at the center of your 1-inch mandrel. Make sure the curls on your core wire are facing up.
Use your fingers to gently form the wire around the mandrel as far as you can without stretching the curled ends of the wire.
Nest Wire 9 around Wire 10 and gently stretch the curve of Wire 9 until it lies neatly against the 16g wire (Wire 10).
- Form Wire 8
Form Wire 8 the same way you just formed Wire 9 in Step 12.
Remember to make sure the curls are facing up (away from the mandrel) and be sure to center the wire on the mandrel so your curve is smooth and symmetrical.
Again, nest your formed core wires together and gently stretch the curve of Wire 8 until it lies neatly against Wire 9.
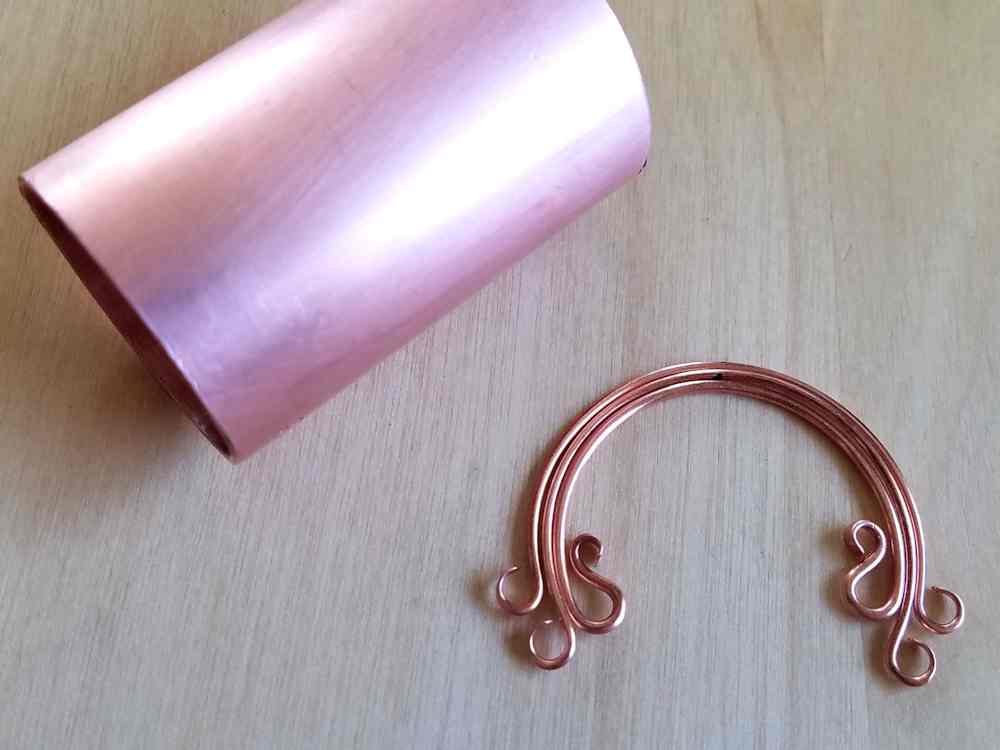
- Form Wires 7, 6, 5, and 4
Wires 7, 6, 5, and 4 are formed the same way as Wires 8 and 9 only you’ll use the 1.25-inch mandrel to form these wires. Position each wire at the center of your 1.25-inch ring mandrel, making sure that the formed ends of the wire are perpendicular to the surface of the ring mandrel.
Use your fingers to gently form the wire into a curve around the mandrel as far as it will go without stretching the formed ends of the wire.
Once you’ve formed a soft curve on each wire, nest them together with Wires 8 through 10 and gently adjust the fit of each wire until the core wires nest neatly together.
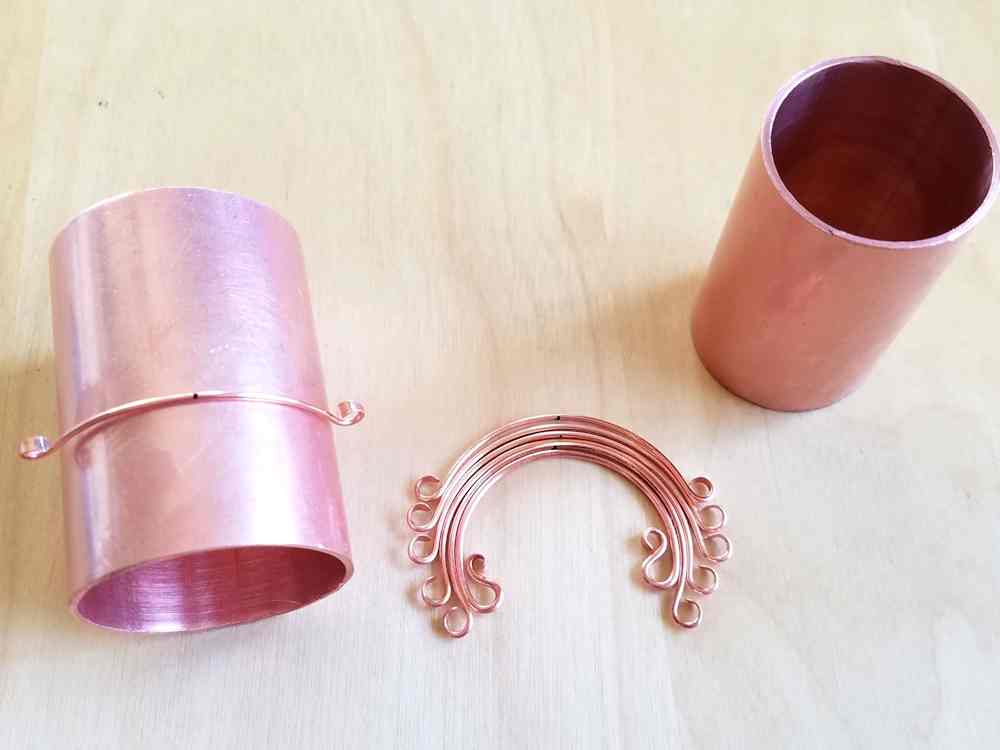
- Form Wires 3, 2, and 1
Use the 1.5-inch mandrel to curve Wires 3, 2, and 1 as described in Step 14. Then nest the remaining three core wires with the wires you’ve already formed. Adjust the fit as needed until all 10 core wires nest neatly together.

- Work Harden Wires 1 and 10
Now that all your core wires are fully formed, we need to harden the ends of Wires 1 and 10 so they’ll retain their shape. These two wires provide almost all of the structural integrity for your pendant, so you want them to be as strong and solid as possible.
Using your bench block and chasing hammer, carefully flatten the curved ends of each wire. Be careful to avoid hitting the small curls with your hammer.
If hammering the curved ends opens a gap between the small curls and the core wire, gently squeeze that gap closed with the 2 mm step of your bail-making pliers. We’re going to lash those ends to the core wire in the next section of this tutorial, so don’t worry if you can’t close that gap completely.
- Fine tune the position of your core wires before weaving
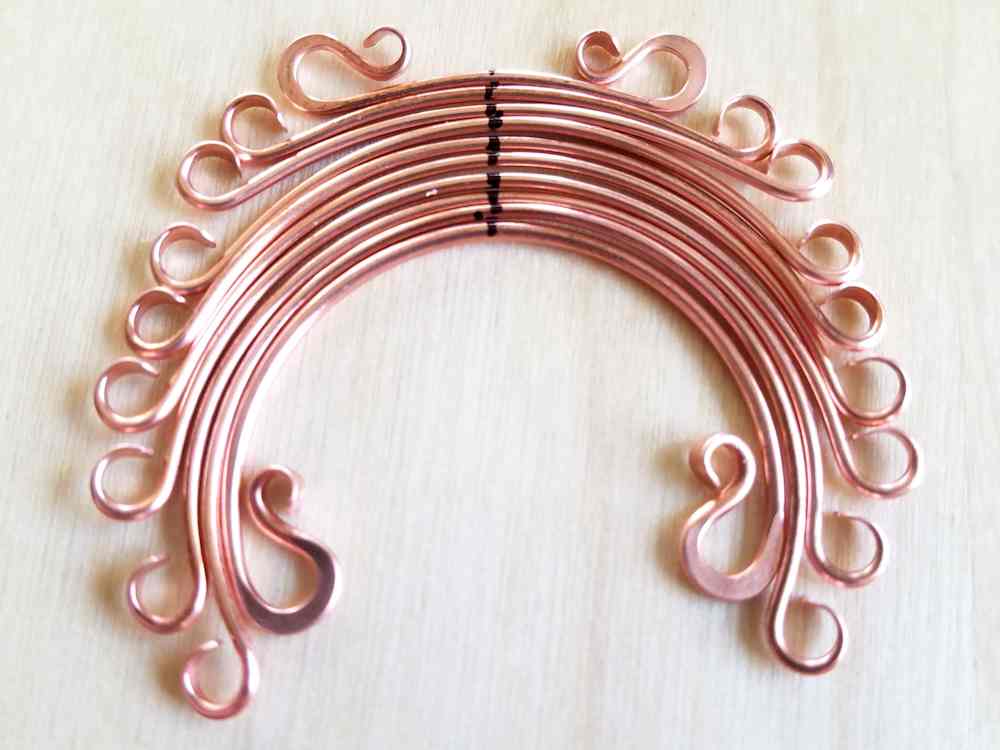
Your frame wires are now complete and ready to weave together. Before proceeding, nest all your core wires together and line up the center marks.
The wires should nest neatly together, and everything should be lined up symmetrically. If not, make any necessary adjustments now and mark new centerlines on your core wires, as shown.
- Prepare your weaving wire
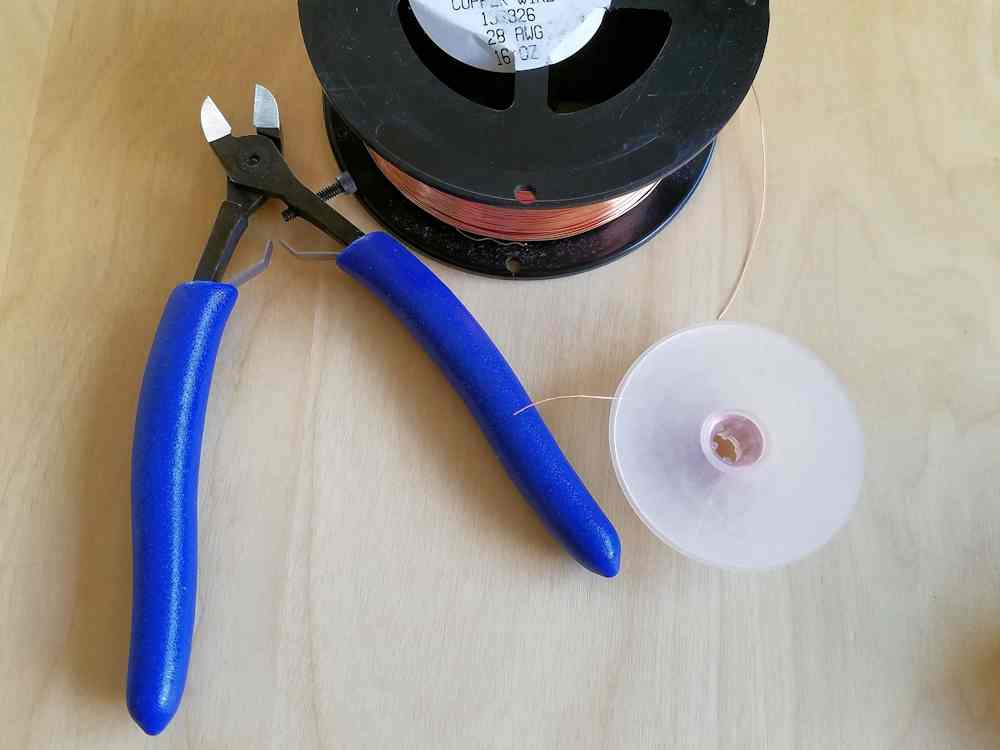
You’ll need about 14 feet of 28g dead soft wire to weave your ten core wires together. I prefer to work from a bobbin when dealing with this much wire. Wind several feet of wire onto a plastic Kumihimo bobbin, as shown. I typically wind about 50 feet of wire onto my bobbins, and then I use that bobbin to weave several pieces of jewelry.
Note: If you’re making a silver pendant, you should have used half-hard sterling silver for the core wires prepared in the previous section. Usedead soft fine silver wire for weaving in this section.
- Begin weaving your core wires together
Pull about 7 feet of wire off your bobbin and position Wire 10 close to the bobbin. Starting at the center mark on Wire 10, begin weaving your core wires together using the Modified Soumak Weave.
Weave in one direction until you reach the small curl on Wire 1. Make sure your center marks still line up before securing that curl. If not, slide the wires back into alignment. Then lash the small curl of Wire 1 with a single pattern repeat.
Continue weaving in pattern until you reach the small curl on Wire 10. Make sure your core wires are still aligned on center. If not, slide the core wires back into position before proceeding. Lash the small curl of Wire 10 with a single weaving pattern repeat.
- Continue weaving the first half of your headdress
Continue weaving in pattern until you have 3 or 4 pattern repeats within the large loop of Wire 1. Then reduce your weaving pattern to just Wires 2 through 10. When you reach the curl on Wire 2, reduce your weaving pattern to just Wires 3 through 10.
Continue weaving in this manner until you reach the point where Wires 9 and 10 diverge. Finish off your weave with three wraps around Wire 9 and break your weaving wire.
- Flip your headdress over and begin weaving the other half
Flip your bead frame over. Pull about 7 feet of wire off your bobbin and trim the wire. Continue the weave seamlessly on the other side of the frame with the wire you just cut.
Again, make sure your core wires are all aligned on the center marks. You won’t really be able to adjust Wires 1 and 10 at this point. Once you lash the small curls on those wires, they are pretty much locked in place, but you can still slide Wires 2 through 9, if necessary.
- Sculpt your headdress into a convex curve
Now that the weaving is complete, we’re going to form your bead frame into a pretty shape that will add depth and dimension to your Ancestor Pendant.
Use your fingers to gently push the bead frame into a convex curve. Once you’re happy with the overall shape, use your fingers or your chain nose pliers to gently bend the curled ends of the core wires back so they continue the lines of the convex curve.
- Patina your wire components and prepare to attach the focal bead
Cut a piece of 24g half-hard wire 8 inches long. This is the wire you’re going to use to secure your focal bead to your woven bead frame.
NOTE: I do not recommend getting ceramic beads wet. The holes in my sample beads aren’t glazed, which means the porous ceramic base of the bead is exposed. You’ll notice in these photos that I patinaed and polished the headdress along with the 4mm copper beads and the 24g wire that I used to attach the focal bead prior to completing this assembly step. If you’re using a carved gemstone bead, made of quartz or another suitably hard stone, you may proceed without pre-finishing your metal, and then finish your necklace all at once when the assembly is complete.
- Test the fit of your focal bead and spacer beads
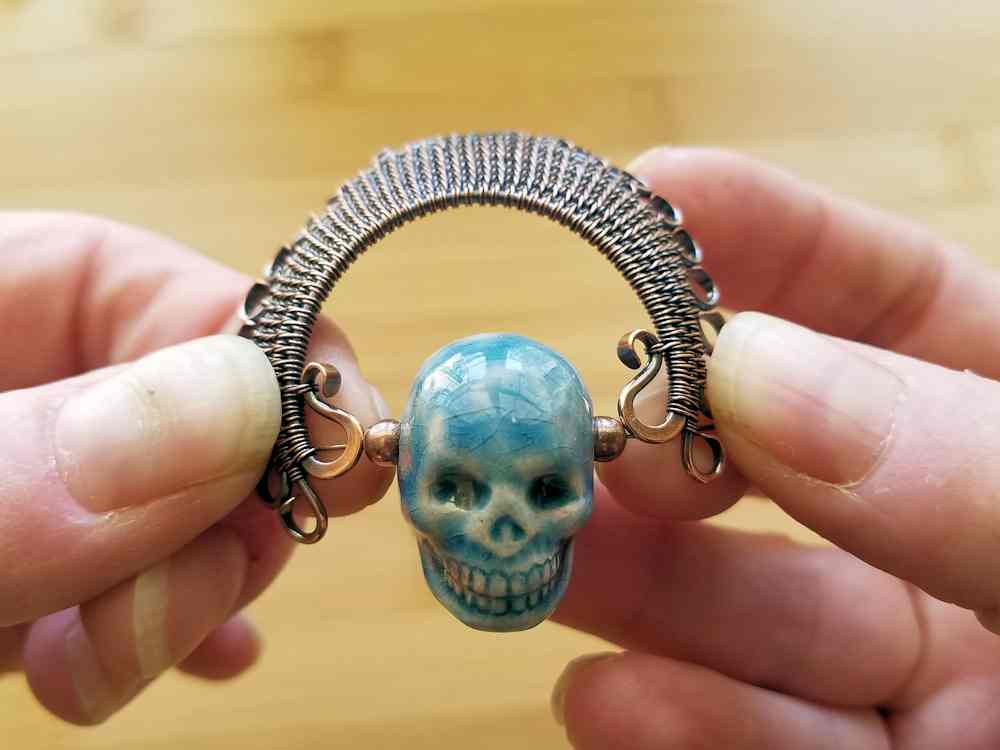
We’re going to add a 4mm copper bead on either side of the focal bead. String your beads on the 24g wire, as shown, and make sure all three beads fit comfortably between the two large loops on Wire 10. If the fit is tight, gently spread the bead frame open until the beads fit comfortably within the frame and the holes on your beads line up evenly with the large loops.

- Fasten your focal bead to the headdress
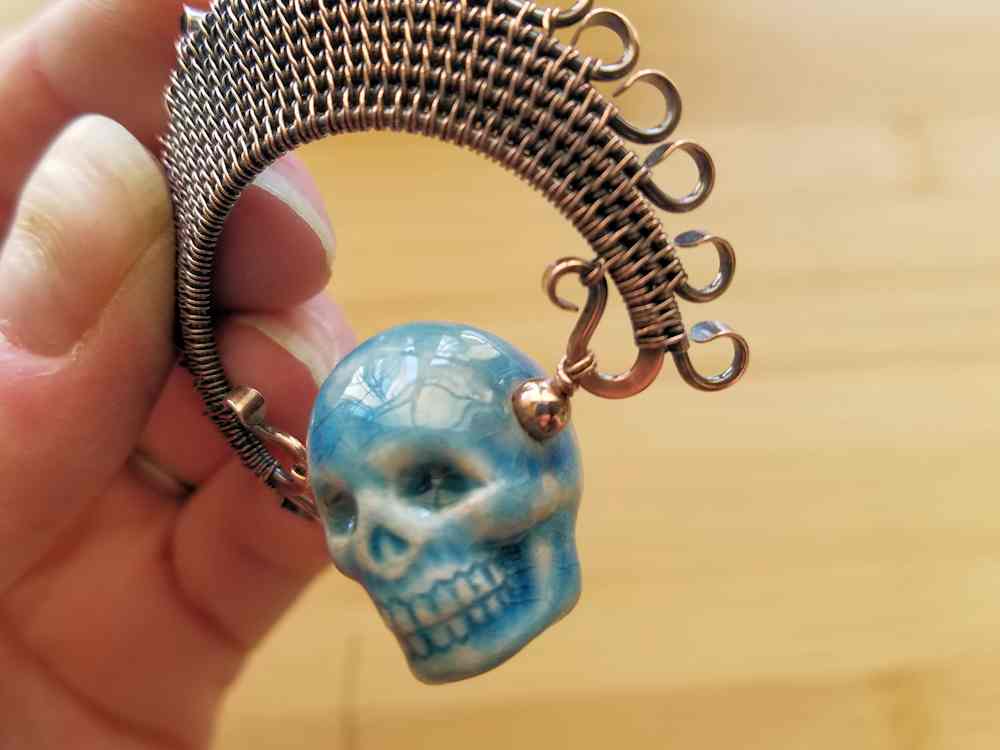
Take one end of your 24g wire. At about 3 inches from the end of the wire, wrap the wire twice around one large loop on Wire 10. Make sure the wraps line up close together and then feed the long end of the wire through your beads.
Bring the end of the wire down through the other large loop on Wire 4, from front to back. Tug it gently until your focal bead slides up into position between the two wire loops. Then wrap the long end of the wire twice around the wire loop.
Wrap the loose ends of wire on either side of the focal bead twice around the 24g wire passing through your beads. These wraps will be between the bead frame and the 4mm copper bead. Pull the second wrap snug and break your wires on the back side of your pendant.
- Cut two pieces of necklace chain to length
Cut two pieces of chain 16 inches long if you want to make the 34-inch chain that I made for my Ancestor Pendant. If you want your necklace to be longer or shorter, here’s how I calculate my chain lengths:
1) Decide how long you want your chain to be and subtract 2 inches from that number. This is the allowance for the length of your clasp and the wrapped loop connectors.
2) Divide the remainder by 2 to determine the cut lengths of your chain.
If you’re using a chain that’s prefinished, I recommend holding off on attaching the chain until after your pendant, clasp, and wrapped loops are patinaed and polished. In that case, leave the four loops that attach to the chain open until after you’ve finished and polished those wire components. Then attach the chain and close the loops.
- Cut four pieces of wire for your wrapped loop connectors
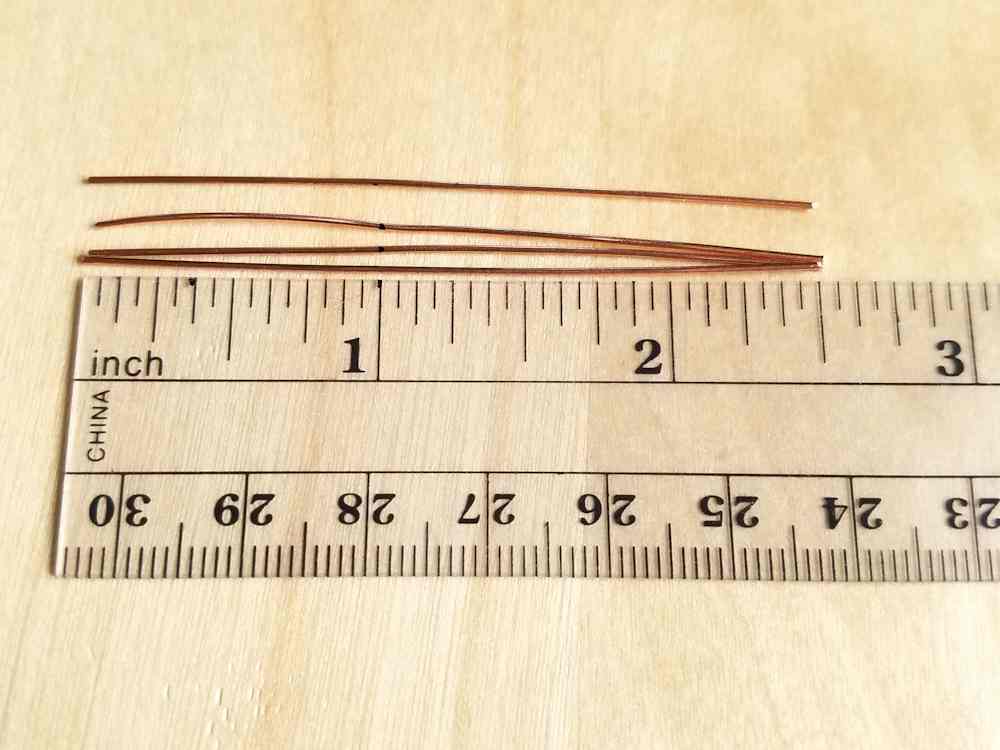
Cut four pieces of 22ga half-hard wire 2-1/2 inches long. Mark each wire at 1 inch from one end. This is where you’ll make your first wrapped loop.

- Connect wrapped loops to one end of each segment of chain
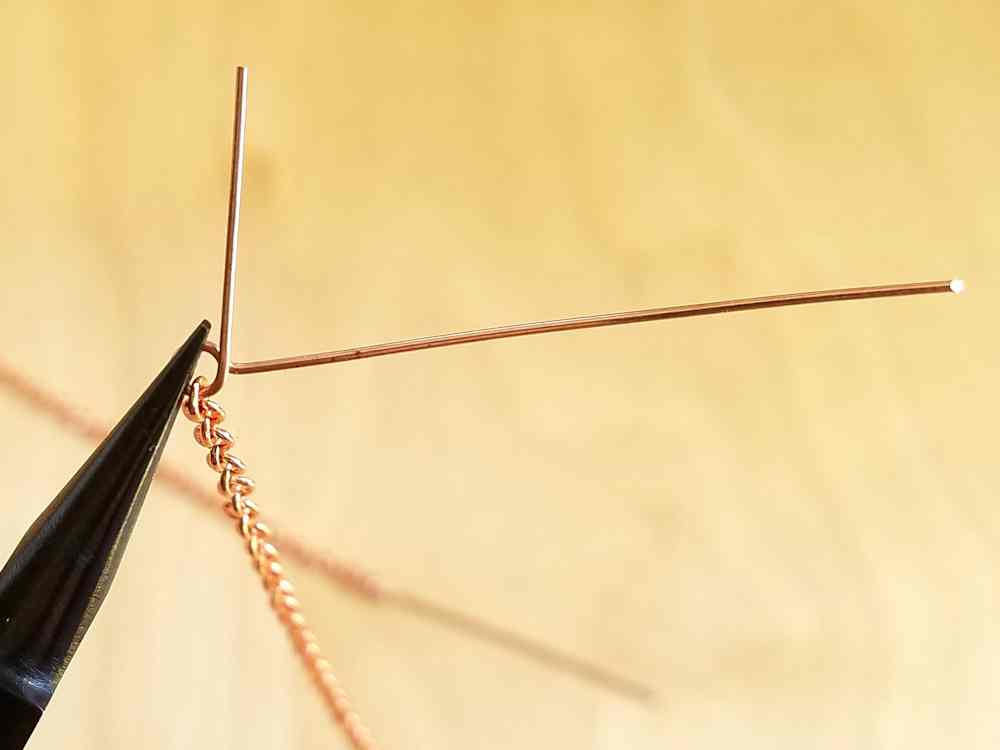
Begin a wrapped loop and thread it through the last link on one end of the chain. Finish wrapping the loop.
Repeat on the second piece of chain. These are the connectors that will attach to the top of your pendant once the chain and clasp are patinaed and polished.
- Add your accent bead(s) to your wrapped loop connectors
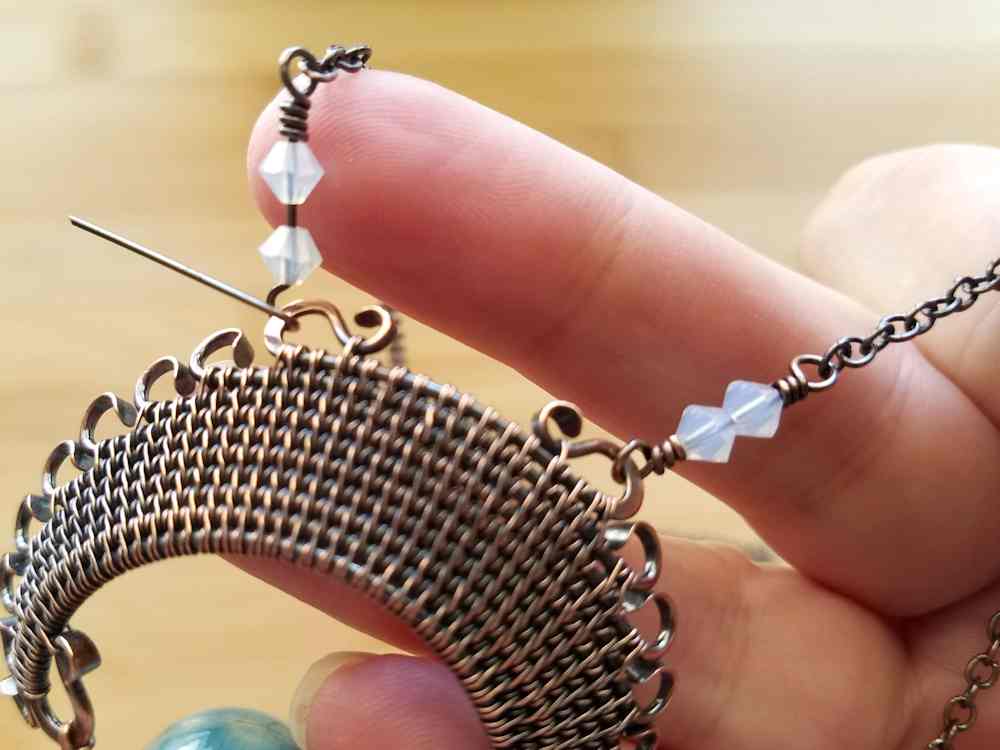
Thread one or more accent beads onto one of the wrapped loops you just added to your chain. I used 4mm White Opal Swarovski bicone beads on the sample I made for this tutorial.
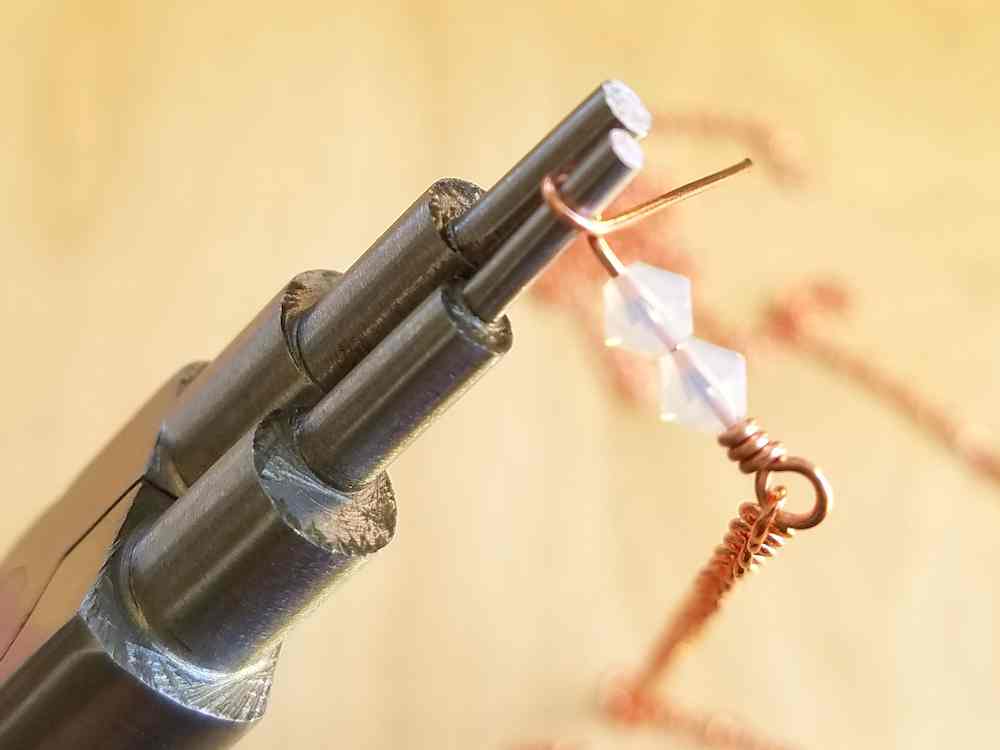
Begin a second wrapped loop just above the bead(s), but don’t wrap the loop yet. Repeat this step on the second piece ofchain .
- Attach your clasp to your chain
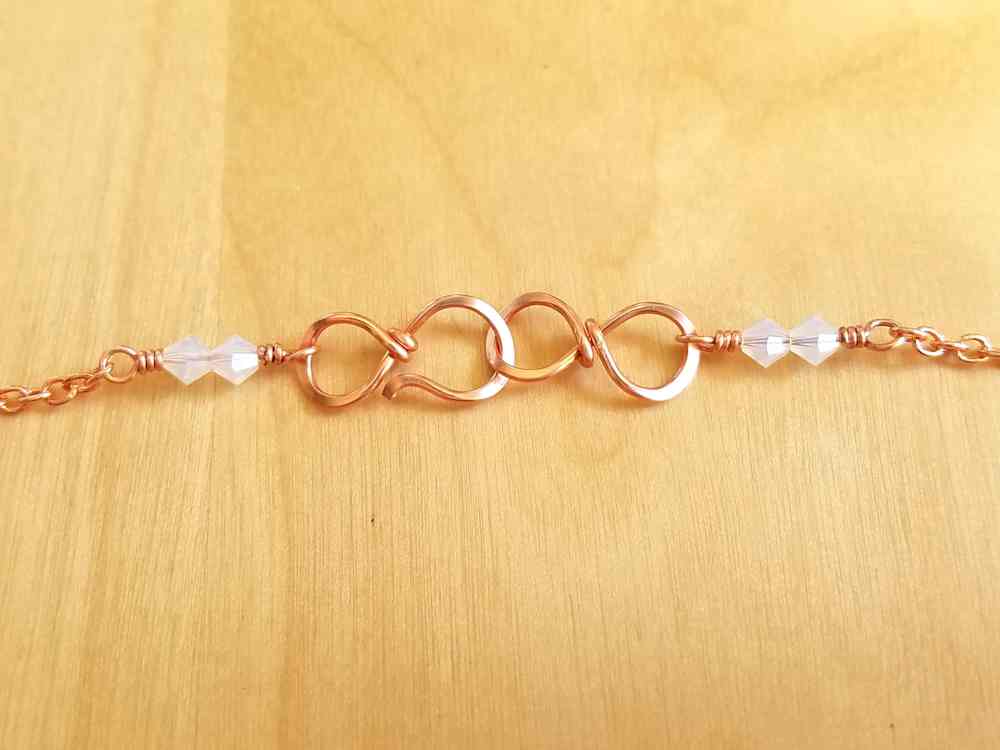
Repeat Steps 28 and 29 on the unfinished ends of your chain and make a medium Easy Infinity Clasp using 6 inches of 18g half-hard wire.
Connect one half of the clasp to an open loop on each piece of chain.
You can find a downloadable PDF tutorial for my Easy Infinity Clasp in my Etsy shop, or check out the free version of that tutorial here on my blog.
- Attach your finished chain to your pendant
Patina and polish your chain and then attach the two unfinished wrapped loops to the top of your pendant.

That’s it. You’ve just completed your Ancestor Pendant! Put it on and admire your work. It’s always a good idea to wear every new piece for a few hours to make sure it’s comfortable and that there are no sharp points that will irritate skin or snag clothing. Make any final adjustments that are necessary before giving your new necklace a final dry polish. I use Sunshine® polishing cloths to dry polish my jewelry. Refer back to the Tools section above for a link to those polishing cloths.
Want a printable version of this tutorial?
Where to Find Skull Beads for Your Ancestor Pendant
A pretty side-drilled skull bead is crucial for this design, but they can be challenging to find. They tend to be available seasonally and they’re most popular around the Halloween and Day of the Dead holidays. I’ve had good luck finding carved gemstone skull beads on Etsy from a shop called Rock Paradise. This shop doesn’t always have skull beads in stock but they do carry these beads every now and again.
I purchased the Peruvian ceramic focal bead that I used in this tutorial on Etsy from a shop called The Crafty Bead. This shop has a wonderful collection of fun ceramic beads including some super cute Sugar Skull beads. Be sure to spend some time browsing this shop.
Another place to look for skull beads is at your local rock shop. I once found a bowl full of mixed gemstone skull beads at a quaint little rock shop in Virginia City, Nevada. When all else fails, do a general search for side-drilled skull beads on Etsy. These beads have recently been replaced by skull cabochons in terms of popularity, so the beads are becoming more difficult to find. They’re out there, though. You just have to be persistent in your search!
Variations of the Ancestor Pendant
The Ancestor P
Changing the Size of the Bead Frame
In order to modify this frame to fit other types of beads, first, consider the size of the focal bead that you have in mind. You want the size of your bead frame to be in balance with the size of your bead.
You can accommodate larger focal beads in two different ways. First, you can use heavier gauge core and weaving wires to make a larger frame, as I did on the oblong Rainbow Agate shown below (second from left). Or you can add more core wires, as I did for the Ancestor Pendant featured in this tutorial.
The key points you need to keep in mind as you expand this design to fit various focal beads are the width of the bead at the point where the hole is drilled and the look that you’re trying to achieve.
Do you want the focal stone to be the most prominent feature of your pendant, as with the oblong Rainbow Agate pendant shown below (second from left)? Or do you want the bead frame to be a major feature of the pendant, as in the Ancestor Pendant we made today (pictured third from right)?
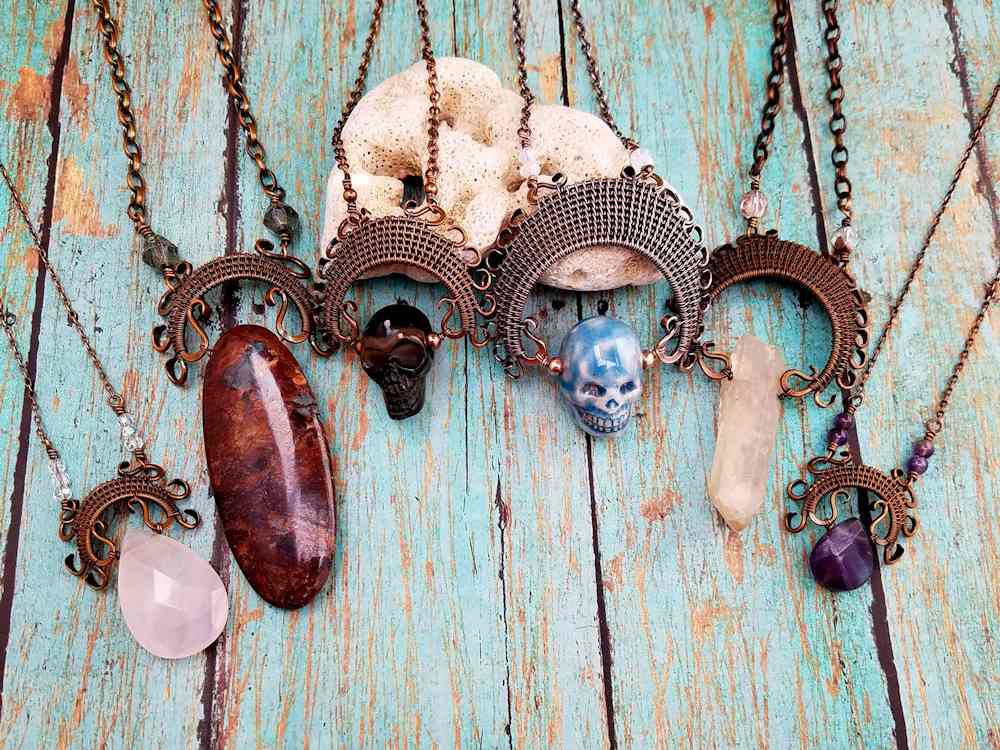
In either case, you’ll need to adjust the length (and possibly the gauge) of your core wires to accommodate larger beads. The Rainbow Agate pendant frame was made with four 16ga core wires and 28ga weaving wire. You can also add spacer beads, as I did on the Ancestor Pendant, which helps the focal bead stand out.
Experiment With Different Focal Beads
Experiment with this design. Choose three very different styles and sizes of focal beads, and see what sort of results you get by changing the core wire gauge or just the number of core wires. The principles for forming and weaving the core wires remain the same. All that you need to change in order to expand your bead frame are the cut lengths of your core and weaving wires and the sizes of the mandrels that you use to shape those wires.
When determining the lengths of your core wires, form the inner core wire (the one that attaches to the bead) first. Once you’ve refined that piece, step the remaining core wires between 1/4 and 1/2 inch shorter until you get to the outer core wire, which will attach to your necklace chain. Cut that last core wire between 1/4 and 1/2 inches longer than the shortest core wire for your frame.
Remember to keep good notes on the ideal lengths for your core wires if you plan to repeat your custom Ancestor Pendant design. Also, tools make a difference so your ideal measurements may be slightly different than mine. Again, don’t be afraid to experiment with this bead frame. Make it your own!
Experiment with Different Weaves and Appliques
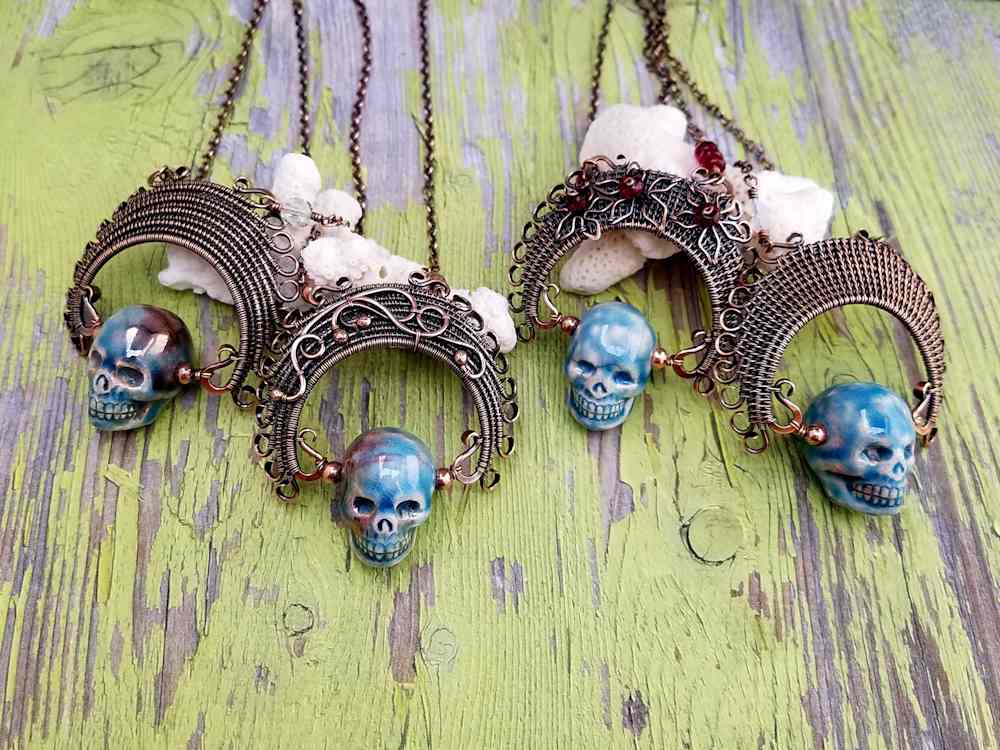
The wonderful thing about the Ancestor Pendant variation of the Lyonesse bead frame is that the additional core wires give you a blank slate that begs for embellishment. This is a great place to add your own personality to your Ancestor Pendant, as I did with the applique flowers and the wire swirls and curls on the two pendants shown below (center right and center left respectively).
Also, try using a different weave for your headdress. Figure 8 weave gives the Ancestor Pendant a completely different texture, as shown on the first and second pendants from the left in the image below. This weave is a bit more challenging to do over 10 core wires, so I do recommend taping your core wires together while you weave the first half of your bead frame with the Figure 8 weave.
Finishing Suggestions
I patina all of my copper and silver jewelry with Liver of Sulfur (LOS), and then I burnish the patinated pieces with super fine steel wool (Grade #0000) in a warm bath of water and original Blue Dawn dish soap. The steel wool brings back the bright copper highlights on the high spots.
Once that’s done, I rinse the jewelry thoroughly to remove any particles of steel wool, and then I put the jewelry in a tumbler barrel filled with warm water and a generous squirt of Blue Dawn. I tumble all of my finished jewelry for a minimum of two hours.
Learn More About My Finishing Process
If you’re new to wire weaving, read this detailed tutorial that walks you through my 7-step patina process. If you’re wondering why I recommend tumble polishing specifically, check out this post. And if you already own a tumbler, make sure you clean your stainless steel shot regularly so you’ll always get the best finish on your tumble-polished jewelry.
One last bit of tumbler advice before you go. Always make sure that any beads or stones that you use for your jewelry are safe to tumble. I don’t recommend tumbling natural pearls, soft gemstones, ceramic beads, or glass beads with polymer coatings, such as glass pearls and certain frosted-look glass. If you’re not sure if your beads can handle the tumbler, run a test tumble with a bead that you’re willing to sacrifice.
Discover More Behind Door 44
Thanks so much for joining me today. I hope you enjoyed creating my fun and funky Ancestor Pendant. If you’d like a printable PDF version of this tutorial, you can find it here.
Want more free wire jewelry goodness?
I like to share useful wire weaving tips and tricks on my social media channels, and we have some great conversations about wire jewelry in my private Facebook Group. Also, be sure to connect with me @door44studios on Instagram, and Facebook to keep up with everything that’s happening behind Door 44. And if you haven’t already done so, be sure to subscribe to my YouTube channel where you’ll find new wire jewelry videos weekly.
Until next time, go make something beautiful!

Pin the Ancestor Pendant Tutorial for Later
