

Spooky Halloween Earrings: Wire Jewelry Basics
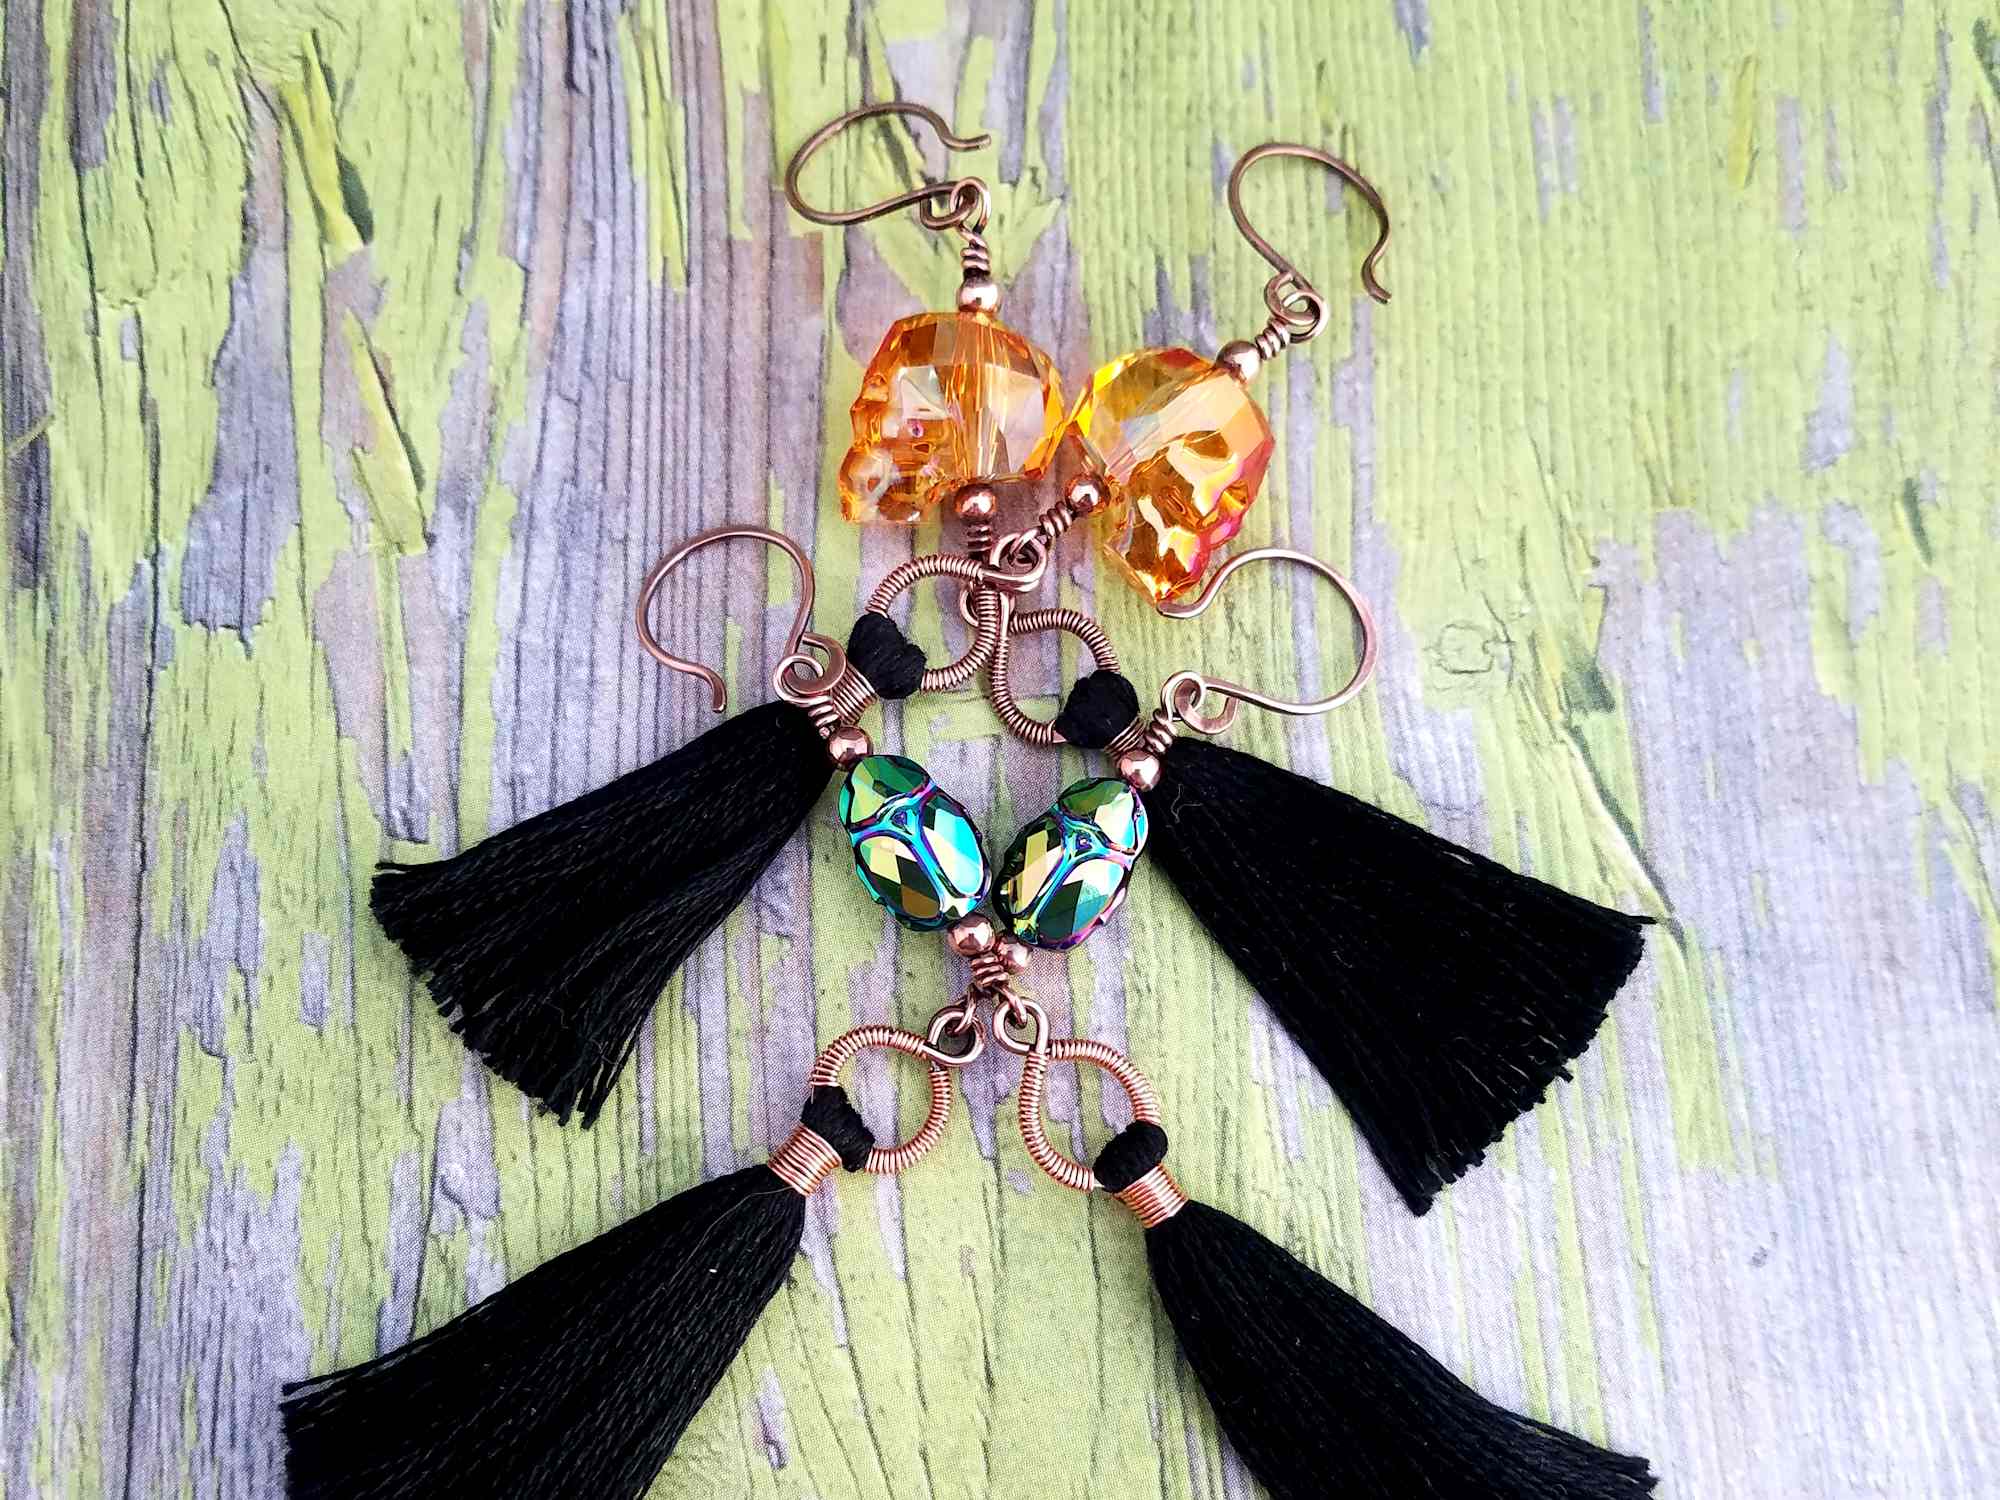
Are you interested in learning wire weaving, but you’re nervous about working with wire? I get it. It’s always a little scary when you start working with new material for the first time. So, I designed these fun and Spooky Halloween Tassel earrings with the absolute beginner in mind.
These cute and flirty earrings are super fun to make, and they’re a great intro to very basic
If you’re not new to Door 44 Studios, you’ve probably heard me preach a lot about how wire weaving isn’t everything. Don’t get me wrong. I love the craft, and it’s something I never seem to tire of doing. But any technique, all by itself, can be a little dull. So, one of the things I like to do to keep things interesting is to mix in some different media every now and again.
Mixed Media Jewelry Tutorials
This tutorial is the first of several mixed media projects that I have planned in the coming months. By adding an unexpected material (in this instance, cotton embroidery thread) to jewelry wire, you can inject a lot of personality into even the most basic wire jewelry. And that’s exactly what we’re going to do here. We’ll make some super simple earrings that consist of just three components: a beaded wrapped-loop connector, a simple wire-wrapped tassel component that we’re going to create from scratch, and a pair of ear wires.
It doesn’t get any easier than this. You can make these earrings, from start to finish, in just a few minutes. If you’re an experienced wireworker, feel free to skip over the very detailed steps in this tutorial, which are intended for beginners who may be brand new to working with wire.
Copyright & Disclosure
You’re welcome to make and sell products from this tutorial on the condition that you credit Wendi Reamy of Door 44 Studios for the design and link back to this page.
When it comes to my written tutorials, however, I reserve exclusive rights to all images and written content. You may not reproduce or redistribute any portion of the New Moon Pendant tutorial in any way, shape, or form. Furthermore, you may not teach the designs contained within this tutorial without my written permission.
This copyright applies to the printable PDF version of the Spooky Halloween Tassel Earrings tutorial as well, and it’s included therein. You may share the free version of this tutorial only by linking directly to this page.
This post may contain affiliate links. If you click on a link and then make a purchase, I may earn a small commission (at no cost to you). As an Amazon Associate I earn from qualifying purchases. To learn more, please see my full disclaimer.
Skill Level: Beginner
This is a very basic wirework project that can be achieved by someone who has never worked with wire before. More experienced wire workers may find this very detailed tutorial to be a bit tedious. If that’s you, feel free to skip over all the detailed descriptions and make the beaded connector and tassel components your own way.
Getting Started
You may use half-hard or dead soft solid jewelry wire for the Spooky Halloween Tassel Earrings. This design works just as well using brass or bronze wire as it does with copper or sterling silver. As usual, you’ll need dead soft wire in the same (or a compatible) alloy for wrapping. If you choose sterling silver for your core wires, I recommend using dead soft fine silver for wrapping.
If you choose to use a filled wire, be aware that parts of these earrings are finished and hardened by hammering the wire. Even light hammering can expose the base metal core in filled wires, which can negatively affect your final finish. As always, I don’t recommend plated or anodized craft wire for these earrings because coated wires can not be hammered without damaging the finish.
How to Choose the Right Jewelry Wire
Jewelry wire is a constant source of confusion for beginners. I remember those days well, and there are far more wires on the market today than there were when I first began making wire jewelry. If you’d like to have a clearer understanding of how to choose the right jewelry wire for wire weaving, be sure to read this post. In it, I share everything you need to know about jewelry wire as you set out on your wire weaving journey.


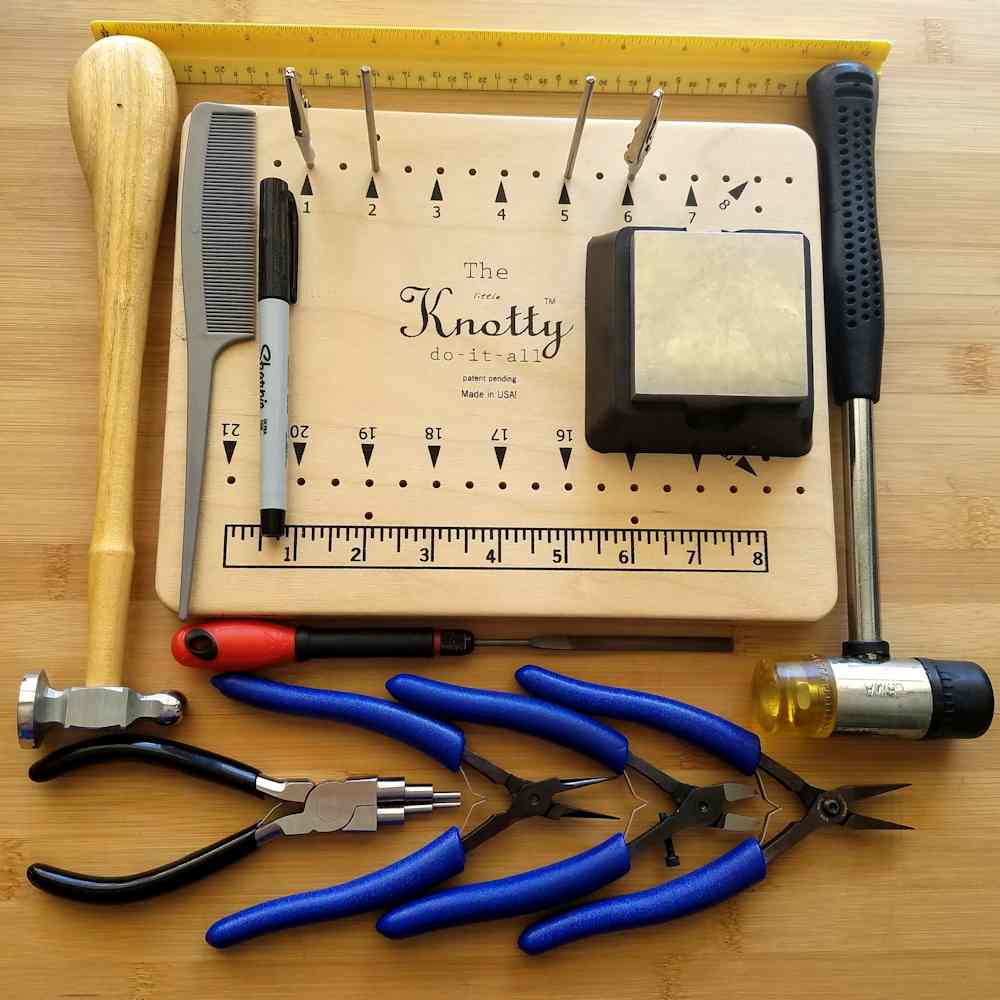
Tools & Materials
- 20ga wire – 4 inches (10 cm)
- 22ga wire – 6 inches (15 cm)
- 28ga dead soft wire – 24 inches (61 cm)
- Swarovski Crystal 14 x 13 x 10mm Skull or 12 x 8mm Scarab Beetle Beads – 2 each
- Accent beads of your choice – 2+ per pair.
- Ear wires that match your chosen wire – 1 pair
- Black cotton or nylon embroidery thread – 1 skein
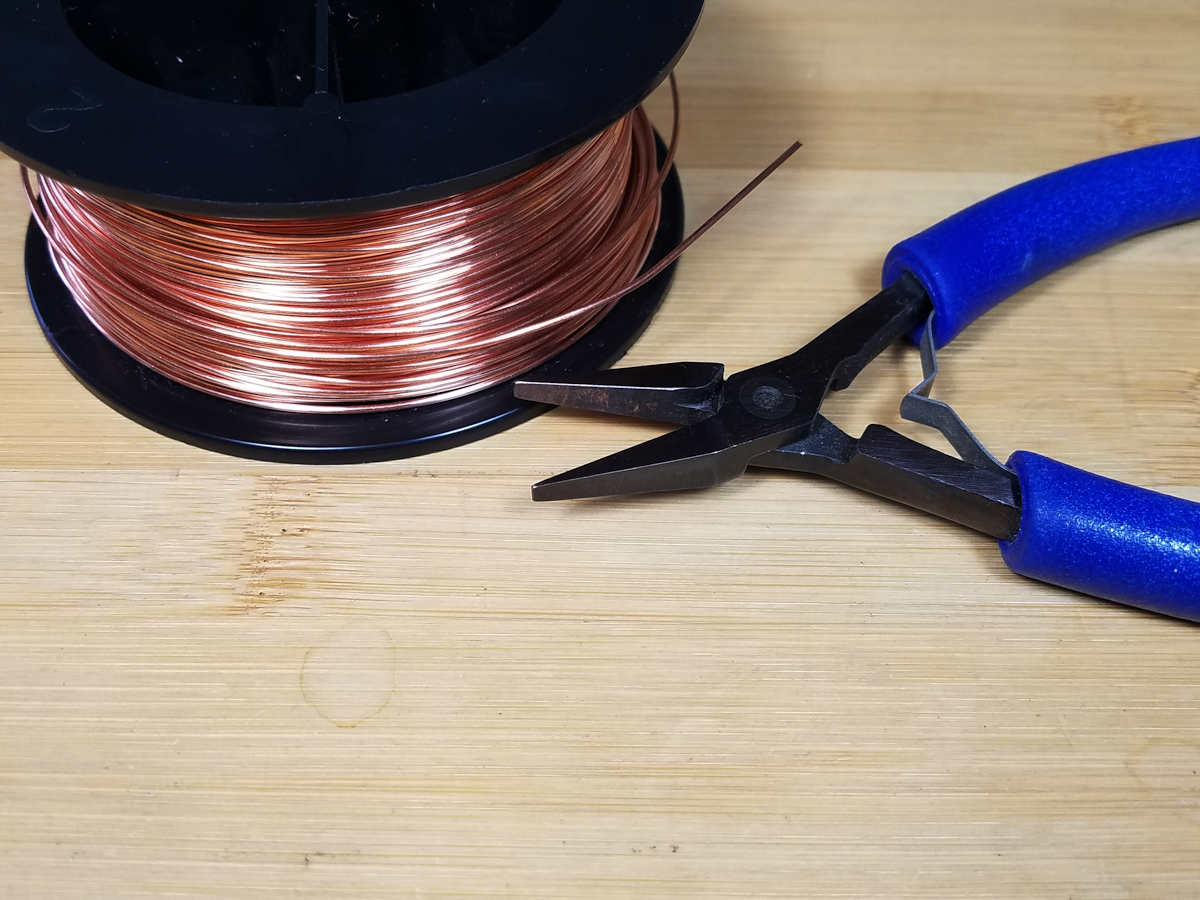
- Wire Cutters
- Chain Nose Pliers
- Flat Nose Pliers
- Stepped Bail-Making Pliers
- Nylon Jaw Pliers (optional)
- Needle File (optional)
- Chasing Hammer (pictured far left)
- Bench Block
- Ruler
- Fine Point Permanent Marker
- Tassel making tool of your choice. I use (and love) the Knotty do-it-all but a simple piece of cardboard will work just fine.
- Sunshine® polishing cloths (optional). These are the polishing cloths that I use for dry polishing jewelry.

Finished Size
- WIDTH: about 1/2 inch (1.27 cm) – May vary depending on the focal beads that you choose
- LENGTH: about 3 inches (7.62 cm) – Again, may vary depending on the beads you choose and how long you make your tassels.
I added my Basic French Hooks to these earrings to complete the look. Ear wires will add between 1/2-inch (1.27 cm) to 3/4-inch (1.91 cm) to the overall drop length, depending on the ear wires that you choose. The Basic French Hooks are on the low end of that range.
How to Make the Spooky Halloween Tassel Earrings
The instructions for these earrings are written for the 3-inch earrings shown above. However, you can make these earrings as long (or as short) as you like. Experiment with different beads and tassel lengths to customize your spooky Halloween earrings to suit you.
See the Variations section of this tutorial for more ideas about how you can make these earrings uniquely your own.
This is a very long post because I go into great detail for creating each component. So I’ve broken the tutorial into three separate sections:
- First, we’ll make the beaded wrapped loop connectors.
- Then we’ll create the tassel components.
- inally, we’ll assemble the earrings.
If you’re already comfortable with one or more of these processes, feel free to skip over any instructions that you don’t need.
Part 1: Make the Wrapped Loop Connectors
Step 1
Straighten some 22ga wire by running it between your fingers or your Nylon jaw pliers. Then measure and cut two 3-inch pieces of wire. Mark the wires at 1 inch from one end. This is where we’ll begin the first wrapped loop.
Step 2
Grasp your two wires at the mark made in Step 1 with your flat nose pliers. Gripping the wires firmly with your pliers, press your thumb on the tips of the pliers and push on the wires to create a bend at the 1-inch mark. You don’t want a sharp 90-degree bend. Just bend the wires about 45-degrees or so. As we form the loop in the next step, this angle will help center the loop over the wire shaft.
Step 3
Grasp one of the wires at the bend with the tips of your stepped bail-making pliers. Make sure the 2mm step (the smallest step) is sitting above the bend while the 3mm step is resting inside the bend, as shown.
Step 4
Press the wire firmly against the mandrel with your fingers and roll the short end of the wire all the way around the 2mm mandrel until it forms a 90-degree angle with the long end of the wire, as shown.
Step 5
Using your flat nose pliers, firmly grasp the loop that you just made in Step 4.
Step 6
Use your fingers to wrap the short end of the wire tightly around the long section of wire below the loop. I like to make three wraps on all my wrapped loops. It doesn’t matter how many wraps you choose to do. Just try to be consistent. Those little details make a big difference in the finished look of your jewelry.
Step 7
Use your wire cutters to trim the excess wire close to your wraps.
Step 8
Use your chain nose pliers to tuck the cut end of the wire snuggly around the shaft of the core wire.
Step 9
You should now have a head pin with a 2mm wrapped loop on one end that looks like this. If necessary, use your chain nose pliers to gently tighten the wraps around your core wire before proceeding to the next step.
Step 10
Thread your accent and focal beads onto the head pin in the order that you want them to appear on your finished earrings.
I chose 3mm copper beads and 14 x 13 x 10mm Swarovski faceted skull beads in Crystal Astral Pink here.
Step 11
Grasp the wire pin just above the beads with your chain nose pliers. Try to position the pliers at a point that is the same width as the wraps you made on the first wrapped loop. This will allow you to make the same number of wraps on your second 2mm loop that you made on the first loop.
Step 12
Use your thumb to firmly bend the pin at a sharp angle against the top edge of the jaws of your chain nose pliers. This is where you will form your second wrapped loop.
Step 13
Again, this angle should be greater than 90 degrees. You want just enough of an angle, as shown, to allow you to center the next loop over the beaded portion of the pin.
Step 14
Grasp the wire pin with the tips of your stepped bail-making pliers. Make sure that the 2mm step (the smallest step) is above the pin while the 3mm step (the second step) is resting in the bend of the wire just above the beads, as shown.
Step 15
Use your fingers to roll the end of the wire tightly around the 2mm step of your bail-making pliers, as shown. Keep wrapping until the short end of the wire forms a 90-degree angle with the beaded connector.
Step 16
The loop should look like this before you secure it with the final wraps. Make any necessary adjustments now before completing those wraps.
Step 17
Grasp the loop firmly with the tips of your flat nose pliers and use your fingers to neatly complete the final wraps. Be sure to add the same number of wraps that you used on the bottom loop of your beaded connector.
Step 18
Once wrapped, your beaded connector should look something like this. Notice that I ended up with three wraps on both the top and bottom loops.
Also notice that the two loops are perpendicular to one another. This is important so that your earrings hang properly.
Step 19
Use your wire cutters to trim off the excess wire.
Step 20
Then use the tips of your chain nose pliers to tuck the cut end of the wire against the core wire.
Step 21
Your first beaded connector is complete. Make sure the loops are perpendicular to one another, as I mentioned in Step 18. The top loop should be facing forward so you can see through the loop. This allows the beaded connector to hang straight down from the ear wire.
The bottom loop should be facing sideways so all you can see is the edge of the wire. This allows the tassel component to hang straight down from the beaded connector. If necessary, grasp one loop with your flat nose pliers and the other with your chain nose pliers and twist the loops into the proper position.
Step 22
Repeat Steps 3 through 21 to complete your pair of matching beaded connectors. As you can see here, I use both the Swarovski faceted skull beads and the scarab beetle beads to make two pairs of Spooky Halloween Tassel Earrings.
Part 2: Make the Tassel Components
Step 1
Straighten a length of 20ga wire by running it between your fingers or the jaws of your Nylon jaw pliers a few times. Once the wire is straight, measure and cut two 2-inch pieces of wire. Use your needle file to remove any burrs from the ends of the wires, if necessary.
Step 2
Using the 2mm step (the smallest step) on your stepped bail-making pliers, grasp the very tip of one wire firmly with your pliers, as shown.
Step 3
Press the wire firmly against the 2mm mandrel (the smallest step) with your fingers. Roll the wire all the way around the mandrel until the tip of the cut end touches the long shaft of the wire, as shown.
Step 4
You’ve just created a simple loop. If necessary, use your bail-making pliers again to neaten your loop until it looks just like the one shown here.
Step 5
We’re now going to create a 6mm loop beneath the small simple loop that you just made. Grasp the wire between the 4mm and 6mm steps on your bail-making pliers (the middle two steps). Make sure that the 2mm simple loop you just created is resting on top of the 4mm step, as shown.
Step 6
Using your thumb, press the wire firmly against the 6mm step on your bail-making pliers and roll the wire as far as you can around that step.
Step 7
Release the pressure on your pliers and slide the 2mm simple loop away from the 4mm step until you can clearly see the cut end of the wire forming that little loop. Then push the shaft of the wire that’s curved around the 6mm loop a bit further until that wire lines up perfectly with the cut end of the 2mm simple loop. This completes your 6mm loop, which is where we’ll attach the tassels.
Step 8
Reposition your tassel component so the small simple loop that you made in Step 3 is again on the 2mm step of your bail-making pliers. The excess wire that extends beyond the 6mm loop that you just made should be resting below the 2mm mandrel, as shown.
Step 9
Use your fingers to roll the wire tail firmly against the 2mm mandrel as far as you can go. This is the beginning of the third and final simple loop on this component.
Step 10
Rotate your wire component a bit so you can grasp both small simple loops with the 2mm step on your bail-making pliers. Then complete the last 2mm loop by pressing the wire tail firmly against the mandrel and rolling it until the wire tail aligns with the top curve of the 6mm loop, as shown.
Step 11
Use flush wire cutters to trim the excess wire tail off. Be careful to cut only the wire tail on the last 2mm simple loop that you just made.
Step 12
Your finished tassel loop should look like the one shown here. Use your bail-making pliers and/or your chain nose pliers to neaten up the loops, if necessary. Repeat Steps 2 through 12 to complete your pair of tassel loops.
Step 13
We’re now going to work harden our tassel loops with a chasing hammer and bench block. Gently flatten just the bottom edge of the 6mm loop by tapping lightly with your chasing hammer. Need help with your hammer technique? Check out my free Chasing Hammer Lessons.
Step 14
If you want to patina your wire, do it now. Bare copper or sterling silver wire will oxidize naturally with exposure to air. So you can skip this step if you like. If you do choose to patina your wire components now, be sure to patina a 24-inch piece of 28g wire, which we’ll use to bind the tassels. Curious about how to patina wire jewelry? Check out my free 7-step patina tutorial.
Step 15
Using the tassel-making method of your choice, wrap 10 to 12 loops of cotton or nylon embroidery thread around a 3-inch wide space. The tool that I’m using allows me to create two 1-1/2-inch tassels at a time, which I’ll demonstrate in the following steps. I like to use my Knotty-do-it-all for making tassels, but a simple piece of cardboard will do.
Step 16
Use your fingers or your pliers to open a small gap between the two 2mm simple loops at the top of your wire tassel loops.
Step 17
Slide the wire tassel loop onto your tassel threads. Make sure that you capture all the tassel threads within the 6mm loop on your wire component. Repeat on the other end of your tassel threads with the second wire loop.
Step 18
Now thread a piece of scrap wire or cord through the two small loops on each of your wire loop components and secure those scrap cords on either end of the fiber tassel loops. I used scrap pieces of waxed jewelry cord, which holds firmly in the clips on my Knotty do-it-all. If you’re using the Knotty do-it-all, you can now remove the two pegs that you used to create your fiber loops.
Step 19
Cut a 12-inch piece of 28g dead soft wire. Find the center of that wire and make one wrap around the tassel fibers just below the wire loop. Pull the 28g wire as snug as you can get it.
Step 20
Now wrap each end of the 28g wire snugly and neatly around the tassel fibers four times. This gives you eight wraps of wire around your tassel fibers. I like to keep my wraps neatly aligned, but you can also create a messy wrap if you’re going for a more rustic look for your earrings.
Step 21
We’re now going to secure the 28g wire by twisting the two wires around one another once or twice. This is going to be the backside of our tassels, so don’t worry. The twist won’t be visible from the front. Just make sure that you center the twist on the 6mm wire loop. Repeat Steps 19 through 21 on the remaining wire loop.
Step 22
Once both tassels are secured with 28g wire, you can now cut the two tassels apart in the middle Locate the center point between your two tassels and cut the tassel fibers at that point with sharp scissors..
Step 23
This last step gives your tassel loops a bit of texture and interest. Take the ends of the 28g wire and neatly coil the wire around the 6mm wire loop on either side of the tassel. Continue coiling until you reach the 2mm simple loop on each side of the 6mm loop. Break your 28g wire at that point and repeat on the other side of the loop with the remaining piece of 28g wire. Repeat on the second tassel.
Part 3: Assemble the Spooky Halloween Tassel Earrings
Step 1
Use your chain nose pliers to gently open one simple 2mm loop on one of your tassels.
Step 2
Thread the bottom loop of a beaded connector onto the open loop and close the loop again.
Repeat Steps 1 and 2 on the second 2mm loop of your tassel.
Step 3
Check to make sure that the front of the tassel is facing forward before attaching your ear wire. If not, just spin the wire on the beaded connector 180 degrees.
Step 4
Use your chain nose pliers to open the simple loop on your ear wire.
Step 5
Thread the ear wire through the top loop on your beaded connector. Again, make sure that everything is facing forward before securing the loop on your ear wire.
Step 6
Use your chain nose pliers to close the simple loop on the ear wire.
Repeat Steps 4 through 6 on the remaining earring.
Step 7
Use a fine-tooth comb to gently comb through your tassels. This separates the twisted strands of thread and fluffs your tassel. If you want to shorten your tassels or touch up the cut edge, trim them now.
And that’s it! Your Spooky Halloween Earrings are complete. Put them on and make sure they fit comfortably and that everything hangs correctly. If not, make any final adjustments.
Variations of the Spooky Halloween Tassel Earrings
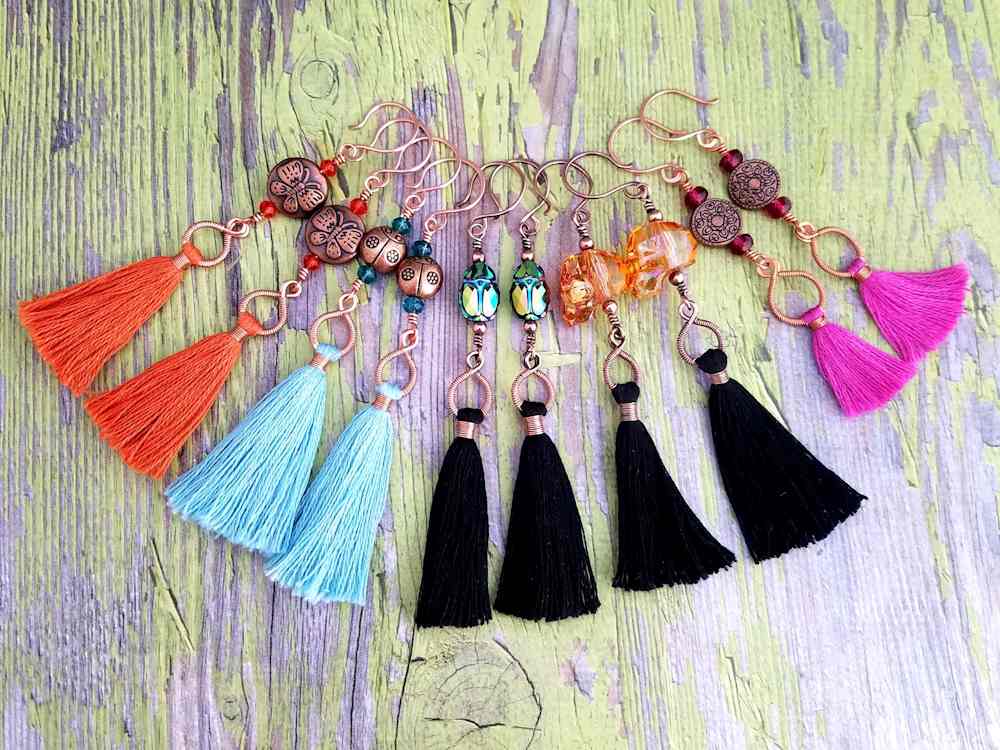
The Spooky Halloween Tassel Earrings can be easily adapted for any season or holiday by simply switching out the beads and thread colors. Experiment with different bead sizes and shapes until you achieve a few looks that you love.
Try switching up the lengths of your tassels to make your earrings longer or shorter. You can even use the tassels alone. Just hang them on ear wires for a super quick and easy pop of color.
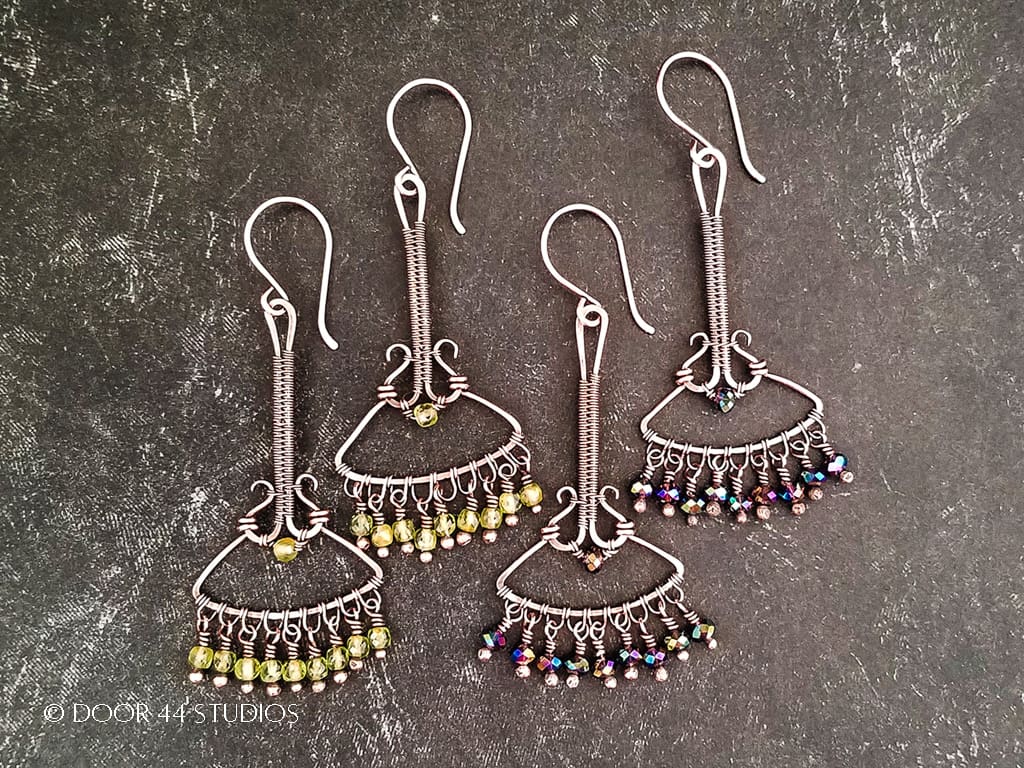
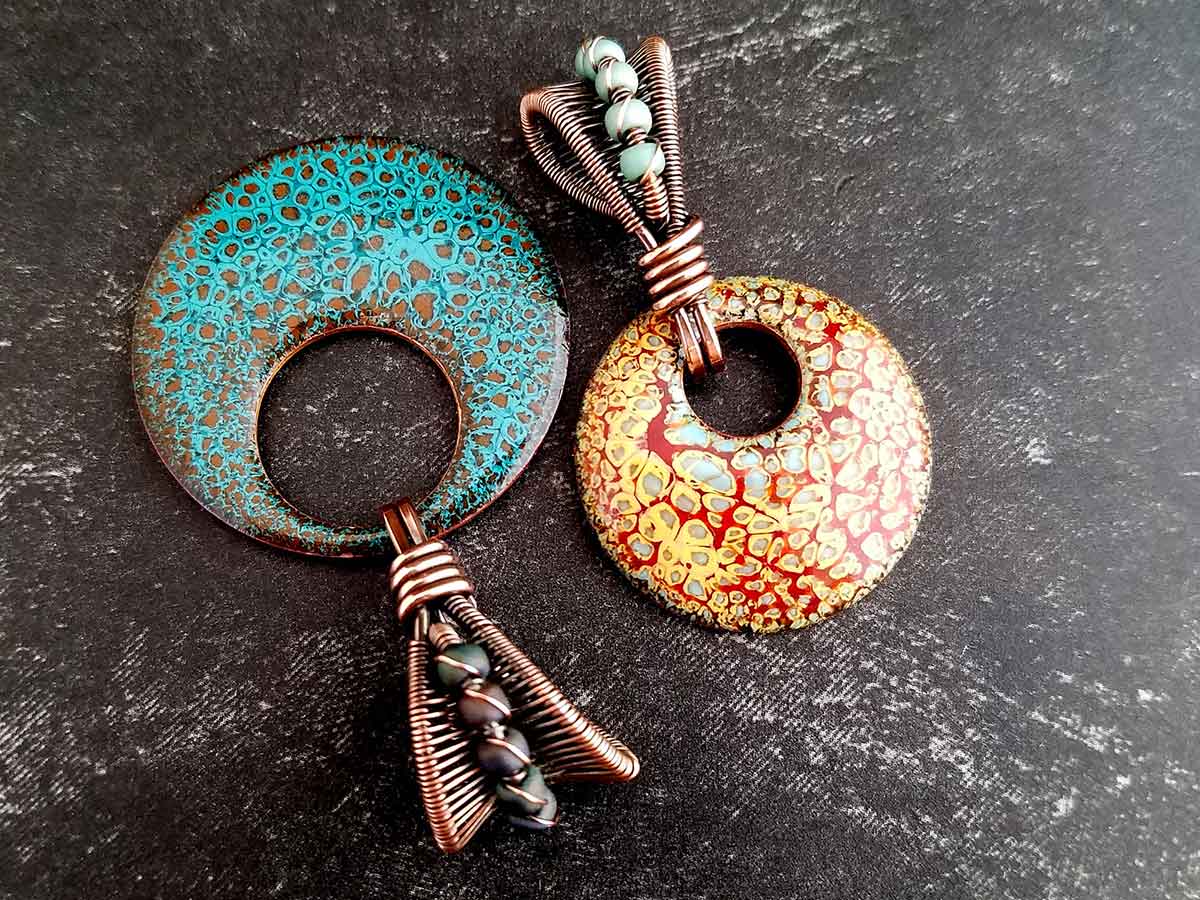
These earrings are so fun and comfortable to wear that you’ll find yourself reaching for them again and again. I have a pair of green tassel earrings featuring the copper butterfly beads shown above (left) that I wear pretty much all summer long.
Finishing Suggestions
I usually patina all my copper and silver jewelry with Liver of Sulfur (LOS), and then I polish the jewelry in my Loretone
First, you can leave the earrings unfinished and simply dry polish them with a Sunshine® polishing cloth. That’s what I did with the bright colored tassel earrings shown above. The unfinished wire will oxidize naturally with exposure to air.
Secondly, you can patina all your wire components before adding the tassels which is what I did on the skull and scarab earrings I made while writing this tutorial.
If you’d like to learn more about how to patina and tumble polish wire jewelry, be sure to grab my free 7-Step Patina Checklist below.
Free guide
Easy 7-Step Patina Process
Subscribe (free!) to my newsletter for weekly updates and wire jewelry tips. PLUS get instant access to my resource library where you’ll find this free guide along with lots of other helpful wire jewelry resources!
Discover More Behind Door 44
Thanks so much for joining me today. I hope you enjoyed creating the fun and flirty Spooky Halloween Earrings. If you’d like a printable PDF version of this tutorial, you can find it here.
Want access to more easy wirework tutorial like this?
I like to share useful wire weaving tips and tricks on my social media channels, and we have some great conversations about wire jewelry in my private Facebook Group. Also, be sure to connect with me @door44studios on Instagram, and Facebook to keep up with everything that’s happening behind Door 44. And if you haven’t already done so, be sure to subscribe to my YouTube channel where you’ll find new wire jewelry videos weekly.
Until next time, go make something beautiful!

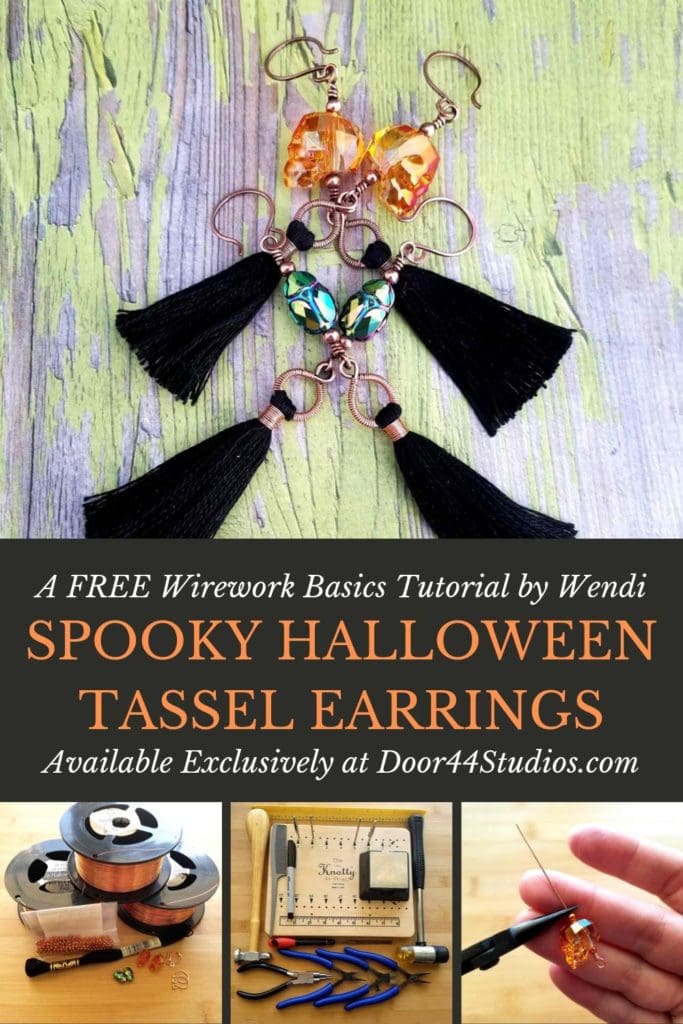
Pin the Spooky Halloween Earrings Tutorial for Later
I am so excited to come on this journey with you. You have inspired me to really start to concentrate on wire work. I am excited to incorporate my beadweaving with this somehow in the future. Thank you for this awesome and I do mean awesome resource. Its one of a kind for sure.
You’re so welcome, Joanne! I’m pleased that you enjoyed this tutorial. Beadwork and wirework blend beautifully together, so I encourage you to combine the two in your own unique way. If you’d like to see a couple of examples of my own bead and wire mashups be sure to check out my Delicate Bar Pendant tutorial. You’ll find two examples of that combination in the Variations section of that tutorial.