

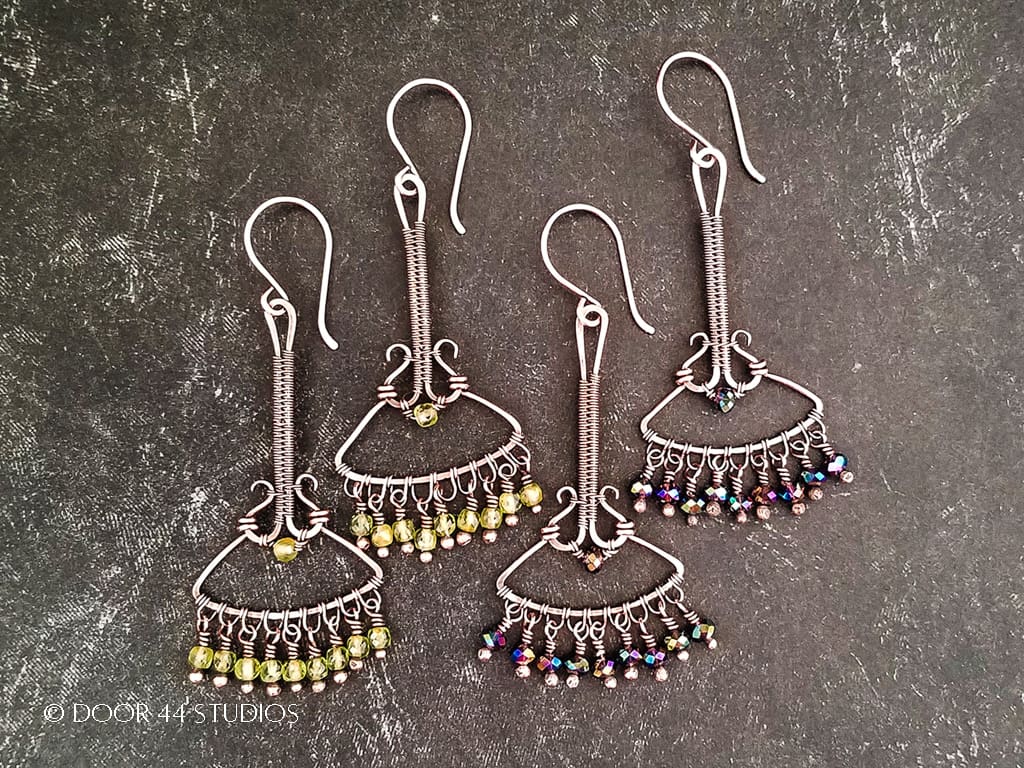
How to Make Symmetrical Wrapped Loop Connectors


Making a neat, tidy, and perfectly symmetrical wrapped loop connector is one of those basic wirework skills that every jewelry maker needs to know. But look carefully at the handmade jewelry you see in your local marketplace and you’ll quickly discover that not all makers have taken the time to master this essential skill. So, today I’m sharing my secret for making perfectly symmetrical wrapped loop connectors, every time.
Copyright & Disclosure
Wrapped loop connectors are a very common wire jewelry component. We all make them, and many of us have developed our own techniques for making them — none of which can be legally copyrighted or claimed as a unique and copyrightable design.
When it comes to my written tutorials, however, I reserve exclusive rights to all images and written content. You may not reproduce or redistribute any portion of this tutorial in any way, shape, or form. You may share this free tutorial only by linking directly to this page.
This post may contain affiliate links. If you click on a link and then make a purchase, I may earn a small commission (at no cost to you). As an Amazon Associate I earn from qualifying purchases. To learn more, please see my full disclaimer.
About This Tutorial
Have you ever wanted to make your own beaded Rosary chain? Are you looking for a pretty and secure method for attaching necklace chain to your pendants?
I always recommend combining a wrapped loop connector with soldered chain for the most secure and professional finish on necklaces, bracelets, and even earrings. And after making literally thousands of these essential jewelry components over the many years that I’ve been making wire jewelry, I’ve developed a simple technique that will help you make perfectly symmetrical wrapped loop connectors that have the same number of wraps on both ends.
Let’s get started!
Skill Level: Beginner
This is a basic wirework project that can be achieved by someone who has never worked with wire before.
Choosing Wire for Wrapped Loop Connectors
You can use almost any gauge of wire for these connectors. I’ve used everything from 16g to 26g. The wire that you’ll use depends entirely on the particular application. When choosing a wire gauge for wrapped loop connectors, your goal is to balance the gauge of your connectors with the chain, or any other components, that you’re using in your jewelry assembly.
For instance, I typically use 22g or 24g wire for wrapped loop connectors when I’m attaching delicate chain to a pendant or when I’m making earrings. For a medium weight chain, I’ll use 20g or 22g. And for a heavy weight chain, I might bump the gauge up to 18g. Or even 16g for a very chunky chain.
It may take a bit of experimentation at first, but soon, you’ll be able to quickly choose a wire gauge that balances perfectly with your overall jewelry composition.
Also, a quick note about wire hardness. I prefer to use half-hard wire for wrapped loop connectors. These jewelry components are workhorses. They’re used in applications where they may be subject to frequent strain.
If, for instance, a long necklace catches on furniture, the chain and connectors will take the brunt of that strain. And half-hard wire retains its shape better than dead soft wire under heavy wear conditions. So, always use half-hard wire if you can.
If all you have available is dead soft wire, that will work, too. Just take a few seconds to harden your wire before forming your connectors. If you’re unsure how to harden dead soft wire, watch this bonus tip, which I shared in my perfectly matched ear wires video tutorial.

Tools & Materials
- 22ga Half-Hard Copper Wire – This is the easiest gauge to use while learning this technique. It’s also the gauge that I use most frequently for my own wrapped loop connectors.
- 3mm to 6mm accent beads of your choice
- Wire Cutters
- Chain Nose Pliers
- Round Nose Pliers or Stepped Bail-Making Pliers
- Ruler
- Fine Point Permanent Marker

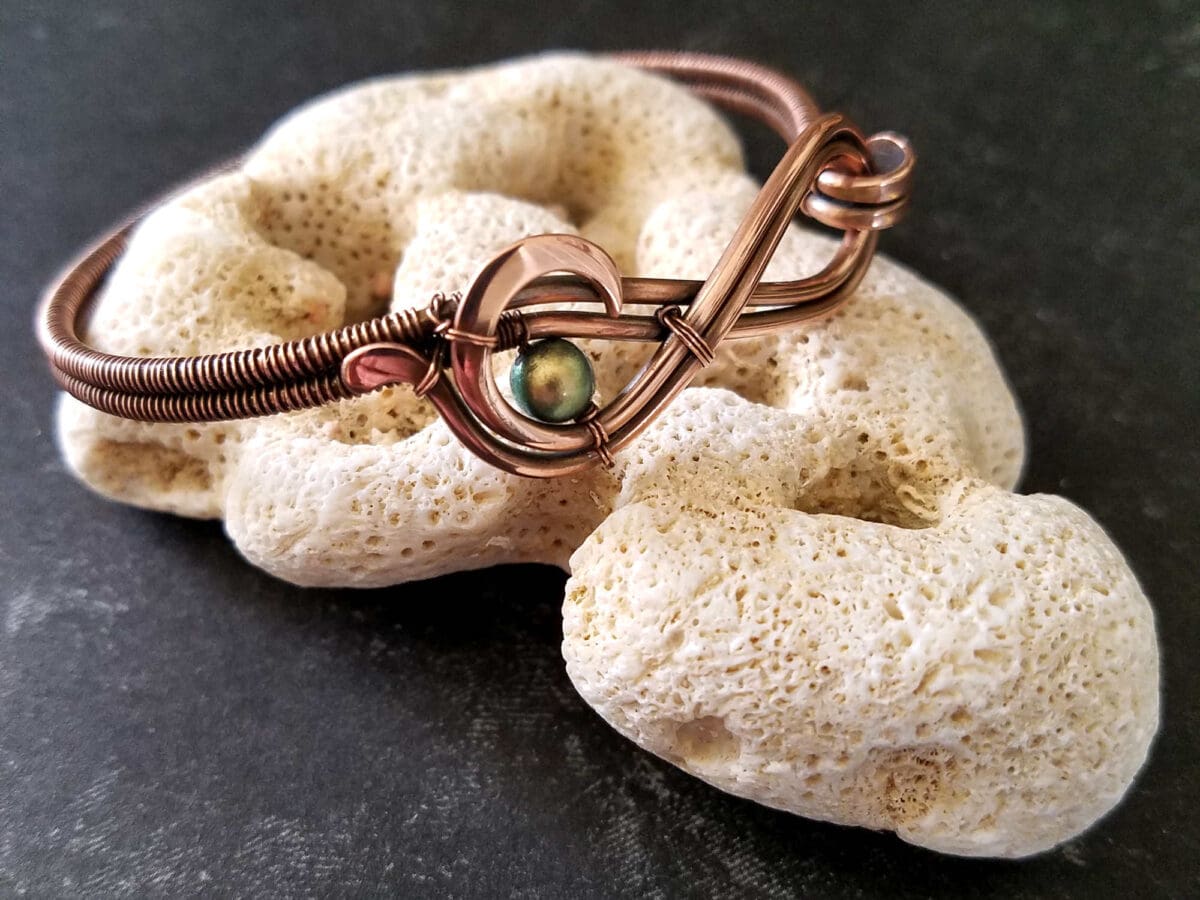
Finished Size
- WIDTH: about 1/8 inch (0.32 cm)*
- LENGTH: about 5/8 inches (1.59 cm)*
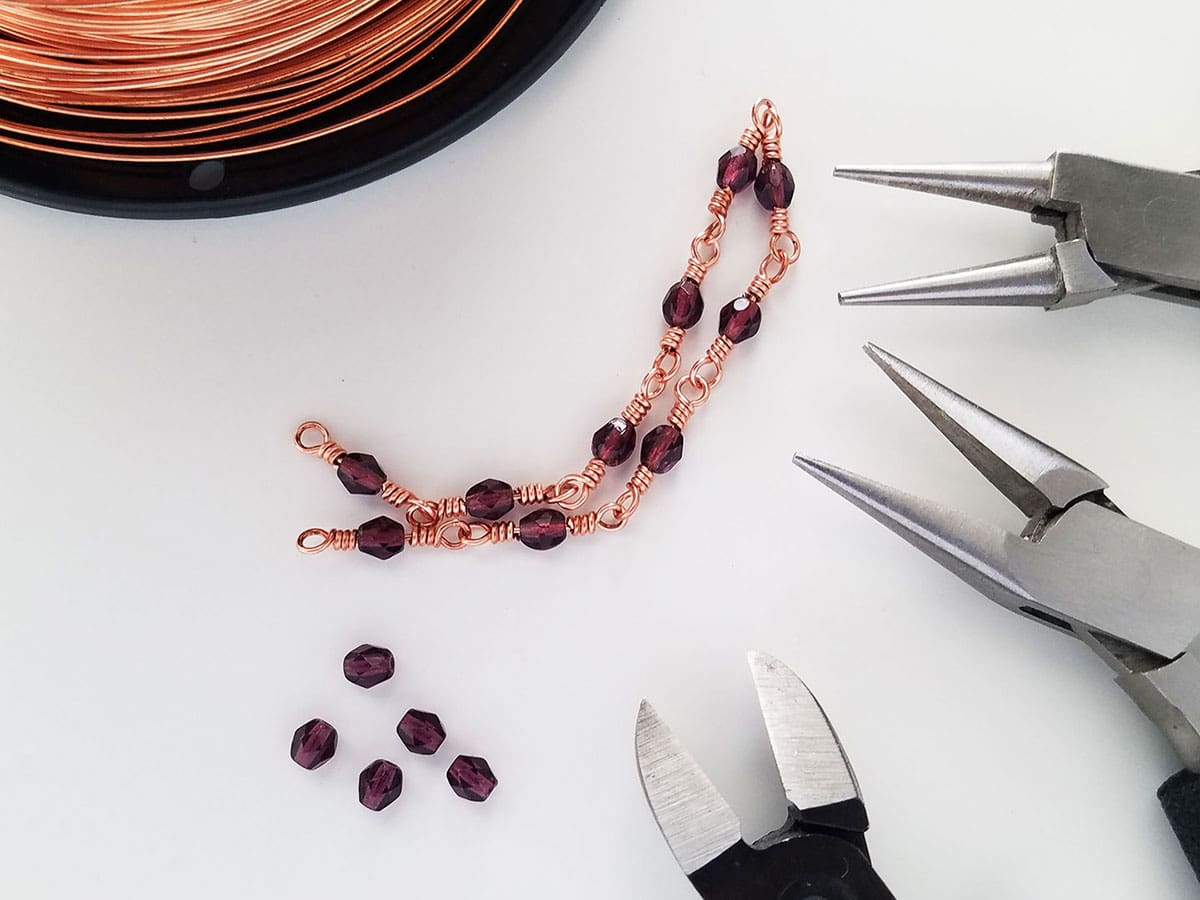
*Your final dimensions will of course depend on the wire gauge and bead size that you choose. The measurements above apply to the links I demonstrate below using 22g wire and 3mm fire polished Czech Glass beads.
Instructions
The video version of this tutorial is much more detailed than this written version. I also include a lot more tips and tricks in the video than I do here. So, if you’re a beginner, I recommend watching the video first. Once you’re familiar with the technique, this written tutorial will be a useful quick reference because it summarizes the technique quickly and briefly with just a handful of photos.
The instructions for the symmetrical wrapped loop connectors are written for the 5/8-inch (1.59 cm) connectors with 3mm accent beads that I demonstrate in this tutorial. However, you can easily change the size of your connectors by simply choosing a different wire gauge and bead size.
If you want to make large connectors for a heavyweight chain, be sure to add enough wire to your cut lengths to accommodate the larger beads and loops. As a general rule, I like to add between 1/4 and 1/2 inch (0.64 to 1.27 cm) of wire for every step in wire gauge.
Step 1 – Measure and Cut Wires
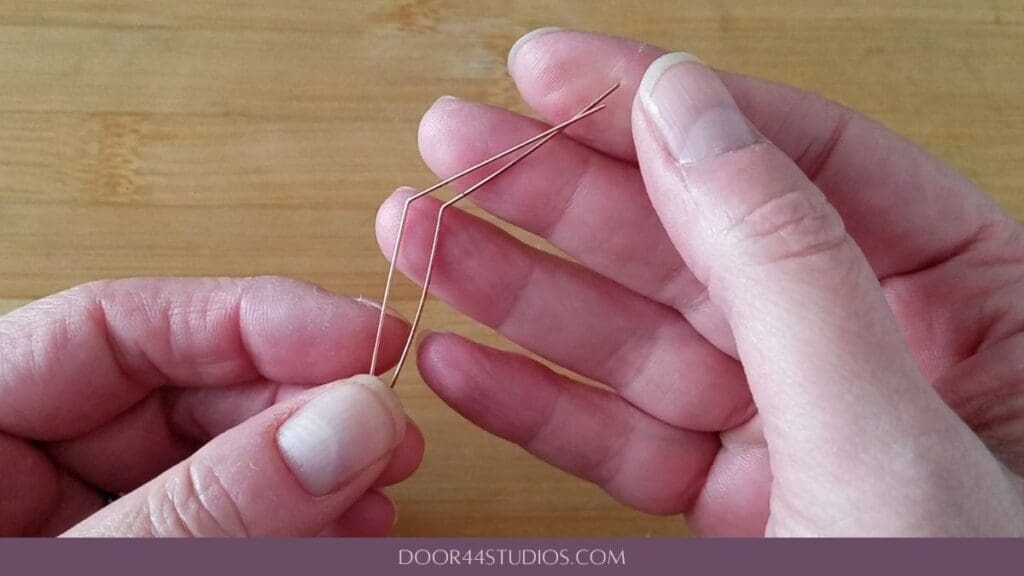
Measure and cut as many 3-inch (7.62 cm) pieces of wire as you think you’ll need for your particular application. Then measure and mark your wires at 1.5 inches (3.81 cm) from one end.
That mark is where we’ll start the bend for our loops. Remember, three inches is enough wire to make wrapped loop connectors that are similar in size and weight to those I demonstrate here. If you want larger connectors in a heavier wire gauge, you’ll need to add additional length to your wires.
I’ve already created a bend in my wire. As you can see in the image below, I start the bend at the 1.5-inch mark and create just a slight bend in my wire (about 45 degrees). I find that if I make a 90-degree bend in my wire, I end up having to adjust my loops to get them centered properly over the center wire shaft.
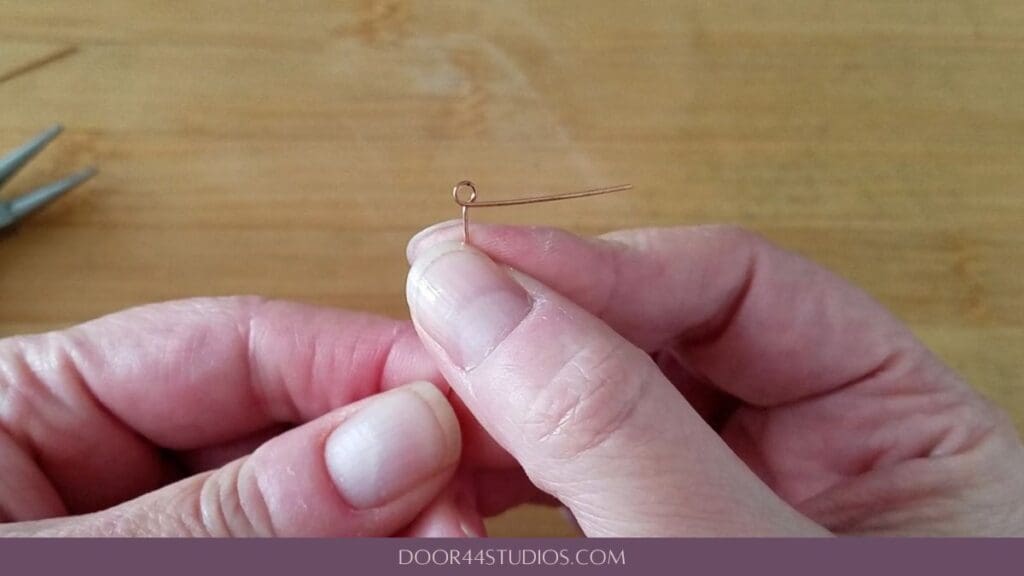
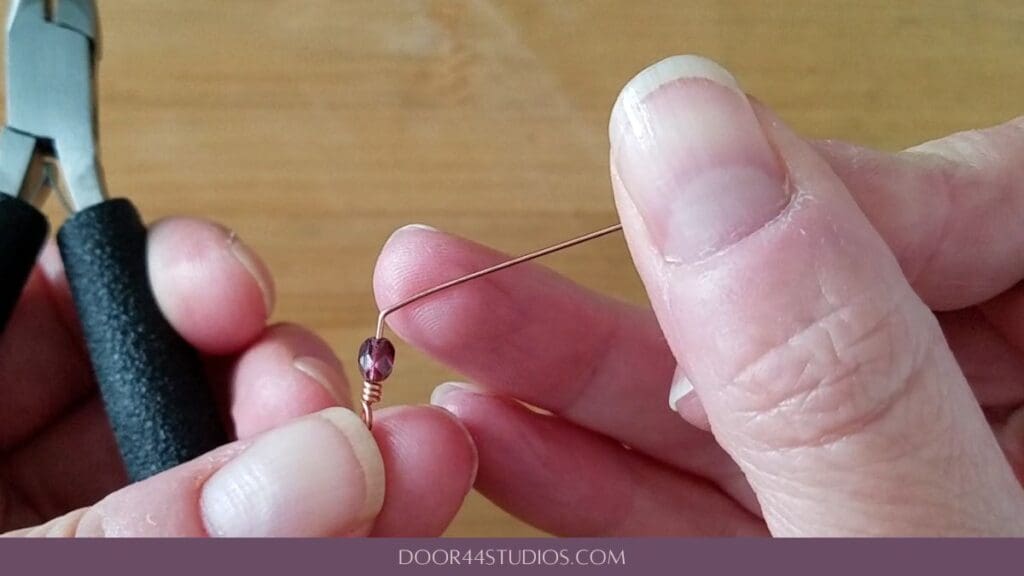
Step 2 – Form the First Loop
Use your round nose pliers (or your stepped bail-making pliers) to form a 2mm loop at the bend. When finished, your loop should look something like the one shown below. Note that the tail of the wire forms a 90-degree angle with the longer shaft of the the wire below the loop.
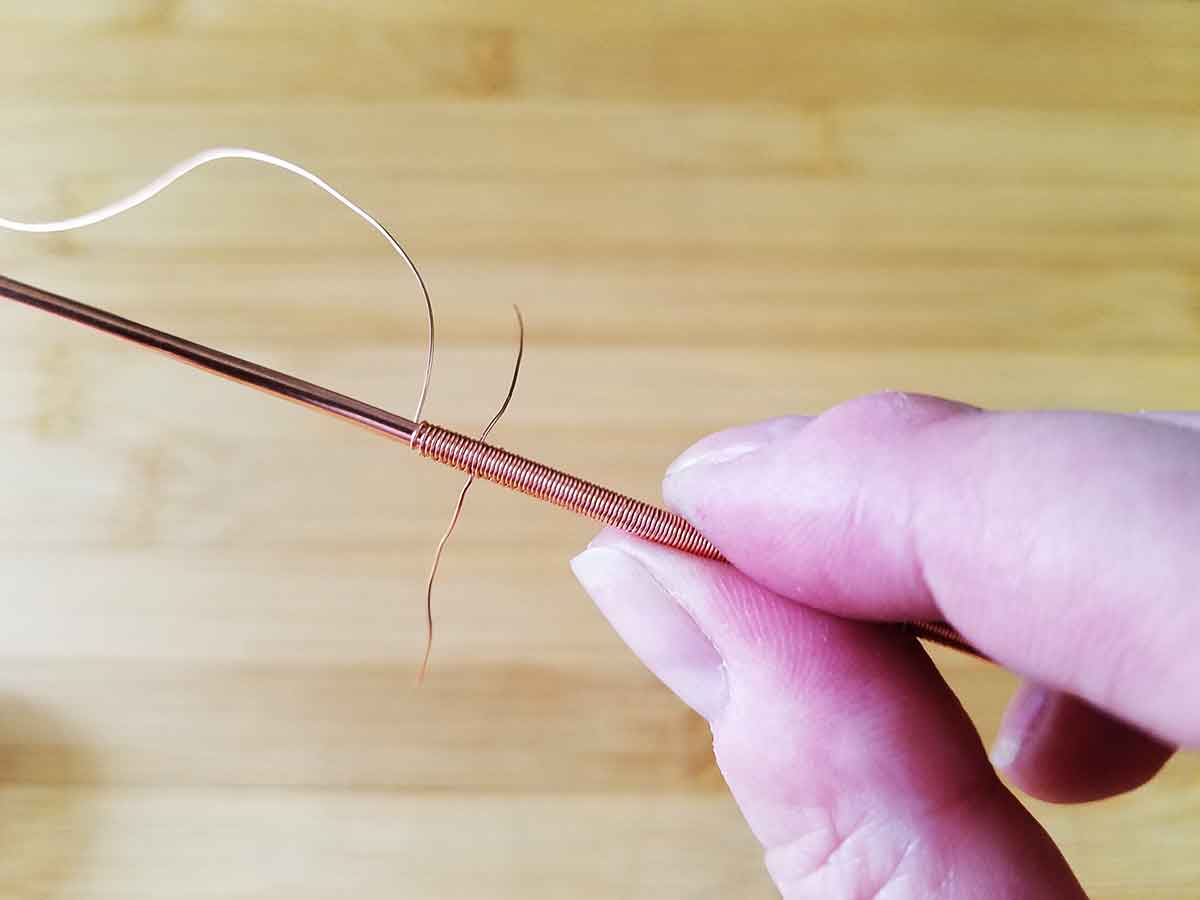
Step 3 – Secure the Loop with Three Complete Wraps
Using your chain nose pliers, gently grip the loop. Then use your fingers to create three complete wraps around the center wire shaft, as shown.
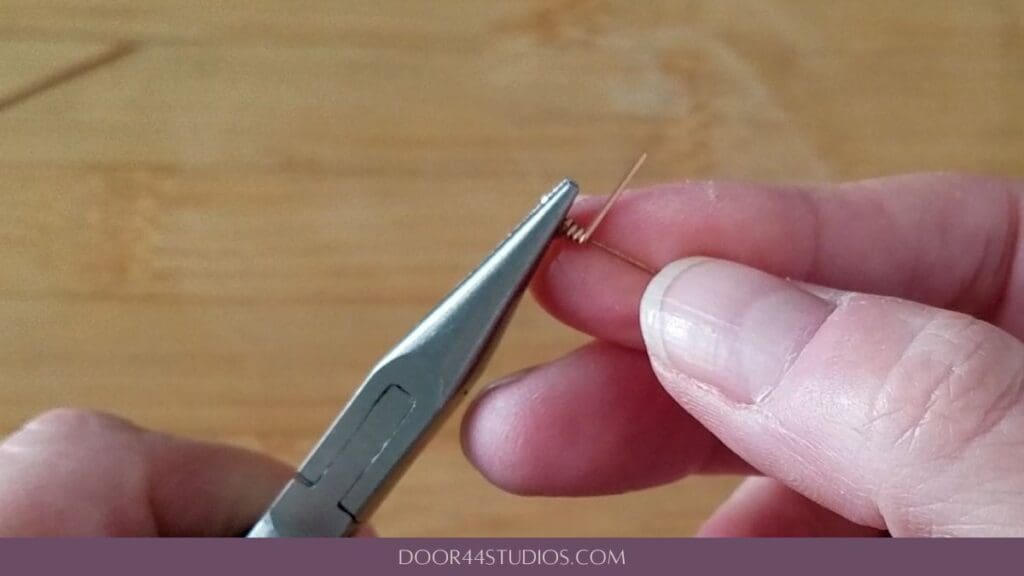
Do not trim your wire tail at this point. We’re going to need that tail to make any adjustments that we might need after completing the second wrapped loop.
This next step is where my secret for getting perfectly symmetrical wrapped loops on either end of my connectors comes in.
Step 4 – Mark Your Chain Nose Pliers
Slide a bead onto the shaft of your connector and press it snuggly against the wraps. Then gently place your chain nose pliers just above the bead and slide the jaws of your pliers back and forth until you locate the point where the first wrap of your loop is flush with the top surface of your pliers, as shown.
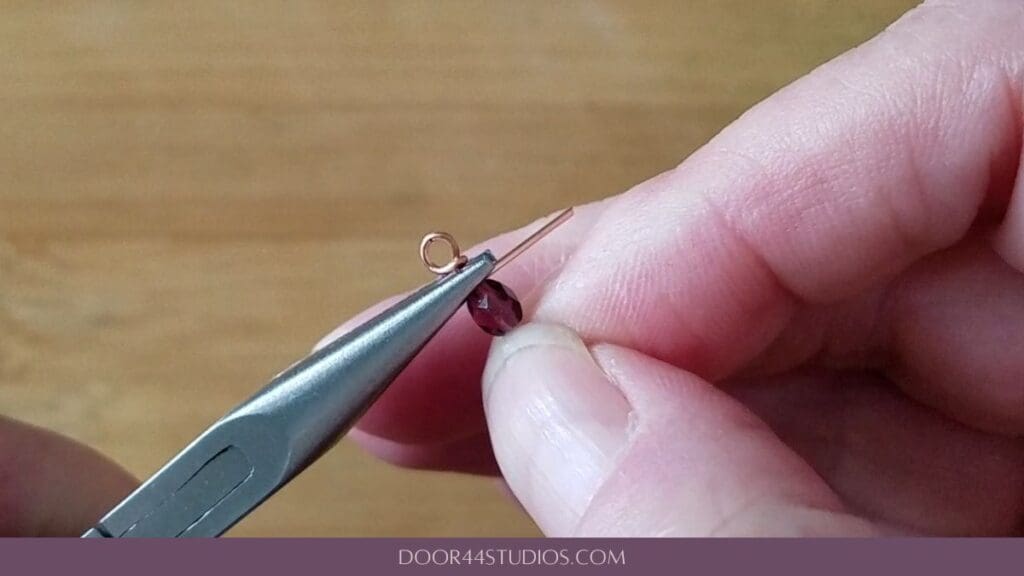
This is the point where you’ll want to place your wire when you make every bend moving forward. Mark the jaws of your pliers at that point, as shown in the image below.
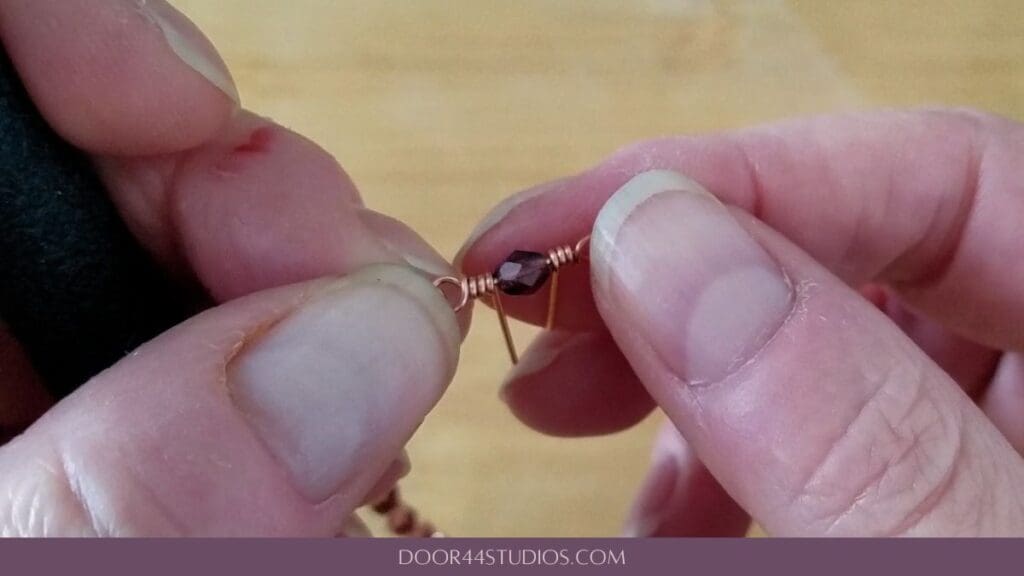
Step 5 – Create the Bend for Your Second Loop
From here on out, we’re simply going to repeat the process of making wrapped loops. Place your chain nose pliers just above the bead on the straight end of the wire. Align the wire with the marks on your pliers and form another 45-degree bend, as shown.
Step 6 – Complete the Second Wrapped Loop
Repeat Steps 2 and 3 to form the second wrapped loop.
At this point, your connector should look like the one shown below with two tails pointing in the same direction on either side of the bead.
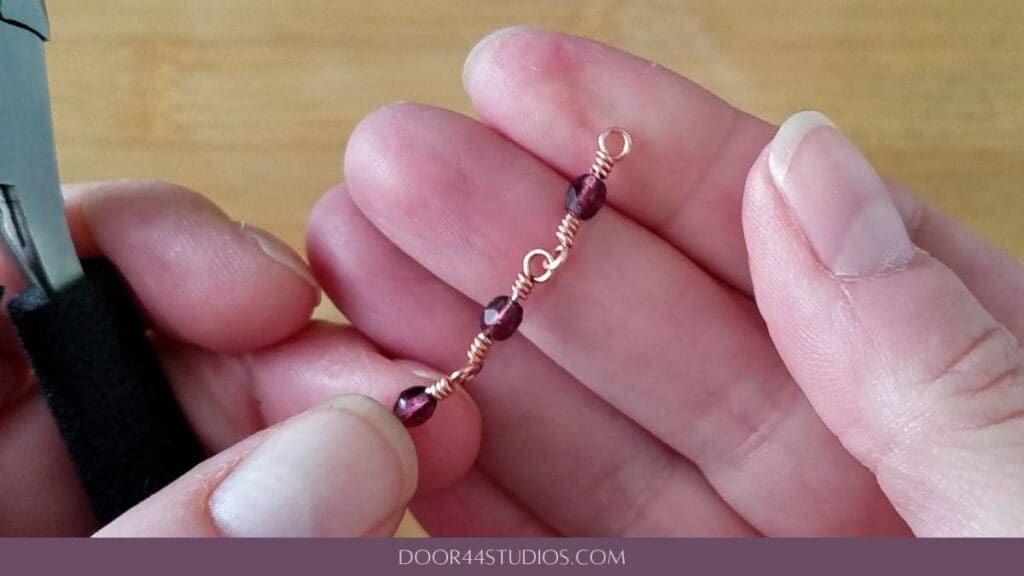
If your bead is too loose at this point, you can use the two wire tails to tighten up that gap. Just continue wrapping the tails around the center shaft until your bead sits neatly between the wraps. Because the wraps are going in opposite directions, you can simply twist the two tails at the same time to maintain symmetry.
Step 7 – Finish the Symmetrical Wrapped Loop Connector
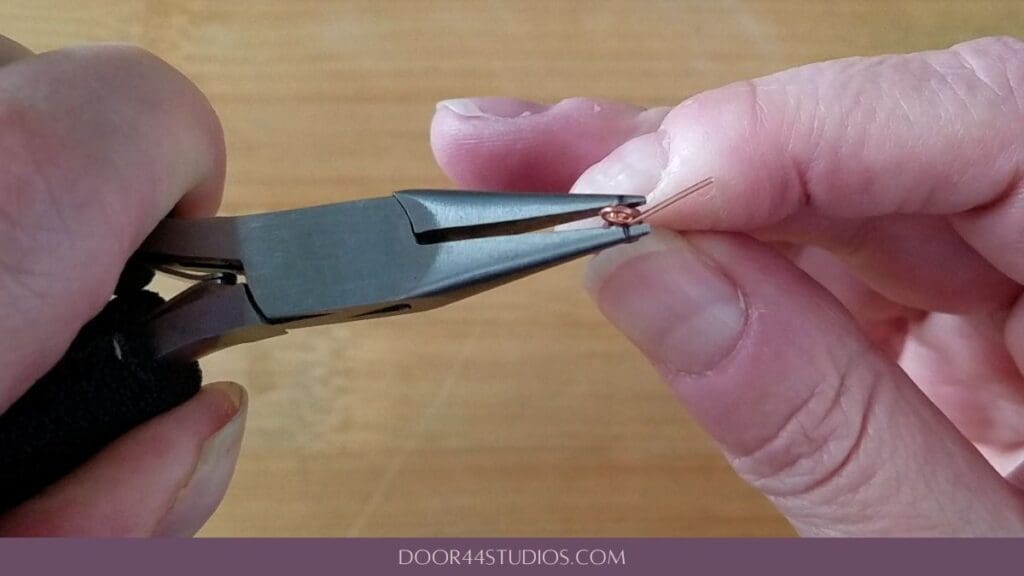
Once you’re happy with the placement of your bead, use your wire cutters to trim off the tails. Then use your chain nose pliers to tuck the cut ends firmly against the center shaft of the connector. When finished, your symmetrical wrapped loop connectors should look something like those shown below.
Discover More Behind Door 44
Thanks so much for joining me today. I hope you enjoyed learning to create perfectly symmetrical wrapped loop connectors. If you’d like a much more detailed printable PDF version of this tutorial with load more tips and tricks, it’s coming soon. And my email subscribers are always the first to know whenever I release a new tutorial. So, join my list now if you’re not already on it!
JOIN MY NEWSLETTER
And get instant access to my FREE Resource Library where you’ll find more free tips, tricks, and tutorials!
Want even more free wire jewelry tips and tricks?
I like to share useful wire weaving tips and tricks on my social media channels, and we have some great conversations about wire jewelry in my private Facebook Group. Also, be sure to connect with me @door44studios on Instagram, and Facebook to keep up with everything that’s happening behind Door 44. And if you haven’t already done so, be sure to subscribe to my YouTube channel where you’ll find new wire jewelry videos weekly.
Until next time, go make something beautiful!

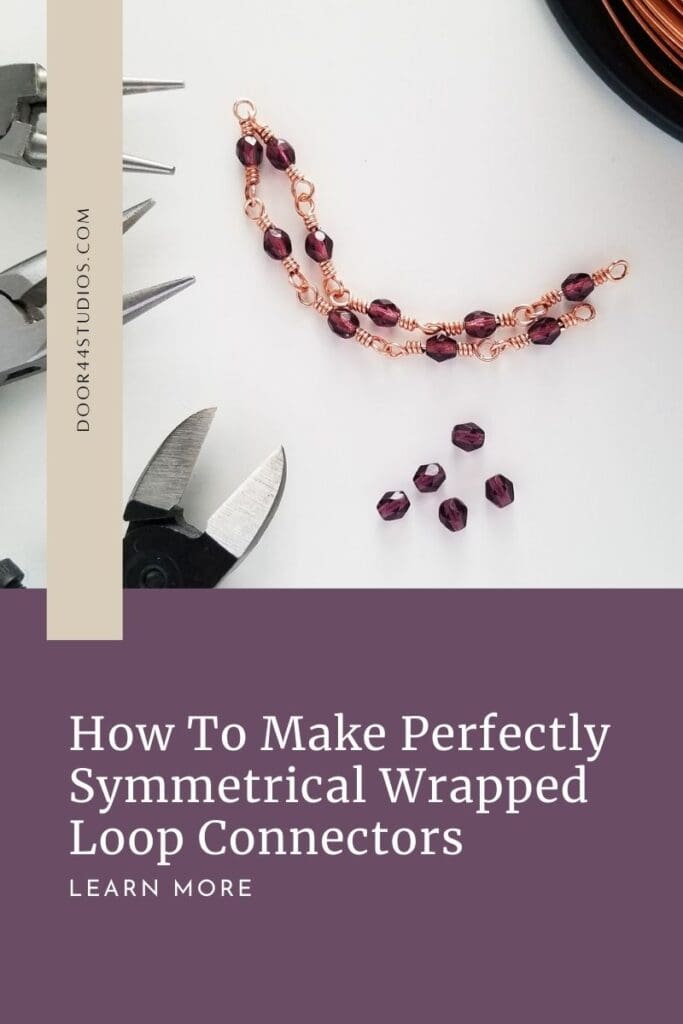
Pin the Symmetrical Wrapped Loop Connector Tutorial

Great tips for making beaded chain! I never thought to mark the space on the second wrap. Definetly helps make them uniform. Thank you!